Table of Contents
Advertisement
Quick Links
Advertisement
Table of Contents

Subscribe to Our Youtube Channel
Related Manuals for Midea EN600C4


Summary of Contents for Midea EN600C4
- Page 1 Ceramic Hob Instruction Manual / Installation Manual MODEL: EN600C4...
-
Page 2: Product Overview
Congratulations on the purchase of your new Ceramic Hob. We recommend that you spend some time to read this Instruction / Installation Manual in order to fully understand how to install correctly and operate it. For installation, please read the installation section. Read all the safety instructions carefully before use and keep this Instruction / Installation Manual for future reference. -
Page 3: Product Information
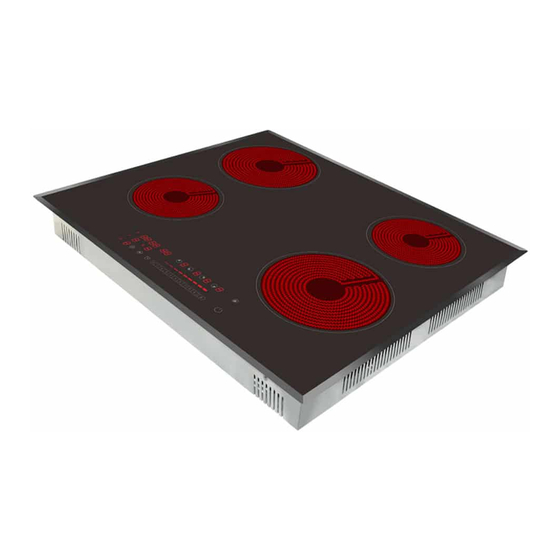
Product Information The microcomputer ceramic cooker hob can meet different kinds of cuisine demands because of resistance wire heating, micro-computerized control and multi-power selection, really the optimal choice for modern families. The ceramic cooker hob centers on customers and adpots personalized design. The hob has safe and reliable performances, making your life comfortable and enabling to fully enjoy the pleasure from life. -
Page 4: Using Your Ceramic Hob
Make sure that the base of your pan is smooth, sits flat against the glass, and is the same size as the cooking zone. Always centre your pan on the cooking zone. Always lift pans off the ceramic hob – do not slide, or they may scratch the glass. Using your Ceramic Hob To start cooking •... -
Page 5: When You Have Finished Cooking
3. Select a heat setting by touching the control. • If you don’t choose a heat setting within 1 minute, the ceramic hob will automatically switch off. You will need to start again at step 1. • You can modify the heat setting at any time during cooking. -
Page 6: Locking The Controls
Locking the Controls • You can lock the controls to prevent unintended use (for example children accidentally turning the cooking zones on). • When the controls are locked, all the controls except the ON/OFF control are disabled. To lock the controls Touch the keylock control. -
Page 7: Using The Timer As A Minute Minder
Using the Timer You can use the timer in two different ways: • You can use it as a minute minder. In this case, the timer will not turn any cooking zone off when the set time is up. • You can set it to turn one cooking zone off after the set time is up. •... -
Page 8: Setting The Timer To Turn One Cooking Zone Off
5. When the time is set, it will begin to count down immediately. The display w ill show the remaining time and the timer indicator will flash for 5 seconds. 6. Buzzer will bips for 30 seconds and the timer indicator shows “- - “... -
Page 9: Cooking Guidelines
3.Touching the together, the timer is cancelled, and it shows ” --” in the minute display. 4. When the time is set, it will begin to count down immediately. The display will show the remaining time and the timer indicator flash for 5 seconds. - Page 10 • Using a lid will reduce cooking times and save energy by retaining the heat. • Minimise the amount of liquid or fat to reduce cooking times. • Start cooking on a high setting and reduce the setting when the food has heated through.
-
Page 11: Heat Settings
Heat Settings The settings below are guidelines only. The exact setting will depend on several factors, including your cookware and the amount you are cooking. Experiment with the cooktop to find the settings that best suit you. Heat setting Suitability •... -
Page 12: Hints And Tips
• Remove stains left by melts and Boilovers, melts, and Remove these immediately with hot sugary spills on a fish slice, palette knife or razor sugary food or spillovers as soon the glass blade scraper suitable for as possible. If left to cool on the ceramic glass cooktops, but glass, they may be difficult to beware of hot cooking zone... -
Page 13: Technical Specification
The glass is being Rough-edged cookware. Use cookware with flat and smooth bases. See ‘Choosing the right scratched. cookware’. See ‘Care and cleaning’. Unsuitable, abrasive scourer or cleaning products being used. Some pans make This may be caused by the This is normal for cookware and crackling or clicking construction of your cookware... -
Page 14: Before Locating The Fixing Brackets
L(mm) W(mm) H(mm) D(mm) A(mm) B(mm) X(mm) 50 mini Under any circumstances, make sure the ceramic cooker hob is well ventilated and the air inlet and outlet are not blocked. Ensure the ceramic cooker hob is in good work state. As shown below Note: The safety distance between the hotplate and the cupboard above the hotplate should be at least A(mm) -
Page 15: Connecting The Hob To The Mains Power Supply
screw bracket Screw hole base Adjust the bracket position to suit for different work surface’s thickness. Cautions 1. The ceramic cooker hob must be installed by qualified personnel or technicians. We have professionals at your service. Please never conduct the operation by yourself. -
Page 16: Safety Warnings
1. If the cable is damaged or needs replacing, this should be done by an after-sales technician using the proper tools, so as to avoid any accidents. 2. If the appliance is being connected directly to the mains supply, an omnipolar circuit breaker must be installed with a minimum gap of 3mm between the contacts. - Page 17 Installation Electrical Shock Hazard • Disconnect the appliance from the mains electricity supply before carrying • out any work or maintenance on it. • Connection to a good earth wiring system is essential and mandatory. • Alterations to the domestic wiring system must only be made by a qualified electrician. •...
- Page 18 until the surface is cool. • Never leave metal objects (such as kitchen utensils) or empty pans on the cooktop as they can become hot very quickly. • Beware: magnetisable metal objects worn on the body may become hot in the vicinity of the cooktop.
- Page 19 This appliance is labeled in compliance with European directive 2002/96/EC for Waste Electrical and Electronic Equipment (WEEE). By ensuring that this appliance is disposed of correctly, you will help prevent any possible damage to the environment and to human health, which might otherwise be caused if it were disposed of in the wrong way.
Need help?
Do you have a question about the EN600C4 and is the answer not in the manual?
Questions and answers