Table of Contents
Advertisement
Available languages
Available languages
Quick Links
H-1024, H-1025
H-1026
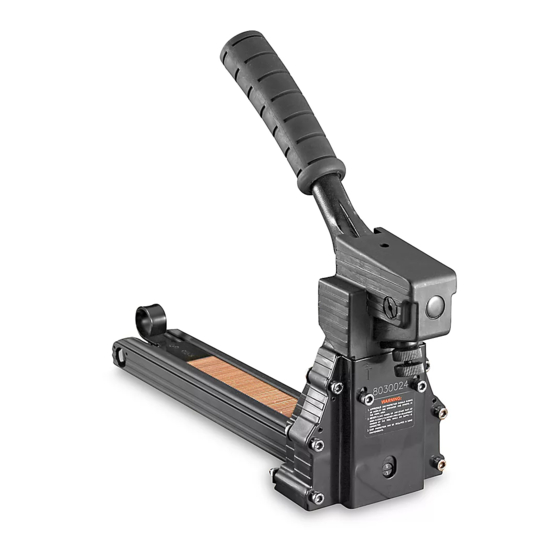
MANUAL CARTON STAPLER
Dimensions (L x H x W)
Weight (Without Fasteners)
H-1025/H-1026 Staple Specification
H-1024 Staple Specification
Staple Capacity
• Read the manual and understand all safety
instructions before operating the stapler. If you have
questions, contact Uline at 1-800-295-5510.
• Always wear protective equipment; e.g., safety
glasses, hearing protection and head protection.
• Do not place your hand or any other body part in
the staple clinching area.
• Never point the stapler at yourself or anyone else.
PAGE 1 OF 18
1-800-295-5510
uline.com
SPECIFICATIONS
15 x 11½ x 4½"
3.75 lb.
S-289 C58 Stick and/or S-1396 C34 Stick
S-1397 A58 Stick
100 Staples
SAFETY
• Ensure that anyone in the vicinity wears safety
protection.
• To prevent accidental injuries, never place a hand
or any other body part in the staple clinching area
or adjustment window.
• Always handle the stapler with care. Never pull the
trigger unless stapler is ready for operation.
• Check and replace any damaged or worn
components on the stapler.
Para Español, vea páginas 7-12.
Pour le français, consulter les pages 13-18.
0323 IH-1024
Advertisement
Table of Contents

Related Manuals for U-Line H-1024


Summary of Contents for U-Line H-1024
- Page 1 Dimensions (L x H x W) 15 x 11½ x 4½" Weight (Without Fasteners) 3.75 lb. H-1025/H-1026 Staple Specification S-289 C58 Stick and/or S-1396 C34 Stick H-1024 Staple Specification S-1397 A58 Stick Staple Capacity 100 Staples SAFETY • Read the manual and understand all safety •...
-
Page 2: Operation
OPERATION LOADING THE STAPLER ADJUSTING STAPLE LEG LENGTH Pull the pusher back until it stops on pusher pivots. Loosen set screw with a 3 mm Allen wrench Rotate pusher to position. (See Figure 1) on bottom of stapler. (See Figure 3) Figure 1 Figure 3 2. -
Page 3: Clinch Adjustment
OPERATION CONTINUED CLINCH ADJUSTMENT BASIC OPERATION Loosen securing nut closest to body. Turn adjustment nut Insert the staples into the stapler following the clockwise to loosen clinch. Turn adjustment nut counter- loading instructions. clockwise to tighten clinch. After adjusting, tighten 2. -
Page 4: Teeth Replacement
OPERATION CONTINUED TEETH REPLACEMENT DRIVER REPLACEMENT Loosen screws and nut with 8 mm spanner wrench Loosen screw and nut with 8 mm spanner wrench and 4 mm Allen wrench. (See Figure 10) and 4 mm Allen wrench. (See Figure 13) Figure 13 Figure 10 2. -
Page 5: Pusher Spring Replacement
OPERATION CONTINUED 4. Remove the linkage mechanism and adjusting rod 3. Pull the pusher back until it stops on the rod, rotate simultaneously from the body. the pusher to position. 5. Loosen the pivot screws with flat screwdriver. Remove 4. Push the magazine seat back and remove it from handle and linkage mechanism. -
Page 6: Troubleshooting
TROUBLESHOOTING WARNING! Stop using the stapler immediately if any of the following problems occur. Serious personal injury could occur. Any repairs or replacements must be done by a qualified person or authorized service center only. PROBLEM CAUSE REMEDY Excessive jams Teeth screws are loose or Tighten screws and check staples. -
Page 7: Especificaciones
38.1 x 29.2 x 11.4 cm (15 x 11½ x 4½”) Peso (sin Cinchos) 1.7 kg (3.75 lbs.) H-1025/H-1026 Especificación de las grapas S-289 C58 en tiras y/o S-1396 C34 en tiras H-1024 Especificación de las grapas S-1397 A58 en tiras Capacidad de grapas 100 grapas SEGURIDAD •... - Page 8 FUNCIONAMIENTO CÓMO CARGAR LA ENGRAPADORA AJUSTE DEL LARGO DE PATA DE LA GRAPA 1. Jale el empujador hasta que se detenga en los 1. Afloje el tornillo de ajuste de la parte inferior con una pivotes de empuje. Gire el empujador hasta su llave Allen de 3 mm.
-
Page 9: Instrucciones De Funcionamiento
INSTRUCCIONES DE FUNCIONAMIENTO AJUSTE DE REMACHE FUNCIONAMIENTO BÁSICO Afloje la tuerca de seguridad más cercana al cuerpo. Inserte las grapas en la engrapadora siguiendo las Gire la tuerca de ajuste en el sentido de las manecillas instrucciones de carga. del reloj para aflojar el remache. Gire la tuerca de 2. - Page 10 INSTRUCCIONES DE FUNCIONAMIENTO REEMPLAZO DE DIENTES REMPLAZO DEL IMPULSOR 1. Afloje los tornillos y la tuerca con una llave de 8 mm 1. Afloje el tornillo y la tuerca con una llave inglesa de y una llave Allen de 4 mm. (Vea Diagrama 10) 8 mm y una llave Allen de 4 mm.
- Page 11 INSTRUCCIONES DE FUNCIONAMIENTO 4. Retire del cuerpo el mecanismo de unión y ajuste la 3. Jale el empujador hasta que se detenga en la varilla, varilla de forma simultánea. gire el empujador hasta que quede en su posición. 5. Afloje los tornillos de pivote con un desarmador 4.
-
Page 12: Solución De Problemas
SOLUCIÓN DE PROBLEMAS Deje de usar la engrapadora de inmediato si presenta cualquiera de los siguientes problemas. Podrían ocurrir lesiones personales graves. Todas las reparaciones o reemplazos deben ser realizados solamente por una persona calificada o en un centro de servicios autorizado. PROBLEMA CAUSA SOLUCIÓN... -
Page 13: Spécifications
Dimensions (long. x haut. x larg.) 38,1 x 29,2 x 11,4 cm (15 x 11½ x 4½ po) Poids (sans Agrafes) 1,7 kg (3,75 lb) Spécifications des agrafes H-1025/H-1026 Bande S-289 C58 et/ou bande S-1396 C34 Spécifications des agrafes H-1024 Bande S-1397 A58 Capacité d'Agrafes 100 agrafes SÉCURITE • Avant d'utiliser cette agrafeuse, prenez • Assurez-vous que toute personne à proximité porte connaissance des avertissements et consignes de une protection de sécurité. -
Page 14: Opération
OPÉRATION CHARGEMENT DE L'AGRAFEUSE RÉGLAGE SELON LA LONGUEUR DES PATTES D'AGRAFE 1. Tirez le pousseur vers l'arrière jusqu'à ce qu'il bute sur les pivots de pousseur. Tournez le pousseur en Desserrez la vis de réglage qui se trouve sous position. (Voir Figure 1) l'agrafeuse à... - Page 15 OPÉRATION SUITE RÉGLAGE DE LA FERMETURE OPÉRATION DE BASE Desserrez l'écrou de fixation le plus rapproché du corps. Insérez les agrafes dans l'agrafeuse conformément Tournez l'écrou de réglage dans le sens horaire pour aux directives de chargement. relâcher la fermeture. Tournez l'écrou de réglage dans le 2.
- Page 16 OPÉRATION SUITE REMPLACEMENT DE DENTS REMPLACEMENT DE LA PLAQUE DE POUSSÉE 1. Desserrez les vis et l'écrou à l'aide d'une clé 8 mm et 1. Desserrez la vis et l'écrou à l'aide d'une tricoise 8 mm d'une clé Allen 4 mm. (Voir Figure 10) et d'une clé...
- Page 17 OPERATION SUITE 4. Retirez simultanément les liens et la tige de réglage 3. Tirez le pousseur vers l'arrière jusqu'à ce qu'il bute du corps. contre la tige, tournez le pousseur en position. 5. Desserrez les vis de pivotement à l'aide d'un tournevis 4.
-
Page 18: Dépannage
DÉPANNAGE AVERTISSEMENT! Cessez immédiatement d'utiliser l'agrafeuse si l'un ou l'autre ARRÊT des problèmes suivants se produit. De graves blessures corporelles pourraient se produire. Tout remplacement et toute réparation ne doivent être effectués que par une personne qualifiée ou par un centre de service autorisé. PROBLÈME CAUSE CORRECTIF...
Need help?
Do you have a question about the H-1024 and is the answer not in the manual?
Questions and answers