Table of Contents
Advertisement
Available languages
Available languages
Quick Links
H-1993
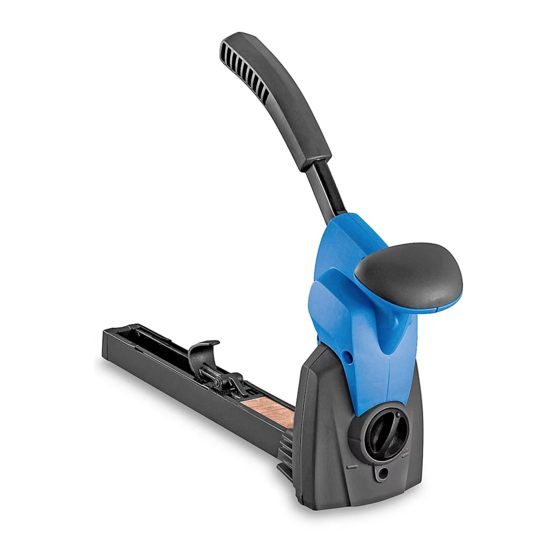
KIHLBERG MANUAL
CARTON STAPLER
TOOL NEEDED
Allen Wrench
(Included)
ADJUSTING THE STAPLE LEG LENGTH
The stapler is adjustable for 5/8"-3/4" staples. The stapler
setting for a different staple leg length is altered as
follows. Start by adjusting the depth of stapling for deep
clinching (=). (See Figure 2)
1.
With the allen wrench,
unscrew locking screw (A)
two turns. (See Figure 1)
2. With a screwdriver, adjust
screw (B) to 5/8" or 3/4" leg
length. (See Figure 1)
3. Tighten the locking
screw (A). (See Figure 1)
ADJUSTING THE PENETRATION DEPTH
The depth of stapling is easily
adjusted by using the setting
knob (1). Press the knob in and
turn it to the desired position.
(See Figure 2)
•
Use "–" for shallow stapling
penetration.
•
Use "=" for deep stapling
penetration.
PAGE 1 OF 9
1-800-295-5510
uline.com
COMPATIBLE STAPLES
S-10720
S-10721
C58
C34
1⁄ x 5/8"
1⁄ x 3/4"
LOADING
Figure 1
B
A
3/4"
5/8"
Figure 2
1
Pour le français, consulter les pages 7-9.
ADJUSTING STAPLE CLINCH
It is possible to adjust how tightly the staples are closing:
1.
With the allen wrench,
turn the adjusting screw
clockwise for a stronger
clinch. (See Figure 3)
2. Turn the adjusting screw
counterclockwise to open
the clinch more.
CONTROLLING THE CLINCH
(See Figure 4)
a. Good clinch.
a. Leg length of the
staple too long or
bent too much.
b. Leg length of staple
too short or not bent
enough.
If necessary, adjust
staple clinch.
Para Español, vea páginas 4-6.
Figure 3
Adjusting
Screw
Figure 4
A
B
C
0421 IH-1993
Advertisement
Table of Contents

Related Manuals for U-Line H-1993


Summary of Contents for U-Line H-1993
- Page 1 Para Español, vea páginas 4-6. Pour le français, consulter les pages 7-9. H-1993 1-800-295-5510 uline.com KIHLBERG MANUAL CARTON STAPLER TOOL NEEDED COMPATIBLE STAPLES Allen Wrench S-10720 S-10721 (Included) 1⁄ x 5/8" 1⁄ x 3/4" LOADING ADJUSTING THE STAPLE LEG LENGTH ADJUSTING STAPLE CLINCH The stapler is adjustable for 5/8"-3/4"...
-
Page 2: Operation
LOADING CONTINUED LOADING THE STAPLER 2. Place three staple strips Figure 6 into the magazine from Staple Strip NOTE: Always use Josef Kihlberg original the top. (See Figure 6) staples – S-10720 (5/8") or S-10721 (3/4"). The correct type of staple is marked on the left hand side of the magazine. - Page 3 MAINTENANCE CONTINUED REPLACING THE DRIVER BLADE/ANVILS NOTE: If changing the anvils, always change both at the same time. TO REPLACE THE DRIVER BLADE: TO REPLACE THE ANVILS: Remove six screws Figure 10 Remove the driver holding the rear Figure 11 blade.
- Page 4 H-1993 800-295-5510 uline.mx KIHLBERG ENGRAPADORA MANUAL PARA CAJAS HERRAMIENTA NECESARIA GRAPAS COMPATIBLES Llave Allen S-10720 S-10721 (Incluida) 1⁄ x 5/8" 1⁄ x 3/4" CARGA AJUSTAR EL LARGO DE PATA DE LA GRAPA AJUSTAR EL REMACHADO DE LAS GRAPAS La engrapadora es ajustable para grapas de 5/8" a 3/4".
-
Page 5: Mantenimiento
CONTINUACIÓN DE CARGA CÓMO CARGAR LA ENGRAPADORA 2. Coloque tres tiras de grapas Diagrama 6 Tira de Grapas en el cargador desde NOTA: Use siempre grapas originales arriba. (Vea Diagrama 6) Josef Kihlberg – S-10720 (5/8") o S-10721 (3/4"). La clase correcta de grapas para la herramienta está indicada a la izquierda del cargador. - Page 6 CONTINUACIÓN DE MANTENIMIENTO REEMPLAZAR LA HOJA IMPULSORA/LOS NOTA: Si va a cambiar los yunques, cambie siempre los dos a la vez. YUNQUES PARA REEMPLAZAR LOS YUNQUES: PARA REEMPLAZAR LA Diagrama 10 HOJA IMPULSORA: 1. Quite la hoja impulsora. Diagrama 11 (Vea Diagrama 11) 1.
- Page 7 H-1993 1-800-295-5510 uline.ca KIHLBERG – AGRAFEUSE MANUELLE POUR CARTON OUTIL REQUIS AGRAFES COMPATIBLES Clé hexagonale S-10720 S-10721 (comprise) 1 ¼ x 5/8 po 1 ¼ x 3/4 po CHARGEMENT RÉGLAGE DE LA LONGUEUR DE PATTE DE RÉGLAGE DE LA FERMETURE DE L'AGRAFE L'AGRAFE Il est possible de régler la force de fermeture des...
-
Page 8: Entretien
CHARGEMENT SUITE CHARGEMENT DE L'AGRAFEUSE 2. Placez trois bandes Figure 6 Bande d'agrafes d'agrafes dans le REMARQUE : Utilisez toujours les agrafes de la magasin à partir du haut. marque Josef Kihlberg – S-10720 (5/8 po) ou (Voir Figure 6) S-10721 (3/4 po). Le type d'agrafes approprié est inscrit sur le côté gauche du magasin. - Page 9 ENTRETIEN SUITE REMPLACEMENT DE LA LAME DE REMARQUE : Si vous changez les enclumes, changez toujours les deux en même temps. POUSSÉE/DES ENCLUMES POUR REMPLACER LES ENCLUMES : POUR REMPLACER LA Figure 10 LAME DE POUSSÉE : Retirez la lame de Figure 11 poussée. Retirez les six vis (Voir Figure 11) qui maintiennent la...
Need help?
Do you have a question about the H-1993 and is the answer not in the manual?
Questions and answers