Table of Contents
Advertisement
Advertisement
Table of Contents

Related Manuals for Newland NLS-LP410


Summary of Contents for Newland NLS-LP410
- Page 1 Barcode Printer NLS-LP410 - 1 -...
- Page 3 Declaration Information in this document is subject to change without notice. Newland Auto-ID Tech. Co., Ltd.(hereinafter referred to as “Newland”) reserves the right to improve products as new technology, components, software, and hardware become available. If users need further data about these products, please feel free to contact Newland or our local dealer.
- Page 4 Newland has been approved by the following certifications: ISO9001 Quality Control System Certification ISO14001 Environmental Management System Certification OHSAS18001 Occupational Health and Safety Management System Certification IECQ QC 080000 Hazardous Substance Process Management System Certification - 2 -...
- Page 5 Safety Instructions Before installing and using the printer, please read the following items carefully. 1. Safety warning The print head is a thermal element and it is at a high temperature during printing or just after operation, therefore do not touch it or its peripherals for safety’s sake The print head is an ESD-sensitive device.
-
Page 6: Table Of Contents
Contents 1 Product description ............................... - 1 - 1.1 Introduction ..................................- 1 - 1.2 Unpacking and checking ............................. - 2 - 1.3 Appearance and module ............................ - 3 - 1.4 Introduction of main modules .......................... - 3 - 2 Printer installation ..............................- 4 - 2.1 Installation position .............................. - Page 7 Appendix 1 Technical specification ........................- 20 - Appendix 1.1 Main technical specifications ....................- 20 - Appendix 1.2 Technical specifications of paper ..................- 22 - Appendix 2 Self-test page ............................. - 24 - Appendix 3 Print and paper out position ....................... - 25 - Appendix 4 Communication interface ......................
-
Page 9: Product Description
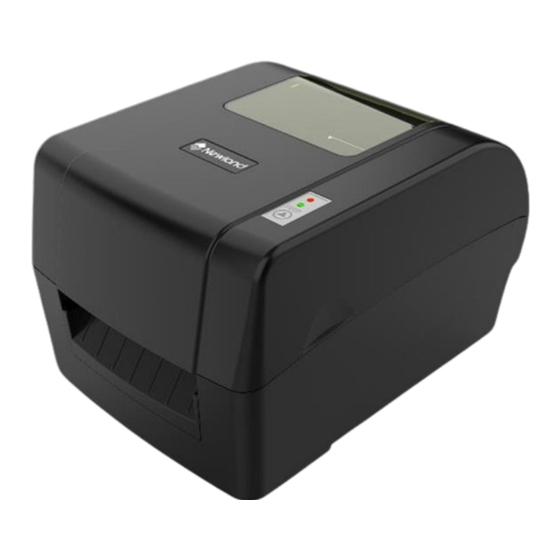
1 Product description 1.1 Introduction NLS-LP410 label printer is an ideal label and barcode printing device for office use, with delicate appearance and excellent performance. It can apply to many fields, such as medical treatment, retailing, manufacture, logistics, asset management and so on. -
Page 10: Unpacking And Checking
Unpacking the printer carton and refer to the packing list to check whether the parts are missing or damaged. If there is, please contact with Newland or your local distributor (communication cables are optional depending on the printer interface type). -
Page 11: Appearance And Module
1.3 Appearance and module 1—LOGO plate 2—Top cover 3—Front baffle plate 4—Bottom cover 5—LED 6—Button 7—Paper guide plate 8—Paper roll holder 9—Ribbon thumb wheel 10—Ribbon holder 11—Paper cabinet 12—Ribbon end cap 13—Open spanner 14—Print head 15—Paper guide block 16—Sensor holder 17—Platen roller 18—Buffer shaft 19—Ethernet interface... -
Page 12: Printer Installation
2 Printer installation 2.1 Installation position Flatly place the printer on the operation table, which must be waterproof, moisture proof and dustproof. The maximal tilted angle should not exceed ±15° during installation. 2.2 Paper roll installation 1) Hold the cover open lever with both hands to turn the top cover upwards, and open the top cover of printer (see figure 2.2.1);... -
Page 13: Ribbon Installation
2.3 Ribbon installation The carbon ribbon shaft has two inner diameters: 12.7mm (1/2 inch) and 25.4mm (1 inch). When the inner diameters of the ribbon shafts are different, the methods for loading ribbon are different: A) For the ribbon shaft with an inner diameter 12.7mm (1/2 inch), the operation method is as shown in Figure 2.3.1 (please pay attention to the installation direction). - Page 14 Figure 2.3.2 Rotate the ribbon holder to the position shown in Fig. 1, then insert the assembled ribbon module into the ribbon end cap in the direction shown in Figure 2 and insert the other end of ribbon into the ribbon thumb wheel, and then pull the ribbon outward slightly until you feel an elastic retraction force which indicates that the installation of ribbon on releasing shaft is complete (see Figure 2.3.3);...
-
Page 15: Power Adapter Connection
The power-on action can be set by commands or configuration tools. Caution: If the printer can not be started or can not work normally after it is started, please contact Newland or local dealer in time. - 7 -... -
Page 16: Mark Calibration
2.6.2 Mark calibration Firstly, install the print medium correctly, and then turn on the printer; 2) After the printer finishes the self-test, it will enter standby mode. Keep pressing the button and release it after the power LED has flashed two times. Then the printer will start feeding paper and start calibration;... -
Page 17: Driver Setup
2.7 Driver setup The installation program of the driver can be downloaded from the website www.Newland.cn. The 32-bit operating systems supported by the driver are as follows: Windows XP/Windows server 2003/ Windows Vista/Windows server 2008/ Windows 7/ Windows 8/Windows server 2012/ Windows 10/Windows server 2019 ... - Page 18 4) As the driver has been installed, you can set the "Param Config" to make the driver work in the way that you want. The "Finish" button can exit the installation program. And ,the "Install Next" button would start a new driver installation; - 10 -...
-
Page 19: Printer Operations
3 Printer operations 3.1 LED, button and buzzer explanation 3.1.1 LED functions LED name Status Explanation Always on Printer is idle or working. Work LED (green) Flash Printer is busy. Always on Printer is in pause status. Pause LED (green+red) Flash Printer is in updating status. -
Page 20: Printer Status And Operation
3.2 Printer status and operation 3.2.1 Printer status The printer has four statuses: idle status, working status, pause status, and abnormal status. Printer status Idle status Green LED is always on and red LED is always off. Working status Green LED is always on and red LED is always off. Pause status Green LED and red LED are always on. -
Page 21: Print Position Adjustment
meet the requirements in Appendix 1.2. Figure 3.3.1 3.4 Print position adjustment Adjust vertical print position When the situation like figure A or B occurs, adjust the vertical print position to figure C. Figure 3.4.1 Caution: Figure A indicates that the print position is upper than the correct position. Adjust it in the positive direction (The data symbol in the option “Vertical position adjustment”... - Page 22 Caution: Figure D indicates that the print position is on the left of the correct position. Adjust it in the positive direction (The data symbol in the option “Horizontal position adjustment” is “+”); Figure E indicates that the print position is on the right of the correct position. Adjust it in the negative direction.
-
Page 23: Routine Maintenance
4 Routine maintenance Clean the print head, platen roller and sensor every month according to the following steps. If the printer works in a tough environment, the maintenance times can be properly increased. 4.1 Cleaning print head When any of the following cases occurs, the print head should be cleaned: ... -
Page 24: Cleaning Platen Roller
4.2 Cleaning platen roller When any of the following cases occurs, the platen roller should be cleaned: Printout is not clear; Feed and retract paper with big noise; Something else sticks onto the platen roller. Follow the steps below to clean the platen roller: 1) Turn off the printer and open the top cover;... -
Page 25: Troubleshooting
5 Troubleshooting When the printer has a malfunction, please handle it with reference to this charter. If it still cannot be cleared, please contact Newland or your local dealer. 5.1 Troubleshooting The error LED flashes and the buzzer beeps when an error or exceptional status occurs. At this time, the printer stops the printing. - Page 26 Troubleshooting methods: Error LED status Reason analysis Solutions Please press down the print Print head is lifted up. head. Print head up The micro switch has Contact the maintainer. a failure. Paper roll is used up or no paper roll is Install a paper roll.
-
Page 27: Print Quality Problems
with marked paper (for example: no mark or unclear mark) Mark height is less than the required height. Table 5.1.1 5.2 Print quality problems Malfunction Reason Solution Print head or platen roller is dirty. Clean the print head or platen roller. Paper does not meet the requirement. -
Page 28: Appendix
Appendix Appendix 1 Technical specification Appendix 1.1 Main technical specifications Item NLS-LP410 parameter Resolution 203DPI Print method Thermal / Thermal transfer Print width (Max.) 104mm Print speed (Max.) 150mm/s 32bit RISC microprocessor FLASH: 8MB Memory SDRAM: 32MB. Print head temperature... - Page 29 1D barcode: Code39, Code93, Codabar, Code128(Subsets A, B, and C), EAN-13, EAN-8, UPC-A, UPC-E, UPC/EAN Extensions, Planet Code, Standard 2 of 5, Industrial 2 of 5, Interleaved 2 of 5, Barcode LOGMARS, GS1 DataBar (RSS) 2D barcode: PDF 417, MicroPDF417, QR Code, DataMatrix, MaxiCode, GS1 Composite Operation interface Button, LED...
-
Page 30: Appendix 1.2 Technical Specifications Of Paper
Appendix 1.2 Technical specifications of paper 1) Specifications of continuous paper (unit: mm) Type Illustration Index Continuous paper without adhesive Print paper width: 18≤a≤120 Base paper width: 18≤a≤120 Continuous paper with adhesive Print paper width: 18≤b≤118 Paper margin width: c ≤1 Table appendix 1.2.1 - 22 -... - Page 31 2) Discontinuous paper specifications (unit: mm) Type Illustration Index Base paper width: 18≤a≤120 Paper margin Discontinuous width: b≤1 label paper with Label width: adhesive 18≤c≤118 Label height:: d≥10 Gap width: e≥2 Punched paper width: 18≤a≤120 Punched paper height: b≥10 Discontinuous Detection hole punched paper position: c≤a/2...
-
Page 32: Appendix 2 Self-Test Page
Printer configuration information (BPLZ II) is related to the configuration of the printer. PRINTER CONFIGURATION NLS-LP410………………………….…… MODEL FV2.000…………………………………. MAIN FIRMWARE 10………………………………….…….. DARKNESS +0………………………………………… TEAR OFF TEAR OFF………………………………... -
Page 33: Appendix 3 Print And Paper Out Position
16360K…………………………………… R: RAM 1472K…………………………………….. E: ONBOARD FLASH NONE…………………………………….. FORMAT CONVERT 0123456789……………………………… SERIAL NUMBER Appendix 3 Print and paper out position Figure appendix 3.1 Caution: To take marked paper for example, the figure above explains the print and paper out position; ... -
Page 34: Appendix 4 Communication Interface
Appendix 4 Communication interface Appendix 4.1 Serial interface Interface signal Signal name Signal direction Function None Input Data input Output Data output Output Data terminal ready Signal ground - Input Data device ready Output Request transmission Input Allow transmission Frame ground -... -
Page 35: Appendix 4.2 Usb Interface
Appendix 4.2 USB interface USB interface meets USB2.0 protocol standard and is optional. USB interface transmits signal and power via a four–wire cable, as shown in the following figure: Figure appendix 4.2.1 USB cable Wire D+ and D- in figure appendix 4.3.1 are used for signal transmission, and the VBUS is +5V. - 27 -... -
Page 36: Appendix 4.3 Ethernet Interface
Appendix 4.3 Ethernet interface Network interface parameter Meets the standard communication protocol of 10BASE-T in IEEE802.3. Figure appendix 4.3.1 Socket Signal name Function Data transmit + Data transmit - Data receiving + Reserved Reserved Data receiving - Reserved Reserved Table appendix 4.3.2 Pin list of Ethernet interface 2) Electrical characteristics of interface Output signal ... - Page 37 - 1 -...
Need help?
Do you have a question about the NLS-LP410 and is the answer not in the manual?
Questions and answers