Table of Contents
Advertisement
Advertisement
Table of Contents

Related Manuals for Newland NLS-FM30 Series


Summary of Contents for Newland NLS-FM30 Series
- Page 1 NLS-FM30 Series Fixed Mount Barcode Scanner User Guide...
- Page 2 All pictures in this manual are for reference only and actual product may differ. Regarding to the product modification and update, Fujian Newland Auto-ID Tech. Co., Ltd. reserves the right to make changes to any software or hardware to improve reliability, function, or design at any time without notice. The information contained herein is subject to change without prior notice.
-
Page 3: Revision History
Revision History Version Description Date V1.0 Initial release. April 14, 2016 Added the “Data Port Pinout” section in Chapter 6. V1.1 May 3, 2016 Changed the model number FM25/FM30 to FM3055/FM3050 V1.1.1 September 20, 2016 respectively. Added a new chapter – Chapter 9 Configuring the FM30 V1.2.0 February 7, 2017 Added the “Optics”... -
Page 4: Table Of Contents
Table of Contents Chapter 1 Standard Configuration ......................... 1 Chapter 2 Optional Configuration ........................2 Chapter 3 Safety Information ......................... 3 Precautions ............................3 Maintenance ............................3 Chapter 4 Product Features ........................... 4 Chapter 5 Technical Specifications ....................... 5 Chapter 6 FM30 Scanner ..........................6 Overview ............................... - Page 5 Illumination ............................39 Notification ............................40 Mute Mode ........................... 40 Good Read Beep ......................... 40 Good Read Beep Frequency/Duration ..................41 Scan Mode ............................42 Sense Mode ..........................42 Factory Defaults ..........................42 Digit Barcodes ............................ 43 Save/Cancel Barcodes ........................45 Chapter 11 RS-232 Interface .........................
- Page 6 EAN-8 ..............................59 Restore Factory Defaults ......................59 Enable/Disable EAN-8 ......................... 59 Transmit Check Digit ........................59 2-Digit Add-On Code ........................60 5-Digit Add-On Code ........................60 EAN-8 Extension .......................... 61 EAN-13 ............................... 62 Restore Factory Defaults ......................62 Enable/Disable EAN-13 ....................... 62 Transmit Check Digit ........................
- Page 7 ITF-6 ..............................74 Restore Factory Defaults ......................74 Enable/Disable ITF-6 ........................74 ITF-14 ..............................75 Restore Factory Defaults ......................75 Enable/Disable ITF-14 ......................... 75 Matrix 2 of 5 (European Matrix 2 of 5) ....................76 Restore Factory Defaults ......................76 Enable/Disable Matrix 2 of 5 ......................
- Page 8 Enable/Disable Plessey ....................... 92 Check Digit Verification ........................ 93 MSI-Plessey ............................94 Restore Factory Defaults ......................94 Enable/Disable MSI-Plessey ......................94 Check Digit Verification ........................ 95 RSS-14 ............................... 96 Restore Factory Defaults ......................96 Enable/Disable RSS-14 ....................... 96 Transmit Application Identifier “01” ....................96 RSS-Limited ............................
-
Page 9: Chapter 1 Standard Configuration
Chapter 1 Standard Configuration 1. FM30 series fixed mount barcode scanner FM3055: FM3050: 2. USB cable 3. Quick Start Guide Quick Start... -
Page 10: Chapter 2 Optional Configuration
Chapter 2 Optional Configuration 1. RS-232 cable 2. 5V power adapter You should retain proof of purchase and ask your dealer for a warranty card. Note: You should check to make sure that everything on the standard configuration list is present and intact after opening the package. -
Page 11: Chapter 3 Safety Information
● Keep the scanner away from fire or heat sources. If there is unusual odor, overheating or smoke, immediately cut off the power and disconnect the power adapter, and contact your dealer or Newland customer service center. Continued use in this case may result in fire or electric shock. -
Page 12: Chapter 4 Product Features
Chapter 4 Product Features Designed primarily for such applications as electronic tickets/coupons, mobile marketing and office automation, FM30 series fixed mount barcode scanner is able to read barcodes from paper and mobile phones. It boasts the following features: 1. Digital barcode data capture Capable of reading 1D and 2D barcodes off mobile phones. -
Page 13: Chapter 5 Technical Specifications
Chapter 5 Technical Specifications FM3055 FM3050 Processor IOTC 0370 CHIP Interface RS-232 (9.6~115.2Kbps), USB 1.1(HID-KBW, HID-POS) 752×480 CMOS Image Sensor 2D: PDF417, Data Matrix, QR Code 1D: EAN-13, EAN-8, UPC-A, UPC-E, ISSN, ISBN, Codabar, Code 128, Code 93, Symbologies ITF-6, ITF-14, Interleaved 2 of 5, Industrial 2 of 5, Standard 2 of 5, Matrix 2 of 5, GS1 Databar (RSS-Expand, RSS-Limited, RSS-14), Code 39, Code 11, MSI-Plessey, Plessey Scan Mode... -
Page 14: Chapter 6 Fm30 Scanner
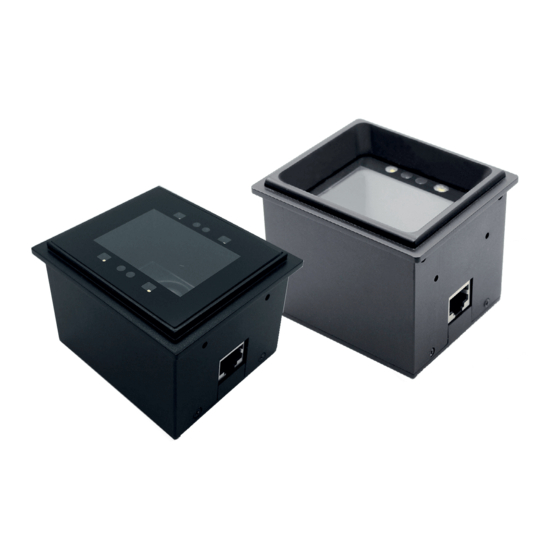
Chapter 6 FM30 Scanner Overview FM3055 Scanner FM3050 Scanner... -
Page 15: Data Port Pinout
Data Port Pinout Definition Type Description Not connected Not connected Power+ (+5V) RS-232 Output RS-232 Input Not connected Not connected Ground USB signal... -
Page 16: Dimensions
Dimensions FM3055 Scanner Note: M2 self-tapping screws should be used when mounting the scanner. The part of the screws into the shell of the scanner cannot exceed 7.5mm. -
Page 17: Fm3050 Scanner
FM3050 Scanner Note: M2 self-tapping screws should be used when mounting the scanner. The part of the screws into the shell of the scanner cannot exceed 7.5mm. -
Page 18: Ir Triggering Range
IR Triggering Range... -
Page 19: Optics
Optics Horizontal: Vertical:... -
Page 20: Chapter 7 Wiring
Chapter 7 Wiring 1. If your scanner is equipped with an RS-232 interface: 1) Plug the supplied cable’s RJ45 connector into the data port on the scanner. 2) Plug the cable’s RS-232 connector into the RS-232 port on PC. 3) Plug the power adapter into the cable’s power jack. ③... - Page 21 2. If your scanner is equipped with a USB interface: 1) Plug the supplied cable’s RJ45 connector into the data port on the scanner. 2) Plug the cable’s USB connector into the USB port on PC. ② ① 3) After 0.5s the scanner will be powered on with a beep.
-
Page 22: Chapter 8 Scanning Instructions
Chapter 8 Scanning Instructions Reading a Digital Barcode off Mobile Phone 1. Place the mobile phone screen close to the scan window and present the barcode to the center of the window, adjusting the distance between them within the range of 1cm-5cm. 2. -
Page 23: Chapter 9 Configuring The Fm30
Chapter 9 Configuring the FM30 There are two ways to configure the scanner: barcode programming and command programming. Barcode Programming The FM30 can be configured by scanning programming barcodes. All user programmable features/options are described along with their programming barcodes/commands in the following chapters. - Page 24 Types : 0x07 Lens : 0x01 Address: 0x0000~0x00FF, starting register address. Datas : 0x00~0xFF, number of registers to be read. When Datas=0x00, 256 contiguous registers are to be read. : CRC-CCITT checksum, 2 bytes. Computation sequence: Types+ Lens+Address+Datas; polynomial: X +1 (0x1021), initial value: 0x0000.
- Page 25 Reply: {Prefix2} {Types} {Lens} {Datas} {FCS} 1) Success message: Prefix2 : 0x02 0x00 Types : 0x00 (success) Lens : The number of data returned. If Lens=0x00, that means values of 256 contiguous registers are returned. Datas : 0x00~0xFF, data that are returned. : CRC-CCITT checksum.
- Page 26 Example: Read the content (0x3E) of register 0x000A 1) Read operation succeeds: Command sent: 0x7E 0x00 0x07 0x01 0x00 0x0A 0x01 0xEE 0x8A Message received: 0x02 0x00 0x00 0x01 0x3E 0xE4 0xAC 2) CRC check fails: Command sent: 0x7E 0x00 0x07 0x01 0x00 0x0A 0x01 0x11 0x22...
-
Page 27: Write Register
Write Register The write command is used to write contiguous registers (1 to 256 registers) in the scanner. Syntax: {Prefix1} {Types} {Lens} {Address} {Datas} {FCS} Prefix1 : 0x7E 0x00 (2 bytes) Types : 0x08 (1 byte) Lens : 0x00~0xFF (1 byte), byte count, i.e. number of registers written. When Lens=0x00, 256 contiguous registers are to be written. - Page 28 unsigned int crc_cal_by_bit(unsigned char* ptr, unsigned int len) unsigned int crc = 0; while(len-- != 0) for(unsigned char i = 0x80; i != 0; i /= 2) crc *= 2; if((crc&0x10000) !=0) crc ^= 0x11021; if((*ptr&i) != 0) crc ^= 0x1021; ptr++;...
- Page 29 Reply: {Prefix2} {Types} {Lens} {Datas} {FCS} 1) Success message: Prefix2 : 0x02 0x00 Types : 0x00 (success) Lens : 0x01 Datas : 0x00 : CRC-CCITT checksum (0x33 0x31) 2) CRC check failure message: Prefix2 : 0x02 0x00 Types : 0x01 (CRC check failure) Lens : 0x01 Datas : 0x00...
- Page 30 Example: Write 0x3E into register 0x000A 1) Write operation succeeds: Command sent: 0x7E 0x00 0x08 0x01 0x00 0x0A 0x3E 0x4C 0xCF Message received: 0x02 0x00 0x00 0x01 0x00 0x33 0x31 2) CRC check fails: Command sent: 0x7E 0x00 0x08 0x01 0x00 0x0A 0x3E 0x11 0x22...
-
Page 31: Save Register Data In Eeprom
Save Register Data in EEPROM The save command is used to save register data into an external EEPROM. Syntax: {Prefix1} {Types} {Lens} {Address} {Datas} {FCS} Prefix1 : 0x7E 0x00 Types : 0x09 Lens : 0x01 Address: 0x0000 Datas : 0x00 : CRC-CCITT checksum (0xDE 0xC8) Reply: {Prefix2} {Types} {Lens} {Datas} {FCS} 1) Success message:... - Page 32 3) Invalid command message: Prefix2 : 0x02 0x00 Types : 0x03 (invalid command) Lens : 0x01 Datas : 0x00 : CRC-CCITT checksum (0x6A 0x61)
-
Page 33: Relationship Between Programming Command And Serial Command
Relationship between Programming Command and Serial Command 1. Program general parameter with serial command A programming command (i.e. the characters under programming barcode) contains 7 characters. The function of each character is described in the table below. 1st Char 2nd Char ~3rd Char 4th Char~5th Char 6th Char~7th Char Remark BITPOSITION ADDR... - Page 34 Step 2: Calculate the value written to the register. Datas = (0xD4 & (! 0x03)) + 0x02 = 0xD6 Step 3: Write the value into the register. serial command sent : 0x7E 0x00 0x08 0x01 0x00 0x00 0xD6 0xDF 0x22 reply received : 0x02 0x00 0x00 0x01 0x00 0x33 0x31...
-
Page 35: Registers
Registers 0x0000 Register Feature Bit 7 1: Good read LED on 0: Good read LED off Bit 6 1: Disable the mute mode 0: Enable the mute mode Aiming: Bit 5-4 00: OFF 01: Normal 10/11: Always ON Illumination: Bit 3-2 00: OFF 01: Normal 10/11: Always ON... - Page 36 Register 0x0009 Feature Good Read Beep Frequency Bit 7-0 0xDA: Low 0x4B: Medium 0x25: High Register 0x000A Feature Good Read Beep Duration Bit 7-0 0x1F: 40ms 0x3E: 80ms 0x5D: 120ms 0x000C Register Feature Bit 7-4 Reserved Bit 3 1: Enable Data Matrix 0: Disable Data Matrix Bit 2 1: Enable 1D symbologies...
- Page 37 0x0010 Register Feature Bit 7-5 Reserved 00: Disable AIM ID prefix for 1D symbologies Bit 4-3 01: Allow to enable/disable AIM ID prefix for individual 1D symbology 10/11: Enable AIM ID prefix for 1D symbologies Bit 2-0 Reserved Register 0x0011 Feature 1: Enable AIM ID prefix for ISSN 0: Disable AIM ID prefix for ISSN...
- Page 38 Register 0x0013 Feature Bit 7 Reserved Bit 6 1: Enable EAN-8 zero extend 0: Disable EAN-8 zero extend Bit 5 1: Enable EAN-8 5-digit add-on code 0: Disable EAN-8 5-digit add-on code Bit 4 1: Enable EAN-8 2-digit add-on code 0: Disable EAN-8 2-digit add-on code Bit 3 1: EAN-8 add-on code required...
- Page 39 Register 0x0016 Feature 1: Transmit AIM 128 check digit in the format of “~nnn” (nnn: ASCII decimal value of check digit) Bit 7 0: Do not transmit AIM 128 check digit 1: FNC1 character in AIM 128 transmitted as “~” (ASCII value: 126) Bit 6 0: FNC1 character in AIM 128 transmitted as GS (ASCII value: 29) 1: Enable AIM ID prefix for AIM 128...
- Page 40 Register 0x0018 Feature Bit 7 1: Transmit ITF-14 check digit 0: Do not transmit ITF-14 check digit 1: Enable AIM ID prefix for ITF-14 0: Disable AIM ID prefix for ITF-14 Bit 6 Note: Bit4 and Bit3 of register 0x0010 must be set to “01” in order for this parameter to function. Bit 5 1: Enable ITF-14 0: Disable ITF-14...
- Page 41 Register 0x001A Feature 1: Transmit Standard 2 of 5 check digit 0: Do not transmit Standard 2 of 5 check digit Bit 7 Note: Standard 2 of 5 check digit must be enabled for this parameter to function. Bit 6 1: Enable Standard 2 of 5 check digit 0: Disable Standard 2 of 5 check digit 1: Enable AIM ID prefix for Standard 2 of 5...
- Page 42 Register 0x001C Feature Bit 7-6 Reserved Bit 5 1: Enable Code 39 Full ASCII 0: Disable Code 39 Full ASCII 1: Transmit Code 39 check digit 0: Do not transmit Code 39 check digit Bit 4 Note: Code 39 check digit must be enabled for this parameter to function. Bit 3 1: Enable Code 39 check digit 0: Disable Code 39 check digit...
- Page 43 Register 0x001E Feature Bit 7-6 Reserved 1: Transmit Codabar check digit 0: Do not transmit Codabar check digit Bit 5 Note: Codabar check digit verification must be enabled for this parameter to function. Bit 4 1: Enable Codabar check digit 0: Disable Codabar check digit Codabar Start/Stop Character Format: Bit 3-2...
- Page 44 0x0020 Register Feature Bit 7-3 Reserved 1: Enable AIM ID prefix for MSI-Plessey 0: Disable AIM ID prefix for MSI-Plessey Bit 2 Note: Bit4 and Bit3 of register 0x0010 must be set to “01” in order for this parameter to function. 1: Enable AIM ID prefix for Plessey 0: Disable AIM ID prefix for Plessey Bit 1...
- Page 45 0x004B Register Feature Bit 7-2 Reserved Bit 1-0 11: Decode rectangular Data Matrix 00: Do not decode rectangular Data Matrix Register 0x0060 Feature Bit 7 Reserved Terminating Character Suffix: Bit 6-5 00/11: CR (0x0D) 01: CRLF (0x0D,0x0A) 10: TAB (0x09) Bit 4 Reserved Bit 3...
- Page 46 0x006F Register Feature Inter-keystroke delay Bit 7-6 00: No delay 01: Short delay (5ms) 10: Medium delay (10ms) 11: Long delay (15ms) Convert case Bit 5-4 00: No case conversion 10: Convert All to Upper Case 11: Convert All to Lower Case Bit 3 Reserved Bit 2...
-
Page 47: Chapter 10 System Settings
Chapter 10 System Settings Illumination Always ON: Illumination LED keeps ON after the scanner is powered on. Normal: Illumination LED is turned on when the scanner is reading barcode. OFF: Illumination LED is OFF all the time. ** Normal Always ON... -
Page 48: Notification
Notification Mute Mode Scanning the Enable Mute Mode/Disable Mute Mode can turn off/on all notification beeps. Enable Mute Mode ** Disable Mute Mode Good Read Beep ** Good Read Beep On Good Read Beep Off... -
Page 49: Good Read Beep Frequency/Duration
Good Read Beep Frequency/Duration Low Frequency ** Medium Frequency High Frequency 40ms ** 80ms 120ms... -
Page 50: Scan Mode
Scan Mode Sense Mode IR trigger: The scanner activates a decode session every time when it detects a barcode presented to it. This feature is always enabled. Light trigger: The scanner activates a decode session every time when it detects a change in ambient illumination. -
Page 51: Digit Barcodes
Digit Barcodes After scanning numeric barcode(s), you need to scan the Save barcode to save the data. -
Page 53: Save/Cancel Barcodes
Save/Cancel Barcodes After reading numeric barcode(s), you need to scan the Save barcode to save the data. If you scan the wrong digit(s), you can either scan the Cancel the Last Digit barcode and then the correct digit, or scan the Cancel All Digits barcode and then the digits you want. -
Page 54: Chapter 11 Rs-232 Interface
Chapter 11 RS-232 Interface When the scanner is connected to a host device through its RS-232 interface, serial communication is enabled by default. However, to ensure smooth communication and accuracy of data, you need to set the scanner’s communication parameters (including baud rate) to match the host’s settings. The default settings of the scanner are 115200bps, no parity check, 8 data bits and 1 stop bit. -
Page 55: Chapter 12 Usb Interface
Chapter 12 USB Interface When the scanner is connected to a host device through its USB interface, USB HID-KBW is enabled by default. You may switch to HID-POS or USB COM Port Emulation by scanning the appropriate barcode below. HID-POS HID-POS USB COM Port Emulation USB COM Port Emulation... -
Page 56: Standard Keyboard
Three methods of input are provided for USB HID-KBW: Standard Keyboard, Function Key Mapping, Emulate ALT+Keypad. Standard Keyboard ** Standard Keyboard Function Key Mapping When Function Key Mapping is enabled, function character (0x00 - 0x1F) are sent as ASCII sequences over the numeric keypad. - Page 57 ASCII Function Key Mapping Table ASCII(HEX) Function key ASCII(HEX) Function key...
-
Page 58: Emulate Alt+Keypad
Emulate ALT+Keypad When Emulate ALT+Keypad is enabled, any ASCII character (0x00 - 0xFF) is sent over the numeric keypad no matter which keyboard type is selected. 1. ALT Make 2. Enter the number corresponding to the ASCII character on the keypad. 3. -
Page 59: Usb Country Keyboard Types
USB Country Keyboard Types ** 1 - U.S. 2 - Belgium 3 - Brazil 4 - Canada 5 - Czech 6 - Denmark 7 - Finland 8 - France... - Page 60 9 - Austria, Germany 10 - Greece 11 - Hungary 12 - Israel 13 - Italy 14 - Latin America 15 - Netherland 16 - Norway 17 - Poland 18 - Portugal...
- Page 61 19 - Romania 20 - Russia 21 - Slovakia 22 - Spain 23 - Sweden 24 - Switzerland 25 - Turkey1 26 - Turkey 2 27 - UK 28 - Japan...
-
Page 62: Chapter 13 Symbologies
Chapter 13 Symbologies Introduction Every symbology (barcode type) has its own unique attributes. This chapter provides programming barcodes for configuring the scanner so that it can identify various barcode symbologies. It is recommended to disable those that are rarely used to increase the efficiency of the scanner. Global Settings Disable All Symbologies If all symbologies are disabled, the scanner can only identify programming barcodes. -
Page 63: Enable 1D Symbologies
Enable 1D Symbologies Enable 1D Symbologies Disable 1D Symbologies Disable 1D Symbologies Enable 2D Symbologies Enable 2D Symbologies Disable 2D Symbologies Disable 2D Symbologies... -
Page 64: Code 128
Code 128 Restore Factory Defaults Restore the Factory Defaults of Code 128 Enable/Disable Code 128 ** Enable Code 128 Disable Code 128... -
Page 65: Ucc/Ean-128 (Gs1-128)
UCC/EAN-128 (GS1-128) Restore Factory Defaults Restore the Factory Defaults of UCC/EAN-128 Enable/Disable UCC/EAN-128 ** Enable UCC/EAN-128 Disable UCC/EAN-128... -
Page 66: Restore Factory Defaults
AIM-128 Restore Factory Defaults Restore the Factory Defaults of AIM-128 Enable/Disable AIM-128 ** Enable AIM-128 Disable AIM-128... -
Page 67: Restore Factory Defaults
EAN-8 Restore Factory Defaults Restore the Factory Defaults of EAN-8 Enable/Disable EAN-8 ** Enable EAN-8 Disable EAN-8 Transmit Check Digit EAN-8 is 8 digits in length with the last one as its check digit used to verify the integrity of the data. ** Transmit Check Digit Do Not Transmit Check Digit... -
Page 68: 2-Digit Add-On Code
2-Digit Add-On Code An EAN-8 barcode can be augmented with a two-digit add-on code to form a new one. In the examples below, the part surrounded by blue dotted line is an EAN-8 barcode while the part circled by red dotted line is add-on code. -
Page 69: Ean-8 Extension
EAN-8 Extension Disable EAN-8 Zero Extend: Transmit EAN-8 barcodes as is. Enable EAN-8 Zero Extend: Add five leading zeros to decoded EAN-8 barcodes to extend to13 digits. ** Disable EAN-8 Zero Extend Enable EAN-8 Zero Extend... -
Page 70: Restore Factory Defaults
EAN-13 Restore Factory Defaults Restore the Factory Defaults of EAN-13 Enable/Disable EAN-13 ** Enable EAN-13 Disable EAN-13 Transmit Check Digit EAN-13 is 13 digits in length with the last one as its check digit used to verify the integrity of the data. ** Transmit Check Digit Do Not Transmit Check Digit... -
Page 71: 2-Digit Add-On Code
2-Digit Add-On Code An EAN-13 barcode can be augmented with a two-digit add-on code to form a new one. In the examples below, the part surrounded by blue dotted line is an EAN-8 barcode while the part circled by red dotted line is add-on code. -
Page 72: Issn
ISSN Restore Factory Defaults Restore the Factory Defaults of ISSN Enable/Disable ISSN Enable ISSN ** Disable ISSN... -
Page 73: Isbn
ISBN Restore Factory Defaults Restore the Factory Defaults of ISBN Enable/Disable ISBN ** Enable ISBN Disable ISBN Set ISBN Format ** ISBN-13 ISBN-10... -
Page 74: Upc-E
UPC-E Restore Factory Defaults Restore the Factory Defaults of UPC-E Enable/Disable UPC-E ** Enable UPC-E Disable UPC-E Transmit Check Digit UPC-E is 8 digits in length with the last one as its check digit used to verify the integrity of the data. ** Transmit Check Digit Do Not Transmit Check Digit... -
Page 75: 2-Digit Add-On Code
2-Digit Add-On Code A UPC-E barcode can be augmented with a two-digit add-on code to form a new one. In the examples below, the part surrounded by blue dotted line is a UPC-E barcode while the part circled by red dotted line is add-on code. -
Page 76: Transmit System Character
Transmit System Character Transmit System Character “0” ** Do Not Transmit System Character “0” UPC-E Extension Disable UPC-E Extend: Transmit UPC-E barcodes as is. Enable UPC-E Extend: Extend UPC-E barcodes to make them compatible in length to UPC-A. Enable UPC-E Extend ** Disable UPC-E Extend... -
Page 77: Upc-A
UPC-A Restore Factory Defaults Restore the Factory Defaults of UPC-A Enable/Disable UPC-A ** Enable UPC-A Disable UPC-A Transmit Check Digit UPC-A is 13 digits in length with the last one as its check digit used to verify the integrity of the data. ** Transmit Check Digit Do Not Transmit Check Digit... -
Page 78: 2-Digit Add-On Code
2-Digit Add-On Code A UPC-A barcode can be augmented with a two-digit add-on code to form a new one. In the examples below, the part surrounded by blue dotted line is a UPC-E barcode while the part circled by red dotted line is add-on code. -
Page 79: Transmit Preamble Character
Transmit Preamble Character Preamble characters (Country Code and System Character) can be transmitted as part of a UPC-A barcode. Select one of the following options for transmitting UPC-A preamble to the host device: transmit system character only or transmit system character and country code (“0” for USA). System Character &... -
Page 80: Interleaved 2 Of 5
Interleaved 2 of 5 Restore Factory Defaults Restore the Factory Defaults of Interleaved 2 of 5 Enable/Disable Interleaved 2 of 5 ** Enable Interleaved 2 of 5 Disable Interleaved 2 of 5... -
Page 81: Check Digit Verification
Check Digit Verification A check digit is optional for Interleaved 2 of 5 and can be added as the last digit. It is a calculated value used to verify the integrity of the data. Disable: The scanner transmits Interleaved 2 of 5 barcodes as is. Do Not Transmit Check Digit after Verification: The scanner checks the integrity of all Interleaved 2 of 5 barcodes to verify that the data complies with the check digit algorithm. -
Page 82: Restore Factory Defaults
ITF-6 Restore Factory Defaults Restore the Factory Defaults of ITF-6 Enable/Disable ITF-6 ** Disable ITF-6 Enable ITF-6 But Do Not Transmit Check Digit Enable ITF-6 and Transmit Check Digit... -
Page 83: Restore Factory Defaults
ITF-14 Restore Factory Defaults Restore the Factory Defaults of ITF-14 Enable/Disable ITF-14 Disable ITF-14 Enable ITF-14 But Do Not Transmit Check Digit Enable ITF-14 and Transmit Check Digit... -
Page 84: Matrix 2 Of 5 (European Matrix 2 Of 5)
Matrix 2 of 5 (European Matrix 2 of 5) Restore Factory Defaults Restore the Factory Defaults of Matrix 2 of 5 Enable/Disable Matrix 2 of 5 ** Enable Matrix 2 of 5 Disable Matrix 2 of 5... -
Page 85: Check Digit Verification
Check Digit Verification A check digit is optional for Matrix 2 of 5 and can be added as the last digit. It is a calculated value used to verify the integrity of the data. Disable: The scanner transmits Matrix 2 of 5 barcodes as is. Do Not Transmit Check Digit After Verification: The scanner checks the integrity of all Matrix 2 of 5 barcodes to verify that the data complies with the check digit algorithm. -
Page 86: Industrial 25
Industrial 25 Restore Factory Defaults Restore the Factory Defaults of Industrial 25 Enable/Disable Industrial 25 ** Enable Industrial 25 Disable Industrial 25... -
Page 87: Check Digit Verification
Check Digit Verification A check digit is optional for Industrial 25 and can be added as the last digit. It is a calculated value used to verify the integrity of the data. Disable: The scanner transmits Industrial 25 barcodes as is. Do Not Transmit Check Digit after Verification: The scanner checks the integrity of all Industrial 25 barcodes to verify that the data complies with the check digit algorithm. -
Page 88: Standard 25
Standard 25 Restore Factory Defaults Restore the Factory Defaults of Standard 25 Enable/Disable Standard 25 ** Enable Standard 25 Disable Standard 25... -
Page 89: Check Digit Verification
Check Digit Verification A check digit is optional for Standard 25 and can be added as the last digit. It is a calculated value used to verify the integrity of the data. Disable: The scanner transmits Standard 25 barcodes as is. Do Not Transmit Check Digit after Verification: The scanner checks the integrity of all Standard 25 barcodes to verify that the data complies with the check digit algorithm. -
Page 90: Code 39
Code 39 Restore Factory Defaults Restore the Factory Defaults of Code 39 Enable/Disable Code 39 ** Enable Code 39 Disable Code 39 Transmit Start/Stop Character Code 39 uses an asterisk (*) for both the start and the stop characters. You can choose whether or not to transmit the start/stop characters by scanning the appropriate barcode below. -
Page 91: Enable/Disable Code 39 Full Ascii
Enable/Disable Code 39 Full ASCII The scanner can be configured to identify all ASCII characters by scanning the appropriate barcode below. ** Disable Code 39 Full ASCII Enable Code 39 Full ASCII... -
Page 92: Check Digit Verification
Check Digit Verification A check digit is optional for Code 39 and can be added as the last digit. It is a calculated value used to verify the integrity of the data. Disable: The scanner transmits Code 39 barcodes as is. Do Not Transmit Check Digit after Verification: The scanner checks the integrity of all Code 39 barcodes to verify that the data complies with the check digit algorithm. -
Page 93: Codabar
Codabar Restore Factory Defaults Restore the Factory Defaults of Codabar Enable/Disable Codabar ** Enable Codabar Disable Codabar... -
Page 94: Check Digit Verification
Check Digit Verification Check digits are optional for Codabar and can be added as the last two digits, which are calculated values used to verify the integrity of the data. Disable: The scanner transmits Codabar barcodes as is. Do Not Transmit Check Digit after Verification: The scanner checks the integrity of all Codabar barcodes to verify that the data complies with the check digit algorithm. -
Page 95: Transmit Start/Stop Character
Transmit Start/Stop Character Do Not Transmit Start/Stop Character Transmit Start/Stop Character ** ABCD/ABCD as the Start/Stop Character ABCD/TN*E as the Start/Stop Character abcd/abcd as the Start/Stop Character abcd/tn*e as the Start/Stop Character... -
Page 96: Code 93
Code 93 Restore Factory Defaults Restore the Factory Defaults of Code 93 Enable/Disable Code 93 ** Enable Code 93 Disable Code 93... -
Page 97: Check Digit Verification
Check Digit Verification Check digits are optional for Code 93 and can be added as the last two digits, which are calculated values used to verify the integrity of the data. Disable: The scanner transmits Code 93 barcodes as is. Do Not Transmit Check Digit after Verification: The scanner checks the integrity of all Code 93 barcodes to verify that the data complies with the check digit algorithm. -
Page 98: Code 11
Code 11 Restore Factory Defaults Restore the Factory Defaults of Code 11 Enable/Disable Code 11 ** Enable Code 11 Disable Code 11... -
Page 99: Check Digit Verification
Check Digit Verification Check digits are optional for Code 11 and can be added as the last one or two digits, which are calculated values used to verify the integrity of the data. If the Disable option is enabled, the scanner transmits Code 11 barcodes as is. Disable ** One Check Digit, MOD11 Two Check Digits, MOD11/MOD11... -
Page 100: Plessey
Plessey Restore Factory Defaults Restore the Factory Defaults of Plessey Enable/Disable Plessey ** Enable Plessey Disable Plessey... -
Page 101: Check Digit Verification
Check Digit Verification Check digits are optional for Plessey and can be added as the last one or two digits, which are calculated values used to verify the integrity of the data. Disable: The scanner transmits Plessey barcodes as is. Do Not Transmit Check Digit after Verification: The scanner checks the integrity of all Plessey barcodes to verify that the data complies with the check digit algorithm. -
Page 102: Msi-Plessey
MSI-Plessey Restore Factory Defaults Restore the Factory Defaults of MSI-Plessey Enable/Disable MSI-Plessey ** Enable MSI-Plessey Disable MSI-Plessey... -
Page 103: Check Digit Verification
Check Digit Verification Check digits are optional for MSI-Plessey and can be added as the last one or two digits, which are calculated values used to verify the integrity of the data. If the Disable option is enabled, the scanner transmits MSI-Plessey barcodes as is. Disable ** One Check Digit, MOD10 Two Check Digits, MOD10/MOD10... -
Page 104: Restore Factory Defaults
RSS-14 Restore Factory Defaults Restore the Factory Defaults of RSS-14 Enable/Disable RSS-14 ** Enable RSS-14 Disable RSS-14 Transmit Application Identifier “01” ** Transmit Application Identifier “01” Do Not Transmit Application Identifier “01”... -
Page 105: Rss-Limited
RSS-Limited Restore Factory Defaults Restore the Factory Defaults of RSS-Limited Enable/Disable RSS-Limited ** Enable RSS-Limited Disable RSS-Limited Transmit Application Identifier “01” ** Transmit Application Identifier “01” Do Not Transmit Application Identifier “01”... -
Page 106: Rss-Expand
RSS-Expand Restore Factory Defaults Restore the Factory Defaults of RSS-Expand Enable/Disable RSS-Expand ** Enable RSS-Expand Disable RSS-Expand... -
Page 107: Pdf417
PDF417 Restore Factory Defaults Restore the Factory Defaults of PDF417 Enable/Disable PDF417 ** Enable PDF417 Disable PDF417 Macro PDF417 Enable Macro PDF417 ** Disable Macro PDF417... -
Page 108: Data Matrix
Data Matrix Restore Factory Defaults Restore the Factory Defaults of Data Matrix Enable/Disable Data Matrix ** Enable Data Matrix Disable Data Matrix Enable/Disable Mirrored DM Enable Mirrored DM ** Disable Mirrored DM... -
Page 109: Rectangular Barcodes
Rectangular Barcodes Data Matrix has two formats: Square barcodes having the same amount of modules in length and width: 10*10, 12*12..144*144. Rectangular barcodes having different amounts of models in length and width: 6*16, 6*14... 14*22. ** Decode Rectangular Barcodes Do Not Decode Rectangular Barcodes... -
Page 110: Qr Code
QR Code Restore Factory Defaults Restore the Factory Defaults of QR Code Enable/Disable QR Code ** Enable QR Code Disable QR Code Micro QR This parameter is valid only when QR Code is enabled. ** Enable Micro QR Disable Micro QR... -
Page 111: Chapter 14 Prefix & Suffix
Chapter 14 Prefix & Suffix AIM ID Prefix AIM (Automatic Identification Manufacturers) IDs define symbology identifiers and data carrier identifiers. For the details, see the AIM ID Table. If AIM ID prefix is enabled, the scanner will add the symbology identifier before the scanned data after decoding. - Page 112 AIM ID Table Symbology AIM ID Remark Code 128 Standard Code 128 UCC/EAN 128 FNC1 is the character right after the start character (GS1-128) AIM 128 FNC1 is the 2nd character after the start character Standard EAN-8 EAN-8 ]E4….]E1… EAN-8 + 2-Digit Add-On Code ]E4….]E2…...
- Page 113 Symbology AIM ID Remark Transmit barcodes as is; Full ASCII disabled; no check digit verification One check digit, MOD 43; transmit check digit One check digit, MOD 43; do not transmit check digit Code 39 Full ASCII enabled; no check digit verification Full ASCII enabled;...
- Page 114 Symbology AIM ID Remark ECC 200; FNC1 is the 2nd or 6th character after the start character ECC 200, ECI protocol supported ECC 200; FNC1 is the 1st or 5th character after the start character; ECI supported ECC 200; FNC1 is the 2nd or 6th character after the start character;...
-
Page 115: Code Id Prefix
CODE ID Prefix Code ID can also be used to identify barcode type. For the details, see the CODE ID Table. ** Disable CODE ID Prefix Enable CODE ID Prefix You can choose to transmit original CODE ID or visible CODE ID by scanning the appropriate barcode below. - Page 116 CODE ID Table Symbology Original Code ID Visible Code ID Code 128 FNC3 0x01 A(0x41) Code 128 0x02 B(0x42) UCC/EAN 128 0x03 C(0x43) EAN-8 0x04 D(0x44) EAN-13 0x05 E(0x45) UPC-E 0x06 F(0x46) UPC-A 0x07 G(0x47) Interleaved 2 of 5 0x08 H(0x48) ITF-14 0x09...
-
Page 117: Terminating Character Suffix
Terminating Character Suffix A terminating character such as carriage return (CR) or carriage return/line feed pair (CRLF) or horizontal tab (TAB) can be used to mark the end of data. Disable Terminating Character Suffix Append CR ** Append CRLF Append TAB... -
Page 118: Chapter 15 Troubleshooting
Chapter 15 Troubleshooting Problem Solution Does not respond to input. Disconnect the power adapter and then reconnect it. Scanned data is not Ensure the scanner’s communication parameters (such as baud rate, interface) displayed on the host. match the host’s settings. 1. - Page 119 Headquarters Fujian Newland Auto-ID Tech. Co., Ltd. 3F, Building A, No.1, Rujiang West Rd., Mawei, Fuzhou, Fujian, China 350015 TEL: +86 - (0) 591-83978605 FAX: +86 - (0) 591-83979216 E-mail: marketing@nlscan.com WEB: www.newlandaidc.com Newland Europe BV Rolweg 25, 4104 AV Culemborg, The Netherlands...
Need help?
Do you have a question about the NLS-FM30 Series and is the answer not in the manual?
Questions and answers