Table of Contents
Advertisement
Quick Links
Advertisement
Table of Contents

Related Manuals for Insportline inCondi ET550i


Summary of Contents for Insportline inCondi ET550i
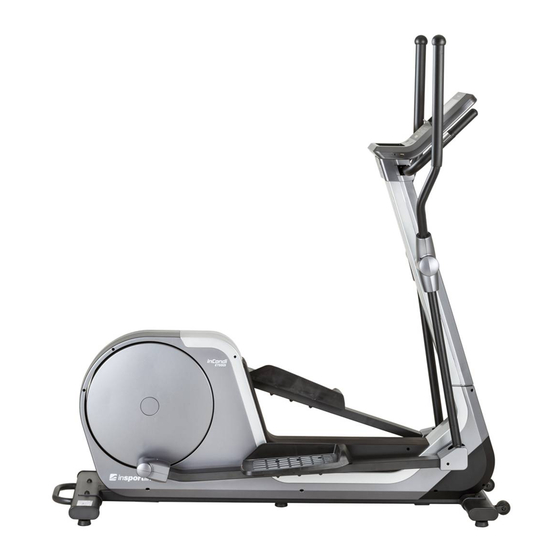
- Page 1 USER MANUAL – EN IN 16145 Elliptical Trainer inSPORTline inCondi ET550i...
-
Page 2: Table Of Contents
CONTENTS SAFETY INSTRUCTIONS ........................3 PACKAGE LIST ............................4 PARTS LIST ............................6 EXPLODED DRAWING ........................... 8 ASSEMBLY STEPS ..........................9 DISPLAY OPERATION MANUAL ......................13 BUTTON FUNCTION ......................... 13 HARDWARE CONFIGURATION ....................... 14 ICON OPERATION AND FUNCTION ....................14 HOMEPAGE ICON FUNCTION INTRODUCTION ................ -
Page 3: Safety Instructions
SAFETY INSTRUCTIONS • Read this manual before first using and keep it for future reference. Product specifications may slightly vary from used illustrations and can be changed without previous warning. • To reduce risk of some injury, observe all warnings and precautions and use it only for intended purpose and only according to this manual. -
Page 4: Package List
PACKAGE LIST Picture Description Qty. Main frame Handlebar post 4L/R Reciprocating bar 1 pair 6L/R Handlebar 1 pair 5L/R Pedal bar 1 pair Front stabilizer Rear stabilizer 49L/R Pedal 1 pair Handrail... - Page 5 33a/b Handlebar post cover 1 pair Display 39a/b Handrail cover 1 pair 40a/b Pedal bar joint cover 2 pairs 34a/b Left reciprocating bar cover 1 pair 35a/b Right reciprocating bar cover 1 pair 36L/R Pedal bar cover 2 pairs Blister card...
-
Page 6: Parts List
PARTS LIST Description Qty. Main frame Rotation frame Handlebar post 4L/R Reciprocating bar 1 pair 5L/R Pedal bar 1 pair 6 L/R Handlebar 1 pair Handrail Pedal joint Front stabilizer Rear stabilizer Hex nut M10x55 Hex bolt M8x75 Hex bolt M8x45 Inner hex pan-head bolt M10x25 Inner hex pan-head bolt M8x38 Inner hex pan head bolt M8x16... - Page 7 36L/R Pedal bar joint cover 2 pairs Bearing sleeve ø17.1xø42x23 Elliptical end cap 39a/b Handrail cover 1 pair 40a/b Pedal joint cover 2 pairs Bearing sleeve 1 Sphere head cap Curve head cap Foam ø24xT3x245 Foam ø31xT3x420 Bearing sleeve 2 Horizontal adjuster Wheel 49L/R...
-
Page 8: Exploded Drawing
EXPLODED DRAWING... -
Page 9: Assembly Steps
ASSEMBLY STEPS STEP 1 • Attach front stabilizer (9) to the main frame (1) with inner hex pan-head bolt (14), spring washer (19), washer (23). • Attach rear stabilizer (10) to the main frame (1) with inner hex pan-head bolt (14), spring washer (19), washer (23). - Page 10 STEP 3 • Install the reciprocating bar (4L/R) to the handlebar post (3) using inner hex pan-head bolt (16), spring washer (20), washer (24) and corrugated washer (26). Don’t tighten it too firmly now. • Fix the pedal bar (5L/R) to the rotation frame (2) with nylon nut (28), washer (21), corrugated washer (27).
- Page 11 STEP 5 • Draw the pulse wire (54) from the back hole of the handlebar post (3) and then pull it out from the top hole of the handlebar post (3). • Fix the handrail (7) to the handlebar post (3) using inner hex pan-head bolt (16), spring washer (20) and washer (25).
- Page 12 STEP 7 • Fix the left reciprocating bar cover (34a/b) and right reciprocating bar cover (35a/b) to the handlebar (6L/R) using cross pan-head self-drilling screw (17). • Fix the pedal bar cover (36L/R) to the pedal bar (5L/R) with cross pan-head self drilling screw (50).
-
Page 13: Display Operation Manual
DISPLAY OPERATION MANUAL BUTTON FUNCTION Start key Stop key HOME key Back key Resistance up Resistance down Pause Up key Down key... -
Page 14: Hardware Configuration
Left key Right key Enter key Volume up Volume down Play/pause The previous The next HARDWARE CONFIGURATION Display 7 inches 1024*600TFT ITE9854 64M inside Music: Mp3 Video: available for max. 1280x768 resolution, Mp4, MKV files that decoded and packed by H.264 FLASH 8M NOR + 8G EMMC ICON OPERATION AND FUNCTION... - Page 15 Icon introduction 1 Speed: displays the current speed (km/h) Rotation per minute Distance: displays running distance (km) Time: displays running time Pace: displays the time per kilometer Displays burned calories (Kcal) Heart rate: displays current heart rate Constant power Resistance level. In condition of constant power mode, it shows wat effort. II) Icon introduction 2 to select icon, press to confirm.
-
Page 16: Homepage Icon Function Introduction
Racing mode: there are 12 preset modes in the system. The contest is between user and system. Selected Workout: there are 12 preset programs inside. Selected Constant power: it is a training mode that the power you consumed will be a constant during your whole exercise. - Page 17 • Press key to stop exercise. Exercise record will be displayed after you press key immediately. 2) COUNTDOWN MODE Select Target Time icon, press to confirm (just take time countdown mode for example): • Press key to set target time.
- Page 18 • Press to confirm and then a new dialogue will be displayed. • Press to begin exercise. Countdown mode: selected a certain countdown mode, set movement data and start exercising. For at last 10 seconds the system will keep alarming for 5 times per 2 seconds. Time countdown Range: 0:10:00-10 hour, default 0:30:00 Distance countdown...
- Page 19 • Press key to select icon. Press to confirm. • Press key to convert resistance mode and power mode. • Press key to set data. • Press key to change the resistance. Press to confirm. • The system keeps data automatically. •...
- Page 20 4) VIRTUAL SCENE MODE Press to enter the virtual scene mode: • Press key to select icon. Press to start exercising. • Default resistance level is 10. Press to adjust resistance. The video plying speed will be in accordance with your exercise speed.
- Page 21 5) RACING Press to enter the racing mode (there are 12 preset modes): • Press key to select icon. Press to confirm. • Press key to convert resistance mode and power mode. • Press key to set data. • Press key to start exercising.
- Page 22 Operation logic: Press key to go back to the previous page. Press key to go to the home page. Press “Racing” icon in the home page to go to the exercise page. If you press other icon (for example virtual scene, user program etc.) a new dialogue will display soon. to stop, after that you can begin other exercises.
- Page 23 Speed of each section of 12 preset programs:...
- Page 24 6) WORK-OUT Press to enter the Work-Out (take fat burn for example): • Press key to select icon. Press to confirm. • Press key to convert resistance mode and power mode. • Press key to set data. • Press key to start exercising.
- Page 25 Work-Out: First choose a certain program and then finish setting movement data. There are 16 sections inside for each program. And each section time = setting time/16. The resistance for each section is as described below.
- Page 26 12 preset program data...
- Page 27 7) HRC Press to enter HRC (once user set their age, system will give a target heart rate automatically. And also, the target heart rate can be adjusted manually. The range of the target time is 22-45 mins.) • Press to set data.
- Page 28 • Cool down NOTE: If there is no signal detected, see picture above. Press to enter constant power mode: • Static constant power mode. • Press to start exercising.
- Page 29 MULTI MEDIA AND SETTING INTRODUCTION 1) MUSIC Press to enter music menu: • Press to select music. Press to playback. play/pause volume+ volume- the previous the next 2) VIDEO Press to enter video menu: a) Playlist will he hidden after 5 seconds without any operation. Press to go to full screen.
- Page 30 3) SETTING Press to go to backlight setting menu: • Press to set the brightness. Press to go to language switching menu: • Press to set the language. Press to go to engineering mode. It is designed for system maintenance. You need pass code to enter it.
-
Page 31: Usage Instructions
If E02 happens, it is most probably that there is something wrong with the resistance motor. USAGE INSTRUCTIONS CONDITIONING GUIDELINES These guidelines help you plan your exercise program. Remember that correct nutrition and adequate rest are essential for successful results. If you begin an exercise program, you should check with your physician if: •... -
Page 32: Workout Tips
115-146 114-144 NOTE: This is a guide only and performance will depend on the fitness and condition (health) of the person using of the machine. WORKOUT TIPS • Always perform stretching exercises before and after your workout. • Start slowly to avoid an injury. •... -
Page 33: Terms And Conditions Of Warranty, Warranty Claims
Thigh stretching • Stand on right leg and hold the left ankle with your left hand while drawing the foot up closely behind your hips. • Keep back straight and knees together. Use a wall for balance. • Hold for about 10 seconds. •... - Page 34 “The Buyer who is not the End Customer” is a Businessman that buys Goods or uses services for the purpose of using the Goods or services for his own business activities. The Buyer conforms to the General Purchase Agreement and business conditions to the extent specified in the Commercial Code.
- Page 35 VAT ID: CZ26847264 Phone: +420 556 300 970 E-mail: eshop@insportline.cz reklamace@insportline.cz servis@insportline.cz Web: www.insportline.cz INSPORTLINE s.r.o. Headquarters, Warranty & Service centre: Elektricna 6471, 911 01 Trencin, Slovakia CRN: 36311723 VAT ID: SK2020177082 Phone: +421(0)326 526 701 E-mail: objednavky@insportline.sk reklamacie@insportline.sk servis@insportline.sk Web: www.insportline.sk...
Need help?
Do you have a question about the inCondi ET550i and is the answer not in the manual?
Questions and answers