
Related Manuals for Sony Xpreia acro S


Summary of Contents for Sony Xpreia acro S
- Page 1 Working Instructions - mechanical - Xpreia acro S LT26w 1267-1071 Rev 2 Sony Mobile Communications AB – Company Internal...
-
Page 2: Table Of Contents
4.21 Battery & Foil Adhesive Battery ............26 4.22 Ear Speaker & Foil Adhesive WP Receiver ........31 4.23 Gasket Dot Connector ............... 34 4.24 Holder Camera ..................35 1267-1071 Rev 2 Sony Mobile Communications AB – Company Internal 2(76) - Page 3 5.9 Cover Bottom ..................74 5.10 SIM Connector ..................74 Revision History ................76 For general information about mechanical repair related issues, refer to 1220-1333: Generic Repair Manual - mechanical 1267-1071 Rev 2 Sony Mobile Communications AB – Company Internal 3(76)
-
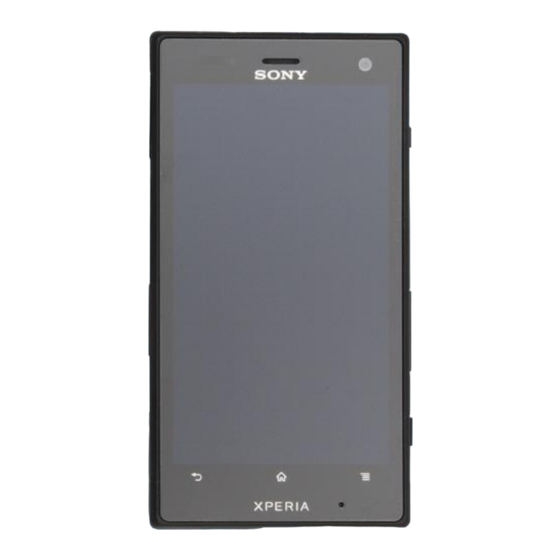
Page 4: Exterior Views
Working Instructions (mech) Exterior Views LT26w 1267-1071 Rev 2 Sony Mobile Communications AB – Company Internal 4(76) -
Page 5: Tools
8. Battery Press Insert 9. Press Tool Loudspeaker 10. Pressure Tool For part no’s on the tools above, refer to the ‘Tools Catalogue/Matrix’! STANDARD TOOLS 1. Tweezers 2. Nylon Pointer 1267-1071 Rev 2 Sony Mobile Communications AB – Company Internal 5(76) -
Page 6: Disassembly
Make sure that the Cap SIM is clean, no dirt, particles and fiber attached on it! Pull upwards to release the Cap SIM with fingers. Pull out the SIM Connector and remove it. Turn the Cap SIM over. 1267-1071 Rev 2 Sony Mobile Communications AB – Company Internal 6(76) -
Page 7: Cover Bottom
Carefully peel off to remove the Core Unit Label by using a Flex Film Assembly Tool. Do not damage the antenna under the Label Core Unit! Scrap! Not to be reused! 1267-1071 Rev 2 Sony Mobile Communications AB – Company Internal 7(76) -
Page 8: Cover Back
Insert a Guitar Pick as shown in picture and gently pull upwards to release the hook of the Cover Back. Do the same to release the hook as shown. 1267-1071 Rev 2 Sony Mobile Communications AB – Company Internal 8(76) -
Page 9: Keys & Charger Pad Connector & Caps
Do the same on this side. Remove the Cover Back. Keys & Charger PAD connector & Caps Gently remove the Key Power by using a Flex Film Assembly Tool. Remove the Key Volume. 1267-1071 Rev 2 Sony Mobile Communications AB – Company Internal 9(76) - Page 10 Do not touch the sealing rubber of the Cap Micro SD! Make sure that the Cap Micro SD is clean, no dirt, particles and fiber attached on it! 1267-1071 Rev 2 Sony Mobile Communications AB – Company Internal 10(76)
-
Page 11: Touch/Display Front Cover Assy
Touch/Display Front Cover Assy Remove these eight screws Len:5.0 Diam:1.7 O-Ring by using a screwdriver with Bits (T6). Scrap! Not to be reused! 1267-1071 Rev 2 Sony Mobile Communications AB – Company Internal 11(76) - Page 12 Scrap! Not to be reused! Insert a Guitar Pick as shown in picture and gently slide along to release this side. Do the same on the opposite side. 1267-1071 Rev 2 Sony Mobile Communications AB – Company Internal 12(76)
- Page 13 Be careful! Do not damage the components around the BtB connector! Do same to release the second BtB connector. Be careful! Do not damage the components around the BtB connector! 1267-1071 Rev 2 Sony Mobile Communications AB – Company Internal 13(76)
-
Page 14: Gasket Main
Be careful! Do not damage the components around the BtB connector! Insert the Front Opening Tool and gently pull upwards to release the Camera from the cavity. Be careful! Do not damage the Camera! 1267-1071 Rev 2 Sony Mobile Communications AB – Company Internal 14(76) -
Page 15: Rear Cover Assy
PBA. Do the same to release the hooks on this side. Do the same to release the hooks on opposite side. 1267-1071 Rev 2 Sony Mobile Communications AB – Company Internal 15(76) -
Page 16: Spacer Felica & Sheet Key Fpc & Pba Flex Module & Pba
Be careful! Do not damage the connector! Disconnect the connector of the Vibrator. Be careful! Do not damage the connector! Gently pull upwards to remove the Spacer Felica with a Flex Film Assembly Tool. 1267-1071 Rev 2 Sony Mobile Communications AB – Company Internal 16(76) - Page 17 Tool. Be careful! Do not damage the components around the BtB connector! Disconnect the other BtB connector. Be careful! Do not damage the components around the BtB connector! 1267-1071 Rev 2 Sony Mobile Communications AB – Company Internal 17(76)
- Page 18 Working Instructions (mech) Disassembly Gently pull outwards to release this side of the PBA Flex Module. Remove the PBA Flex Module from this side as shown. 1267-1071 Rev 2 Sony Mobile Communications AB – Company Internal 18(76)
-
Page 19: Replacement
Follow the 5.8 – 5.9 Reassembly instructions! Cover Back Follow the 3.2 – 3.4 Disassembly instructions! Prepare a new Cover Back. Follow the 5.7 – 5.9 Reassembly instructions! Follow the 4.27 Installation instructions! 1267-1071 Rev 2 Sony Mobile Communications AB – Company Internal 19(76) -
Page 20: Key Power
Follow the 5.6 – 5.9 Reassembly instructions! Charger PAD connector Follow the 3.2 – 3.5 Disassembly instructions! Prepare a new Charger PAD connector. Follow the 5.6 – 5.9 Reassembly instructions! 1267-1071 Rev 2 Sony Mobile Communications AB – Company Internal 20(76) -
Page 21: Cap Sim
Follow the 5.6 – 5.9 Reassembly instructions! 4.12 Cap Audio Jack Follow the 3.2 – 3.5 Disassembly instructions! Prepare a new Cap Audio Jack. Follow the 5.6 – 5.9 Reassembly instructions! 1267-1071 Rev 2 Sony Mobile Communications AB – Company Internal 21(76) -
Page 22: Cap Hdmi
Follow the 3.1 – 3.8 Disassembly instructions! Follow the 4.24 Removal instructions! Prepare a new Camera. Follow the 4.24 Installation instructions! Follow the 5.3 – 5.10 Reassembly instructions! 1267-1071 Rev 2 Sony Mobile Communications AB – Company Internal 22(76) -
Page 23: Rear Cover Assy
Follow the 3.1 – 3.10 Disassembly instructions! Follow the 4.35 Removal instructions! Prepare a new PBA Flex Module. Follow the 4.35 Installation instructions! Follow the 5.1 – 5.10 Reassembly instructions! 1267-1071 Rev 2 Sony Mobile Communications AB – Company Internal 23(76) -
Page 24: Audio Jack & Foil Adhesive Audio Jack
Peel off the Foil Adhesive Audio Jack by using a Flex Film Assembly Tool. Scrap! Not to be reused. INSTALLATION Place a new Foil Adhesive Audio Jack into the socket. 1267-1071 Rev 2 Sony Mobile Communications AB – Company Internal 24(76) - Page 25 Press to secure its attachment. Peel off the protective film. Place a new Audio Jack into the socket. Press to secure its attachment. Do not touch the contact pins! 1267-1071 Rev 2 Sony Mobile Communications AB – Company Internal 25(76)
-
Page 26: Battery & Foil Adhesive Battery
Guitar Picks and gently slide back and forth to release this side. Gently lift upwards to release this side by using two Guitar Picks as shown. 1267-1071 Rev 2 Sony Mobile Communications AB – Company Internal 26(76) - Page 27 Working Instructions (mech) Replacement: Battery & Foil Adhesive Battery Do the same to the opposite side. Remove the Battery. INSTALLATION Prepare the Battery Press Insert. Open the tool. 1267-1071 Rev 2 Sony Mobile Communications AB – Company Internal 27(76)
- Page 28 Battery Press Insert as indicated by the holes and location pins. Press along to secure its attachment and position. Peel off the protective film. Be careful! Do not peel off Foil Adhesive Battery with the film. 1267-1071 Rev 2 Sony Mobile Communications AB – Company Internal 28(76)
- Page 29 Prepare a new Battery and insert it into the cavity as shown. Securely place the Battery in the cavity in alignment with the tool as shown. Close it. 1267-1071 Rev 2 Sony Mobile Communications AB – Company Internal 29(76)
- Page 30 Fasten the Battery Press Insert assembly (1) to the Pressure Tool (2). Press it with a pressure value of 100N for 5±1 seconds. Make sure the Battery is securely attached. 1267-1071 Rev 2 Sony Mobile Communications AB – Company Internal 30(76)
-
Page 31: Ear Speaker & Foil Adhesive Wp Receiver
Scrap! Not to be reused! Make sure all remains have been removed! Do not scratch the plastic surface! INSTALLATION Place a new Foil Adhesive WP Receiver in the cavity. 1267-1071 Rev 2 Sony Mobile Communications AB – Company Internal 31(76) - Page 32 Gently peel off the protective film. Place a new Ear Speaker in the cavity. Note the orientation of the Ear Speaker to be installed! Prepare the Press Tool Earspeaker. 1267-1071 Rev 2 Sony Mobile Communications AB – Company Internal 32(76)
- Page 33 Do not press the clip! The rubber of the tool presses the Ear Speaker when pressing as shown. Press the clip and remove the Touch/Display Front Cover Assy. 1267-1071 Rev 2 Sony Mobile Communications AB – Company Internal 33(76)
-
Page 34: Gasket Dot Connector
Film Assembly Tool. Scrap! Not to be reused! INSTALLATION Place a new Gasket Dot Connector on its proper position as indicated by the golden area. Press to secure its attachment. 1267-1071 Rev 2 Sony Mobile Communications AB – Company Internal 34(76) -
Page 35: Holder Camera
Remove the Holder Camera by using a Flex Film Assembly Tool. Do not touch the camera lens! INSTALLATION Place a new Holder Camera on the Camera. Press along to secure its attachment. 1267-1071 Rev 2 Sony Mobile Communications AB – Company Internal 35(76) -
Page 36: Key Gasket (For Key Power & Key Camera)
Press to secure its solid attachment. Do not touch the central area of the Key Gasket! Make sure the key gasket solid attachment onto plastic surface, no floating and no damaging! 1267-1071 Rev 2 Sony Mobile Communications AB – Company Internal 36(76) - Page 37 Working Instructions (mech) Replacement: Key Gasket Do the same to replace the Key Gasket of the Key Camera. 1267-1071 Rev 2 Sony Mobile Communications AB – Company Internal 37(76)
-
Page 38: Key Gasket (For Key Volume)
Press to secure its solid attachment. Do not touch the central area of the Key Gasket! Make sure the key gasket solid attachment onto plastic surface, no floating and no damaging! 1267-1071 Rev 2 Sony Mobile Communications AB – Company Internal 38(76) - Page 39 Working Instructions (mech) Replacement: Key Gasket Do the same to replace the other one. 1267-1071 Rev 2 Sony Mobile Communications AB – Company Internal 39(76)
-
Page 40: Label Nfc
Assembly Tool. Scrap! Not to be reused! Do not damage the Cover Back! INSTALLATION Place a new Label NFC on the correct position. Press to secure its attachment. 1267-1071 Rev 2 Sony Mobile Communications AB – Company Internal 40(76) -
Page 41: Lightguide Key Sub Assy
Lightguide Key Sub Assy. Lift upwards to remove it with fingers. INSTALLATION Place a new Lightguide Key Sub Assy in the cavity. 1267-1071 Rev 2 Sony Mobile Communications AB – Company Internal 41(76) - Page 42 Working Instructions (mech) Replacement: Lightguide Key Sub Assy Press to secure its attachment. 1267-1071 Rev 2 Sony Mobile Communications AB – Company Internal 42(76)
-
Page 43: Loudspeaker & Foil Adhesive Wp Speaker
Do not damage speaker box cushion and battery film on the Rear Cover Assy in this action! INSTALLATION Place a new Foil Adhesive WP Speaker into the socket. 1267-1071 Rev 2 Sony Mobile Communications AB – Company Internal 43(76) - Page 44 Press to secure its attachment. Peel off the protective film. Place a new Loudspeaker into the cavity. Note the orientation of the Loudspeaker to be installed! Prepare the Press Tool Loudspeaker. 1267-1071 Rev 2 Sony Mobile Communications AB – Company Internal 44(76)
- Page 45 Loosen the clip to press the Loudspeaker for 5±1 seconds. Do not press the clip! The rubber of the tool presses the Loudspeaker when pressing as shown. Press the clip and remove the Rear Cover Assy. 1267-1071 Rev 2 Sony Mobile Communications AB – Company Internal 45(76)
-
Page 46: Net Speaker
Scrap! Not to be reused! Make sure that all remains have been removed! INSTALLATION Place a new Net Speaker on its proper position. Press along to secure its position. 1267-1071 Rev 2 Sony Mobile Communications AB – Company Internal 46(76) -
Page 47: Sheet Key Fpc (On The Pba Flex Module)
Follow the 3.1 – 3.10 Disassembly instructions! Carry out the Removal as described below. Prepare a new Sheet Key FPC. Carry out the Installation as described below. Follow the 5.1 – 5.10 Reassembly instructions! 1267-1071 Rev 2 Sony Mobile Communications AB – Company Internal 47(76) -
Page 48: Sheet Key Fpc (On Board)
Assembly Tool. Scrap! Not to be reused! INSTALLATION Place a new Sheet Key FPC on the PBA as indicated by the blue lines. Press along to secure its attachment. 1267-1071 Rev 2 Sony Mobile Communications AB – Company Internal 48(76) -
Page 49: Sheet Led
Assembly Tool. Scrap! Not to be reused! Do not damage the LED! INSTALLATION Place a new Sheet LED aligning by the blue rectangle. Press along to secure its attachment. 1267-1071 Rev 2 Sony Mobile Communications AB – Company Internal 49(76) -
Page 50: Sheet Volume Key
Scrap! Not to be reused! Do not damage the Key Gasket! INSTALLATION Place a new Sheet Volume Key aligning by the blue rectangle. Press along to secure its attachment. 1267-1071 Rev 2 Sony Mobile Communications AB – Company Internal 50(76) -
Page 51: Vibrator
Carry out the Installation as described below. Follow the 5.1 – 5.10 Reassembly instructions! REMOVAL Disconnect the connector of the Vibrator. Remove it. INSTALLATION Place a new Vibrator in the socket. 1267-1071 Rev 2 Sony Mobile Communications AB – Company Internal 51(76) - Page 52 Working Instructions (mech) Replacement: Vibrator Press it to the bottom of the socket. Snap the connector. 1267-1071 Rev 2 Sony Mobile Communications AB – Company Internal 52(76)
-
Page 53: Water Indicator
Detach to remove the Water Indicator as shown. Scrap! Not to be reused! INSTALLATION Attach a new Water Indicator on the correct position as shown and press to secure its attachment. 1267-1071 Rev 2 Sony Mobile Communications AB – Company Internal 53(76) - Page 54 Otherwise replace a new one. Turn it over. Press to snap the Cap Micro SD. Do the same to the other Water Indicator. 1267-1071 Rev 2 Sony Mobile Communications AB – Company Internal 54(76)
-
Page 55: Board Swap - Replacement
Build swap for change of label. 4.39 Board Swap – Customize of Software CUSTOMIZE OF SOFTWARE Follow the instructions in the Generic Repair Manual – Build swap for customization of the software. 1267-1071 Rev 2 Sony Mobile Communications AB – Company Internal 55(76) -
Page 56: Reassembly
Place the PBA Flex Module onto the PBA as shown in picture. Make sure the Vibrator connector is NOT between the PBA Flex Module and the PBA! Press to secure its position of this side. 1267-1071 Rev 2 Sony Mobile Communications AB – Company Internal 56(76) - Page 57 Press to secure its position. Press to snap the BtB connector. Press to snap the other BtB connector. Attach a new Sheet Key FPC on its proper position as shown. 1267-1071 Rev 2 Sony Mobile Communications AB – Company Internal 57(76)
- Page 58 Do the same to attach a new Sheet Key FPC on its proper position as shown in picture. Press to secure its attachment and position. Turn the PBA over and gently insert the Spacer Felica in the cavity. 1267-1071 Rev 2 Sony Mobile Communications AB – Company Internal 58(76)
-
Page 59: Rear Cover Assy
Press to snap the BtB connector of Battery. Rear Cover Assy Prepare the Rear Cover Assy and insert a film into the hole as shown to protect Audio Jack pins. 1267-1071 Rev 2 Sony Mobile Communications AB – Company Internal 59(76) -
Page 60: Camera With The Holder
Make sure the desk is clean and flat in order to protect battery film! Camera with the holder Securely place the Camera in the cavity as shown in picture. 1267-1071 Rev 2 Sony Mobile Communications AB – Company Internal 60(76) -
Page 61: Gasket Main
Make sure that the Gasket Main is clean and no dirt, particles and fiber attached on it! Otherwise replace a new one. Securely place the Gasket Main in the cavity as shown in picture. 1267-1071 Rev 2 Sony Mobile Communications AB – Company Internal 61(76) -
Page 62: Touch/Display Front Cover Assy
Use an air gun to clean the Gasket Main cavity on the Touch/Display Front Cover Assy! There are two BtB connectors. Press to snap the BtB connector with a finger. 1267-1071 Rev 2 Sony Mobile Communications AB – Company Internal 62(76) - Page 63 Securely place the Touch/Display Front Cover Assy on its proper position as shown in picture. Press to snap the hooks. Turn the phone over and press to snap the hooks on this side. 1267-1071 Rev 2 Sony Mobile Communications AB – Company Internal 63(76)
- Page 64 Bits (JCIS No 0) according to the sequence of 1 to 3. Apply 12Ncm±1Ncm torque when tightening these two screws with Bits (JCIS No 0) according to the sequence of 4 to 5. 1267-1071 Rev 2 Sony Mobile Communications AB – Company Internal 64(76)
-
Page 65: Caps & Charger Pad Connector & Keys
Otherwise replace a new one. Gently insert the plug of the Cap Audio Jack into the socket with fingers as shown in picture. 1267-1071 Rev 2 Sony Mobile Communications AB – Company Internal 65(76) - Page 66 Otherwise replace a new one. Gently insert the plug of the Cap Micro USB into the socket with fingers as shown in picture. Turn it over. 1267-1071 Rev 2 Sony Mobile Communications AB – Company Internal 66(76)
- Page 67 Otherwise replace a new one. Gently insert the plug of the Cap Micro SD into the socket with fingers as shown in picture. Press to secure its position. 1267-1071 Rev 2 Sony Mobile Communications AB – Company Internal 67(76)
- Page 68 Make sure that the Charger PAD connector is clean and no dirt, particles and fiber attached on it! Otherwise replace a new one. Gently insert the Charger PAD connector into the slot as shown in picture. 1267-1071 Rev 2 Sony Mobile Communications AB – Company Internal 68(76)
- Page 69 Place the Key Camera on its proper position as shown. Note the orientation of the Key Camera to be installed! Press this side to position the Key Camera by using pin and hole. 1267-1071 Rev 2 Sony Mobile Communications AB – Company Internal 69(76)
- Page 70 Note the orientation of the Key Volume to be installed! Press this side to position the Key Volume by using pin and hole. Do the same on this side as shown in picture. 1267-1071 Rev 2 Sony Mobile Communications AB – Company Internal 70(76)
-
Page 71: Cover Back
Press this side to position the Key Power by using pin and hole. Do the same on this side as shown in picture. Cover Back Securely place the Cover Back on its proper position as shown. 1267-1071 Rev 2 Sony Mobile Communications AB – Company Internal 71(76) - Page 72 Press to snap the hooks of the Cover Back. Press this side to snap the hooks. Do the same on the opposite side. Do the same on this side. 1267-1071 Rev 2 Sony Mobile Communications AB – Company Internal 72(76)
-
Page 73: Core Unit Label
One label only is allowed! Press along the surface to make the label securely attached. Press this side to make it securely attached. 1267-1071 Rev 2 Sony Mobile Communications AB – Company Internal 73(76) -
Page 74: Cover Bottom
Pull upwards to release the Cap SIM with fingers. Insert the SIM Connector into the slot. Make sure the correct direction of the SIM Connector! 1267-1071 Rev 2 Sony Mobile Communications AB – Company Internal 74(76) - Page 75 Make sure that the Cap SIM is clean and no dirt, particles and fiber attached on it! Otherwise replace a new one. Press to snap the Cap SIM. 1267-1071 Rev 2 Sony Mobile Communications AB – Company Internal 75(76)
-
Page 76: Revision History
Working Instructions (mech) Revision History Rev. Date Changes / Comments 2012-Jul-27 Initial release 2012-Sep-14 Update chapter 4.22 and 4.29, add chapter 4.39 1267-1071 Rev 2 Sony Mobile Communications AB – Company Internal 76(76) - Page 77 Test Instructions - mechanical - Xperia acro S LT26w 1267-1077 Rev 2 Sony Mobile Communications AB – Company Internal...
- Page 78 2.2.31 Flip slider counter ..................25 2.2.32 Verify certificates ..................25 2.2.33 IrDA Test ..................... 25 2.2.34 HDMI Test ....................26 2.3 Manual Tests ..................28 2.3.1 SIM ......................28 1267-1077 Rev 2 Sony Mobile Communications AB – Company Internal 2(32)
- Page 79 2.4.2 On-the-air call to mobile (UMTS network available) ....... 31 Revision History ................32 For general information about test procedures, refer to 1220-1333: Generic Repair Manual - mechanical 1267-1077 Rev 2 Sony Mobile Communications AB – Company Internal 3(32)
-
Page 80: Pre-Test Preparations
5. The unit must be rejected if the visual inspection or the Water Resistance Test shows any kind of abuse of the unit. 6. Otherwise shall the unit be handled in the ordinary repair flow. 1267-1077 Rev 2 Sony Mobile Communications AB – Company Internal 4(32) -
Page 81: Hardware
Cap Audio Jack, Cap Micro SD, Cap SIM, Cap HDMI, Cap Micro USB and Charger PAD connector are assembled well. Seal the primary microphone hole with tape. 1267-1077 Rev 2 Sony Mobile Communications AB – Company Internal 5(32) - Page 82 Vacuum Cup 7mm Silicone, part number is 1266-4397. Use the Vacuum Cup 7mm Silicone (1266-4397: Vacuum Cup 7mm Silicone) for LT26w instead of the original Vacuum Cup 9mm Silicone. 1267-1077 Rev 2 Sony Mobile Communications AB – Company Internal 6(32)
- Page 83 How to assemble the Water Resistance Test (WRT) tool with external sensor. How to run the Water Resistance Test (WRT). Sample phone is used in Movie, WRT method is the same. 1267-1077 Rev 2 Sony Mobile Communications AB – Company Internal 7(32)
- Page 84 Make sure to open the clamp before pressing “start” as the system will be calibrated. The Water Resistance Test application is ready for test. 1267-1077 Rev 2 Sony Mobile Communications AB – Company Internal 8(32)
- Page 85 Position the clamp to make sure the ventilation hole is fully sealed by vacuum cup. Pull the Syringe SLOWLY to produce under pressure, meanwhile the bar becomes yellow color. 1267-1077 Rev 2 Sony Mobile Communications AB – Company Internal 9(32)
- Page 86 Do not push back syringe if bar color is red! Re-start the test. Press ‘Start Measurement’ button and wait for measurement result. If the deviation value is less than or equal to test limit the test is ‘PASSED’. 1267-1077 Rev 2 Sony Mobile Communications AB – Company Internal 10(32)
- Page 87 Test Instructions (mech) Pre-Test Preparations Otherwise the test is ‘FAILED’. Repair the unit according to the Mechanical Troubleshooting Guide and Working Instructions, then run the test again. 1267-1077 Rev 2 Sony Mobile Communications AB – Company Internal 11(32)
-
Page 88: Software
(see “Service Types” and “Aspects of large files”) In Swap flow, when change a phone from Customer A to Customer B, always use the service Customization script. 1267-1077 Rev 2 Sony Mobile Communications AB – Company Internal 12(32) -
Page 89: Tests
For more information, refer to 1220-1333: Generic Repair Manual - mechanical XPERIA The following pictures will show a simplified basic phone for a general visualization of the service tests! 1267-1077 Rev 2 Sony Mobile Communications AB – Company Internal 13(32) -
Page 90: Service Tests
Make sure that there are no missing segments and that the colors and contrast are OK. XPERIA Press the Back key to return to the Service Test Menu. 1267-1077 Rev 2 Sony Mobile Communications AB – Company Internal 14(32) -
Page 91: Led/Illumination
Press the Back key to return to the Service Test Menu. XPERIA SONY Stereo speaker 2.2.6 Stereo speaker Left channel is speaking Press the Back key to return to the Service Test Menu. XPERIA 1267-1077 Rev 2 Sony Mobile Communications AB – Company Internal 15(32) -
Page 92: Earphone
Step 2: Check the quality by listening to the recording from the Speaker during the ‘Playing recorded sound’ phase at maximum volume. XPERIA Press the Back key to return to the Service Test Menu. 1267-1077 Rev 2 Sony Mobile Communications AB – Company Internal 16(32) -
Page 93: Vibrator
Aim the camera (located in front of the phone) at an object and check the quality of the image shown in the display. Press the Back key to return to the Service Test Menu. 1267-1077 Rev 2 Sony Mobile Communications AB – Company Internal 17(32) -
Page 94: Flash Led
Device also, when successful, it shows ‘Test XPERIA Enable Bluetooth OK Searching Devices found Complete’. Test Complete Press the Back key to return to the Service Test Menu. XPERIA 1267-1077 Rev 2 Sony Mobile Communications AB – Company Internal 18(32) -
Page 95: Wlan
Enter the GPS Location Test and wait for the GPS location data. Press the Back key to return to the Service Test Menu. For GPS testing, refer to 1220-1333: Generic Repair Manual – mechanical XPERIA 1267-1077 Rev 2 Sony Mobile Communications AB – Company Internal 19(32) -
Page 96: Compass
Front picture. LEFT SIDE Front VIEW BOTTOM VIEW Press the Back key to return to the Service Test Menu. 1267-1077 Rev 2 Sony Mobile Communications AB – Company Internal 20(32) -
Page 97: Gyroscope
Value:45 increase when the window gets more light and decrease when the window gets less light. Press the Back key to return to the Service Test Menu. XPERIA 1267-1077 Rev 2 Sony Mobile Communications AB – Company Internal 21(32) -
Page 98: Proximity Switch
Water Proof This test is not available for this product! This device does not support the This device does not support the function function Real time clock XPERIA 1267-1077 Rev 2 Sony Mobile Communications AB – Company Internal 22(32) -
Page 99: Real Time Clock
Attach USB Adaptor between phone and an USB disk as shown in picture. The USB Host Mass Storage status is shown on the screen. Press the Back key to return to the Service Test Menu. XPERIA 1267-1077 Rev 2 Sony Mobile Communications AB – Company Internal 23(32) -
Page 100: Security
OK and red writing and say ‘Bad, need to replace it’ if the battery is not OK. Press the Back key to return to the Service Test Menu. XPERIA 1267-1077 Rev 2 Sony Mobile Communications AB – Company Internal 24(32) -
Page 101: Flip Slider Counter
Flip slider counter This test is not available for this product! Verify certificates IrDA Test IrDA Test app doesn’t exist IrDA Test app doesn’t exist TV-Out Test XPERIA 1267-1077 Rev 2 Sony Mobile Communications AB – Company Internal 25(32) -
Page 102: Hdmi Test
Note: If the HDMI Monitor doesn’t automatically indentify the picture, the Monitor may require to set the HDMI port chosen as source manually in the Monitors menus. XPERIA 1267-1077 Rev 2 Sony Mobile Communications AB – Company Internal 26(32) - Page 103 TDMS Status: TDMS Status: On HDCP Status: HDCP Status: On CEC Status: Idle CEC Status: Idle Press the Back key to return to the Service Test Menu. XPERIA 1267-1077 Rev 2 Sony Mobile Communications AB – Company Internal 27(32)
-
Page 104: Manual Tests
Press the Key Power for a long time to turn the phone on or 2010-03-15 off. Press the Key Power for a short time to enter Sleep mode or to wake it up from Sleep mode. XPERIA 1267-1077 Rev 2 Sony Mobile Communications AB – Company Internal 28(32) -
Page 105: Home Key Test
Perform a force shut down (Press Power key + Volume Up for 10sec). If phones vibrate three times the shutdown is performed. If no vibration is detected, the battery might be discharged. XPERIA 1267-1077 Rev 2 Sony Mobile Communications AB – Company Internal 29(32) -
Page 106: Charging Via Charger Pad Connector (Charger Or Computer)
Perform a force shut down (Press Power key + Volume XPERIA Up for 10sec). If phones vibrate three times the shutdown is performed. If no vibration is detected, the battery might be discharged. 1267-1077 Rev 2 Sony Mobile Communications AB – Company Internal 30(32) -
Page 107: Network Test
Ensure that the UMTS/3G icon now is visible at the top of the display. To verify the radio functions (UMTS) of the phone, follow the ‘2.4.1.1 Procedure’ above. 1267-1077 Rev 2 Sony Mobile Communications AB – Company Internal 31(32) -
Page 108: Revision History
Test Instructions (mech) Revision History Rev. Date Changes / Comments 2012-Jul-27 Initial release 2012-Sep-14 Add chapter 1.2.2, chapter 2.3.5 and update chapter 2.2.24 1267-1077 Rev 2 Sony Mobile Communications AB – Company Internal 32(32) - Page 109 Repair Movies - mechanical - Xperia acro S LT26w 1267-1081 Rev 1 Sony Mobile Communications AB – Company Internal...
- Page 110 In that case, right-click with the mouse on the document name and select Save Target As to download the repair movie document for off-line viewing. For general information about repair movies, refer to 1220-1333: Generic Repair Manual - mechanical 1267-1081 Rev 1 Sony Mobile Communications AB – Company Internal 2(4)
- Page 111 - Touch/Display Front Cover Assy - Caps (a) & Charger PAD connector (b) & Keys - Cover Back - Core Unit Label - Cover Bottom - SIM Connector 1267-1081 Rev 1 Sony Mobile Communications AB – Company Internal 3(4)
- Page 112 Repair Movies (mech) Revision History Rev. Date Changes / Comments 2012-Jul-27 Initial release 1267-1081 Rev 1 Sony Mobile Communications AB – Company Internal 4(4)
- Page 113 Troubleshooting Guide - mechanical - Xperia acro S LT26w 1267-1086 Rev 2 Sony Mobile Communications AB – Company Internal...
- Page 114 1.15.1 Compass fails .................... 33 1.16 Accelerometer ..................34 1.16.1 Accelerometer test fails ................34 1.17 Gyroscope ..................35 1.17.1 Gyroscope test fails .................. 35 1.18 Ambient Light Sensor ................ 36 1267-1086 Rev 2 Sony Mobile Communications AB – Company Internal 2(72)
- Page 115 1.35 HandsFree by Wire ................69 1.35.1 Connection to Portable HandsFree fails ..........69 1.36 Data Communication ................. 71 1.36.1 Data transfer via System Connector fails ..........71 Revision History ................72 1267-1086 Rev 2 Sony Mobile Communications AB – Company Internal 3(72)
-
Page 116: Problem Areas
Note: Ensure the BtB connector of Battery is disconnected in the following steps! Check: Inspect the Key Gasket (a) and key power switch (b). Action: 1. If dirty – clean them. 1267-1086 Rev 2 Sony Mobile Communications AB – Company Internal 4(72) - Page 117 3. If the FPC or the BtB connector of PBA Flex Module is damaged – replace the PBA Flex Module. 4. If the BtB connector on the PBA is damaged – replace PBA. 1267-1086 Rev 2 Sony Mobile Communications AB – Company Internal 5(72)
- Page 118 4. If the BtB connector on the PBA is damaged – replace PBA. Check: Check current draw in off mode by using “Dummy Battery” (max 1 mA). Action: If current draw is abnormal – replace PBA. 1267-1086 Rev 2 Sony Mobile Communications AB – Company Internal 6(72)
-
Page 119: Keys
Inspect the external area of the Key Camera. Action: If dirty – clean it. Check: Inspect the Key Camera. Action: 1. If dirty – clean it. 2. If damaged – replace it. 1267-1086 Rev 2 Sony Mobile Communications AB – Company Internal 7(72) - Page 120 Inspect the BtB connector of PBA Flex Module to the PBA. Action: 1. If not properly connected – disconnect and reconnect. 2. If dirty or oxidized – clean the both sides of the BtB connectors. 1267-1086 Rev 2 Sony Mobile Communications AB – Company Internal 8(72)
-
Page 121: Volume Key
Inspect the external area of the Key Volume. Action: If dirty – clean it. Check: Inspect the Key Volume. Action: 1. If dirty – clean it. 2. If damaged – replace it. 1267-1086 Rev 2 Sony Mobile Communications AB – Company Internal 9(72) - Page 122 Inspect the BtB connector of PBA Flex Module to the PBA. Action: 1. If not properly connected – disconnect and reconnect. 2. If dirty or oxidized – clean the both sides of the BtB connectors. 1267-1086 Rev 2 Sony Mobile Communications AB – Company Internal 10(72)
-
Page 123: On/Off Key
Inspect the external area of the Key Power. Action: If dirty – clean it. Check: Inspect the Key Power. Action: 1. If dirty – clean it. 2. If damaged – replace it. 1267-1086 Rev 2 Sony Mobile Communications AB – Company Internal 11(72) - Page 124 Inspect the BtB connector of PBA Flex Module to the PBA. Action: 1. If not properly connected – disconnect and reconnect. 2. If dirty or oxidized – clean the both sides of the BtB connectors. 1267-1086 Rev 2 Sony Mobile Communications AB – Company Internal 12(72)
- Page 125 3. If the FPC or the BtB connector of PBA Flex Module is damaged – replace the PBA Flex Module. 4. If the BtB connector on the PBA is damaged – replace PBA. 1267-1086 Rev 2 Sony Mobile Communications AB – Company Internal 13(72)
-
Page 126: Touch Screen
3. If the touch screen, the FPC or the BtB connector of the Touch/Display Front Cover Assy is damaged – replace the Touch/Display Front Cover Assy. 4. Replace PBA. 1267-1086 Rev 2 Sony Mobile Communications AB – Company Internal 14(72) -
Page 127: Display
3. If the display, the FPC or the BtB connector of the Touch/Display Front Cover Assy is damaged – replace the Touch/Display Front Cover Assy. 4. Replace PBA. 1267-1086 Rev 2 Sony Mobile Communications AB – Company Internal 15(72) -
Page 128: Led/Illumination
Inspect the FPC and the BtB connector of PBA Flex Module to the PBA. Action: 1. If not properly connected – disconnect and reconnect. 2. If dirty or oxidized – clean the both sides of the BtB connectors. 1267-1086 Rev 2 Sony Mobile Communications AB – Company Internal 16(72) -
Page 129: Menu, Home And Back Keys Illumination
Inspect the LEDs on the PBA, Sheet LED and the Lightguide Key Sub Assy. Action: 1. If dirty – clean them. 2. If the Lightguide Key Sub Assy is damaged – replace it. 1267-1086 Rev 2 Sony Mobile Communications AB – Company Internal 17(72) - Page 130 Troubleshooting Guide (mech) Problem Areas: Illumination 3. If the Sheet LED is damaged – replace it. 4. Replace PBA. 1267-1086 Rev 2 Sony Mobile Communications AB – Company Internal 18(72)
-
Page 131: Speaker
Inspect the Net Speaker of the Loudspeaker on the Rear Cover Assy. Action: 1. If dirty – clean it. 2. If the Net Speaker is damaged – replace it. 1267-1086 Rev 2 Sony Mobile Communications AB – Company Internal 19(72) - Page 132 Inspect the Loudspeaker’s pins and the pads on the PBA. Action: 1. If dirty – clean them. 2. If the pins of the Loudspeaker are damaged – replace the Loudspeaker. 3. Replace PBA. 1267-1086 Rev 2 Sony Mobile Communications AB – Company Internal 20(72)
-
Page 133: Earphone
Inspect the Ear Speaker’s pins and the pads on the PBA Flex Module. Action: 1. If dirty – clean them. 2. If the Ear Speaker’s pins are damaged – replace the Ear Speaker. 1267-1086 Rev 2 Sony Mobile Communications AB – Company Internal 21(72) - Page 134 2. If dirty or oxidized – clean them. 3. If the pads, the BtB connector or the FPC of the PBA Flex Module is damaged – replace the PBA Flex Module. 4. Replace PBA. 1267-1086 Rev 2 Sony Mobile Communications AB – Company Internal 22(72)
-
Page 135: Microphone
1. If the hole on the Lightguide Key Sub Assy or the Microphone on the PBA is dirty or clogged – clean them. 2. If microphone mesh is dirty or damaged – replace Touch/Display Front Cover Assy. 1267-1086 Rev 2 Sony Mobile Communications AB – Company Internal 23(72) -
Page 136: Secondary Microphone
1. If clogged – clean the port. 2. If the port is damaged – replace the Cover Back. Check: Inspect the port of the secondary microphone mesh on the Rear Cover Assy. 1267-1086 Rev 2 Sony Mobile Communications AB – Company Internal 24(72) - Page 137 Note: Ensure the BtB connector of Battery is disconnected in the following steps! Check: Inspect the secondary microphone on the PBA. Action: 1. If dirty – clean it. 2. Replace PBA. 1267-1086 Rev 2 Sony Mobile Communications AB – Company Internal 25(72)
-
Page 138: Vibrator
1. If not properly connected – disconnect and reconnect. 2. If dirty or oxidized – clean them. 3. If the Vibrator or its BtB connector is damaged – replace the Vibrator. 4. Replace PBA. 1267-1086 Rev 2 Sony Mobile Communications AB – Company Internal 26(72) -
Page 139: Camera
2. If dirty or oxidized – clean both sides of the BtB connectors. Check: Inspect the Camera. Action: 1. If the Camera is damaged – replace it. 2. Replace PBA. 1267-1086 Rev 2 Sony Mobile Communications AB – Company Internal 27(72) -
Page 140: Video Call Camera Defects
2. If scratched or damaged – replace the Touch/Display Front Cover Assy. Check: Inspect the video camera on the PBA. Action: 1. If dirty or clogged – clean it. 2. Replace PBA. 1267-1086 Rev 2 Sony Mobile Communications AB – Company Internal 28(72) -
Page 141: Flash Led
Note: Ensure the BtB connector of Battery is disconnected in the following steps! Check: Inspect the flash LED on the PBA. Action: 1. If dirty – clean it. 2. Replace PBA. 1267-1086 Rev 2 Sony Mobile Communications AB – Company Internal 29(72) -
Page 142: Bluetooth And Wlan
PBA. Action: 1. If dirty or oxidized – clean the pad and pin. 2. If the pad is damaged – replace the Rear Cover Assy. 3. Replace PBA. 1267-1086 Rev 2 Sony Mobile Communications AB – Company Internal 30(72) -
Page 143: Nfc
1. If dirty or oxidized – clean the pads and pins. 2. If the NFC antenna or its pads is damaged – replace the Rear Cover Assy. 3. Replace PBA. 1267-1086 Rev 2 Sony Mobile Communications AB – Company Internal 31(72) -
Page 144: Gps
PBA. Action: 1. If dirty or oxidized – clean the pad and pin. 2. If the pad is damaged – replace the Rear Cover Assy. 3. Replace PBA. 1267-1086 Rev 2 Sony Mobile Communications AB – Company Internal 32(72) -
Page 145: Compass
Troubleshooting Guide (mech) Problem Areas 1.15 Compass 1.15.1 Compass fails Action: Replace PBA. 1267-1086 Rev 2 Sony Mobile Communications AB – Company Internal 33(72) -
Page 146: Accelerometer
Troubleshooting Guide (mech) Problem Areas 1.16 Accelerometer 1.16.1 Accelerometer test fails Action: Replace PBA. 1267-1086 Rev 2 Sony Mobile Communications AB – Company Internal 34(72) -
Page 147: Gyroscope
Troubleshooting Guide (mech) Problem Areas 1.17 Gyroscope 1.17.1 Gyroscope test fails Action: Replace PBA. 1267-1086 Rev 2 Sony Mobile Communications AB – Company Internal 35(72) -
Page 148: Ambient Light Sensor
Inspect the BtB connector of the PBA Flex Module to the PBA. Action: 1. If not properly connected – disconnect and reconnect. 2. If dirty or oxidized – clean them. 1267-1086 Rev 2 Sony Mobile Communications AB – Company Internal 36(72) - Page 149 Problem Areas: Ambient Light Sensor 3. If the light sensor, the FPC or the BtB connector of the PBA Flex Module is damaged – replace the PBA Flex Module. 4. Replace PBA. 1267-1086 Rev 2 Sony Mobile Communications AB – Company Internal 37(72)
-
Page 150: Proximity Switch
Check: Inspect the proximity sensor on the PBA Flex Module. Action: If dirty or clogged – clean it. Check: Inspect the bracket of the proximity sensor. 1267-1086 Rev 2 Sony Mobile Communications AB – Company Internal 38(72) - Page 151 2. If dirty or oxidized – clean them. 3. If the proximity sensor, the FPC or the BtB connector of the PBA Flex Module is damaged – replace the PBA Flex Module. 4. Replace PBA. 1267-1086 Rev 2 Sony Mobile Communications AB – Company Internal 39(72)
-
Page 152: Pressure Sensor
Troubleshooting Guide (mech) Problem Areas 1.20 Pressure Sensor 1.20.1 Pressure Sensor test fails N/A, no pressure sensor on PBA. 1267-1086 Rev 2 Sony Mobile Communications AB – Company Internal 40(72) -
Page 153: Water Resistance
Check the Vacuum Cup sealing area and the syringe. Check for dirt, cracks, damages. Check direction on the valve. Action: 1. If any bad connection – remount the equipment. 2. If damaged – replace the equipment. 1267-1086 Rev 2 Sony Mobile Communications AB – Company Internal 41(72) - Page 154 Run the Water Resistance Test again! Check: Inspect the Cap Micro SD. Action: 1. If dirty – clean it. 2. If not properly assembled – disassemble and reassemble. 1267-1086 Rev 2 Sony Mobile Communications AB – Company Internal 42(72)
- Page 155 Run the Water Resistance Test again! Check: Inspect the Cap Audio Jack. Action: 1. If dirty – clean it. 2. If not properly assembled – disassemble and reassemble. 1267-1086 Rev 2 Sony Mobile Communications AB – Company Internal 43(72)
- Page 156 Run the Water Resistance Test again! Check: Inspect the Charger PAD connector. Action: 1. If dirty – clean it. 2. If not properly assembled – disassemble and reassemble. 1267-1086 Rev 2 Sony Mobile Communications AB – Company Internal 44(72)
- Page 157 Run the Water Resistance Test again! Check: Inspect the Screw Len:2.8 Diam:1.4 O-Ring M. Action: 1. If not properly assembled – reassemble them. Do not reuse in case of disassembling! 1267-1086 Rev 2 Sony Mobile Communications AB – Company Internal 45(72)
- Page 158 2. If the Key Gasket is damaged – replace it. Run the Water Resistance Test again! Check: Inspect the Gasket Main. Action: 1. If dirty – clean it. 2. If not properly assembled – disassemble and reassemble. 1267-1086 Rev 2 Sony Mobile Communications AB – Company Internal 46(72)
- Page 159 Be careful! In this action, the Loudspeaker can be pressed only once. Run the Water Resistance Test again! Check: Inspect the cavity of the Rear Cover Assy. Action: 1. If dirty – clean it. 1267-1086 Rev 2 Sony Mobile Communications AB – Company Internal 47(72)
- Page 160 Press Tool Earspeaker to make sure the Ear Speaker securely attached. Be careful! In this action, the Ear Speaker can be pressed only once. Run the Water Resistance Test again! 1267-1086 Rev 2 Sony Mobile Communications AB – Company Internal 48(72)
- Page 161 Cover Assy are failed – replace the Touch/Display Front Cover Assy. Run the Water Resistance Test again! If the test fails, handle the unit according to your local instruction. 1267-1086 Rev 2 Sony Mobile Communications AB – Company Internal 49(72)
-
Page 162: Real Time Clock
Troubleshooting Guide (mech) Problem Areas 1.22 Real Time Clock 1.22.1 Real Time Clock test fails Action: Replace PBA. 1267-1086 Rev 2 Sony Mobile Communications AB – Company Internal 50(72) -
Page 163: Total Call Time
Troubleshooting Guide (mech) Problem Areas 1.23 Total call time 1.23.1 Total call time fails Action: Replace PBA. 1267-1086 Rev 2 Sony Mobile Communications AB – Company Internal 51(72) -
Page 164: External Memory
Note: Ensure the BtB connector of Battery is disconnected in the following steps! Check: Inspect the memory card holder on the PBA. Action: 1. If dirty or clogged – clean the holder. 2. Replace PBA. 1267-1086 Rev 2 Sony Mobile Communications AB – Company Internal 52(72) -
Page 165: Security
Troubleshooting Guide (mech) Problem Areas 1.25 Security 1.25.1 Security fails Action: Replace PBA. 1267-1086 Rev 2 Sony Mobile Communications AB – Company Internal 53(72) -
Page 166: Fm Radio
Inspect the BtB connector of the PBA Flex Module to the PBA. Action: 1. If not properly connected – disconnect and reconnect. 2. If dirty or oxidized – clean them. 1267-1086 Rev 2 Sony Mobile Communications AB – Company Internal 54(72) - Page 167 Problem Areas: FM Radio 3. If the contact pads or the BtB connector of the PBA Flex Module is damaged – replace the PBA Flex Module. 4. Replace PBA. 1267-1086 Rev 2 Sony Mobile Communications AB – Company Internal 55(72)
-
Page 168: Flip Slider Counter
Troubleshooting Guide (mech) Problem Areas 1.27 Flip slider counter 1.27.1 Flip slider counter fails Action: N/A. Not slider phone. 1267-1086 Rev 2 Sony Mobile Communications AB – Company Internal 56(72) -
Page 169: Verify Certificates
Troubleshooting Guide (mech) Problem Areas 1.28 Verify Certificates 1.28.1 Verify certificates fails Action: Replace PBA. 1267-1086 Rev 2 Sony Mobile Communications AB – Company Internal 57(72) -
Page 170: Irda Test
Troubleshooting Guide (mech) Problem Areas 1.29 IrDA Test 1.29.1 IrDA test fails Action: N/A. No IrDA functionality in the phone. 1267-1086 Rev 2 Sony Mobile Communications AB – Company Internal 58(72) -
Page 171: Tv-Out Test
Troubleshooting Guide (mech) Problem Areas 1.30 TV-Out Test 1.30.1 TV-Out test fails Check: Inspect the HDMI connector. Action: 1. If dirty or oxidized – clean the connector. 2. Replace PBA. 1267-1086 Rev 2 Sony Mobile Communications AB – Company Internal 59(72) -
Page 172: Connector Ground Test
Troubleshooting Guide (mech) Problem Areas 1.31 Connector Ground Test 1.31.1 Connector ground test fails Action: N/A. This test is not applicable for this product. 1267-1086 Rev 2 Sony Mobile Communications AB – Company Internal 60(72) -
Page 173: Network & Signal
Inspect contact pads on the main antenna and contact pins on the PBA. Action: 1. If dirty or oxidized – clean the pads and pins. 2. If the contact pads are damaged – replace Rear Cover Assy. 1267-1086 Rev 2 Sony Mobile Communications AB – Company Internal 61(72) - Page 174 PBA. Action: 1. If dirty or oxidized – clean the pad and pin. 2. If the pad is damaged – replace Rear Cover Assy. 3. Replace PBA. 1267-1086 Rev 2 Sony Mobile Communications AB – Company Internal 62(72)
-
Page 175: Sim
1. If dirty or clogged – clean the holder. 2. Replace PBA. Check: Check whether the SIM card is assembled onto SIM Connector correctly. Action: 1. Put SIM card onto SIM Connector. 1267-1086 Rev 2 Sony Mobile Communications AB – Company Internal 63(72) -
Page 176: Incorrect Sim-Card Adapter
2. If SIM Card connector is damaged, deal with it according to local directive. Check: Check whether the SIM-Card adapter is used correctly. Action: 1. Peel off the protection tape from SIM-Card adapter. 1267-1086 Rev 2 Sony Mobile Communications AB – Company Internal 64(72) - Page 177 3. Assemble this SIM-Card adapter with Micro SIM card onto SIM Connector. 4. Turn over the SIM Connector with Micro SIM card. 5. Insert this SIM Connector assembly into its connector. 6. Replace PBA. 1267-1086 Rev 2 Sony Mobile Communications AB – Company Internal 65(72)
-
Page 178: Incorrect Sim Indicated
Check whether the phone is locked to a particular operator and whether the correct operator SIM is being used. Action: 1. Use a proper operator SIM or test SIM. 2. Replace PBA. 1267-1086 Rev 2 Sony Mobile Communications AB – Company Internal 66(72) -
Page 179: Charging
Battery. 4. Replace PBA. 1.34.2 Battery will not charge via Charger PAD connector Check: Inspect the Charger PAD. Action: If dirty or oxidized – clean the connector. 1267-1086 Rev 2 Sony Mobile Communications AB – Company Internal 67(72) - Page 180 2. If dirty or oxidized – clean the both sides of the BtB connectors. 3. If the Battery or its BtB connector is damaged – replace the Battery. 4. Replace PBA. 1267-1086 Rev 2 Sony Mobile Communications AB – Company Internal 68(72)
-
Page 181: Handsfree By Wire
Inspect the BtB connector of the PBA Flex Module to the PBA. Action: 1. If not properly connected – disconnect and reconnect. 2. If dirty or oxidized – clean them. 1267-1086 Rev 2 Sony Mobile Communications AB – Company Internal 69(72) - Page 182 Problem Areas: HandsFree by Wire 3. If the contact pads, the FPC or the BtB connector of the PBA Flex Module is damaged – replace the PBA Flex Module. 4. Replace PBA. 1267-1086 Rev 2 Sony Mobile Communications AB – Company Internal 70(72)
-
Page 183: Data Communication
1.36 Data Communication 1.36.1 Data transfer via System Connector fails Check: Inspect the USB connector. Action: 1. If dirty or oxidized – clean the connector. 2. Replace PBA. 1267-1086 Rev 2 Sony Mobile Communications AB – Company Internal 71(72) -
Page 184: Revision History
Troubleshooting Guide (mech) Revision History Rev. Date Changes / Comments 2012-Jul-27 Initial release 2012-Sep-14 Update chapter 1.34 1267-1086 Rev 2 Sony Mobile Communications AB – Company Internal 72(72) - Page 185 Part List - mechanical - Xperia acro S LT26w 1267-1091 Rev 2 © Sony Mobile Communications AB – Company Internal...
- Page 186 Part List (mech) CONTENTS Part List ................... 3 Revision History ................9 1267-1091 Rev 2 © Sony Mobile Communications AB – Company Internal 2(9)
- Page 187 Cap Micro USB Black 1253-4757 Cap Micro USB White 1257-0196 Cap Micro USB D-Pink 1257-0199 Cap SIM Cap SIM Black 1253-4783 Cap SIM D-Pink 1257-0212 Cap SIM D-White 1261-7614 1267-1091 Rev 2 © Sony Mobile Communications AB – Company Internal 3(9)
- Page 188 Cover Bottom Black 1253-4857 Cover Bottom White 1266-5670 Cover Bottom Pink 1266-5679 Ear Speaker 1252-7376 Camera FICTIVE Camera 13.1 M 1252-6695 Foil Adhesive Audio Jack 1253-4632 Foil Adhesive Battery 1253-4563 1267-1091 Rev 2 © Sony Mobile Communications AB – Company Internal 4(9)
- Page 189 Key Camera Black 1253-4836 Key Camera D-Pink 1257-0343 Key Camera D-White 1261-7622 Key Gasket 1253-4704 Key Power Key Power Black 1253-4822 Key Power D-Pink 1257-0333 Key Power D-White 1261-7619 1267-1091 Rev 2 © Sony Mobile Communications AB – Company Internal 5(9)
- Page 190 1253-4613 PBA Flex Module 1253-3431 Rear Cover Assy Rear Cover Assy Black 1266-6015 Rear Cover Assy White 1266-9695 Rear Cover Assy Pink 1266-9709 Screw Len:5.0 Diam:1.7 O-Ring 1253-4694 1267-1091 Rev 2 © Sony Mobile Communications AB – Company Internal 6(9)
- Page 191 SIM Connector 1255-4576 Spacer Felica 1255-5491 Touch/Display Front Cover Assy Touch/Display Front Cover Assy Black 1266-0987 Touch/Display Front Cover Assy White 1266-9687 Touch/Display Front Cover Assy Pink 1266-9702 1267-1091 Rev 2 © Sony Mobile Communications AB – Company Internal 7(9)
- Page 192 Part List (mech) Designation Part No. Part Location Vibrator Vibr Bar Analog AC S003 1231-8585 Water Indicator 1255-4136 1267-1091 Rev 2 © Sony Mobile Communications AB – Company Internal 8(9)
- Page 193 Part List (mech) Revision History Rev. Date Changes / Comments 2012-Jul-27 Initial release 2012-Aug-03 No change 1267-1091 Rev 2 © Sony Mobile Communications AB – Company Internal 9(9)
- Page 194 Go/No Go Test - electrical - Xperia acro S LT26w 1267-1087 Rev 2 © Sony Mobile Communications AB – Company Internal...
- Page 195 1.1 Antenna Coupler .................. 3 1.2 Attenuation Factors ................5 1.2.1 Loss Values – Antenna Coupler ..............5 Revision History ................6 This product is ONLY implemented in SERP II 1267-1087 Rev 2 © Sony Mobile Communications AB – Company Internal 2(6)
- Page 196 Put the grid positioning holder with its reference point in position G11 and place the phone as shown in the adjacent picture. G H I O P Q R 1267-1087 Rev 2 © Sony Mobile Communications AB – Company Internal 3(6)
- Page 197 Follow the directions stated in ‘Go/NoGo Test Script Parameters’ to be found in 1220-1336: Generic Repair Manual – electrical, together with the ‘Attenuation Factors’ below! This phone is available in one version, LT26w, including the following bands: LT26w: GSM-850/900/1800/1900 WCDMA-850/900/1900/2100 1267-1087 Rev 2 © Sony Mobile Communications AB – Company Internal 4(6)
- Page 198 High 6.00 5.62 WCDMA 900 6.00 8.69 High 6.00 4.44 8.00 15.72 11.00 11.02 WCDMA 1900 13.00 11.05 High 12.00 9.64 11.00 11.74 WCDMA 2100 High 11.00 12.95 1267-1087 Rev 2 © Sony Mobile Communications AB – Company Internal 5(6)
- Page 199 Test and Calibration Repair Instruction Electrical/ Revision History Rev. Date Changes / Comments 2012-July-30 Initial release 2012-Aug-03 No change 1267-1087 Rev 2 © Sony Mobile Communications AB – Company Internal 6(6)
- Page 200 Customization - build swap - Xperia acro S LT26w 1267-1088 Rev 2 © Sony Mobile Communications AB – Company Internal...
- Page 201 Customize to Ship ..................7 2.3.2 Build Swap ....................7 Revision History ................8 For general information about Customization and Swap, refer to 1221-5655: Generic Repair Manual – build swap 1267-1088 Rev 2 © Sony Mobile Communications AB – Company Internal 2(8)
-
Page 202: Emma Login & Script Execution
Activation Script’ you will be prompted for the PIN of your USB Activation Dongle you will be prompted for the PIN of your USB Activation Dongle. 1267-1088 Rev 2 © Sony Mobile Communications AB Sony Mobile Communications AB – Company Internal 3(8) -
Page 203: Customization Workflow
Customization (Build Swap) Customization Workflow 1267-1088 Rev 2 © Sony Mobile Communications AB – Company Internal 4(8) -
Page 204: Customize Unit
User Guide info. http://emma.extranet.sonyericsson.com/documents/emma_user_guide.pdf (see “Service Types” and “Aspects of large files”) In Swap flow, when change a phone from Customer A to Customer B, always use the service Customization script. 1267-1088 Rev 2 © Sony Mobile Communications AB – Company Internal 5(8) -
Page 205: Power On Unit
Press the Key Power to power on the unit, place unit on the flat desk and wait until system boot up has been completed. Please DO NOT move the unit during starting up until “Select Language” menu is shown on the display! 1267-1088 Rev 2 © Sony Mobile Communications AB – Company Internal 6(8) -
Page 206: Customize To Ship Or Build Swap
Refer to the Cross Reference List for the appropriate variant, which should be based on the non- customizable mechanics of the unit. 2.3.2.2 De-Customize Unit Remove any co-branding as described in 1267-1071: Working Instructions – mechanical 1267-1088 Rev 2 © Sony Mobile Communications AB – Company Internal 7(8) -
Page 207: Revision History
Customization (Build Swap) Revision History Date Changes / Comments 2012-Jul-27 Initial release 2012-Aug-03 No change 1267-1088 Rev 2 © Sony Mobile Communications AB – Company Internal 8(8)
Need help?
Do you have a question about the Xpreia acro S and is the answer not in the manual?
Questions and answers