Trade-wind VSL400 Series Installation Instructions Manual
Hide thumbs
Also See for VSL400 Series:
- Installation instructions and use & care manual (12 pages) ,
- Installation instructions & use & care manual (12 pages) ,
- Installation instructions & use & care manual (12 pages)
Advertisement
PERFORMANCE · QUALITY · CUSTOMER SERVICE
FRONT TO
MODEL
BACK
18"
VSL430BF
18"
VSL436BF
19 ¼"
VSL436-0-19BF
22
VSL436-0-22BF
18"
VSL442BF
19 ¼"
VSL442-0-19BF
22"
VSL442-0-22BF
18"
VSL448BF
19 ¼"
VSL448-0-19BF
22"
VSL448-0-22BF
18"
VSL454BF
19 ¼"
VSL454-0-19BF
22"
VSL454-0-22BF
18"
VSL460BF
19 ¼"
VSL460-0-19BF
22"
VSL460-0-22BF
18"
VSL472BF
19 ¼"
VSL472-0-19BF
22"
VSL472-0-22BF
Installer:
Please leave Installation Instructions with the range hood liner.
Owner:
Please keep Installation Instructions for local electrical inspector's use and for future reference.
WARNINGS:
Must be followed carefully to avoid personal injury.
IMPORTANT:
Must be followed carefully to avoid damage and incorrect installation.
TIPS:
Contains helpful information to facilitate installation.
WARNING! TO REDUCE THE RISK OF FIRE, ELECTRICAL SHOCK, OR INJURY TO PERSONS OBSERVE THE FOLLOWING:
a) Use this unit only in the manner intended by the manufacturer. If you have any questions, please contact the
manufacturer at the address or telephone number listed in the warranty.
b) Before servicing or cleaning unit, switch power off at service panel, lock service panel, and lock the service
disconnection means to prevent power from being switched on accidentally. When the service disconnecting means
cannot be locked, securely fasten a prominent warning device, such as a tag, to the service panel.
CAUTION: For general ventilating use only. Do not use to exhaust hazardous or explosive materials and vapors.
WARNING! TO REDUCE THE RISK OF A RANGE TOP GREASE FIRE:
a) Never leave surface units unattended at high settings. Boilovers cause smoking and greasy spillovers that may ignite.
Heat oils slowly on low or medium settings.
P R O V E R B S
WIDTH
CFM
28 ⅜"
x
34 ⅜"
x
34 ⅜"
x
34 ⅜"
x
40 ⅜"
x
40 ⅜"
x
40 ⅜"
x
46 ⅜"
x
46 ⅜"
x
46 ⅜"
x
52 ⅜"
x
52 ⅜"
x
52 ⅜"
x
58 ⅜"
x
58 ⅜"
x
58 ⅜"
x
70 ⅜"
x
70 ⅜"
x
70 ⅜"
x
READ AND SAVE THESE INSTRUCTIONS
2 2 : 2 9
I N S T A L L A T I O N I N S T R U C T I O N S
F O R I N - L I N E / E X T E R N A L R E M O T E
These models connect to an In-Line, Roof or Wall-
Mounted Remote Blower. The blower used determines
the CFM. The Trade-Wind In-Line blowers are either 836
CFM or 1266 CFM.
Before beginning installation, please thoroughly read and
become familiar with these instructions. Installation and
service must be completed by a qualified installer. Failure to
properly install this product may void the warranty.
© 2 0 2 3
T R A D E - W I N D
U S E & C A R E G U I D E
V S L 4 0 0 S E R I E S
REVISED: JANUARY 1, 2023
M A N U F A C T U R I N G ,
L L C
Advertisement
Table of Contents

Related Manuals for Trade-wind VSL400 Series


Summary of Contents for Trade-wind VSL400 Series
- Page 1 These models connect to an In-Line, Roof or Wall- 22" 52 ⅜" VSL454-0-22BF Mounted Remote Blower. The blower used determines 18" 58 ⅜" VSL460BF the CFM. The Trade-Wind In-Line blowers are either 836 CFM or 1266 CFM. 19 ¼" 58 ⅜" VSL460-0-19BF 22" 58 ⅜" VSL460-0-22BF Before beginning installation, please thoroughly read and become familiar with these instructions.
-
Page 2: Installation Instructions
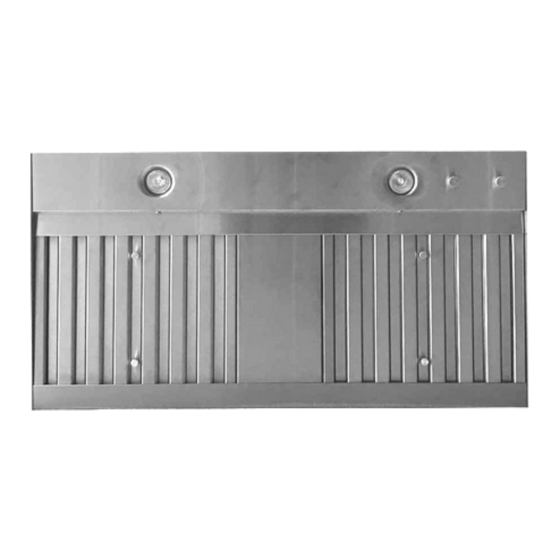
To reduce the risk of fire and electric shock, install this (range hood liner) only with Remote Blower models rated maximum 6 amps. TO ACCESS THE INSTALLATION INSTRUCTIONS FOR YOUR TRADE-WIND® PRODUCT, PLEASE SCAN THE QR CODE: INSERT QR CODE WHEN READY FROM THE WEBSITE. - Page 3 REVISED: JANUARY 1, 2023 IMPORTANT: CUT-OUT INFORMATION Cabinets or hood cut-outs should be at least 1/8” larger than outside dimensions VARIABLE FRONT TO S/S BAFFLE REMOTE DUCT ROTARY MODEL BACK FLITERS CONTROL WIDTH COLOR LIGHTS COLLAR CONTROL 18" 28 ⅜" √...
-
Page 4: Part 1: Planning The Installation
Given the high performance of TRADE-WIND® In-Line Blowers, it is highly recommended that the blower NOT be attached directly to the liner or in a chase immediately above the liner unless a TRADE-WIND® brand duct silencer is installed between the blower and liner and neoprene lined FC Clamps are used. FC Clamps are available from TRADE- WIND®... -
Page 5: Part 3: Electrical Connection
(either in-line or roof top). If the ventilator is rated in watts rather than amps, divide the watts by 120 and this will give you the amperage rating. The TRADE-WIND® liner, without the internal motor, is supplied with a 6.0 amp variable speed fan control. -
Page 6: Wiring Diagram
REVISED: JANUARY 1, 2023 IMPORTANT: Trade-Wind Manufacturing does not pay warranty claims for damage to liners or components connected to other brand blowers inconsistent with these Installation Instructions. Always consult the switch manufacturer's installation instructions when substituting control switches. The warranty may be voided if any unauthorized service, alterations or repairs are made to the product. -
Page 7: Care And Cleaning
LED LIGHT BULBS: TRADE-WIND® liners are designed for MR16/GU10 LED light bulbs. They can be purchased at most home or grocery stores. The bulbs provided with the unit are 3.5 watt, 350 lumens, and 3000K (warm white color temperature). To remove the light bulbs, press your palm into the lens face of the bulb and turn a ¼... -
Page 8: Warranty
(3) years from the date of purchase. TRADE-WIND Manufacturing, LLC®, at its option, will repair or replace the complete unit or any defective component without charge. This warranty may be voided if any unauthorized service, alterations, or repairs are made to the product. -
Page 9: Building Codes
B E S T P R A C T I C E S V E N T I N G I N S T A L L A T I O N I N S T R U C T I O N S F O R R A N G E H O O D S A N D W O O D H O O D L I N E R S ( A L L M O D E L S ) PERFORMANCE ·... - Page 10 REVISED: JANUARY 1, 2023 b.) No portion of the ducting should be run so that the exhaust air flows downward. Since exhaust heat rises, forcing the air to flow downward will cause increased static pressure. As previously mentioned, improperly installed duct pipe will cause excessive static pressure (air resistance), that may result in rattling, vibration and air buffeting noises, as well as inadequate ventilation.
- Page 11 No Mushroom Cap Style No "Goose-Neck" Style Only use a shape that looks like the picture shown. Call TRADE-WIND® Customer Service for any questions. 6. ATTACHING DUCT TO HOUSE FRAMEWORK The ventilation system should be attached to the framework in such a manner that the weight of the duct and fittings is supported with no stress on the duct joints, fittings or on the ventilator.
Need help?
Do you have a question about the VSL400 Series and is the answer not in the manual?
Questions and answers