Leica LED1 Instructions For Use Manual

External light sources for leica microscopes

Advertisement

From Eye to Insight
Leica LeD1
Leica LeD3
Leica LeD5
Leica LeD8
External light sources for Leica microscopes
Instructions for use
Leica Microsystems CMS GmbH. Instructions for use, 11934173, Revision 1.0, 2019.05.01
Document Number 57-10022 Revision A
1
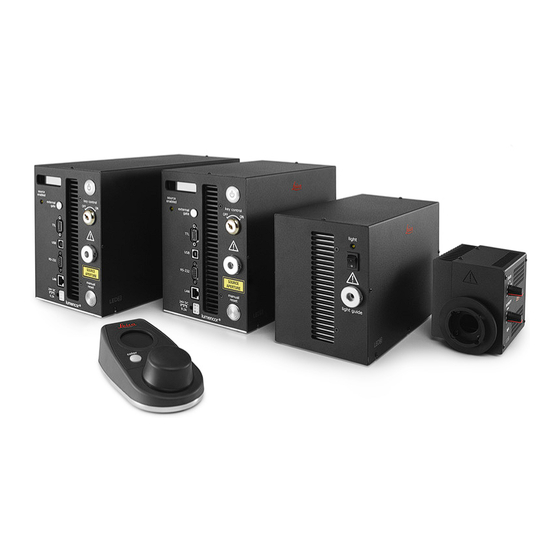
Advertisement

Table of Contents
loading

Summary of Contents for Leica LED1

  • Page 1 From Eye to Insight Leica LeD1 Leica LeD3 Leica LeD5 Leica LeD8 External light sources for Leica microscopes Instructions for use Leica Microsystems CMS GmbH. Instructions for use, 11934173, Revision 1.0, 2019.05.01 Document Number 57-10022 Revision A...
  • Page 2 Copyright copyright As the official manufacturer of Leica branded All rights to this documentation are held by light engine products, Lumencor is the respon- Leica Microsystems CMS GmbH. Reproduction sible owner of this instructions for use 57-10022, of text or illustrations (in whole or in part) by Revision A.
  • Page 3: Table Of Contents

    Function of the Compact Light Source ..6 7.2 Connecting the LED1 ........24 7.3 LED3/5/8 – connecting the light guide ..24 Safety Notes .............7 7.4 Connecting the Leica POD (optional) ..26 3.1 Regulatory safety notes .........7 7.5 Connecting the power cable .......26 3.1.1 Introduction LED1 ..........8 3.1.2 Introduction LED3 ..........8...
  • Page 4: Important Notes About This Manual

    1. Important Notes about this Manual 1. important Notes about this Manual Attention! This User Manual contains important instruc- This User Manual is an essential component tions and information for the operational safety of the instrument and must be read carefully and maintenance of the instrument and acces- before assembly, commissioning or use.
  • Page 5 1. Important Notes about this Manual Warning of hazardous electrical voltage! Danger of electric shock! Warning of hot surface. Warning: Possibly hazardous optical radiation emitted from this product. Do not look at operat- ing lamp. Eye injury may result. Warning: UV emitted from this product. Avoid eye and skin exposure to unshielded product.
  • Page 6: Function Of The Compact Light Source

    2. Function of the Compact Light Source 2. Function of the compact Light Source The Leica LED1, LED3, LED5 and LED8 compact light sources, with which this instructions for use Attention! are associated, are intended for biological rou- tine and research work as well as examinations The manufacturer assumes no liability for in materials science or mineralogy.
  • Page 7: Safety Notes

    It also meets the requirements of EN 61326-1, lamps and associated instruments, the products Electrical equipment for measurement, control described here, Leica LED1, LED3, LED5 and and laboratory use – EMC requirements. LED8, are special products because they are not suitable for general lighting purposes.
  • Page 8: Introduction Led1

    3. Safety Notes 3.1.1 Introduction LED1 3.1.3 Introduction LED5/LED8 The LED1 light source is a compact solid-state The LED light source consists of 4 (LED5) and 8 light source for fluorescence microscopy and (LED8) individually addressable solid-state light other bioanalytical applications. The light source...
  • Page 9: Precautions And Warnings

    Warning: ONLY use the power supply provided la lampe lorsqu‘elle est allumée. Évitez tout exposition aux yeux. by Leica. It is imperative that the DC power sup- Utilisez un écran ou dispositif de protection oculaire approprié. ply has output over-current protection, as the power input of the light sources are not fused.
  • Page 10 Warning: UV emitted from this product. Avoid protection. eye and skin exposure to unshielded product. The Leica LED1, LED3, LED5 and LED8 com- Caution: DO NOT open the unit. There are no pact light sources generate high-energy light serviceable parts inside and opening the light with invisible UV components and has been engine enclosure will void the manufacturer’s...
  • Page 11 The responsible Leica representative or the main plant in Wetzlar must be consulted whenever the instrument is altered, modified or used in conjunction with non-Leica com- ponents that are outside of the scope of this manual! Unauthorized alterations to the instrument or...
  • Page 12: Electrical Safety

    Specifications of the external power supply Overvoltage category: One of the power supply units listed below Pollution degree: (LPS-certified) must be used: LED1 Mean Well GST120A24-P1M Supply voltage: 9 V DC, 4.45 A Power input: 40 W max. Shared technical data:...
  • Page 13 3. Safety Notes LED8 WARNING Supply voltage: 24 V DC, 9.20 A Power input: 220 W Only use original power cables or alternative Fuses: Integrated in external cables with VDE/HAR codes that minimally power supply unit, not fulfill the following conditions: 3 x 0.75 mm replaceable and 10 A / 250 V.
  • Page 14 3. Safety Notes WARNING Attention! The light source must be placed at least Do not plug in or unplug data lines and con- 15 cm away from the wall and away from trol circuits unless the instrument has been flammable substances. shut down;...
  • Page 15: Disposal

    Never look directly into the beam path (blind- ing hazard). 3.3 Disposal Once the product has reached the end of its ser- vice life, please contact Leica Service or Sales about disposal. Please observe and comply with the national and federal laws and regulations implementing the WEEE EC directive, for example.
  • Page 16: Transport, Storage, Unpacking

    4. Transport, Storage, Unpacking 4. Transport, Storage, Unpacking Attention! Attention! For unpacking, open the box on its top. It is Transport and storage at -20 °C to +70 °C and then possible to lift the light source out of the max.
  • Page 17: Notes On Warranty

    5. Notes on Warranty 5. Notes on Warranty The manufacturer of the instrument warrants that the instrument is free of material or produc- tion defects at the time of delivery. Any defects that have occurred must be reported immediate- ly, and everything must be done to minimize dam- age.
  • Page 18: Overview Of The Instrument

    LED1: The light source can be turned on/off with the manual light on/off switch on the side panel. LED3: The light source can be turned on/off with the manual light on/off switch on the front panel or in combination with the electronic shutter in- put on the rear panel.
  • Page 19: Overview Light Sources

    1 Output adapter 1 USB A connection for POD 2 On/Off and color switch 2 Electronic shutter TTL input 3 Intensity switch 3 Power indicator light 4 Light output indicator light 4 Receptacle DC power supply Table 1 Output power spectrum LED1...
  • Page 20 6. Overview of the Instrument Fig. 4 LED3 Fig. 3 LED3 1 Power indicator light 1 Light indicator 2 On/Off switch 2 Light switch 3 Foot switch 3 Output adapter 4 Receptacle DC power supply 5 Electronic shutter TTL input Table 2 Output power spectrum LED3...
  • Page 21 6. Overview of the Instrument Fig. 5 LED5 front Fig. 6 LED5 rear 1 Status indicator display 2 Light indicator 3 Interlock 4 TTL connection 5 USB B connection 6 RS-232 connection 7 Receptacle DC power supply 8 On/Off switch 9 Key control 10 Output adpater 11 Manual interlock reset...
  • Page 22 6. Overview of the Instrument Fig. 7 LED5 front Fig. 8 LED5 rear 1 Status indicator display 2 Light indicator 3 Interlock 4 TTL connection 5 USB B connection 6 RS-232 connection 7 Receptacle DC power supply 8 On/Off switch 9 Key control 10 Adpater 11 Manual interlock reset...
  • Page 23: Connecting Led1

    6. Overview of the Instrument 6.5 Connecting LED1 The LED1 can be directly installed to the lamp housing receptacle. 6.6 Connectable light guides (LED3-8) The light source is compatible with liquid light guides that are compatible with a "Storz long"...
  • Page 24: Instrument Setup

    Always connect the light guide to be connected 7.2 Connecting the LED1 to the instrument to the target system by its out- The LED1 has to be connected to the microscope put first to prevent a hazard to the user from the before it is turned on.
  • Page 25 Fig. 12 LED5/8 source into the light output (Fig. 11.1, Fig. 12.1) of 1 Output adapter the instrument. There must be a noticeable click. Fig. 13 LED1 Connections Fig. 11 LED3 1 Output adapter 1 USB A connection...
  • Page 26: Connecting The Leica Pod (Optional)

    The escaping light can cause injury to eyes trol pod (Fig. 14.1) accessory to the USB A (“ex- and skin and damage to furniture. ternal”) port on the LED1 (Fig. 13.1) using the Never look into the light escaping from the USB-A to-USB A cable.
  • Page 27: Operation

    A yellow indicator light (Fig. 15.4) below the IN- TENSITY control knob on the side panel alerts the user that light output is active. 8.1 Operation LED1 Two control knobs are located on the side panel 8.2 Operation LED3 (Fig. 15.2). The “COLOR” knob allows the user to...
  • Page 28 8. Operation closed optical path (e.g. microscope input col- Light output can be switched off during intervals limator or a beam dump), turn the power switch when it is not required for active viewing or data ON to begin operation. collection.
  • Page 29: Operation Led5/8

    8. Operation 8.3 Operation LED5/8 The Key Control must be in the on position before light output can be turned on. The key must be The Master Power Switch button on the front removed and stored in a secure location when panel (Fig.
  • Page 30: Start Up

    ON position. rectly registered. These selections are typically • As soon the DC power supply is energized, the found under the “Devices” tab in the Leica LAS master power button (Fig. 18.8) will automati- X software. cally light up. The light engine automatically starts when the power is connected;...
  • Page 31: Service

    9. Service 9. Service 9.1 Maintenance and cleaning 9.2 Repairs The light source has no need of regular mainte- Repairs may be carried out by the manufacturer nance. This does not void the obligation of carry- of the instrument or specially authorized repre- ing out legally controlled regular checks with re- sentatives only.
  • Page 32: Troubleshooting

    Opening the light engine enclosure will void the manufacturer’s warranty. If prob- lems are encountered during installation or routine operation, review the troubleshooting procedures described below. If the problem remains unresolved, please contact your local Leica sales represen- tative for assistance.
  • Page 33: Ec Declaration Of Conformity

    Select the LED Light Source and go to the "Download" page. If you have any further questions or require technical support, please contact your country's Leica branch office or your local contact person directly. The appropriate contacts can be found on the Internet under: http://www.leica-microsystems.com...
  • Page 34 Copyright © Leica Microsystems CMS GmbH · Ernst-Leitz-Straße · 35578 Wetzlar · Germany 2019 Phone +49-6441-29-0 · Fax +49-6441-29-2599 LEICA and the Leica logos are registered trademarks of Leica IR GmbH. Order nos. of the editions in: English/German/French 11934173 · Printed on chlorine-free bleached paper.

This manual is also suitable for:

Led3Led8Led5

Table of Contents