Table of Contents
Advertisement
Quick Links
EN
The instruction manual is an integral part of the product
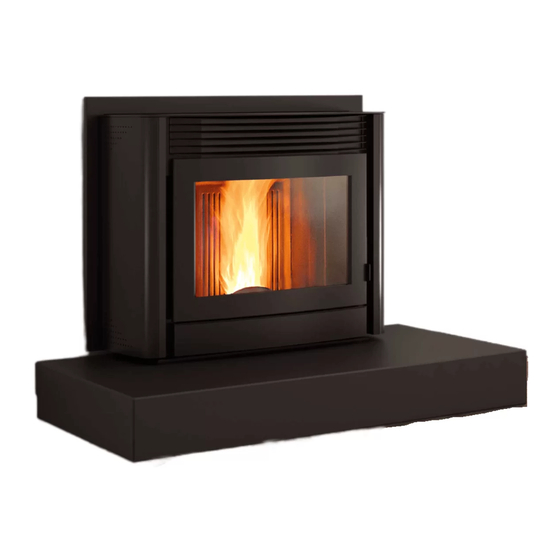
Pellet insert
SAHARA
PRODUCT INFORMATION,
INSTALLATION AND MAINTENANCE
Please read this entire manual before installation and use of
this pellet fuel-burning room heater.
Failure to follow these instructions could result in property
damage, bodily injury or even death.
Contact local building or fire officials about restrictions and
installation inspection requirements in your area.
Contact local building autorithy (such as municipal
building department, fire department, fire prevention,
bureau. etc.) before installation to determine if a permit
and/or inspection is required.
Save these Instructions.
Advertisement
Table of Contents

Related Manuals for Piazzetta SAHARA


Summary of Contents for Piazzetta SAHARA
- Page 1 The instruction manual is an integral part of the product Pellet insert SAHARA Please read this entire manual before installation and use of this pellet fuel-burning room heater. Failure to follow these instructions could result in property damage, bodily injury or even death.
- Page 2 The images shown in this manual are for explanatory purposes and at times may not accurately depict the product. This document is the property of Gruppo Piazzetta S.p.A. and no part of it may be reproduced or disclosed to third parties, whol- ly or in part, without written permission All rights reserved by Gruppo Piazzetta S.p.A..
-
Page 3: Table Of Contents
PRODUCT INFORMATION, INSTALLATION AND MAINTENANCE CONTENTS GENERAL INFORMATION PRODUCT INFORMATION Product description Part identification Safety devices Check devices Product identification data Characteristics Accessories upon request Technical data Sizes FUEL Pellet specifications Information regarding pellet loading GENERAL INFORMATION REGARDING THE SYSTEM Installation room Fresh air intake Chimney... -
Page 4: General Information
(authorized technical assistance centre). appliance, observe all safety recommen- - Gruppo Piazzetta S.p.A. cannot be held liable for situations of risk, defects, damage, product malfunctioning or for damage dations and contact the appropriate au- to objects, people or animals resulting from tampering of the thorities. - Page 5 PRODUCT INFORMATION, INSTALLATION AND MAINTENANCE Product use may cause some surfaces to If you expect that small children or vulner- become extremely hot (the glass, the ex- able adults may come into contact with ternal surfaces, the handles, the smoke this appliance, the following precautions outlet passage).
- Page 6 PRODUCT INFORMATION, INSTALLATION AND MAINTENANCE Do not install the product near walls or Do not overfire - If any external part starts objects in heat-sensitive or combustible to glow, you are overfiring. Reduce feed combustible material (wood or similar). rate. Overfiring will void your warranty. It is important to observe and respect the distances and safety indications pre- scribed by regulations and indicated in...
-
Page 7: Product Information
PRODUCT INFORMATION, INSTALLATION AND MAINTENANCE Before carrying out any assembly, installation or ignition proce- PRODUCT INFORMATION dures, the enabled installer must check that the system has been manufactured in compliance with the applicable instructions provided by the manufacturer and in compliance with all relevant regulations. -
Page 8: Part Identification
PRODUCT INFORMATION, INSTALLATION AND MAINTENANCE PART IDENTIFICATION Trim 20 Pellet indicator Hot air outlet 21 Auger motor Combustion chamber 22 External electrical connections Door 23 Environment fan Ceramic glass 24 Combustion air duct Door handle 25 Smoke intake/Extractor fan Pellet delivery hole 26 Smoke outlet Grate deflector Grate... -
Page 9: Safety Devices
PRODUCT INFORMATION, INSTALLATION AND MAINTENANCE Electronic control unit: SAFETY DEVICES the electronic control unit signals and controls a series of events including power and ignition failure. The appliance is equipped with the following safety and check devices which stop the appliance from operating if any faults oc- cur against over-firing and ensuring heaters is operating properly, including ensuring visible emissions are minimized. -
Page 10: Product Identification Data
PRODUCT INFORMATION, INSTALLATION AND MAINTENANCE PRODUCT IDENTIFICATION DATA CHARACTERISTICS Each product is identified in the following way: Structure: - IDENTIFICATION DATA PLATE (1) with the model (A), appli- - in steel ance performance specifications and important informations Cladding: - SERIAL NUMBER PLATE (2) with the serial number of the ap- - in painted steel pliance (B) Firebox:... -
Page 11: Technical Data
PRODUCT INFORMATION, INSTALLATION AND MAINTENANCE TECHNICAL DATA Model SAHARA Unit of meas- Medium burn Overall burn Description High burn rate Low burn rate urement rate rate Power Setting Fuel natural pure wood pellets Btu/hr 48554 22736 18316 24829 Heat Input... -
Page 12: Sizes
PRODUCT INFORMATION, INSTALLATION AND MAINTENANCE values in inch (mm) SIZES SAHARA Fig. 5 A Smoke outlet Length Combustion air duct H Height SAHARA + ZERO CLEARANCE KIT Fig. 6 31.02" 28.25" 788 mm 718 mm " 3.27" 83 mm "... -
Page 13: Fuel
- Any materials that are not included in the warranty and owner’s thorised by Gruppo Piazzetta S.p.A.. manual for the subject pellet heater Using pellets that are out of date or not in conformity - Any materials that were not included in the certification tests ■... -
Page 14: Information Regarding Pellet Loading
PRODUCT INFORMATION, INSTALLATION AND MAINTENANCE Pellets must be stowed in a dry, sheltered place that complies 3.2.1 Pellet indicator with the relevant safety clearances from the appliance and When the red reload indicator can be seen inside the hopper, it is from heat sources which could cause combustion. -
Page 15: General Information Regarding The System
PRODUCT INFORMATION, INSTALLATION AND MAINTENANCE GENERAL INFORMATION REGARDING Appropriate ventilation in the installation room must THE SYSTEM be ensured (refer to the section " FRESH AIR INTAKE "). The installation room and the area which is to be heat- ■ Below is some general information regarding the system, appli- ed must be suitable sized and have appropriate charac- ance installation and products manufactured by Gruppo Piazzet-... -
Page 16: Fresh Air Intake
PRODUCT INFORMATION, INSTALLATION AND MAINTENANCE It is recommended that the chimney has a chamber for collect- FRESH AIR INTAKE ing solid matter and any condensate below the connection and which may be easily opened and inspected by means of an air In order to operate normally, each appliance must be provided tight door with the air needed for combustion. - Page 17 Where 4” (10 cm) diameter pipe must be used, connect it to the appliance flue outlet with a "TEE" connector. Gruppo Piazzetta S.p.A. assumes no responsibility for, Pellet appliances depend on a combustion fan to pull air through nor does the warranty cover, smoke damage caused by the unit for combustion.
-
Page 18: Interior Vent Installation
PRODUCT INFORMATION, INSTALLATION AND MAINTENANCE INTERIOR VENT INSTALLATION RAIN CAP 12" (305 mm) MIN This kind of installation provides the natural draft that results TO ROOF from a vertical rise avoiding smoke being released into the house STORM COLLAR when electricity to the unit is interrupted while burning or smold- ering pellets remains in the burn grate. -
Page 19: Connecting To A Conventional Chimney
PRODUCT INFORMATION, INSTALLATION AND MAINTENANCE RAIN CAP 12"(305 mm) MIN TO ROOF STORM COLLAR FLASHING SEE VENT MANUFACTURER'S INSTRUCTIONS MASONRY MUD THIMBLE PL ADAPTER SUPPORT VENT VENT SOOT INSPECTION APERTURE Fig. 11 The damper area must be sealed with a non-combustible mate- rial and it is recommended that, mineral wool, or an equivalent non combustible insulation be placed on top of the sealed area Fig. -
Page 20: Installing Into An Existing Fireplace Chimney
PRODUCT INFORMATION, INSTALLATION AND MAINTENANCE It is necessary to permanently seal any opening between the ma- sonry of the fireplace and the facing masonry. The insulation material must not be allowed to expand When installing the insert into a masonry fireplace, DO NOT re- to the point that it covers the end of the flex pipe. -
Page 21: Installing The Pellet Insert Into An Existing Factory Built Wood Burning Fireplace
PRODUCT INFORMATION, INSTALLATION AND MAINTENANCE RAIN CAP A chimney system with known drafting problems may require a liner, which may also need to be insulated to CHIMNEY FLASHING keep vent system warm in cold chimney environment. A cap shall be installed on the chimney to keep out rain. ■... -
Page 22: Short Rise Installation - Wall Outlet
PRODUCT INFORMATION, INSTALLATION AND MAINTENANCE SHORT RISE INSTALLATION - WALL 4.10 MINIMUM FLUE VENT CONFIGURATION OUTLET Horizontal installations that terminate without any vertical sec- tions of pipe are approved; however, it is recommended that a When terminating the exhaust system under the houses eaves, minimum of 5’... -
Page 23: Installing The Pellet Insert Into Azero Clearance Cabinet
PRODUCT INFORMATION, INSTALLATION AND MAINTENANCE 4.11 INSTALLING THE PELLET INSERT INTO A 4.12 VENTING: TERMINATION REQUIREMENTS ZERO CLEARANCE CABINET In determining optimum vent termination, carefully evaluate ex- ternal conditions especially when venting directly through a wall. If you don’t have a factory built fireplace or masonry fireplace, the Since you must deal with odors, gases, and fly ash, consider aes- pellet insert can also be installed into the Zero Clearance Cabinet. -
Page 24: Mobile Home Installation
PRODUCT INFORMATION, INSTALLATION AND MAINTENANCE The exit terminal shall be located not less than 4' (1.2 m) below, 4' - 3’ (915 mm) from any adjacent combustibles such as: adjacent (1.2 m) horizontally from, or 1' (305 mm) above any door, window, buildings, fences, protruding parts of the structure, roof eaves or gravity air inlet into any building. - Page 25 PRODUCT INFORMATION, INSTALLATION AND MAINTENANCE PL Vent must be used for exhaust venting (single wall vent is not allowed). Follow PL Vent manufacturer’s installation directions and observe all listed clearances to combustibles. Check any other local buildings codes or other codes that may apply.
-
Page 26: Preparations For Installation
PRODUCT INFORMATION, INSTALLATION AND MAINTENANCE PREPARATIONS FOR INSTALLATION Product installation and maintenance must be carried out exclusively by qualified personnel with sufficient knowledge of the product itself. Polystyrene This work must also be carried out using suitable equip- ■ ment and in full compliance with all health and safety regulations. - Page 27 PRODUCT INFORMATION, INSTALLATION AND MAINTENANCE - push the red levers (3) to pull out the mobile part for 4" (10 cm) - rest the appliance on the (A) unit supplied Fig. 31 - remove the pallet fastening brackets (8) by unscrewing the Fig.
-
Page 28: Access To The Internal Parts Of The Product
PRODUCT INFORMATION, INSTALLATION AND MAINTENANCE ACCESS TO THE INTERNAL PARTS OF THE INSTALLATION PRODUCT Proceed as follows: For all installation and maintenance interventions - open the door (refer to the section " OPENING THE DOOR ") which require access to inside the cladding, the smoke - remove the lower front panel (1), unscrewing the screws (2) chamber or access to electrical and electronic parts, the holding it in place... - Page 29 PRODUCT INFORMATION, INSTALLATION AND MAINTENANCE The product must be installed in compliance with the Mantel appropriate safety distances from the walls and ob- Face trim jects. Failure to comply with these indications could result in fire. Keep any combustible or heat-sensitive products such as wooden furniture, curtains, carpets, fabric, clothing, ornaments and flammable liquids well away from the product while it is in operation (where not indicated,...
-
Page 30: Installation Kit And Accessories
PRODUCT INFORMATION, INSTALLATION AND MAINTENANCE BASE Use the optional approved Zero Clearance Cabinet kit if the walls adjacent to the product, the structure above the appliance, and the floor on which the appliance The product is fitted with sliding rails which allow the rests shall be made of a combustible material. -
Page 31: Extractable Part
PRODUCT INFORMATION, INSTALLATION AND MAINTENANCE - check a few times that the rails slide fully to their end of travel - check that there is nothing to prevent the product from closing After having secured the base, check that the support- and engaging correctly. -
Page 32: Connection To The Smoke Outlet
(which An open wire mesh screen should be placed over the outside is not supplied by Gruppo Piazzetta S.p.A.). air pipe opening to prevent birds or rodents from nesting in the opening. -
Page 33: Electrical Connections
PRODUCT INFORMATION, INSTALLATION AND MAINTENANCE 6.7.1 Power cable ELECTRICAL CONNECTIONS The appliance comes supplied with a power cable which must be Pull out the mobile part in order to access the electrical connec- connected to a properly grounded three-prong, 120 VAC, 60 Hz tions (refer to the section "... -
Page 34: Start-Up And Operating Test
PRODUCT INFORMATION, INSTALLATION AND MAINTENANCE 6.7.3 External environment thermostat START-UP AND OPERATING TEST The appliance allows for connection to an external thermostat (not supplied as standard). This allows operation to be deter- A start-up and operational test must be carried out by a special- mined on the basis of the room temperature detected by the ized qualified technician to check that the appliance and all other thermostat. -
Page 35: Loading Pellets
- cleaning ■ our dealers or distributors. For more information visit - all interventions needed to ensure correct operation provided www.piazzetta.com under "Support". they are carried out in compliance with regulations. restore all initial connections together with the normal ■... -
Page 36: Cleaning The Painted Metal Parts
PRODUCT INFORMATION, INSTALLATION AND MAINTENANCE 10.3 OPENING THE DOOR Recommended interval Interventions which may be carried out by the user The appliance is equipped with a retractable handle. Use the firedoor opening tool, which is supplied as standard, to Glass 1 day open the door as follows: Brazier and grate support... -
Page 37: Cleaning The Glass
PRODUCT INFORMATION, INSTALLATION AND MAINTENANCE 10.4 CLEANING THE GLASS 10.6 CLEANING THE GRATE AND GRATE SUPPORT During start-up it is possible that tar may accumulate on the glass which will disappear when optimal combustion is reached. If this The grate area must be cleaned. does not happen, it is recommended that the glass is cleaned dai- ly, before start-up, to prevent the formation of any deposits which Recommended cleaning frequency: refer to the section... -
Page 38: Cleaning The Combustion Chamber
PRODUCT INFORMATION, INSTALLATION AND MAINTENANCE - remove all the residue formed on the side walls and at the top 10.7 CLEANING THE COMBUSTION CHAMBER of the firebox - clean the hole and the grate (5) without removing it - clean the hole for the vacuum detection (6) inside the smoke Recommended cleaning frequency: refer to the section chamber as indicated in the figure "... -
Page 39: Extracting The Mobile Part
PRODUCT INFORMATION, INSTALLATION AND MAINTENANCE 10.8 EXTRACTING THE MOBILE PART 10.9 CLEANING THE EXTRACTOR FAN The appliance is designed so that it can be pulled out to access Any dust or ash deposits on the smoke extractor fan blades may the back of the appliance for maintenance and repairs. -
Page 40: Cleaning The Room Fan
PRODUCT INFORMATION, INSTALLATION AND MAINTENANCE The frequency with which the smoke outlet is to be cleaned de- 10.10 CLEANING THE ROOM FAN pends on the how much the appliance gathers dirt. Any dust deposits on the fan blades may make the fans noisy dur- ing operation. -
Page 41: Replacing The Fuses
PRODUCT INFORMATION, INSTALLATION AND MAINTENANCE 10.12 REPLACING THE FUSES 10.13 REMOVE THE DOOR Remove the cladding (refer to the section " ACCESS TO THE IN- To remove the door: TERNAL PARTS OF THE PRODUCT "). - open the door (refer to the section " OPENING THE DOOR ") - remove the 2 pins (1) FUSE ON THE POWER CABLE SOCKET Proceed as follows:... -
Page 42: Replacing The Glass
PRODUCT INFORMATION, INSTALLATION AND MAINTENANCE 10.15 REPLACING THE GLASS 11 WHEN NOT IN USE The door of the stove is equipped with a ceramic glass window When shutting the appliance down at the end of the season or if a 0.197'' (5 mm) thick, resistant to temperatures up to 1382°F long period of inactivity is anticipated, proceed as follows: (750°C). -
Page 43: Disposal Of Product At End Of Product Life
PRODUCT INFORMATION, INSTALLATION AND MAINTENANCE 12 DISPOSAL OF PRODUCT AT END OF PRODUCT LIFE The owner is exclusively responsible for destroying and disposing of the product in compliance with the regulations in force as re- gards safety and respecting/protecting the environment. Contact the relevant authorities for information regarding local regulations. -
Page 44: Wiring Diagram
PRODUCT INFORMATION, INSTALLATION AND MAINTENANCE 13 WIRING DIAGRAM DT2006203_H072658EN0_01... -
Page 45: Reference Standards
PRODUCT INFORMATION, INSTALLATION AND MAINTENANCE 14 REFERENCE STANDARDS ASTM E1509 Standard Specification for Room Heaters, Pellet Fuel-Burning Type ASTM E2515 Standard Test Method for Determination of Particulate Matter Emissions Collected by a Dilution Tunnel ASTM E2779 Standard Test Method for Determining Particulate Matter Emissions from Pellet Heaters ULC S628 Fireplace Inserts CSA B415.1... -
Page 46: Warranty
Parts and Labour Piazzetta (North America) will repair or replace any part found to be defective (parts and labour) for two (2) years from the date of purchase, including glass for thermal breakage only (not impact) and exterior cladding for gloss retention. - Page 47 PRODUCT INFORMATION, INSTALLATION AND MAINTENANCE DT2006203_H072658EN0_01...
- Page 48 Via Montello, 22 31011 Asolo (TV) - ITALY Tel. +39.04235271 - Fax +39.042355178 www.piazzetta.com e-mail:infopiazzetta@piazzetta.it...
Need help?
Do you have a question about the SAHARA and is the answer not in the manual?
Questions and answers