Cinderella Comfort NA Installation Manual
Hide thumbs
Also See for Comfort NA:
- User manual (32 pages) ,
- Product manual (64 pages) ,
- Owner's manual (36 pages)

Related Manuals for Cinderella Comfort NA


Summary of Contents for Cinderella Comfort NA
- Page 1 CINDERELLA COMFORT Model Comfort NA Cinderella Comfort Installation Manual Language: English, French...
-
Page 2: Table Of Contents
Outils et accessoires nécessaires............................ 19 Caractéristiques et exigences électriques ........................20 Exigences environnementales ............................20 Schéma de la toilette - Dimensions de la Cinderella Comfort ..................21 Avant l’installation ................................22 Installation du tuyau d’évacuation d’air ......................... 23 Installation du tuyau d’admission d’air .......................... 27 Installation sans tuyaux d’entrée d’air ........................... -
Page 3: Items Included
• Rasp or file When installing your Cinderella Comfort toilet, it will be necessary to use the specially adapted “Installation kit electric”. This is a complete installation package developed in collaboration with Centrotherm. This set contains 110mm pipe and elbow that fits directly on your toilet, it also comes with pipe clamps and wall mounts for easy securing of the ventilation pipe. -
Page 4: Electrical Specifications And Requirements
Visit www.cinderellaeco.com/installation for detailed step-by-step animations for the installation of your new toilet. It can be a good idea to look at these animations prior to installing your new Cinderella Comfort toilet. They can be a useful tool in addition to this manual. -
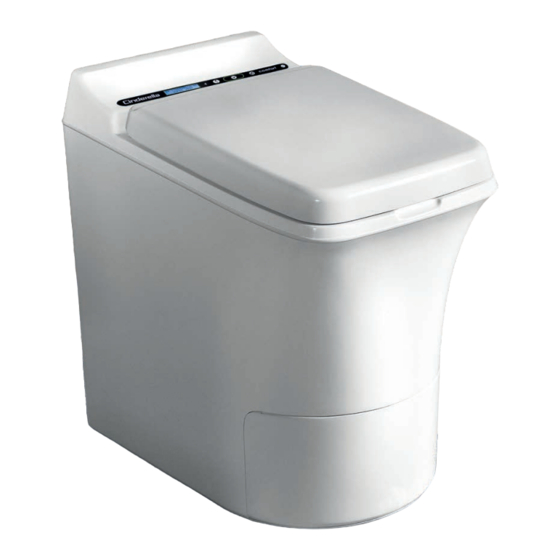
Page 5: Cinderella Comfort Toilet Diagram
CINDERELLA COMFORT TOILET DIAGRAM 23 1/16 in 23 1/16 in 1 1/8 in 1 1/8 in 1/2 in 1/2 in 20 13/16 in 20 13/16 in... -
Page 6: Before Installation
For more information about rules for installations in wet rooms, please consult a plumber. The toilet must be placed on a firm and level base and your Cinderella Comfort may be installed on a... -
Page 7: Venting The Cinderella Comfort Toilet
VENTING THE CINDERELLA COMFORT TOILET SPECIFICATIONS INSTALLING THE VENTILATION PIPES NOTICE! It is not allowed to use any 90° bends in addition to the t-bend Diameter vent pipe Vent pipe direction Allowed Bends Maximum pipe length ⁄ in. (110mm) Horizontal flue pipe (Not allowed) 2 ft. - Page 8 SPECIFICATIONS VENT PIPE AND MATERIAL NOTICE! We strongly recommend using the Cinderella Installation Kit as designed by the manufacturer for the installation of your toilet. This set contains necessary parts for an optimal installation. For more information on this installation kit please contact your dealer or visit our website for additional information.
- Page 9 ⁄ • In the center line of the Cinderella’s chosen position, make a mark on the wall for the outlet air pipe 16 (415 mm) from the floor. • Drill a pilot hole with a long drill bit through the wall. Make sure you are holding the drill perpendicular to the floor.
- Page 10 • For the Cinderella toilet to be placed close to the wall you need to cut off a piece of the included long pipe to a minimum length of 3 in. (80mm). Always make sure to preserve one of the beveled pipe ends, to be used when connecting the toilet to the pipe.
-
Page 11: Installing The Inlet Air Pipe
It is important to ensure that the toilet has enough access to fresh air, and we therefore always recommend installing Cinderella Comfort with designated inlet air connection. The supplied air is essential for cooling, air flow and the supply of oxygen to the incineration. If the toilet has restricted access to air / oxygen, you will experience poor incineration, reduced efficiency and possibly overheating of the appliance. - Page 12 Draw a mark in the Cinderella’s center line, 6 in. (155 mm) from the floor. Drill a hole using a long drill bit through the interior and exterior wall in the center of where you will drill your 4 5 ⁄...
-
Page 13: Installation Without Inlet Air Pipes
• It is not recommended to install the Cinderella Comfort toilet without using the inlet air pipes. Using air from the toilet room will require a wall vent in accordance to the specifications in this manual, and there cannot be other air dependent installations in the same environment e.g. -
Page 14: Finalizing The Installation
Lift the lid and seat – Red light should be lit and the fan starting to blow. • Simply insert an Original Cinderella Bowl Liner into the toilet. • Add water 5 cup (1.2 liters) and toilet paper 39 3/8 in (1 meter) •... -
Page 15: Regular Maintenance
Failure to perform proper maintenance as described in the manual will void warranty. In order to ensure optimal operation and extend the lifetime of your Cinderella Comfort, you will need to set aside a little time for preventative maintenance. Good maintenance routines will give you lower operating costs and cause less wear on the product. - Page 16 STEAM CLEANING Recommended frequency: After every one hundred uses or when emptying the ash container 1–5 steps as written: Ensure that the toilet is cold and the ash container has been emptied and cleaned. Remove the front cover and release the ash container Pour approximately 1/4 gallon (1 liter) of clean water into the toilet insert Insert the ash container carefully so that you don’t spill out the water Press Start to begin an incineration cycle.
-
Page 17: Repairs And Spare Parts
Approved date Approved by Change description Battery Material Replacement for Created by Date of issue Status Tolerance 06.11.2020 Draft Appr. by Mass [g] Sheet size Projection Scale 3008.54 Title Sheet Item No Wire diagram Cinderella Comfort NA Drawing number CE-0667-MA... - Page 18 REPLACING THE BACKUP BATTERY Disassembly: Disconnect the mains power supply Pull the toilet away from the ventilation pipe and unscrew the rear panel with a Torx Size T10 screwdriver and open the cover Disconnect the earth lead removing it from its clip on the circuit board Disconnect both power leads from the battery Loosen the battery hose clip with the help of screw driver or a 7 mm wrench Lift the battery upwards to remove it...
-
Page 19: Pièces Incluses
• Râpe ou lime Lors de l’installation de votre toilette Cinderella Comfort, il sera nécessaire d’utiliser le «Kit d’installation électrique» spécialement adapté. Il s’agit d’un package d’installation complet développé en collaboration avec Centrotherm. Cet ensemble contient un tuyau et un coude de 110 mm qui s’adapte directement sur votre toilette, il est également livré... -
Page 20: Caractéristiques Et Exigences Électriques
10 A • Consommation électrique 2 000 W La Cinderella Comfort a une consommation électrique de 2 000 W, pouvant être continuelle pendant plus d’une heure à la fois. L’électricien chargé de l’installation doit prendre en compte cette charge électrique. AVIS! CONVERTISSEURS : L’utilisation de convertisseurs de puissance avec votre produit Cinderella est déconseillée. -
Page 21: Schéma De La Toilette - Dimensions De La Cinderella Comfort
DIMENSIONS DE LA CINDERELLA COMFORT 23 1/16 in 1 1/8 in 1/2 in 20 13/16 in... -
Page 22: Avant L'installation
Nous vous recommandons de joindre votre revendeur local pour planifier l’installation de votre toilette Cinderella. L’utilisation de la Cinderella Comfort est approuvée pour les salles de bains et salles d’eau (classe IP 34), mais il ne doit y avoir aucune éclaboussure d’eau sur les parties externes de la toilette. Pour plus d’information sur la réglementation entourant les installations dans une salle d’eau, veuillez consulter un plombier. -
Page 23: Installation Du Tuyau D'évacuation D'air
VENTILATION DE LA TOILETTE CINDERELLA COMFORT SPÉCIFICATIONS D’INSTALLATION DES TUYAUX DE VENTILATION AVIS! Il n’est pas permis d’utiliser des coudes à 90° en plus des raccords en T Diamètre du tuyau de Direction du tuyau de ventilation Coudes utilisables Longueur de tuyau... - Page 24 AVIS! • Nous recommandons d’utiliser la trousse d’installation de la Cinderella conçue par le fabricant pour l’installation de votre toilette. Cet ensemble contient les pièces nécessaires pour une installation optimale. Pour plus d’information sur cette trousse d’installation, veuillez contacter votre revendeur ou visiter notre site web.
- Page 25 Avant de percer des trous, assurez-vous toujours de ne pas risquer d’atteindre un fil électrique ou un tuyau d’eau. Négliger de respecter les précautions de sécurité peut entraîner des blessures graves ou fatales. Dans l‘axe de la position voulue pour la Cinderella, faites une marque sur le mur pour le tuyau d’évacuation d’air à ⁄...
- Page 26 • Pour placer la toilette Cinderella près du mur, découpez un morceau du long tuyau fourni avec une longueur minimum de 3 po (80 mm). Assurez-vous de toujours conserver un bout de tuyau biseauté, afin de l’utiliser pour connecter la toilette au tuyau.
-
Page 27: Installation Du Tuyau D'admission D'air
Il est important de s’assurer que la toilette ait un apport d’air frais suffisant, c’est pourquoi nous recommandons d’installer la Cinderella Comfort en utilisant le raccord d’admission d’air indiqué. L’apport d’air est essentiel au refroidissement, à l’écoulement de l’air et à l’apport d’oxygène pour l’incinération. Si l’accès à l’air et à l’oxygène est restreint, l’incinération de votre appareil sera de mauvaise qualité, son efficacité... - Page 28 Négliger de respecter les précautions de sécurité peut entraîner des blessures graves ou fatales. Faites une marque sur la ligne centrale de la Cinderella, à 6 po (155 mm) du plancher. Percez un avant-trou, à l’aide d’un long foret, à travers le mur intérieur et extérieur au centre de l’endroit où vous percerez votre trou de 4 ⁄...
-
Page 29: Installation Sans Tuyaux D'entrée D'air
AVIS! • Il est déconseillé d’installer la toilette Cinderella Comfort sans tuyaux d’admission d’air. L’utilisation de l’air de la salle de bains nécessite la présence d’une prise d’air murale conforme aux spécifications du présent manuel, et il ne doit pas exister d’autres installations avec entrée d’air dans le même local (par ex. ventilateur d’extraction, cheminée avec foyer ouvert). -
Page 30: Finalisation De L'installation
Soulevez le couvercle et le siège – Le voyant rouge doit être allumé et le ventilateur doit se mettre en marche. • Insérez un sac en papier Cinderella d’origine dans la toilette. • Ajoutez 5 tasses (1,2 litre) d’eau et 39 3/8 po (1 mètre) de papier de toilette •... -
Page 31: Entretien Régulier
La garantie est annulée si l’utilisateur néglige d’effectuer l’entretien de la toilette conformément aux directives du manuel. Afin d’assurer le fonctionnement optimal et de prolonger la durée de vie de votre Cinderella Comfort, vous devez consacrer un peu de temps à l’entretien préventif. Une bonne routine d’entretien réduira vos coûts d’opération et l’usure du produit. - Page 32 NETTOYAGE À LA VAPEUR Fréquence recommandée : Toutes les 100 utilisations ou en vidant la boîte à cendres. 1 à 5 étapes selon les instructions Assurez-vous que la toilette est froide et la boîte à cendres a été vidée et nettoyée. Retirez le couvercle avant et sortez la boîte à...
-
Page 33: Réparations Et Pièces De Rechange
Approved date Approved by Change description Battery Material Replacement for Created by Date of issue Status Tolerance 06.11.2020 Draft Appr. by Mass [g] Sheet size Projection Scale 3008.54 Title Sheet Item No Wire diagram Cinderella Comfort NA Drawing number CE-0667-MA... - Page 34 REMPLACEMENT DE LA BATTERIE DE SECOURS Démontage : Débranchez le bloc d’alimentation principal Tirez la toilette pour l’éloigner du tuyau de ventilation, retirez les vis du panneau arrière avec un tournevis Torx T10 et ouvrez le couvercle. Débranchez le fil de mise à la terre en retirant l’attache au circuit imprimé. Débranchez les deux fils d’alimentation de la batterie.
- Page 36 Document number: D000300 Manufacturer: Revision number: 02 When nature calls Learn more about Cinderella www.cinderellaeco.com Cinderella Eco Canada Ltd. 2 Robert Speck Pkwy, Suite 750, Mississauga, Ontario Canada, L4Z 1H8 Phone: (905)-281-8566, E-mail: support.canada@cinderellaeco.com...
Need help?
Do you have a question about the Comfort NA and is the answer not in the manual?
Questions and answers