SolaX Power X1 Series User Manual
2.5kw - 6.0kw
Hide thumbs
Also See for X1 Series:
- User manual (63 pages) ,
- Quick installation manual (3 pages) ,
- Quick installation manual (2 pages)
Table of Contents
Advertisement
Solax Power Network Technology (Zhejiang) Co., Ltd.
No.288 Shizhu Road, Tonglu Economic Development Zone,
Tonglu City, Zhejiang province, China.
Tel: +86 0571-56260011
E-mail: info@solaxpower.com
X1 Series User Manual
2.5kW - 6.0kW
Copyright Declaration
The copyright of this manual belongs to Solax Power Network Technology (Zhejiang)
Co., Ltd. Any corporation or individual should not plagiarize, partially or fully copy
(including software, etc.), and no replication or distribution of it in any form or by any
means. All rights reserved. SolaX Power Network Technology (Zhejiang) Co., Ltd.
reserves the right of final interpretation.
320101048401
WWW.solaxpower.com
Advertisement
Table of Contents

Subscribe to Our Youtube Channel
Related Manuals for SolaX Power X1 Series


Summary of Contents for SolaX Power X1 Series
- Page 1 Solax Power Network Technology (Zhejiang) Co., Ltd. Copyright Declaration The copyright of this manual belongs to Solax Power Network Technology (Zhejiang) No.288 Shizhu Road, Tonglu Economic Development Zone, Co., Ltd. Any corporation or individual should not plagiarize, partially or fully copy Tonglu City, Zhejiang province, China.
- Page 2 CHANGE HISTORY Changes between document versions are cumulative. The latest version contains all updates made in previous versions. Version 01 (Jan. 03, 2023) Updated 4. Technical Data (Added technical data). Version 00 (Sept. 27, 2022) Initial release...
-
Page 3: Table Of Contents
Contents Contents 1 Note on this Manual Scope of Validity Target Group Symbols Used 2 Safety Appropriate Usage Important Safety Instructions Explanation of Symbols EC Directives 3 Introduction Basic Features Terminals of the Inverter Dimension 4 Technical Data DC Input AC Output Efficiency, Safety and Protection System Data... -
Page 4: Scope Of Validity
LCD Operation 7 Troubleshooting 1.1 Scope of Validity Troubleshooting This manual is an integral part of X1 Series. It describes the assembly, Routine Maintenance installation, commissioning, maintenance and failure of the product. Please read it carefully before operating. 8 Decommissioning X1-BOOST-2.5K-G4... -
Page 5: Safety
2 Safety 2.1 Appropriate Usage WARNING ! The X1 Series are PV inverters which can convert the DC current of the PV Potential surge shock may damage the inverter. generator into AC current and feed it into the public grid. -
Page 6: Important Safety Instructions
• Ensure input DC voltage ≤Max. DC voltage. Over voltage present. It is dangerous for maintenance personnel and the public. X1 series may cause permanent damage to inverter or other provide Active Frequency Drift (AFD) to prevent the islanding effect. - Page 7 Safety Safety • PV modules shall have an IEC 61730 class A rating. PE Connection and Leakage Current Avoid touching the PV connecting device in case of electric shock. • • After the MAINS and PV supply has been disconnected, the capacitor of WARNING ! the unit still contains hazardous voltage for up to 5 minutes, please don’t •...
-
Page 8: Explanation Of Symbols
Safety Safety 2.3 Explanation of Symbols 2.4 EC Directives This section gives an explanation of all the symbols shown on the inverter This section describes the requirements of the European low voltage and on the type label. regulations, including safety instructions and system licensing conditions, Symbols on the Inverter the user must comply with these regulations when Symbol... -
Page 9: Introduction
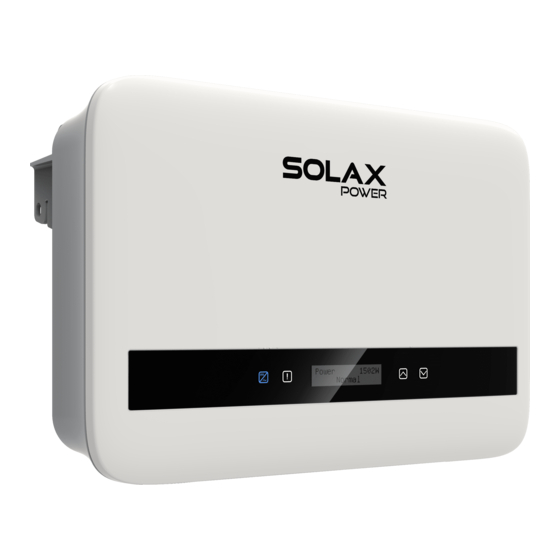
Safety Safety 3. Introduction WARNING! 3.1 Basic Features Only authorized personnel are allowed to connect. 3.3 Dimension Dimension Ø 404.0 mm 145.5 mm 3.2 Terminals of the Inverter Object Description DC Switch (optional) DC Connector DONGLE Ground screw RS485/ Meter/ CT/ DRM(optional) AC Connector Note: Wi-Fi/ LAN/ 4G DONGLE shares one port C;... -
Page 10: Technical Data
Introduction Technical Data 4. Technical Data 4.3 Protection 4.1 DC Input Model BOOST- BOOST- BOOST- BOOST- BOOST- BOOST- BOOST- 2.5K-G4 3K-G4 3.3K-G4 4.2K-G4 5K-G4 6K-G4 3.6K-G4 Safety & Protection Model BOOST- BOOST- BOOST- BOOST- BOOST- BOOST- BOOST- Over/under voltage protection 2.5K-G4 3K-G4 3.3K-G4... -
Page 11: Installation
Non-isolated 5.3 Installation Precaution Active anti-islanding method Frequency Shift X1 Series inverter is designed for outdoor installation (IP 66). 5. Installation Make sure the installation site meets the following conditions: • Avoid exposure to glare. 5.1 Check for Transport Damage •... -
Page 12: Installation Steps
Installation Installation Available Space Size ≥300 mm Torque wrench MC4 crimping tool Diagonal pliers Hot-air blower (10 mm) ≥300 mm ≥300 mm ≥300 mm Crimping tool Heat shrinking Spirit level for RJ45 tube (5 mm) Allen key (4 mm) ≥300 mm Table Available Space Size Position Min.size... - Page 13 Installation Installation Ø Step 2: Match the inverter with the wall bracket b) Drill holes with a drill (drill bit: 10 mm), make sure the holes are deep d) Hang the inverter over the bracket, move the inverter close to it, slightly enough (at least 60 mm) for installation.
-
Page 14: Connections Of The Inverter
Installation Installation Connection Steps 5.5 Connections of the Inverter Tools below are needed before connection. 5.5.1 The Main Steps to Connect to the Inverter Ø PV String Connection MC4 crimping tool recommended The inverter has a couple of PV connectors which can be connected in model: H4TC0001 series into 2-strings PV modules. - Page 15 Installation Installation d) Crimp pin contact by using the MC4 crimping tool g) Use a multimeter to measure the open circuit voltage of the positive pole and negative pole of the PV cable, and make sure the open circuit voltage <600 V (Otherwise the machine may be damaged);...
- Page 16 Installation Installation - Separate A into 2 components. NOTE! Inverters should not be used in multiple phase combinations. Micro-breaker should be installed between inverter and grid, any loads should not be connected with inverter directly. - Then the AC connector is finally classified into 3 components for Incorrect Connection between Load and Inverter use (as shown below).
- Page 17 Installation Installation Ø Earth Connection Screw the ground screw with cross screwdriver as shown below. h) Screw down the component 1 tightly. (Torque: 3±0.3N·m) WARNING! Be sure the ground wire must be connected! Connection steps: 1) Use a crimping tool to strip the terminal from the PE cable. I) Connect the AC plug to the inverter.
- Page 18 Installation Installation 3) Use a crimping tool to squish the terminal. Connection steps: 1. Plug the WiFi Dongle (optional) into “DONGLE” port at the bottom of inverter. 2. Connect the WiFi with router. 3. Scan below QR code or search for the keyword "MonotoringCloud" in APP Store to download APP for setting up the monitoring.
- Page 19 With this single phase meter working together with the X1 series, you can: (1) Monitor the energy to grid and from grid through the whole day. (2) Achieve the export control function with a higher accuracy.
- Page 20 Installation Installation CT connection diagram CT structural decomposition CT clamp RJ45 connector communication line Screw cap 1. Insert the RJ45 connector of CT into the COM/CT port on the inverter, and screw down the screw cap tightly. 2. Clip the CT clamp on L line from the home main meter box side. 3.
- Page 21 Installation Installation Heat Pump Adapter box is provided to control the closing and breaking of switches by giving control signals. It can also be used to control heat pump via Adapter Box. Adapter Box Heat Pump The PIN definition of heat pump is listed as below: Ø...
- Page 22 Installation Installation Parallel connection 2) There are 2 modes for selection after you enter the DryContact interface: The series inverter provides the parallel connection function, which could Load Management and Genrator. support several inverters to parallel in one system and can control zero (2.1) Choose Load Management and then select Manual in the Schedule injection to the grid with a meter installed in the main circuit.
- Page 23 Installation Installation c) Choose “M/S Mode” to select the Master inverter. Only one inverter can be set as “Master”. M/S Mode M/S Mode Master System Limit d) Set the value for “System Limit” on the master inverter. This will be the overall power limit for parallel system.
- Page 24 Installation Installation EV-Charger Function NOTE! The inverter can communicate with the smart EV-Charger to form an The parallel system with Modbus Function and the EV-Charger intelligent photovoltaic, storage and EV charging energy system, thus function cannot be used at the same time currently. If the maximizing the utilization of photovoltaic energy.
- Page 25 Installation Installation 3) Then insert U-disk into the DONGLE port on the bottom of the inverter. b) Select “EvChargerEnable” and then enter "Mode Select". Ensure the Then turn on DC switch or connect the PV connector, the LCD interface interface shows "Enable" under "Mode Select" , which indicate the EV- Charger function started successfully.
-
Page 26: Run The Inverter
Installation Operation Method 5.6 Run the Inverter Enter the setting interface to follow the instructions when it is first time to start up. •Start inverter after checking all steps below: a) Check that device is fixed well on the wall. WARNING! b) Make sure all the DC breakers and AC breakers are disconnected. -
Page 27: Operation Method
Installation Operation Method 6.2 LCD Structure NOTE! Once settings are selected at commissioning they are Please refer to the inverter for the most updated structure locked to view only. *User can also see the U,I & P Level 1 Level 2 Level 3 of the PV. - Page 28 Operation Method Operation Method 6.3 LCD Operation >Safety >Country >U >Grid >Export Control >Mode Select >I >DRM Function >Mode Select >F >Pout > P (Freq) >Grid Services >Password >Status >mWindowMenu >Pgrid > Soft Start >U1 > Reactive Power >I1 > P (u) Function >P1 >...
- Page 29 Operation Method Operation Method FacUvp3rdTime **Only shown under Connection Poland safety regulations **Only shown under Frt_EnterVoltDn Reconnection Poland safety regulations VacOvp3rdTime **Go to next page **Go to next page...
- Page 30 Operation Method Operation Method >Machine Type >Generator >PVConnection >Mode Select >Switch >Manual >Settings >Password >Mode Select >EvChargerEnable > Feedin power > Consumption >Earth Detect >Load >SmartSave Management >per on-signal >Mode Select >DryContact **Go to next page **Go to next page >per day Only shown under Australian >GeneralControl...
- Page 31 Operation Method Operation Method > Soft Limit >GeneralControl >Hard limit > All Test > Test Report > OvpValve test > UvpValve1 test > UvpValve2 test >Enable > OfpValve test > UfpValve test > OfpValve2 test > UfpValve2 test > Ovp_AVG test...
- Page 32 Operation Method Operation Method Long press the “Enter” button to enter the second-level interface. User can see parameters, such as the Status, Language, Date Time, Settings (need password ), Meter energy (including Total Import, Total Export), Error Logs (of the inverter), and About ( the user can browse the information of the inverter, including product serial number, machine type, register sn, master, slave, manager and internal code).
- Page 33 Operation Method Operation Method This status includes 5 parameters: U, I, F, Pout, Pgrid. Settings Press “Up” and “Down” button to browse the parameter, long press “up” to This function is used for setting the inverter return to Status. * Password The default password is “2014”...
- Page 34 Operation Method Operation Method...
- Page 35 Operation Method Operation Method NOTE! The terms shown in the interface depend on the local safety regulations.
- Page 36 Operation Method Operation Method...
- Page 37 Operation Method Operation Method 10) Reset Energy The user can clear the power energy of CT and meter by this function (if the user uses CT or meter).
- Page 38 Operation Method Operation Method >Load Management< X1-BOOST-6K-G4 The user can use the Dry Contact to connect heat pump by this function (require SG Ready).
- Page 39 Operation Method Operation Method > Enable/Disable > P(u) Function > Pu_GridV1/2/3/4 > Pu_Ratio1/2/3/4 >About >Information > QPowerLockEn > QuLockIn > Q(u) Function > QuGridV1/2/3/4 > Qu_Ratio1/2/3/4 Frt_EnterVoltUp Entry value of high voltage ride through VacOVP3rdTime Stage-3 overvoltage protection time Stage-2 undervoltage protection time VacUVP3rdTime Stage-3 undervoltage protection time NOTE!
- Page 40 Operation Method Operation Method...
- Page 41 Operation Method Troubleshooting Faults Diagnosis and solution Code 7 Troubleshooting Over Current Fault. IE:00001 TzFault -Wait for about 10 seconds to check if the inverter is back to normal. 7.1 Troubleshooting -Disconnect the DC switch and restart the inverter. -Or consult us for solutions. This section contains information and procedures for solving possible problems of our inverter, and provides you with troubleshooting tips to Grid Lost Fault.
- Page 42 Troubleshooting Troubleshooting 7.2 Routine Maintenance Faults Diagnosis and solution Code Low Temperature Fault. LowTempFault IE:00029 -Check if the ambient temperature is too low. Inverters do not need any maintenance or correction in most cases, but if the -Or consult us for solutions. inverter often loses power due to overheating, this can be attributed to the following reason: Internal Communication Fault.
- Page 43 Troubleshooting Decommissioning 9 Disclaimer 8 Decommissioning 8.1 Dismantling the Inverter This limited warranty applies to products sold after date of 1st Jan 2022, • Turn off the AC and DC switches of the inverter system and sold through our company or authorized resellers. The defective •...
- Page 44 Warranty Registration hardware (eg. the devices to control the inverters or the devices to control Form battery charging or discharging) from third parties without authorization (agreement in writing) from our company; For Customer (Compulsory) K.The product is modified or altered (including the cases in which the product series number or product label is altered, removed, or defaced);...
- Page 45 PLEASE REGISTER THE WARRANTY IMMEDIATELY AFTER INSTALLATION! GET YOUR WARRANTY CERTIFICATE FROM SOLAX! KEEP YOUR INVERTER ONLINE & WIN SOLAX POINTS! Open your Wait for the camera app camera to and point recognize your device the QR code at the QR code Notification Click the notification banner...
Need help?
Do you have a question about the X1 Series and is the answer not in the manual?
Questions and answers