Table of Contents
Advertisement
Advertisement
Table of Contents

Related Manuals for Hisense E6431C


Summary of Contents for Hisense E6431C
- Page 1 INSTRUCTIONS FOR USE GLASS CERAMIC COOKING...
- Page 2 We thank you for your trust and the purchase of our appliance. This detailed instruction manual is supplied to make the use of this product easier. The instructions should allow you to learn about your new appliance as quickly as possible. Make sure you have received an undamaged appliance.
-
Page 3: Table Of Contents
Contents Safety precautions ........................Carfully read the instructions and save them for future reference ..........Important notes and precautions ..................Before connecting the appliance ....................Appliance description ......................Technical data ........................... Before first use .......................... Glass ceramic cooking surface ....................Tips regarding your cookware .................... -
Page 4: Safety Precautions
Safety precautions Carfully read the instructions and save them for future reference This appliance can be used by children aged from 8 years and above and persons with reduced physical, sensory or mental capabilities or lack of experience and knowledge if they have been given supervision or instruction concerning use of the appliance in a safe way and understand the hazards involved. - Page 5 If the supply cord is damaged, it must be replaced by the manufacturer, its service agent or. similarly qualified persons in order to avoid a hazard (only for appliances supplied with connection cord). WARNING: If the surface is cracked, switch off the appliance to avoid the possibility of electric shock.
-
Page 6: Important Notes And Precautions
Appliance must be connected to fixed wiring which has incorporated means of disconnection. Fixed wiring must be made in accordance with the wiring rules. Important notes and precautions The appliance is intended for household use. Do not use it for any other purpose, such as room heating, drying of pets or other animals, paper, fabrics, herbs etc. -
Page 7: Appliance Description
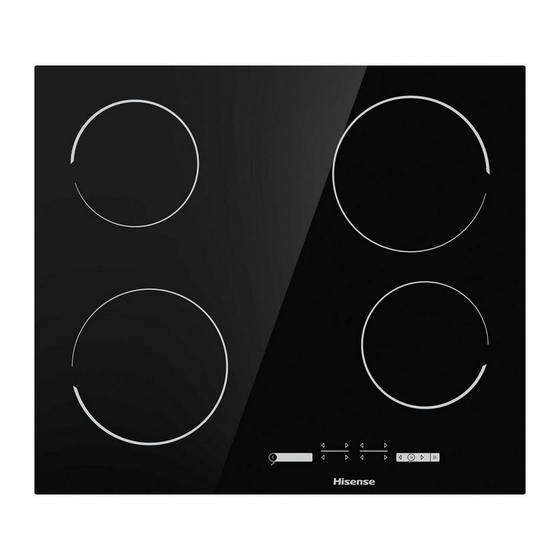
Appliance description INFORMATION! Appliance functions and equipment depend on the model. 1. Cooking zone rear (left) 2. Cooking zone front (left) 3. Cooking zone rear right 4. Cooking zone front right 5. Operating the cooking hob Technical data (depending on the model) A. -
Page 8: Glass Ceramic Cooking Surface
Glass ceramic cooking surface • The hob is resistant to temperature changes. • Do not use the glass ceramic hob if it is cracked or broken. If a sharp object falls on the hob, the hob may break. The consequences of such occurrence may be visible immediately or only after a while. -
Page 9: Operating The Cooking Hob
Operating the cooking hob Control unit (depending on the model) A Hob on/off and lock key A1 Appliance on indicator light C Stop & Go (pause) key C1 Stop & Go (pause) indicator light D Minute minder of power off timer key E Extended cooking zone indicator light F Power level/residual heat displays G Power increase key (+) -
Page 10: Switching On The Hob
Switching on the hob Touch the on/off key (A) and hold it for 1 second to switch on the hob. "0" will appear on all power level indicators. A brief acoustic signal will be emitted and an indicator light will light up above the "on" key. INFORMATION! If no cooking zone is switched on in 10 seconds, the cooking hob will power off. -
Page 11: Automatic Rapid Heating
Automatic rapid heating All cooking zones are fitted with a special mechanism that sets the cooking power to maximum at the start of the cooking process, regardless of the actual power setting. After a while, the cooking zone power switches back to the initially set level (1 to 8). The auto rapid heating function is suitablefor dishes that have to be heated up at maximum power first, and then cooked for a longer period of time. -
Page 12: Additional Heating Zone
Additional heating zone (depending on the model) An additional heater ring can be activated for some cooking zones (depending on the model). Activating the cooking zone extension / additional heater ring • An additional ring can be activated to extend an already selected cooking zone for which the power level has been set. -
Page 13: Child Lock/Lock
INFORMATION! Each cooking zone has built-in overheating protection. If there is no cookware on the cooking zone or if the heat transfer to the food is not sufficient, then heating will be automatically deactivated for a few seconds. This is particularly important on the cooking zone with the power boost option as it operates at much higher power and there is a greater probability of overheating. -
Page 14: Timer Functions
Timer functions Cooking time can be set from 1 to 99 minutes. This function allows two operating modes: 1 Minute minder Press the timer/minute minder key (D) to activate the timer. "0" will appear on the timer display (L). Touch the (N) and (M) keys to set the time in the range from 1 to 99 minutes. -
Page 15: Pausing The Cooking Process With Stop&Go
• Select the desired timer display by pressing the (D) key (see section Changing the set cooking time). The set timer will be displayed and the indicator light for the relevant cooking zone will light • Touch the (M) key to set the value to "0" , or press the (N) and (M) key simultaneously to immediately reset the value to "0"... -
Page 16: Maximum Cooking Time
• "H" cooking zone is hot; How long this will be displayed depends on the power level and on how long a cooking zone was activated. When the "H" sign disappears, the cooking zone may still be hot in some cases (power failure, a hot pan left on the cooking zone etc.). -
Page 17: User Settings
User settings You can adjust the volume of the acoustic signal, duration of acoustic alarm, and automatic lock settings. The parameter settings menu can be activated within two minutes after the appliance is connected to the power mains, by touching and holding the pause (Stop&Go) key for around 3 seconds while the appliance is switched off. -
Page 18: Cleaning And Maintenance
Cleaning and maintenance After each use, wait for the glass ceramic surface to cool down and clean it. Otherwise, all remaining impurities will burn onto the hot surface the next time you use the hob. For regular maintenance of the glass ceramic hob, use special care products that create a protective film on the surface to prevent the dirt from sticking onto it. -
Page 19: Troubleshooting Table
Troubleshooting table During the warranty period, only a service center authorized by the manufacturer may carry out any repairs. Before making any repairs, make sure the appliance is disconnected from the power mains either by removing the fuse or by disconnecting the power plug from the wall outlet. Any unauthorized repairs of the appliance may result in electric shock and short circuit hazard;... -
Page 20: Installing A Built-In Hob
Installing a built-in hob Installation procedure • The worktop has to be completely level. • Suitably protect the edges of the cut aperture. • Connect the cooking hob to the mains power supply (see instructions for the connection of the cooking hob to mains power supply). - Page 21 30 cm 60 cm 80 cm...
-
Page 22: Air Vents In The Lower Kitchen Cabinet
Air vents in the lower kitchen cabinet INFORMATION! Normal operation of the induction cooking hob electronic components requires sufficient air circulation. Lower cabinet with a drawer • There must be an opening with a height of no less than 140 mm along the entire width of the cabinet in the cabinet rear wall. -
Page 23: Flush-Mount Installation Into The Worktop
Flush-mount installation into the worktop Appliances without faceted edges or decorative frames, are suitable for flush mounting. - Page 24 Installing the appliance The appliance may only be installed into a temperature- and water-resistant countertop, such as a countertop made of (natural) stone (marble, granite), or solid wood (the edges along the cut-out have to be sealed). When installing into a countertop made of ceramics, wood, or glass, a wooden sub-frame should be used.
- Page 25 Stone countertop 1. Countertop 2. Appliance 3. Slot Given the margin of error (tolerance) for the glass ceramic plate of the appliance, and the cutout in the countertop, the slot is adjustable (min.2 mm). Ceramic, wooden, or glass countertop 1. Countertop 2.
- Page 26 30 cm 60 cm 80 cm WARNING! If the oven is installed under a flush-mounted cooking hob, then the worktop thickness should be at least 40 mm.
-
Page 27: Fitting The Foam Gasket
Fitting the foam gasket INFORMATION! Some appliances come with the gasket already fitted! Before installing the appliance into a kitchen worktop, attach the foam gasket supplied with the appliance to the bottom side of the glass ceramic hob. Remove the protective film from the gasket. Attach the gasket to the bottom side of the glass (2 3 mm away from the edge). -
Page 28: Connecting The Cooking Hob To The Power Mains
Connecting the cooking hob to the power mains • Power mains protection must conform to the relevant regulations. • Before connecting the appliance, make sure the voltage specified on the rating plate conforms to the voltage of the power mains. •... - Page 29 Single phase connection (32 A) • Single-phase connection (1 1N, 220 240 V~ /50 60 Hz): Voltage between line and neutral conductor is 220 240 V~. Install a jumper between terminals 1 and 2, and between terminals 4 and 5. The circuit should be fitted with a fuse of at least 32 A.
- Page 30 Connecting the power cord (appliance with a power cord) • The appliance has to be hard-wired directly to the power mains. • Devices for disconnecting from the power mains have to comply with the relevant regulations. • Do not extend the power cord and do not lead it over sharp edges. •...
-
Page 31: Disposal
Disposal Our product packaging is made of environmentally friendly materials that can be recycled, disposed of, or destroyed without any hazard to the environment. To this end, packaging materials are labelled appropriately. The symbol on the product or its packaging indicates that the product should not be treated as normal household waste. - Page 32 785068-a3...
Need help?
Do you have a question about the E6431C and is the answer not in the manual?
Questions and answers