Table of Contents
Advertisement
Quick Links
Advertisement
Table of Contents

Related Manuals for Hisense HI6442BSCE


Summary of Contents for Hisense HI6442BSCE
- Page 1 Induction hob HI6442BSCE...
- Page 2 Warning notices: Before using this product, please read this manual carefully and keep it for future reference. The design and specifications are subject to change without prior notice for product improvement. Consult with your dealer or manufacturer for details. The diagram above is just for reference. Please take the appearance of the actual product as the standard.
-
Page 3: Table Of Contents
CONTENTS SAFETY INSTRUCTIONS ............. 4 SAFETY WARNINGS ..............5 2.1. Installation ................. 5 2.2. Operation and maintenance ............ 6 PRODUCT OVERVIEW .............. 10 3.1. Top View ................. 10 3.2. Control panel ..............10 OPERATION INSTRUCTIONS ............. 11 4.1. Touch Controls..............11 4.2. -
Page 4: Safety Instructions
1. SAFETY INSTRUCTIONS Intended use The following safety instructions are intended to prevent unforeseen hazards or damage caused by unsafe or incorrect operation of the appliance. Please check the packaging and the appliance on arrival to ensure that everything is intact to ensure safe operation. -
Page 5: Safety Warnings
2. SAFETY WARNINGS Your safety is important to us. Please read this information before using your cooktop. 2.1. Installation Electrical Shock Hazard • Disconnect the appliance from the mains before carrying out any work or maintenance on it. • Connection to a properly earthed mains supply is essential and mandatory. •... -
Page 6: Operation And Maintenance
• WARNING! If the surface is cracked, switch off the appliance to avoid the possibility of electric shock on hob surfaces made of glass ceramic or similar material that protect live parts • Metal objects such as knives, forks, spoons and lids should not be placed on the cooktop as they can become hot •... - Page 7 • Failure to observe this instruction can lead to burns and scalds. Cut Hazard • The razor-sharp blade of a cooktop scraper is exposed when the safety cover is retracted. Use with extreme care and always store safely and out of reach of children.
- Page 8 • This appliance is intended to be used in household and similar applications such as: staff kitchen areas in shops, offices and other working environments; farm houses; by clients in hotels, motels and other residential type environments; bed and breakfast type environments. •...
- Page 9 SPECIFICATIONS Cooking Hob HI6442BSCE Cooking Zones 4 Zones Supply Voltage 220-240V~ 380-415V 3N~ 50Hz or 60Hz Installed Electric Power 7400W Product Size D×W×H(mm) 590X520X53 Building-in Dimensions A×B (mm) 560X480 Weight and Dimensions are approximate. Because we continually strive to improve our products we may...
-
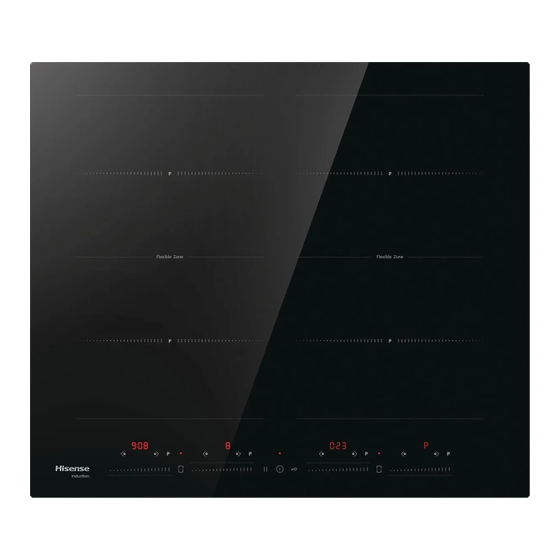
Page 10: Product Overview
3. PRODUCT OVERVIEW 3.1. Top View 1. Zone: 2200 / 3300 W (P) 2. Zone: 2200 / 3300 W (P) 3. Zone: 2200 / 3300 W (P) 4. Zone: 2200 / 3300 W (P) 5. Zone: 3300 / 3700 W (P) 6. -
Page 11: Working Theory
Working Theory Induction cooking is a safe, advanced, eicient, and economical cooking technology. It works by electromagnetic vibrations generating heat directly in the pan, rather than indirectly through heating the glass surface. The glass becomes hot only because the pan eventually warms it up. Iron pot magnetic circuit ceramic glass plate... - Page 12 • Move a magnet towards the base of the pan. If it is attracted, the pan is suitable for induction. • If you do not have a magnet: 1. Put some water in the pan you want to check. 2. If does not flash in the display and the water is heating, the pan is suitable.
-
Page 13: Pan Dimension
4.3. Pan Dimension The cooking zones are automatically adjusted to the diameter of the pan up to a certain limit. However, the base of the pan must have a minimum diameter corresponding to the cooking zone. To achieve the best efficiency of your hob, please place the pan in the middle of the cooking zone. -
Page 14: Finish Cooking
Finish Cooking • Move the slider of the corresponding burner all the way to the left, make sure that the display shows “0”, after 3s the hob is switched off and the display shows “-”. Power down • Turn the whole cooktop of by touching the ON/OFF control. •... -
Page 15: Flexible Area
• After the boost operating time has reached 10 minutes, boost mode is automatically terminated and the level before entering boost mode is reached again. If the level before entering boost mode is 0, it is set to level 9 for operation. NOTE •... -
Page 16: Locking The Controls
Locking the Controls • You can lock the controls to prevent unintentional use (e.g. if children accidentally switch on the cooking zones). • When the controls are locked, all controls except the ON/OFF button are deactivated. To lock the controls The digital will show “Lo”... - Page 17 Pause 1. When the cooking zones are in operation, touch the “ II ” button, all displays show “ ‘ ' ” and heating at level 2. At this moment, only the “ II ” and “ " controls can be operated. 2.
-
Page 18: Default Working Times
Confirmation Disconfirmation RF bunner is heated at LR bunner level Operate the RF slide. cancel the transfer and heat in the set Default Working Times The automatic switch-off is a safety protection function for your induction hob. It switches off automatically if you forget to switch off the hob. -
Page 19: Power Management Function
Power Management Function It is possible to set a maximum power consumption for the induction hob and choose between different power ranges. Induction hobs are able to limit themselves automatically to operate at lower power to avoid the risk of overloading To enter Power Management Function Switch off the appliance with pressing “power”... -
Page 20: Quick Start Guide
5. QUICK START GUIDE Be careful when deep-frying, as oil and fat heat up very quickly, especially when using PowerBoost. At extremely high temperatures, oil and fat will ignite spontaneously, posing a serious fire hazard. Cooking Tips • When the food is boiling, reduce the temperature. •... -
Page 21: Detection Of Small Articles
Detection of Small Articles If a pan of unsuitable size or a non-magnetic pan (e.g. aluminium) or another small item (e.g. knife, fork, key) is left on the cooktop, the hob automatically switches to standby after 1 minute. The fan continues to work for another 1 minute. -
Page 22: Product Installation
6. PRODUCT INSTALLATION Selection of Installation Equipment Cut out the work surface according to the dimensions shown in the drawing. A minimum clearance of 5 cm must be maintained around the hole for installation and use. Ensure that the thickness of the work surface is at least 30 mm. Choose a heat-resistant and insulated material for the work surface (wood and similar fibrous or hygroscopic materials must not be used as work surface material unless they are impregnated) to avoid electric shock and major deformation due to heat radiation from the heating plate. - Page 23 Ensure that the induction hob is well ventilated and that the air inlet and outlet are not blocked. To avoid accidental contact with the overheated bottom of the hob or an unforeseeable electric shock during work, it is necessary to install a wooden insert fixed with screws at a minimum distance of 15 mm from the bottom of the hob.
-
Page 24: Before Locating The Fixing Brackets
Before Locating the Fixing Brackets The appliance should be placed on a stable, smooth surface (use the packaging). Do not apply force to the controls protruding from the hob. Adjusting the Bracket Positio Secure the hob to the worktop by attaching 4 brackets to the underside of the hob before installation (see illustration). -
Page 25: Connecting The Hob To The Mains Power Supply
Connecting the Hob to the Mains Power Supply This hob may be connected to the mains power supply only by a suitably qualified person. Before connecting the hob to the mains supply, check that: 1. The domestic installation is suitable for the power consumed by the hob. 2. - Page 26 Flush-mount Installation Into The Worktop Appliances without faceted edges or decorative frames, are suitable for flush mounting. Installing the appliance The appliance may only be installed into a temperature- and water-resistant countertop, such as a countertop made of (natural) stone (marble, granite), or solid wood (the edges along the cut-out have to be sealed).
- Page 27 WARNING! Do not attempt to remove the appliance from the upper side of countertop. WARNING! The service department shall only be responsible for repair and servicing of the cooking hob. Consult your specialized kitchen equipment dealer regarding the re-installation (of the flush-mount) Stone countertop 1.
- Page 28 60cm WARNING! If the oven is installed under a flush-mounted cooking hob, then the worktop thickness should be at least 40 mm.
-
Page 29: Cleaning And Maintenance
7. CLEANING AND MAINTENANCE What? How? Important! • When the power to the cooktop is switched of, there will be no ‘hot surface’ indication but the cooking Everyday soiling on Switch the power to the cooktop of. zone may still be hot! Take extreme glass (fingerprints, care. -
Page 30: Troubleshooting
8. TROUBLESHOOTING The operation of your appliance can lead to faults and malfunctions. The following tables contain possible causes and instructions for rectifying an error message or fault. It is recommended that you read the following tables carefully to save time and money that a call to customer service can cost. -
Page 31: Failure Display And Inspection
Failure Display and Inspection The induction hob is equipped with a self-diagnostic function. This test allows the technician to check the function of various components without removing the hob or taking it off the Kitchen Worktop. Troubleshooting Problem Possible causes What to do! E1, E2, E7 Failure of the temperature sensor... - Page 32 Specific Failure & Solution Failure Problem Solution A Solution B Check that the plug is firmly seated in the socket No power supply. and that the socket is working The additional board and The LED does not light up the display board are Check the connection.
-
Page 33: Disposal And Recycling
Table. 5a Regulation (EU) No 66/2014 Information for domestic electric hobs Symbol Value Unit HI6442BSCE Model identification Built-in hob Type of hob 4 zones Number of cooking zones and/or areas...
Need help?
Do you have a question about the HI6442BSCE and is the answer not in the manual?
Questions and answers