
Related Manuals for Hisense I6421C


Summary of Contents for Hisense I6421C
- Page 1 DETAILED INSTRUCTIONS FOR USE OF GLASS CERAMIC BUILT-IN INDUCTION COOKING...
- Page 2 We thank you for your trust and the purchase of our appliance. This detailed instruction manual is supplied to make the use of this product easier. The instructions should allow you to learn about your new appliance as quickly as possible. Make sure you have received an undamaged appliance.
-
Page 3: Table Of Contents
CONTENTS INTRODUCTION IMPORTANT SAFETY INSTRUCTIONS BUILT-IN GLASS CERAMIC INDUCTION COOKING HOB Technical specifications PREPARING THE APPLIANCE FOR BEFORE USING THE APPLIANCE FOR THE FIRST TIME THE FIRST USE COOKING HOB 10 INDUCTION COOKING SURFACE OPERATION 10 Glass ceramic cooking surface Power saving tips Pan recognition 12 Induction cooking zone operating principle... -
Page 4: Important Safety Instructions
IMPORTANT SAFETY INSTRUCTIONS CAREFULLY READ THE INSTRUCTIONS AND SAVE THEM FOR FUTURE REFERENCE. This appliance can be used by children aged from 8 years and above and persons with reduced physical, sensory or mental capabilities or lack of experience and knowledge if they have been given supervision or instruction concerning use of the appliance in a safe way and understand the hazards involved. - Page 5 remove the fuse or trip the main circuit breaker so that the appliance is fully isolated from the power mains. Means for disconnection must be incorporated in the fixed wiring in accordance with the wiring rules. Do not place objects like knives, forks, spoons, or lids on the induction cooking zone as they can become very hot.
- Page 6 The appliance is intended for household Using the glass ceramic hob as a storage use. Do not use it for any other purpose, area may result in scratches or other e.g. for room heating. damage to it. Never heat food in aluminium foil or in plastic containers on the cooking The appliance may only be connected to hob.
-
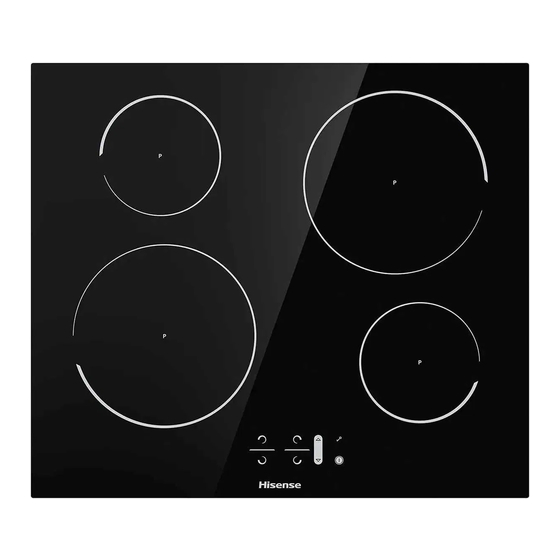
Page 7: Built-In Glass Ceramic Induction Cooking Hob
BUILT-IN GLASS CERAMIC INDUCTION COOKING HOB (DESCRIPTION OF EQUIPMENT AND FUNCTIONS – DEPENDING ON THE MODEL) Since the appliances for which these instructions were drawn up may have different equipment, some functions or equipment may be described in the manual that may not be present in your appliances. -
Page 8: Technical Specifications
TECHNICAL SPECIFICATIONS (DEPENDING ON THE MODEL) A Serial number B Code/ID C Type D Brand E Model F Technical data G Compliance symbols The rating plate with basic information on the appliance is located on the bottom side of the cooking hob. Information on appliance type and model can be found on the warranty sheet. -
Page 9: Before Using The Appliance For The First Time
BEFORE USING THE APPLIANCE FOR THE FIRST TIME If your hob has a glass ceramic surface, clean it with a damp cloth and some washing- up liquid. Do not use aggressive cleaners, such as abrasive cleaners that could cause scratches, abrasive dishwashing sponges, or stain removers. During initial use, characteristic "new appliance smell"... -
Page 10: Induction Cooking Surface
INDUCTION COOKING SURFACE GLASS CERAMIC COOKING SURFACE - The hob is resistant to temperature changes. - The hob is also impact-resistant. - Using the glass ceramic hob as a storage area may result in scratches or other damage to it. - Do not use the glass ceramic hob if it is cracked or broken. -
Page 11: Power Saving Tips
POWER SAVING TIPS - When purchasing cookware, note that the diameter indicated on the pan usually pertains to the upper edge or the lid, which is normally larger than the diameter of the pan bottom. - If a dish takes a long time to cook, use a pressure cooker. Make sure there is always suffi cient liquid in the pressure cooker. -
Page 12: Induction Cooking Zone Operating Principle
INDUCTION COOKING ZONE OPERATING PRINCIPLE - The cooking hob is fi tted with highly effi cient induction cooking zones. The heat is generated directly in the bottom of the pan where it is needed the most. This avoids any losses through the glass ceramic surface. -
Page 13: Induction Cookware
INDUCTION COOKWARE COOKWARE SUITABLE FOR AN INDUCTION HOB - The induction will work correctly if you use suitable cookware. - Make sure the pot or pan is in the middle of the cooking zone. - Suitable cookware: cookware made of steel, enamel-coated steel pans, or cast iron pans. -
Page 14: Operating The Cooking Hob
OPERATING THE COOKING HOB CONTROL UNIT (depending on the model) Settings sensor keys: Hob on/off key Lock/child lock key Power and timer decrease key (–) Power and timer increase key (+) Cooking zone on key Decimal point indicating that timer function is activated Power level displays... -
Page 15: Switching On The Hob
SWITCHING ON THE HOB Touch the on/off key (A) and hold it for 1 second to switch on the hob. An acoustic signal will be sounded and the decimal point will light up on all display units. If no cooking zone is switched on in 10 seconds, the cooking hob will power off. A short beep will be heard. -
Page 16: Power Zone With The Rapid Boil Option
POWER ZONE WITH THE RAPID BOIL OPTION Select any cooking zone. Touch the (C) key. A short acoustic signal will be emitted and "9" will appear on the display unit. Touch the D key and P will appear on the display unit. The cooking zone will operate at maximum power for 10 minutes;... -
Page 17: Child Lock
CHILD LOCK Child lock may be activated on the hob to prevent the appliance from being switched on easily and quickly and to prevent any changes during operation. Locking the cooking hob controls Touch the lock/child lock key (B) and hold it for 1 second. -
Page 18: Timer Functions
TIMER FUNCTIONS This function allows setting the cooking time for the selected cooking zone on which a power level has already been set. When the time expires, the cooking zone is switched off automatically. Cooking time can be set from 1 to 99 minutes. The program timer can be set for all cooking zones at all power levels. -
Page 19: Switching Off A Cooking Zone
SWITCHING OFF A COOKING ZONE To switch off a cooking zone (E), use the relevant (C) key to set the power level to "0". To quickly switch off the cooking zone, touch the relevant (C) and (D) keys simultaneously. You will hear a short beep, and "0"... -
Page 20: Switching Off The Entire Cooking Hob
SWITCHING OFF THE ENTIRE COOKING Touch the on/off key (A) and hold it for 1 second to switch off the hob. An acoustic signal will be emitted and all cooking zones will be switched off. AUTOMATIC SWITCH OFF If the keys are activated for too long during cooking (e.g. due to spilt liquid or an object placed over the sensor keys), the cooking hob will be switched off after 10 seconds. -
Page 21: Maintenance & Cleaning
MAINTENANCE & CLEANING Be sure to unplug the appliance from the power supply and wait for the appliance to cool down. Children should not clean the appliance or perform maintenance tasks without proper supervision. After each use, wait for the glass ceramic surface to cool down and clean it. Otherwise, all remaining impurities will burn onto the hot surface the next time you use the hob. - Page 22 Hold the scraper at the correct angle (45° to 60°). Gently press the scraper against the glass and slide it over the signage to remove the dirt. Make sure the plastic handle of the scraper (in some models) does not come into contact with a hot cooking zone.
-
Page 23: Troubleshooting Table
TROUBLESHOOTING TABLE NOISE AND ITS CAUSES DURING INDUCTION COOKING Noises and sounds Cause Solution "Induction technology is based on This is normal and it is not a Inductiongenerat- the properties of some metals under result of any malfunction. ed operating noise electromagnetic effect. - Page 24 SAFETY FUNCTIONS AND ERROR DISPLAY The cooking hob is fitted with overheating sensors. These sensors can automatically switch off any cooking zone or the entire hob temporarily. Error, possible cause, solution • Continuous beep and »–« fl ashing on the display. - Water spilt over sensor surface, or an object placed over the sensors.
-
Page 25: Installing A Built-In Hob
INSTALLING A BUILT-IN HOB 595-600 520-525 min 20 58-63 min 40 495-497 min 600 min 50 560-562 - Use of solid wood corner trims on worktops behind the cooking zone is only allowed if the clearance between the trim and the cooking hob is no smaller than indicated on the installation plans. - Page 26 AIR VENTS IN THE LOWER KITCHEN CABINET - Normal operation of the induction cooking hob electronic components requires suffi cient air circulation. A Lower cabinet with a drawer - There must be an opening with a height of no less than 140 mm along the entire width of the cabinet in the cabinet rear wall.
- Page 27 B Lower cabinet with an oven - Installing an oven under the induction hob is possible for oven types EVP4, EVP2, EVP3 with a cooling fan. Before installing the oven, the kitchen cabinet rear wall has to be removed in the area of the opening for installation. In addition, there should be an opening of at least 6 mm in the front side, along the entire width of the cupboard.
- Page 28 FLUSH-MOUNT INSTALLATION INTO THE WORKTOP Appliances without faceted edges or decorative frames are suitable for flush mounting. brushed edge faceted edge decorative frame 1. Installing the appliance The appliance may only be installed into a temperature- and water-resistant countertop, such as a countertop made of (natural) stone (marble, granite), or solid wood (the edges along the cut-out have to be sealed).
- Page 29 1. Silicone sealant, 2. Sealing tape Pay particular attention to built-in dimensions with (natural) stone countertops. When choosing the silicone sealant, observe the countertop material and consult the countertop manufacturer. Use of inappropriate silicone sealants can result in permanent discolouration of some parts. 2.
- Page 30 Ceramic, wooden, or glass countertop 1 - Countertop 2 - Appliance 3 - Slot 4 - Wooden frame, thickness 16 mm. Given the margin of error (tolerance) for the glass ceramic plate of the appliance, and the cut-out in the countertop, the slot is adjustable (min. 2mm). Install the wooden frame 5.5mm below the upper edge of the countertop (see figure).
- Page 31 FLUSH-MOUNT INSTALLATION INTO THE WORKTOP - FLUSH MOUNT (depending on the model) min 20 58 -63 min 40 524-525 min 600 495-497 min 50 560-562 599-600 If the oven is installed under a flush-mounted cooking hob, then the worktop thickness should be at least 45 mm.
- Page 32 FITTING THE FOAM GASKET Some appliances come with the gasket already fitted! Before installing the appliance into a kitchen worktop, attach the foam gasket supplied with the appliance to the bottom side of the glass ceramic hob. - Remove the protective fi lm from the gasket. - Attach the gasket to the bottom side of the glass (2–3 mm away from the edge).
-
Page 33: Connecting The Cooking Hob To The Power Mains
CONNECTING THE COOKING HOB TO THE POWER MAINS - Power mains protection must conform to the relevant regulations. - Before connecting the appliance, make sure the voltage indicated on the rating plate conforms to the voltage in your power mains. - There should be a switching device in the electrical installation that can disconnect all poles of the appliance form the power mains, with a minimum clearance of 3 mm between the contacts when open. - Page 34 CONNECTION DIAGRAM: Jumpers (connecting bridges) are placed in the dedicated slot on the clamp. POWER CORD The following may be used for connection: • PVC insulated connection cables type H05 VV-F or H05V2V2-F with yellow-and-green protective conductor, or other equivalent or superior cables.
-
Page 35: Disposal
DISPOSAL Packaging is made of environmentally friendly materials that can be recycled, disposed of, or destroyed without any hazard to the environment. To this end, packaging materials are labelled appropriately. The symbol on the product or its packaging indicates that the product should not be treated as normal household waste. - Page 36 BI4 7G en (10-18)
Need help?
Do you have a question about the I6421C and is the answer not in the manual?
Questions and answers