
Related Manuals for New England Arbors 7.5 x 7.5 Cardiff Pergola


Summary of Contents for New England Arbors 7.5 x 7.5 Cardiff Pergola
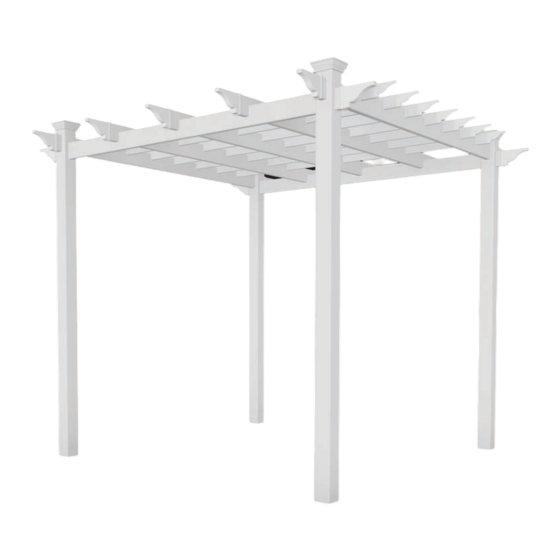
- Page 1 7.5 x 7.5 Cardiff Pergola A S S E M B L Y G U I D E www.newenglandarbors.com www.newenglandarbors.co.uk Ver 1.3-020518...
- Page 2 Ta b l e o f Co n t e n t s PAGE Cardiff Pergola Introduction & Overview……………………………..........………..Pergola Materials Overview……………………….
- Page 3 I n t r o d u c t i o n & O ve r v i e w Restriction of Use This product is not designed to carry additional weight loads such as swings, people or other Getting Started objects.
- Page 4 Cardiff Pergola Materials Overview 1. Post Caps (4) - 10735-1 2. Posts (4) - 11123 3. Main Support Beams (2) - 11122 4. Rafters (5) - 11124 5. Beam and Rafter Decorative End Caps (14) - 10700-1 6. Shade Slats (7) - 11125 7.
- Page 5 Cardiff Pergola Materials Breakdown www.newenglandarbors.com www.newenglandarbors.co.uk Check Boxes (Total of 4) for These Contents In the event of missing or defective parts please call our customer service department at 1 800 282 9346 (Mon. to F ri. 8:00 AM to 4:00 PM EST) (UK Tel: (44) 2038 687160 - Mon to Fri.
- Page 6 Pergola Additional Materials List Hardware (in plastic bag) All Screws Included with this Kit are Self-Auguring. A. 1 1/2” (38 mm) Self-Auguring Stainless Steel Screws (35) - 20005 (to lock Shade Slats to Rafters) B. 2 1/2” (64 mm) Self-Auguring Stainless Steel Screws (10) - 20009-1 (to lock Rafters to Main Support Beams) C.
- Page 7 Wood Post Layout & Installation for In-Ground Application www.newenglandarbors.com www.newenglandarbors.co.uk Overhead View This pergola can also be installed on a pre-existing wood or concrete surface using the steel post base kit and a 4x4 wood post (sold separate). See page eight for more details. 82 1/2 in (209.6 cm) Post location and placement is the most critical step in the...
- Page 8 O P T I O N A L S T E P www.newenglandarbors.com www.newenglandarbors.co.uk Wood Post Layout & Installation Using Steel Post Base Overhead View for Concrete or Wood Surface 86 in 218.4 cm Measure and mark out the location of the steel post bases using measurements shown aside.
- Page 9 S T E P T H R E E www.newenglandarbors.com Vinyl Column Assembly & Installation www.newenglandarbors.co.uk Over Wood Posts Using a step ladder guide the top vinyl columns over the wood 4x4 posts down into position. *Ensure the holes at the top of the posts are orientated correctly for future beam and rafter placement as per illustration.
- Page 10 At this stage, the columns should be properly installed as per the following illustration, with the columns 82” (208 cm) apart. www.newenglandarbors.com www.newenglandarbors.co.uk 82 in 208 cm 82 in 208 cm S T E P F O U R Rafters Installation With a helper, slide the two rafters through the TOP holes in the posts as shown.
- Page 11 S T E P F I V E www.newenglandarbors.com www.newenglandarbors.co.uk Main Support Beams Installation With a helper, slide the two main support beams through the bottom holes on the posts as shown. The beams should overhang the posts equally (1.5 inches, 3.8 cm). Lock the main support beams and two outside rafters to the posts using eight 3in (76 mm) screws for every post as shown.
- Page 12 S T E P S I X www.newenglandarbors.com www.newenglandarbors.co.uk Rafters Installation Place the remaining three rafters onto the beams as shown. The spacing between the rafters should be 20 inches (50.8 cm), but don’t worry for now as the shade slat installation will automatically space them out accordingly.
- Page 13 S T E P E I G H T www.newenglandarbors.com www.newenglandarbors.co.uk Shade Slats Installation With a helper, place two shade slats at each end, 9 1/2” (24.13 cm) away from the posts as shown aside. The notches in the shade slats will spread the rafters apart accordingly.
- Page 14 S T E P E I G H T ( C O N T ’ D ) www.newenglandarbors.com www.newenglandarbors.co.uk Lock the outer two shade slats onto the rafters using a 1 1/2 in (38 mm) screw for each intersection between the shade slat and rafter as shown.
- Page 15 S T E P N I N E www.newenglandarbors.com www.newenglandarbors.co.uk Decorative End Caps and Post Caps Installation Apply a small bead of vinyl glue to the inside of the decorative end caps and attach them to the beams and rafters as shown. Hold the end cap in place for 30 seconds to allow the glue to set.
Need help?
Do you have a question about the 7.5 x 7.5 Cardiff Pergola and is the answer not in the manual?
Questions and answers