Table of Contents
Advertisement
Quick Links
Advertisement
Table of Contents

Related Manuals for Electrolux LKR64000BX


Summary of Contents for Electrolux LKR64000BX
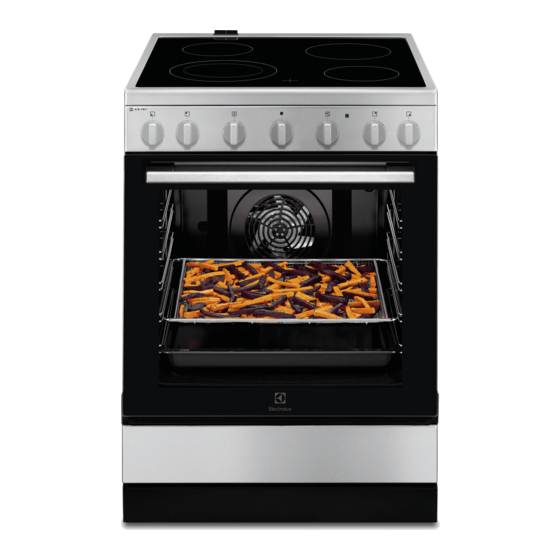
- Page 1 LKR64000BX Cooker User Manual...
-
Page 2: Table Of Contents
13. ENVIRONMENTAL CONCERNS..............31 WE’RE THINKING OF YOU Thank you for purchasing an Electrolux appliance. You’ve chosen a product that brings with it decades of professional experience and innovation. Ingenious and stylish, it has been designed with you in mind. So whenever you use it, you can be safe in the knowledge that you’ll get great results every time. - Page 3 ENGLISH responsible for any injuries or damage that are the result of incorrect installation or usage. Always keep the instructions in a safe and accessible location for future reference. 1.1 Children and vulnerable people safety This appliance is not intended for use by persons •...
- Page 4 This appliance is not intended to be used on ships, • boats or vessels. Do not install the appliance behind a decorative door • in order to avoid overheating. Do not install the appliance on a platform. • Do not operate the appliance by means of an external •...
-
Page 5: Safety Instructions
ENGLISH WARNING: Ensure that the appliance is switched off • before replacing the lamp to avoid the possibility of electric shock. If the mains power supply cable is damaged, it must • be replaced by the manufacturer, its Authorised Service Centre or similarly qualified persons to avoid an electrical hazard. - Page 6 2.2 Electrical Connection • Do not change the specification of this appliance. WARNING! • Make sure that the ventilation Risk of fire and electric openings are not blocked. shock. • Do not let the appliance stay unattended during operation.
- Page 7 ENGLISH – do not keep moist dishes and decrease the condensation operate food in the appliance after you the appliance for 10 minutes before finish the cooking. cooking. – be careful when you remove or • Clean the appliance with a moist soft install the accessories.
-
Page 8: Installation
• Remove the door catch to prevent children or pets from becoming trapped in the appliance. 3. INSTALLATION 3.3 Levelling of the appliance WARNING! Refer to Safety chapters. 3.1 Technical data Dimensions Height 847 - 867 mm Width 596 mm... - Page 9 ENGLISH 3.5 Electrical installation WARNING! The manufacturer is not responsible if you do not follow the safety precautions from Safety chapters. This appliance is supplied without a main plug or a main cable. Applicable types of cables for different phases: CAUTION! Make sure you install the Phase...
-
Page 10: Product Description
4. PRODUCT DESCRIPTION 4.1 General overview Knob for the heating functions Knob for the Minute Minder Control knob (for the temperature) Temperature indicator / symbol Knobs for the hob Heating element Lamp Shelf support, removable Shelf positions 4.2 Hob overview... -
Page 11: Hob - Daily Use
ENGLISH Refer to "Care and cleaning" chapter. 3. Set the function . Set the maximum temperature. Clean the oven and the accessories 4. Let the oven operate for 15 minutes. before the first use. Put the accessories and the removable 5. -
Page 12: Hob - Hints And Tips
The indicator may also appear: • when the hob is deactivated but the • for the neighbouring cooking zones cooking zone is still hot. even if you are not using them, The indicator disappears when the • when hot cookware is placed on cold cooking zone has cooled down. -
Page 13: Hob - Care And Cleaning
ENGLISH Heat setting Use to: Time Hints (min) Keep cooked food warm. as nec‐ Put a lid on the cookware. essary 1 - 2 Hollandaise sauce, melt: but‐ 5 - 25 Mix from time to time. ter, chocolate, gelatine. Solidify: fluffy omelettes, 10 - 40 Cook with a lid on. -
Page 14: Oven - Daily Use
After cleaning, wipe the with vinegar and clean the glass hob dry with a soft cloth. surface with a cloth. • Remove shiny metallic discoloration: use a solution of water 9. OVEN - DAILY USE 9.1 Oven functions WARNING! Refer to Safety chapters. - Page 15 ENGLISH Symbol Oven function Application Moist Fan Baking This function was used to comply with the energy efficiency class and eco design (according to EU 65/2014 and EU 66/2014). Tests according to: IEC/EN 60350-1 . The oven door should be closed dur‐ ing cooking so that the function is not interrupted and to ensure that the oven operates with the highest energy effi‐...
-
Page 16: Oven - Hints And Tips
Wire shelf and the deep pan together: Push the deep pan between the guide • All accessories have bars of the shelf support and the wire small indentations at the shelf on the guide bars above. top of the right and left side to increase safety. - Page 17 ENGLISH 10.2 Tips on baking Baking results Possible cause Remedy The bottom of the cake The shelf position is incor‐ Put the cake on a lower shelf. is not baked sufficient‐ rect. The cake sinks and The oven temperature is Next time set slightly lower becomes soggy or too high.
- Page 18 Cakes / pastries / breads on baking trays Food Temperature Time (min) Shelf posi‐ (°C) tion Cake with crumble topping (dry) 150 - 160 20 - 40 Fruit flans (made with yeast 35 - 55 dough / sponge mixture)
- Page 19 ENGLISH Multileveled Baking Cakes / pastries / breads on baking trays Food Temperature Time (min) Shelf posi‐ (°C) tion 2 positions Cream puffs / Eclairs 25 - 45 2 / 4 160 - 180 Dry streusel cake 150 - 160 30 - 45 2 / 4 1) Preheat the oven.
- Page 20 Food Temperature Time (min) Shelf po‐ (°C) sition Apple pie (2tins Ø20cm, diagonally 60 - 90 1 - 2 off set) Savoury flan (e. g, quiche lorraine) 180 - 220 35 - 60 Cheesecake 160 - 180 60 - 90 1 - 2 1) Preheat the oven.
- Page 21 ENGLISH Food Temperature Time (min) Shelf posi‐ (°C) tion Short bread / Pastry Stripes 20 - 35 Biscuits made with sponge dough 170 - 190 20 - 30 Pastries made with egg white, mer‐ 80 - 100 120 - 150 ingues Macaroons 120 - 130...
- Page 22 Food Temperature Time (min) Shelf posi‐ (°C) tion Swiss Flan 170 - 200 35 - 55 1 - 2 Cheesecake 140 - 160 60 - 90 1 - 2 Apple cake, covered 150 - 170 50 - 60 1 - 2...
- Page 23 ENGLISH Food Temperature Time (min) Shelf posi‐ (°C) tion Whole fish 200 g 25 - 35 Fish fillet 300 g 25 - 35 Meat Food Temperature Time (min) Shelf posi‐ (°C) tion Meat in pouch 250 g 25 - 35 Meat skewers 500 g 30 - 40 Small baked items...
- Page 24 10.8 Conventional Roasting Beef Food Quantity Temperature Time (min) Shelf (°C) position Pot roast 1 - 1.5 kg 200 - 230 105 - 150 Roast beef or fillet: per cm. of thick‐ 6 - 8 230 - 250 rare ness Roast beef or fillet: me‐...
- Page 25 ENGLISH Food Quantity Tempera‐ Time (min) Shelf po‐ ture (°C) sition Half chicken 400 - 500 g 220 - 250 35 - 50 each Chicken, poulard 1 - 1.5 kg 220 - 250 50 - 70 Duck 1.5 - 2 kg 210 - 220 80 - 100 Goose...
- Page 26 Poultry Food Quantity Tempera‐ Time Shelf po‐ ture (°C) (min) sition Poultry portions 200 - 250 g 200 - 220 30 - 50 each Half chicken 400 - 500 g 190 - 210 35 - 50 each Chicken, poulard 1 - 1.5 kg...
-
Page 27: Oven - Care And Cleaning
ENGLISH Vegetables Shelf position Temperature Food Time (h) 1 posi‐ 2 posi‐ (°C) tion tions Beans 60 - 70 6 - 8 2 / 4 Peppers 60 - 70 5 - 6 2 / 4 Vegetables for sour 60 - 70 5 - 6 2 / 4 Mushrooms... - Page 28 Clean all accessories after each use and let them dry. Use only a mi‐ crofibre cloth with warm water and a mild detergent. Do not clean the accessories in a dishwasher (except from AirFry tray). Do not clean the non-stick accessories and AirFry tray using abrasive Accessories cleaner or sharp-edged objects.
- Page 29 ENGLISH When the cleaning procedure is 3. Put a cloth on the bottom of the completed, insert the oven door in the cavity. opposite sequence. Make sure that you The back lamp hear a click when you insert the door. Use force if necessary.
-
Page 30: Troubleshooting
12. TROUBLESHOOTING WARNING! Refer to Safety chapters. 12.1 What to do if... Problem Possible cause Remedy You cannot activate the The appliance is not con‐ Check if the appliance is appliance. nected to an electrical sup‐ correctly connected to the ply or it is connected incor‐... -
Page 31: Environmental Concerns
ENGLISH 13. ENVIRONMENTAL CONCERNS appliances marked with the symbol Recycle materials with the symbol with the household waste. Return the Put the packaging in relevant containers product to your local recycling facility or to recycle it. Help protect the contact your municipal office. environment and human health by recycling waste of electrical and electronic appliances. - Page 32 www.electrolux.com/shop...
Need help?
Do you have a question about the LKR64000BX and is the answer not in the manual?
Questions and answers
The left side is not heating , right side and oven are working normal
The left side of the Electrolux LKR64000BX may not be heating due to one of the following reasons:
1. The appliance is not connected correctly to the electrical supply. Check the connection.
2. A fuse may be blown. Check and replace the fuse if necessary. If it blows repeatedly, contact a qualified electrician.
3. If the left side has a dual zone and the outer ring is not heating, ensure the inner ring is activated first.
If these steps do not resolve the issue, it may require service by an authorized technician.
This answer is automatically generated