Advertisement
Available languages
Available languages
Quick Links
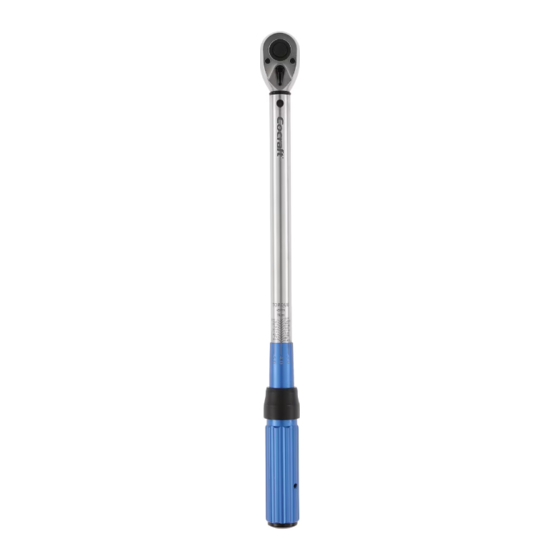
1/2" Torque Wrench
Art.no 41-2680
Model GS150W2
Please read the entire instruction manual before using the product and
then save it for future reference. We reserve the right for any errors in
text or images and any necessary changes made to technical data.
If you experience any technical problems or have questions, please
contact our customer service team (address on the back).
Safety
• Always release the spring tension after use by setting the torque
wrench to its lowest torque setting.
• Never use the torque wrench to undo nuts, bolts or other fasteners
– exceeding the maximum torque limit whilst loosening a fastener
could damage the wrench and affect its accuracy for future use.
• Never continue tightening once the desired torque setting has
been reached.
• Never set the torque wrench to a setting higher or lower than
the working torque range of the wrench (40–220 Nm).
• The torque wrench should be treated as a precision instrument.
Handle it carefully and store it in a clean, dry place where there is
no risk of it sustaining damage.
Product description
7
1
2
1. Socket release button – depress
to attach/detach a socket/adapter/
extension bar.
2. Forward/Reverse switch to select clock
wise or anticlockwise torque control.
3. Scale in Nm (Newton metres)
4. Locking ring – pull down to unlock
the handle.
5. Handle – twist to set the torque.
6. 125 mm extension bar
7. 1/2" (F) to 3/8" (M) adapter
8. Minor scale
9. Major scale
10. Centre line
11. Top of the handle
UNITED KINGDOM • www.clasohlson.co.uk
Instructions for use
• Always refer to the manufacturer's recommended torque settings
and tightening sequences.
• Make sure that the threading on the fastener to be tightened is free
from dirt and other contaminates.
• Tighten the fastener in a smooth and continuous motion until
a click is heard and felt. At low torque settings, the click can be felt
less noticeably than at high torque settings. Test using the wrench
on both low and high torque settings to familiarise yourself with
the feel of the different clicks.
Example: Setting a torque of 125 Nm
N.m
220
210
200
190
180
170
160
150
140
130
120
6
Pull the locking ring (4) down while
twisting the handle. Twist the handle
3
4
5
until the top edge (11) is in line with
the 120 Nm mark on the major
9.0
scale (9). Make sure that the 0.0
0.0
1.0
mark on the minor scale (8) is in line
10
with the centre line (10).
Note:
220
210
200
Always release the spring tension after use by setting the torque
190
180
170
160
wrench to its lowest torque setting.
150
140
130
120
110
9
100
90
80
70
Cleaning and care
60
50
40
11
Cleaning
8
Wipe the torque wrench clean using a clean dry cloth. Never immerse
the wrench in any kind of cleaning fluid, doing so will affect
the lubrication of the internal mechanism.
Calibration
In order to ensure the correct operation and accuracy of the torque
wrench, it should be calibrated regularly. We recommend that the wrench
is calibrated at least every 12 months or more frequently depending on
how often it is used.
Responsible disposal
The product should be disposed of in accordance with local regulations.
If you are unsure how to proceed, contact your local council.
Specifications
Working range
Accuracy
N.m
Square drive
220
210
200
190
180
170
Length
160
150
140
130
120
Conversion table
From
cNm
cNm
cNm
Twist the handle five
graduations on the minor
Nm
scale until the centre line
is aligned with the 5.0 Nm
Nm
mark.
Nm
Nm
Nm
kgcm
kgcm
kgcm
kgm
kgm
kgm
40–220 Nm
3 %
1/2"
510 mm
To
Multiply by
inlb
0.0885
ftlb
0.00737
Nm
0.01
inlb
8.85074
ftlb
0.73756
kgcm
10.1972
kgm
0.10197
cNm
100
inlb
0.86796
ftlb
0.07233
Nm
0.09806
inlb
86.7961
ftlb
7.23301
Nm
9.80665
Advertisement

Subscribe to Our Youtube Channel
Related Manuals for Cocraft GS150W2


Summary of Contents for Cocraft GS150W2
- Page 1 In order to ensure the correct operation and accuracy of the torque • Always refer to the manufacturer’s recommended torque settings Art.no 41-2680 Model GS150W2 wrench, it should be calibrated regularly. We recommend that the wrench and tightening sequences. is calibrated at least every 12 months or more frequently depending on •...
- Page 2 Avfallshantering • Följ alltid tillverkarens rekommendationer om vridmoment och När du ska göra dig av med produkten ska detta ske enligt lokala Art.nr 41-2680 Modell GS150W2 åtdragningsföljd. föreskrifter. Är du osäker på hur du ska gå tillväga, kontakta din kommun.
- Page 3 • Følg alltid produsentens anbefalinger vedr. dreiemoment og Når produktet skal kasseres skal det skje i henhold til lokale forskrifter. Art.nr. 41-2680 Modell GS150W2 strammesekvens. Er du usikker på hvordan du skal gå frem, kontakt din kommune. • Sørg for at gjengene på festedetaljene som skal trekkes til er frie Les gjennom hele bruksanvisningen før produktet tas i bruk og ta vare...
- Page 4 Kierrättäminen • Noudata aina valmistajan suosituksia koskien vääntömomenttia ja Kierrätä tuote asianmukaisesti, kun poistat sen käytöstä. Tuotenro 41-2680 Malli GS150W2 kiristysjärjestystä. Tarkempia kierrätysohjeita saat kuntasi jäteneuvonnasta. • Varmista, että kiristettävien pulttien kierteissä ei ole likaa tai muita Lue koko käyttöohje ja säästä se tulevaa käyttöä varten. Pidätämme epäpuhtauksia.
Need help?
Do you have a question about the GS150W2 and is the answer not in the manual?
Questions and answers