Table of Contents
Advertisement
Quick Links
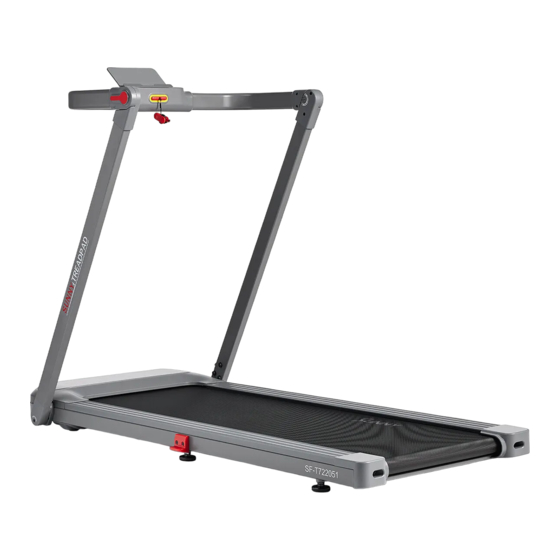
HELIUS LITE SMART BRUSHLESS
MOTOR TREADPAD TREADMILL
SF-T722051
USER MANUAL
IMPORTANT! Please retain owner's manual for maintenance and adjustment instructions. Your
satisfaction is very important to us, PLEASE DO NOT RETURN UNTIL YOU HAVE
CONTACTED US: support@sunnyhealthfitness.com or 1-877-90SUNNY (877-907-8669).
Advertisement
Table of Contents

Related Manuals for Sunny Health & Fitness SF-T722051


Summary of Contents for Sunny Health & Fitness SF-T722051
- Page 1 HELIUS LITE SMART BRUSHLESS MOTOR TREADPAD TREADMILL SF-T722051 USER MANUAL IMPORTANT! Please retain owner’s manual for maintenance and adjustment instructions. Your satisfaction is very important to us, PLEASE DO NOT RETURN UNTIL YOU HAVE CONTACTED US: support@sunnyhealthfitness.com or 1-877-90SUNNY (877-907-8669).
-
Page 2: Important Safety Instructions
IMPORTANT SAFETY INSTRUCTIONS When using electrical appliances, basic precautions should always be followed, including the following: Read all instructions before using this treadmill. DANGER – To reduce the risk of electric shock: 1. Always unplug this appliance from the electrical outlet immediately after using and before cleaning. WARNING –... -
Page 3: Important Safety Information
IMPORTANT SAFETY INFORMATION We thank you for choosing our product. To ensure your safety and health, please use this equipment correctly. It is important to read this entire manual before assembling and using the equipment. Safe and effective use can only be achieved if the equipment is assembled, maintained and used properly. It is your responsibility to ensure that all users of the equipment are informed of all warnings and precautions. - Page 4 IMPORTANT OPERATING INSTRUCTIONS 1. Insert the power plug directly into the socket. 2. Read the manual before operating the equipment. 3. Changes in speed do not occur immediately. Set your desired speed using the adjustment keys on the main console. The speed will increase gradually. 4.
-
Page 5: Pre-Assembly Check List
PRE-ASSEMBLY CHECK LIST Before you start to assemble, please make sure all parts are included. Description Spec. Qty. Main Frame Tablet Holder Remote Control Safety Key Lubricant Oil Manual Power Wire Thank You Card Allen Wrench Spanner w/ Screw Driver S=13、14、15 Battery... - Page 6 ASSEMBLY INSTRUCTIONS We value your experience using Sunny Health and Fitness products. For assistance with parts or troubleshooting, please contact us at support@sunnyhealthfitness.com or 1-877-90SUNNY (877-907-8669). STEP 1: Open the carton box and remove contents. Place the Main Frame (No. A) on level ground, ensure that you have a work area that is clean and has adequate space.
- Page 7 We value your experience using Sunny Health and Fitness products. For assistance with parts or troubleshooting, please contact us at support@sunnyhealthfitness.com or 1-877-90SUNNY (877-907-8669). STEP 3: Lift the Console Base Bracket (No. A04) along with Left & Right Upright Tubes (No. A02 &...
- Page 8 We value your experience using Sunny Health and Fitness products. For assistance with parts or troubleshooting, please contact us at support@sunnyhealthfitness.com or 1-877-90SUNNY (877-907-8669). STEP 5: Adjust the Console Base Bracket (No. A04) downward (in the direction specified by the arrows on the diagram to the left).
- Page 9 We value your experience using Sunny Health and Fitness products. For assistance with parts or troubleshooting, please contact us at support@sunnyhealthfitness.com or 1-877-90SUNNY (877-907-8669). STEP 7: Insert the pin end of Safety Key (No. C24) into the Console Front Cover (No. C13). The assembly is complete! IMPORTANT NOTE! You will need to lubricate your...
-
Page 10: Lubricating The Treadmill
LUBRICATING THE TREADMILL IMPORTANT NOTE: You will need to lubricate your treadmill before the first use. RUNNING BELT & TREADMILL LUBRICANT: Lubricating the Running Board (No. E18) and Running Belt (No. C22) is essential as the friction affects the life span and operations of the treadmill. Inspect the Running Belt (No. C22) and Running Board (No. - Page 11 HOW TO FOLD THE MACHINE STEP 1: Pull out the Tablet Holder Fixed Base (No. C19) from Console Rear Cover (No. C14). STEP 2: Loosen the 2 Puller Bolts B (No. B10) inside the Console Base Bracket (No. A04) clockwise by using Allen Wrench (No. B03). Lift the Console Base Bracket (No.
- Page 12 STEP 3: Support the Left & Right Upright Tubes (No. A02 & No. A03) with your hands to prevent them from falling. Loosen the 2 Puller Bolts A (No. B09) inside Left & Right Upright Tubes (No. A02 & No. A03) Allen counter-clockwise...
-
Page 13: How To Move The Machine
HOW TO MOVE THE MACHINE Hold the treadmill at position as above with your hand. Lift up the treadmill and then you can move the treadmill to any place. - Page 14 HOW TO ADJUST THE BALANCE When the height of each pad or because of individual machine placed on the ground is not even, you need to adjust the Adjustable Pads (No. C31) to level the machine on the ground. Adjustment method: First, place the machine as shown in above, use Spanner w/ Screw Driver (No.
-
Page 15: Maintenance And Care
MAINTENANCE & CARE General cleaning will help prolong the life and improve performance of your treadmill. Keep the unit clean and maintained by dusting the components on a regular basis. Cleaning two exposed sides of the Running Belt (No. C22) will prevent dust from accumulating underneath. Keep your running shoes clean so that dirt from your shoes does not wear out the Running Board (No. -
Page 16: Important Electrical Information
IMPORTANT ELECTRICAL INFORMATION WARNING: This treadmill requires a power source of 10 amps (100-120V) in order to properly operate. For your safety, as well as the safety of others, please verify that the power source is correct before plugging in the equipment. Any power source above or below this level could cause significant damage to the equipment and/or user. -
Page 17: The Display Console
THE DISPLAY CONSOLE QUICK START: 1. Insert the pin end of the Safety Key (No. C24) into the Console Front Cover (No. C13). 2. Press the START button, and the system will automatically display a 3 seconds countdown. Once the countdown reaches zero, the Running Belt (No. C22) will start at the initial default speed of 0.5 MPH. -
Page 18: Remote Control Functions
in order to start. 0.5 MPH is the default start speed. STOP/PAUSE: This button has functions of PAUSE and STOP. When in use, press this button once to PAUSE your workout and the current workout data will still be shown. Press STOP again to terminate your workout session completely and all data will be deleted and reset to the initial setting. - Page 19 4. Pay attention to the battery + and - ends before installing. 5. Press the buckle of battery cover. Then, put the battery cover back on the Remote Control (No. E14). Dispose the old batteries according to your regional guidelines. LUBRICATION REMINDER: Your treadmill needs lubrication maintenance every 188 Miles.
-
Page 20: Exercise Instructions
EXERCISE INSTRUCTIONS GETTING STARTED: Before starting any exercise program, you should consult your physician to determine if you have any medical or physical conditions that could put your health and safety at risk or prevent you from using the equipment properly. Be aware of your body’s signals. -
Page 21: Exploded Diagram
EXPLODED DIAGRAM 1... - Page 22 EXPLODED DIAGRAM 2...
-
Page 23: Parts List
PARTS LIST Description Specification Qty. Description Specification Qty. Main Frame Handle Inner Cover R Left Upright Tube Handle Outer Cover R Right Upright Tube Tablet Holder Fixed Base Console Base Bracket Tablet Holder Tablet Holder Base Anti-slip Sticker Front Roller Running Belt Rear Roller Motor Belt... - Page 24 Description Specification Qty. Description Specification Qty. Spring Washer Φ6 AC Single Line Brown 200 Spring Washer Φ5 AC Single Line Brown 350 Locked Washer Φ6 AC Single Line Blue 350 Flat Washer Φ8 Grounding Wire Spring Washer Φ8 Remote Control Countersunk Head Screw ST2.9*10 Magnet Ring...
Need help?
Do you have a question about the SF-T722051 and is the answer not in the manual?
Questions and answers