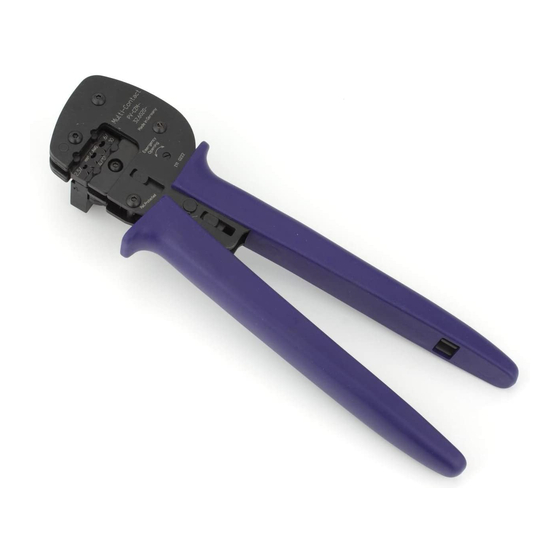
Staubli PV-CZM Operating Instructions Manual
Crimping pliers
Hide thumbs
Also See for PV-CZM:
- Operating instructions manual (12 pages) ,
- Operating instruction (12 pages) ,
- Operating instructions manual (12 pages)
Table of Contents
Advertisement
Quick Links
MA251 (de_en)
Bedienungsanleitung
Crimpzange PV-CZM
Inhalt
Hinweis zur Pflege der Crimpzange ���������������������������������������������1
Sicherheitshinweise ���������������������������������������������������������������������2
Zange bestückt für MC4 Steckverbinder �������������������������������������3
Zange bestückt für MC4-EVO 2 Steckverbinder �������������������������6
Crimpeinsatz auswechseln ����������������������������������������������������������8
Crimpen ������������������������������������������������������������������������������������10
Hinweis zur Pflege der Crimpzange
Um eine optimale Crimpausführung und eine lange Lebensdauer
der Zange zu erreichen, ist folgendes zu beachten:
Das Werkzeug frei von Staub, Feuchtigkeit und anderen Rück-
•
ständen halten�
Zange mit einer sauberen, weichen Bürste oder einem fusel-
•
freien Tuch reinigen� Dabei keine harten oder abrasiven Reini-
gungsmittel verwenden�
Regelmäßige optische Kontrolle der Crimpeinsätze auf Abnut-
•
zung oder Beschädigungen durchführen�
Die Zange an einem sauberen, trockenen und geschlossenen
•
Ort lagern�
4866N85000
MA251 (de_en)
Operating instructions
Crimping pliers PV-CZM
Content
Care instructions��������������������������������������������������������������������������1
Safety Instructions �����������������������������������������������������������������������2
Crimping pliers equipped for MC4 connectors �����������������������������3
Crimping pliers equipped for MC4-EVO 2 connectors ������������������6
Exchanging the crimping die ��������������������������������������������������������8
Crimping ������������������������������������������������������������������������������������10
Care instructions
To ensure best crimp performance and crimping pliers service life
the following care instructions shall be met:
Clean the crimping pliers from dust, moisture and other resi-
•
dues using a clean, soft brush or lint-free cloth�
Do not use any harsh or abrasive agents�
•
Regular visual inspection of the profile area regarding damage
•
or wear�
When crimping pliers are not in use, store them in a clean and
•
dry place�
1 / 12
Advertisement
Table of Contents

Summary of Contents for Staubli PV-CZM
-
Page 1: Table Of Contents
MA251 (de_en) 4866N85000 MA251 (de_en) Bedienungsanleitung Operating instructions Crimpzange PV-CZM Crimping pliers PV-CZM Inhalt Content Hinweis zur Pflege der Crimpzange ���������������������������������������������1 Care instructions��������������������������������������������������������������������������1 Sicherheitshinweise ���������������������������������������������������������������������2 Safety Instructions �����������������������������������������������������������������������2 Zange bestückt für MC4 Steckverbinder �������������������������������������3 Crimping pliers equipped for MC4 connectors �����������������������������3 Zange bestückt für MC4-EVO 2 Steckverbinder �������������������������6... -
Page 2: Sicherheitshinweise
Daten anschließen und verwenden� The digital instruction manual and the technical data are Die digitale Bedienungsanleitung und die technischen Daten sind available at: unter dem folgenden Link verfügbar: www�staubli�com/re-downloads�html • www�staubli�com/re-downloads�html • Bestimmungsgemäße Verwendung Intended use Die vorliegenden Handwerkzeuge sind für die ordnungsgemäße... -
Page 3: Zange Bestückt Für Mc4 Steckverbinder
Zange bestückt für MC4 Steckverbinder Crimping pliers equipped for MC4 connectors (ill. 1) (ill. 1) Crimpzange inkl� Lokator und eingebautem Crimpeinsatz� Crimping pliers incl� locator and built-in crimping die� Crimpzangen Crimpeinsätze Lokator Crimping pliers Crimping dies Locator 2.5 mm • •... - Page 4 Einzelteile Individual parts Leiterquerschnitt geeignet für Pos. Cable cross section suitable for (ill. 2 + 3 + 4 + 5 + 6 + 7) (ill. 2 + 3 + 4 + 5 + 6 + 7) mm² Auswechselbare Crimpeinsätze� Interchangeable crimping dies� PV-KST4/2.5-UR PV-KBT4/2.5-UR (ill.
- Page 5 Lokator PV-LOC-B Locator PV-LOC-B Bestell-Nr�: 32�6055 Order No�: 32�6055 Hinweis: Note: Beim Einsatz des Crimpwerkzeuges When using the crimping pliers PV-CZM-22100 Lokator PV-LOC-B PV-CZM-22100, use the locator benutzen� PV-LOC-B� (ill. 9) (ill. 9) Leiterquerschnitt geeignet für Pos. Cable cross section Crimpbereich Bestell-Nr.
-
Page 6: Zange Bestückt Für Mc4-Evo 2 Steckverbinder
Zange bestückt für MC4-EVO 2 Steckverbinder Crimping pliers equipped for MC4-EVO 2 connec- tors (ill. 11) (ill. 11) Crimpzange inkl� Lokator und eingebautem Crimpeinsatz� Crimping pliers incl� locator and built-in crimping die� Crimpzangen Crimpeinsätze Lokator Crimping pliers Crimping dies Locator 2.5 mm •... - Page 7 Einzelteile Individual parts Leiterquerschnitt geeignet für Pos. Cable cross section suitable for (ill. 12 + 13 + 14) (ill. 12 + 13 + 14) Auswechselbare Crimpeinsätze� Interchangeable crimping dies� PV-KST4-EVO 2/2,5...-UR PV-KBT4-EVO 2/2,5...-UR (ill. 12) (ill. 12) PV-KST4-EVO 2/2,5...-UR PV-KBT4-EVO 2/2,5...-UR Crimpbereich Bestell-Nr.
-
Page 8: Crimpeinsatz Auswechseln
Crimpeinsatz auswechseln Exchanging the crimping die Crimpeinsatz ausbauen Removing the crimping die (ill. 16) (ill. 16) Crimpzange schließen� Close the crimping pliers� (ill. 17) (ill. 17) Schraube S (lang) und S1 (kurz) kom- Remove completely both mounting • • plett herausdrehen� screws: the long S and the short S1�... - Page 9 Crimpeinsatz einbauen Fitting the crimping die (ill. 20) (ill. 20) Crimpzange öffnen (ganz zusammen- Open the crimping pliers (press com- • • drücken und loslassen)� pletely together and release)� Beide Crimpeinsätze einführen� Insert both crimping dies� • • Die Beschriftung muss sich auf der The markings must be on the same •...
-
Page 10: Crimpen
Crimpen Crimping (ill. 24) (ill. 24) Klemmbügel (K) öffnen und festhalten� Open clamp (K) and hold tight� • • Kontakt in den passenden Quer- Insert the contact in the appropriate • • schnittsbereich legen� cross-section range� Crimplaschen (C) nach oben drehen� Turn the crimping flaps (C) upwards�... - Page 11 (ill. 28) (ill. 28) Crimpung kontrollieren bezüglich der Kriterien, die in Visually check the crimp according to the criteria written in IEC 60352-2 beschrieben sind� IEC 60352-2� Sicherstellen, dass: Confirm that: alle Litzen in der Crimphülse eingeschlossen sind� All of the strands have been captured in the crimp sleeve� •...
- Page 12 Open crimp wings� • • Nicht gecrimpte Leitungslitzen� Not included strands� • • Hersteller/Manufacturer: Stäubli Electrical Connectors AG Stockbrunnenrain 8 4123 Allschwil/Switzerland Tel� +41 61 306 55 55 +41 61 306 55 56 mail ec�ch@staubli�com www�staubli�com/electrical 12 / 12 MA251...


Need help?
Do you have a question about the PV-CZM and is the answer not in the manual?
Questions and answers