
Related Manuals for BDI LINQ 9181


Summary of Contents for BDI LINQ 9181
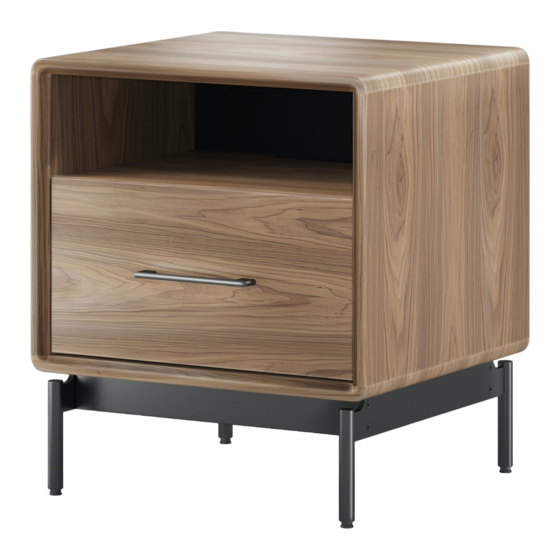
- Page 1 LINQ 9181 & 9182 ™ NIGHTSTANDS INSTRUCTION MANUAL LET’S GET STARTED. 9181 9182 DESIGNED BY MATTHEW WEATHERLY...
- Page 2 Congratulations on the purchase of your LINQ Nightstand 9181 | 9182 from BDI. Your nightstand has been designed to provide a lifetime of enjoyment. This manual will provide assembly instructions and other helpful information to ensure you get the most out of your product. Please save it for future reference.
- Page 3 HARDWARE AND COMPONENTS Unpack and identify the parts listed below. The assembly workspace should be a non-marring surface, such as carpet. For missing hardware pieces, please contact BDI Customer Service at customerservice@bdiusa.com. For all other concerns, please contact your BDI retailer.
- Page 4 Lay the Cabinet (C3) on a soft, non-marring surface, like carpet. Attach the Base to the Cabinet (C3) using 6 Screws (H2). Tighten with Hex Wrench (H1). HEX WRENCH – T1 SCREW – H2 4 | BDIUSA.COM LINQ 9181 & 9182...
- Page 5 STEP 3. INSTALL DRAWER PULL ASSEMBLY With the help of another person, carefully turn NOT INCLUDED the Side Table onto its feet. Open the drawer PHILLIPS SCREWDRIVER and connect the Drawer Pull (C4) with 2 Screws (H3). Tighten with Phillips Head Screwdriver (not included).
- Page 6 LEVELER WRENCH – T2 Wire management slot in sub panel 9182 9181 Wires can pass under the pullout tray’s back panel. Neoprene keeps the wires in place as the pullout tray moves. Dial down 6 | BDIUSA.COM LINQ 9181 & 9182...
- Page 7 While BDI’s stained wood finishes are stable in tone & appearance, all finishes are subject to some degree of discoloration with prolonged exposure to direct sunlight. Please avoid positioning your BDI cabinet in any area with ample direct sunlight.
- Page 8 The decision to repair or replace will be at BDI’s sole discretion. BDI furniture is warranted for three (3) years from the date of purchase, as shown on your sales receipt. The warranty period starts from the date of purchase. This warranty extends only to the original purchasers who acquire new products from BDI Authorized Resellers.
Need help?
Do you have a question about the LINQ 9181 and is the answer not in the manual?
Questions and answers