Table of Contents
Advertisement
Quick Links
Instruction Manual
MIL 76000
High Pressure Letdown Control Valves
Purchase Order No :
The following instructions should be thoroughly
reviewed and understood prior to installing, operating
or performing maintenance on this equipment.
Throughout the text, safety and/or caution notes will
appear and must be strictly adhered to, otherwise, serious injury
or equipment malfunction could result.
___________________________________________
Advertisement
Table of Contents

Related Manuals for KSB MIL 76000


Summary of Contents for KSB MIL 76000
- Page 1 Instruction Manual MIL 76000 High Pressure Letdown Control Valves Purchase Order No : ___________________________________________ The following instructions should be thoroughly reviewed and understood prior to installing, operating or performing maintenance on this equipment. Throughout the text, safety and/or caution notes will appear and must be strictly adhered to, otherwise, serious injury or equipment malfunction could result.
-
Page 2: Table Of Contents
TABLE OF CONTENTS Introduction........................2 General..........................3 Unpacking...........................3 Installation ..........................4 Air Piping..........................4 Body Disassembly ........................4 Maintenance / Repair ......................5 Guide Bush Removal.....................5 Lapping Seats .......................5 Plug Stem Pinning....................6 7.3.1 Replacing Plug and Stem..............6 7.3.2 Replacing Existing Stem only..............7 Packing Box......................7 Valve Body Reassembly.......................8 Parts List..........................10 Note: Easily replaceable Pressure gauges for Air sets and externally mounted Pressure gauges of positioners are normally dismantled, separately packed and bound to the... -
Page 3: General
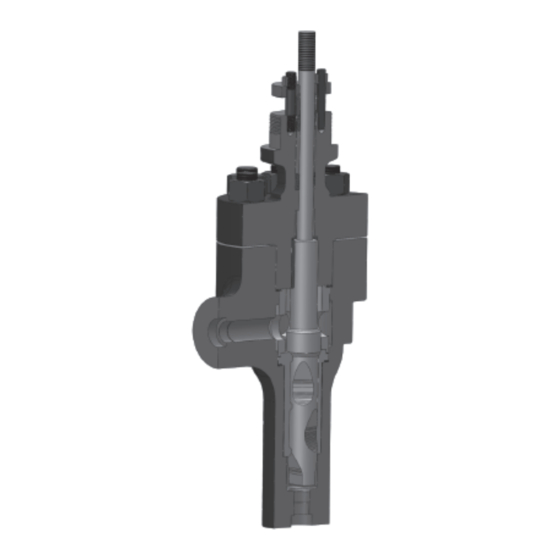
MIL 76000 has single and multi stage trim ratings of the MIL 76000 series control valves options. Single stage design allows high flow regardless of the type of trim used. -
Page 4: Installation
Main Line interruption, provide a manually operated stop Isolation Valve Isolation Valve valve on either side of the MIL 76000 series Control Valve valve with a manually operated throttling valve Caution: The valve must be installed so Caution: Where insulation of the valve... -
Page 5: Maintenance / Repair
Note : Spiral wound gaskets (12 & 16) Warning: Prior to performing are standard in the 76000 series design maintenance on the valve, isolate the and it is imperative that new gaskets be valve and vent the process pressure. installed each time the valve is Cut off supply air line and pneumatic disassembled. - Page 6 CIean body gasket surface areas. Caution: Avoid over-lapping as this can Install a new seat ring gasket (16) and insert cause damage to the seating surface seat ring (15) in the body. rather than improve leakage performance. Note : Gasket (16) is temporarily placed to hold the seat ring during lapping.
-
Page 7: Plug Stem Pinning
of the plug guide. hole or any center mark, Drilling the New Parts Measure dimension D based on the Ÿ If the plug is already fully drilled (typical plug guide diameter and stem diameter for 440C hardened stainless steel material (see Figure 5). -
Page 8: Packing Box
Replace packing (7) referring to Figure 6 Pinning for correct amount of packing to place Select the correct size pin based on the above the spacer. plug guide diameter and pin hole diameter. Proceed as described in part D of the Note : Assemble and compress rings one previous section 'Replacing Plug &... -
Page 9: Valve Body Reassembly
Plug Stem Plug Stem Plug Stem Packing Nut Packing Nut Packing Nut Disc Spring Packing Flange Packing Flange Packing Flange Packing Follower Packing Follower Packing Follower Packing Stud Packing Stud Packing Stud Packing Eco-lock Packing Packing Bonnet Bonnet Bonnet Figure 6 Figure 8 Figure 7 Standard Packing Box With Live Loading... -
Page 10: Parts List
lnsert lower packing set (7) and lantern Caution: Do not overtighten (See ring or spacer (6). Refer to Section 7.4 for Section ‘7.4. Packing Box’). proper packing assembly procedure for standard or optional designs. Install upper packing set and packing For actuator assembly and plug stem follower (5) and packing flange (4). - Page 12 Damage, if any, noticed to valve body and bonnet also should be replaced or repaired. After the life-cycle, we recommend to dispose the parts as per your established procedures, through approved agencies only. KSB MIL Controls Limited Meladoor, Annamanada, Pin - 680741 Thrissur District, Kerala, India Tel.
Need help?
Do you have a question about the MIL 76000 and is the answer not in the manual?
Questions and answers