3Com EtherLink III User Manual
Parallel tasking 16-bit isa network interface card
Hide thumbs
Also See for EtherLink III:
- User manual (56 pages) ,
- Quick start (2 pages) ,
- Quick manual (8 pages)
Table of Contents
Troubleshooting

Subscribe to Our Youtube Channel
Related Manuals for 3Com EtherLink III


Summary of Contents for 3Com EtherLink III
- Page 1 EtherLink ® Parallel Tasking ® 16-Bit ISA Network Interface Card User Guide A member of the 3Com EtherLink III family of network interface cards http://www.3com.com/ Part No. 09-1216-000 Published June 1997...
- Page 2 3Com Corporation. 3Com Corporation reserves the right to revise this documentation and to make changes in content from time to time without obligation on the part of 3Com Corporation to provide notification of such revision or change.
- Page 3 ™ FDDILink network interface cards have a Lifetime Limited Warranty. For further details, please see 3Com’s Limited Warranty statement in this manual. To ensure the very best 3Com service and support, take the time to complete the product registration card.
- Page 4 U.S. address on the front of the card. Asia Italy, Greece, Spain, Portugal, Malta 3Com Asia Ltd., Marketing Department Room 2506-07, 25/F. 3Com Mediterraneo Srl, Citibank Tower Marketing Department Citibank Plaza, Central...
-
Page 5: Table Of Contents
ONTENTS BOUT UIDE How to Use This Guide Conventions RODUCT VERVIEW Features DynamicAccess Technology PACE Technology Support Distributed RMON Transcend EtherLink SmartAgent Software How Do I Install the 3C509B NIC? 3C509B NIC NSTALLING THE Installing the 3C509B NIC Connecting to the Network RJ-45 Port BNC Port AUI Port... - Page 6 3C509B NIC ONFIGURING THE Configuring the 3C509B NIC Reconfiguring the NIC Changing NIC Configuration from ISA to EISA Changing NIC Configuration from EISA to ISA Changing Configuration Settings Configuration Option Settings Changing the Settings Changing PACE Configuration Selecting PACE Applications Changing PACE Ranges and Protocols PACE Advanced Options 4-10...
- Page 7 AUI Connector Pin Assignments Cable Specifications ECHNICAL UPPORT Online Technical Services World Wide Web Site 3Com Bulletin Board Service Access by Analog Modem Access by Digital Modem 3ComFacts Automated Fax Service 3ComForum on CompuServe Online Service Support from Your Network Supplier...
- Page 9 IGURES 1-1 3C509B Network Interface Cards 2-1 Inserting the 3C509B NIC in a PC 2-2 Connecting the 3C509B-TPO NIC Using the RJ-45 Port 2-3 Connecting the 3C509B-TPC NIC Using the BNC Port 2-4 Connecting the 3C509B-COMBO NIC Using the AUI Port 3-1 Main Menu 4-1 NIC Configuration Screen 4-2 PACE Applications Screen...
- Page 10 ABLES 1 Notice Icons 2 Text Conventions 3-1 NetWare NLMs 3-2 Network Driver Text File Names 3-10 4-1 Option Settings 5-1 Diagnostic Programs 5-2 Frequently Asked Questions 5-12 A-1 AUI Connector Pin Assignments viii...
-
Page 11: About This Guide
BOUT UIDE This guide describes how to install, configure, and ® ® troubleshoot the 3Com EtherLink III 16-bit ISA network interface card (called the 3C509B NIC in this guide). If the information in the README.TXT file differs from the information in this guide, follow the information in the README.TXT file on the EtherDisk diskette. -
Page 12: Notice Icons
BOUT UIDE Table 1 Notice Icons Icon Notice Type Alerts you to... Information note Important features or instructions Caution Risk of personal safety, system damage, or loss of data Warning Risk of severe personal injury Table 2 Text Conventions Convention Description This typeface represents information as it appears on Screen displays... -
Page 13: Product Overview
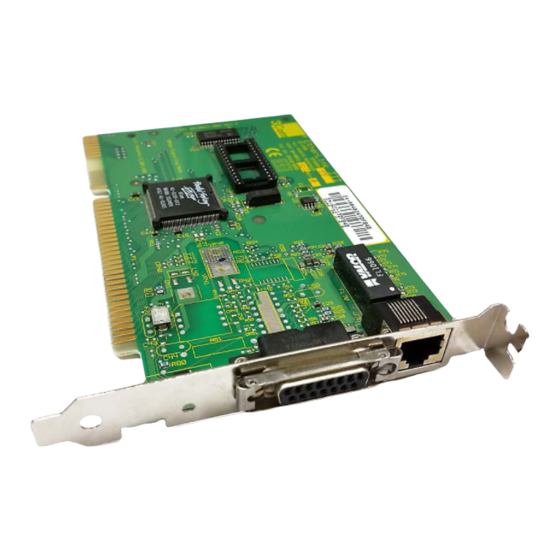
This guide describes these four 3Com EtherLink 3C509B network interface cards (NICs): 3C509B-TPO 3C509B-TPC 3C509B-TP 3C509B-COMBO These 3C509B NICs, shown in Figure 1-1, belong to the best-selling EtherLink III family of NICs. RJ-45 port AUI port BNC port 3C509B-TPO 3C509B-TPC 3C509B-TP 3C509B-COMBO... -
Page 14: Features
Full-duplex support, which allows data to be sent and received at the same time in a switched-Ethernet topology Backward compatibility with 3C509 EtherLink III ISA network interface cards Network management support, including SNMP (Simple Network Management Protocol) and DMI ®... -
Page 15: Pace Technology Support
Transcend PC Link SmartAgent software or on 3Com’s bulletin board service and World Wide Web site. (For information on 3Com’s BBS and WWW site, refer to Appendix B, “Technical Support.”) How Do I Install the 3C509B NIC? To install the 3C509B NIC hardware and software, you must install the 3C509B NIC in your PC, connect it to the network, and install the network driver. -
Page 17: Installing The 3C509B Nic
NSTALLING THE 3C509B NIC You can install the 3C509B NIC in a PC with an available ISA or EISA slot. If you need to change the configuration, see Chapter 4. This chapter describes how to install the 3C509B NIC in your PC and connect it to the network. -
Page 18: Connecting To The Network
2: I 3C509B NIC HAPTER NSTALLING THE Backplate 3C509B NIC screw ISA or EISA slot Figure 2-1 Inserting the 3C509B NIC in a PC The backplate should be flush with the backplane. Be sure that the NIC’s connector fingers are completely seated in the slot. -
Page 19: Rj-45 Port
Connecting to the Network Each 3C509B NIC provides different network ports, as shown in Figure 1-1. Use the port required for your network segment. RJ-45 Port You can connect the 3C509B NIC to the network using the RJ-45 port. RJ-45 port RJ-45 connector Figure 2-2 Connecting the 3C509B-TPO NIC Using the RJ-45 Port Figure 2-2 shows how to connect the RJ-45 connector... -
Page 20: Bnc Port
2: I 3C509B NIC HAPTER NSTALLING THE BNC Port You can connect the 3C509B-TPC and 3C509B-COMBO NICs to the network using the BNC port. BNC port BNC connector Figure 2-3 Connecting the 3C509B-TPC NIC Using the BNC Port Figure 2-3 shows how to connect a BNC connector on thin Ethernet cable to the BNC port. -
Page 21: Link Led
Link LED AUI port connector Figure 2-4 Connecting the 3C509B-COMBO NIC Using the AUI Port 3 Move the slide latch up to the closed position to lock the cable in place. 4 Connect the other end of the AUI cable to the external transceiver. - Page 22 2: I 3C509B NIC HAPTER NSTALLING THE If you are experiencing any problems: Make sure that the hub and cable comply with 10BASE-T specifications described in Appendix A Make sure that the hub is powered up Check the LED If the LED is on, the connection is active. If the LED is off, something is preventing the connection between the NIC and the hub.
-
Page 23: Installing The Network
3Com URL into your Internet browser: http://www.3Com.com/ The drivers are in the Customer Support area. You can also obtain the latest drivers on the 3Com bulletin board. Refer to Appendix B for information on how to access the 3Com BBS. - Page 24 5 Select Driver from disk provided by the hardware manufacturer and click OK. 6 Insert the 3Com EtherDisk diskette in your floppy drive, and if the diskette is in drive A, click OK. Supply the correct drive letter, if required.
- Page 25 Microsoft Client for Microsoft Network NetBEUI The network components should now include: Client for NetWare Networks 3Com EtherLink III Adapter IPX/SPX Compatible Protocol If a protocol is missing, follow these steps: a Select the protocol and click Add.
-
Page 26: Confirming Installation
A list of devices appears, arranged by type. 5 Double-click the Network icon. The name of the installed 3C509B NIC appears: 3Com EtherLink III ISA (3C509B) 6 Double-click the 3C509B name to display a description of the 3C509B NIC and its current status. -
Page 27: Windows Nt
4 In the Control Panel, double-click Network. 5 In the Network window, select the Adapter tab. If you have a NIC already installed, follow these steps: a Select the existing 3Com NIC in the Installed Adapters group. b Click Remove. -
Page 28: Windows Nt Version 3.51
3 Start Windows NT. 4 In the Control Panel, double-click Network. a If you have a NIC already installed, in the Network Settings window, select the existing 3Com NIC in the Installed Adapters group. b Click Remove. c Click Yes in the confirmation window. -
Page 29: Netware For Windows 3.1X, Windows For Workgroups, And Dos
NetWare for Windows 3.1x, Windows for Workgroups, and DOS 12 In the Network Settings Change window, click OK. Windows NT completes the installation. 13 In the Network Settings Change window, click Restart to restart your PC. The driver installation is complete. NetWare for Windows 3.1x, Windows for Workgroups, and DOS The AutoLink program installs client software and drivers... -
Page 30: Autolink Requirements
3 Put the EtherDisk diskette in floppy drive A. 4 Run the Install program. Type: a:install [Enter] This opens the main menu shown in Figure 3-1. EtherDisk for the EtherLink III Adapter Family v5.0 ESC=Cancel F1=Help M A I N M E N U Installation Overview (ReadMe) ... -
Page 31: Obtaining Netware Nlms
NetWare for Windows 3.1x, Windows for Workgroups, and DOS 5 From the main menu, select Auto Install and Config for NetWare (AutoLink) and press [Enter]. 6 Select DOS, Windows 3.1x, or Windows for Workgroups 3.11 and follow the instructions. 7 When the auto installation process is finished, remove the EtherDisk diskette and reboot the PC. -
Page 32: Installing Other Supported Network Drivers
3-10 3: I HAPTER NSTALLING THE ETWORK RIVERS The NetWare 3.11 server is no longer supported by the 3C509B NIC. Installing Other Supported Network Drivers Table 3-2 provides the text file names and driver names for additional supported drivers. These files are located in the HELP directory on the EtherDisk diskette. -
Page 33: Configuring The 3C509B Nic
ONFIGURING THE 3C509B NIC This chapter describes how to configure the 3C509B NIC, reconfigure the NIC, and change configuration settings. Configuring the 3C509B NIC This section describes how to configure the 3C509B NIC. If you have only one 3C509B NIC installed and you are running Novell NetWare, use the AutoLink program to configure the NIC and load the necessary driver, as described in Chapter 3. -
Page 34: Reconfiguring The Nic
ONFIGURING THE Configuration and Diagnostic Program Version 3.2 Quit Install Test View Select F1=Help NIC Configuration EtherLink III NIC Configuration I/O Base Address 300h Interrupt Request Level Boot PROM Transceiver Type On-board TP (RJ-45) Network Driver Optimization Windows or OS/2 Client... -
Page 35: Changing Nic Configuration From Isa To Eisa
Reconfiguring the NIC You can configure an ISA NIC for EISA mode only if it is in an EISA slot. If you have configured an ISA NIC for an EISA PC, the PROTOCOL.INI file looks for the parameter SLOT=number rather than the I/O base address. The SLOT number is required only if you have multiple NICs installed. -
Page 36: Changing Nic Configuration From Eisa To Isa
4: C 3C509B NIC HAPTER ONFIGURING THE 8 Use the arrow key to select EISA and press [Enter]. This changes the I/O base address setting. 9 Save the new configuration setting to the NIC by selecting OK. Press [Enter]. 10 Exit the program and remove the EtherDisk diskette. 11 Insert the EISA configuration utility diskette provided with your PC. -
Page 37: Changing Configuration Settings
Changing Configuration Settings 4 A screen identifying the NIC appears with the Test menu bar item highlighted. 5 Select Install and press [Enter]. 6 When the NIC Configuration dialog box appears, select Modify and press [Enter]. The I/O Base Address field is selected. An I/O Base Address dialog box appears. -
Page 38: Configuration Option Settings
4: C 3C509B NIC HAPTER ONFIGURING THE Configuration Option Settings Table 4-1 lists each software option, the default setting, and the available settings. For more information about each setting, select the option and press [F1]). Table 4-1 Option Settings Option Default Setting Available Settings I/O Base Address... -
Page 39: Changing The Settings
Changing Configuration Settings Changing the Settings To change the configuration settings: 1 Run the Install program as described earlier in “Configuring the 3C509B NIC.” 2 From the main menu, shown in Figure 3-1, select Configuration and Diagnostic Program. 3 If necessary, use the arrow keys to select the NIC you want to configure. - Page 40 4: C 3C509B NIC HAPTER ONFIGURING THE Figure 4-2 PACE Applications Screen For the PACE driver to recognize high-priority network traffic, it must know if a stream of network traffic was generated by a specific PACE application. 2 To enable PACE support for an application, click the box next to the appropriate application name.
-
Page 41: Changing Pace Ranges And Protocols
Changing Configuration Settings Changing PACE Ranges and Protocols You can add information for PACE applications which you want to prioritize but which are not listed on the PACE Applications screen. You must specify the port or socket ranges as well as the network protocol being used. -
Page 42: Pace Advanced Options
4-10 4: C 3C509B NIC HAPTER ONFIGURING THE 2 Enter the beginning of the port or socket range for the application in the Range Start box. The range start should be a four-digit hexadecimal value. 3 Enter the inclusive Range End value of the port or socket range for the application. -
Page 43: Pace Settings Descriptions
Changing Configuration Settings 4-11 Figure 4-4 PACE Advanced Options Screen 2 Enter new information as required. 3 Click OK to set the new value. PACE Settings Descriptions FIFO Packet Threshold This threshold is the number of non-PACE packets the network driver will allow in the FIFO ahead of any PACE packets. - Page 44 4-12 4: C 3C509B NIC HAPTER ONFIGURING THE For example, for video conferencing with three people, applications use three UDP streams for the video data. The value must be a power of two (2, 4, 8), but the optimal value varies depending on the PC and application. A video server can support 32 connections but a client may only want to conference with four other people at a time.
- Page 45 4-13 Disable Switch Packet Prioritization This option disables modification of Ethernet packets used for prioritization of multimedia traffic within 3Com switch products. If a multimedia connection cannot be made between a PACE-enabled workstation and a non-PACE workstation, disabling the switch packet prioritization can sometimes alleviate this problem.
-
Page 47: Troubleshooting
ROUBLESHOOTING This chapter explains how to isolate and solve NIC problems, including the following sections: Checking the NIC Troubleshooting with the Diagnostic Tests Getting Help If a Test Fails Resolving Hardware Resource Conflicts with Windows 95 and Windows NT Changing the I/O, IRQ, or Memory Range Removing the 3C509B NIC Software Crossover Cable Troubleshooting Tips Troubleshooting Tips... -
Page 48: Troubleshooting With The Diagnostic Tests
5: T HAPTER ROUBLESHOOTING Troubleshooting with the Diagnostic Tests The diagnostic tests on the EtherDisk diskette check the NIC’s overall operation and permit the isolation of faults. You can run the diagnostic tests after installing one or more 3C509B NICs, or you can run them when a fault is suspected. -
Page 49: Running The Group 1 Tests
Starting the Diagnostic Program 3 To run the Install program, type: a:install [Enter] This opens the main menu shown in Figure 3-1. 4 In the main menu, select Configuration and Diagnostic Program, and press [Enter]. If you are testing multiple NICs, you will see a screen describing each installed NIC. -
Page 50: Running The Group 2 Test
You can purchase the terminators from your network supplier (3Com part number 3C535). To assemble the loopback plug, connect two 50-ohm network cable terminators to a T connector, as shown in Figure 5-1. -
Page 51: Starting The Group 2 Test
NIC being tested and echoes them back to the NIC. The second computer must be equipped with a 3Com NIC. The diagnostic program that comes with the NIC supports the 3C509B echo server diagnostic program. -
Page 52: Setting Up An Echo Server
Server under the Test menu, and click the Start button to make the computer an echo server. If you are setting up an echo server using a 3Com NIC other than a 3C509B NIC, follow these steps: 1 Select a computer to use as an echo server. -
Page 53: Starting The Group 3 Test
Getting Help If a Test Fails 4 In the Configuration and Diagnostic Program main window, select Echo Server from the Test menu on the menu bar. The program notifies you that your computer is now set up as an echo server. Starting the Group 3 Test To run the Group 3 test on the 3C509B NIC, follow these steps:... -
Page 54: Resolving Hardware Resource Conflicts With Windows 95 And Windows Nt
1 In the Control Panel, double-click System. 2 In the System Properties window, click Network Adapters. 3 Double-click 3Com EtherLink III Adapter. 4 Select the Resources tab. 5 Select Input/Output Range or Interrupt Request Level. 6 Click Change Settings. -
Page 55: Removing The 3C509B Nic Software
Removing the 3C509B NIC Software Removing the 3C509B NIC Software The 3C509B software includes a program that removes the 3C509B software. To run the uninstall program, at the DOS prompt, type: un3c509.exe [Enter] The program removes the 3C509B software. Crossover Cable Troubleshooting Tips When you work with 10BASE-T cabling, concentrators, and NICs from different vendors, it is possible to connect everything and still have no communication between... -
Page 56: Troubleshooting Hubs With Crossover Cable
5-10 5: T HAPTER ROUBLESHOOTING Troubleshooting Hubs with Crossover Cable When there is doubt whether a hub is performing correctly, or if the impedance settings are in question, a crossover cable can help you isolate the failing component. 1 Connect a file server and a client PC back to back with a crossover cable to verify that the NIC and network operating system are properly configured. -
Page 57: Troubleshooting Tips
Troubleshooting Tips 5-11 Troubleshooting Tips Review these tips to check the 3C509B NIC further. 1 Make sure the NIC is seated correctly in the slot. Check the installation by reviewing the installation instructions in Chapter 2. 2 Inspect all cables and connections. If you are using thin Ethernet cable, make sure that you have a T connector attached to the NIC and all other NICs on the network. -
Page 58: Frequently Asked Questions
5-12 5: T HAPTER ROUBLESHOOTING 7 Install the NIC in another slot and run the diagnostic tests again. The original slot may be defective. 8 Replace the failed NIC with a working NIC and run the diagnostic tests again. Use the same option settings as those used on the failed NIC. - Page 59 Frequently Asked Questions 5-13 Table 5-2 Frequently Asked Questions (continued) Question Answer I have two PCs with 3C509B-TPO 1 Check the cable. If the machines are NICs installed, running Windows connected back to back, use a 95. Each PC can see itself but crossover cable.
-
Page 61: Specifications
PECIFICATIONS This appendix lists specifications, pin assignments, and cable requirements for the 3C509B NIC. NIC Specifications Network Interface 3C509B-TP Ethernet IEEE 802.3i 10BASE-T 3C509B-TPO industry standard for a 10 Mbps baseband CSMA/CD local area network 3C509B-COMBO IEEE 802.3i 10BASE-T and 3C509B-TPC Ethernet IEEE 802.3 industry standard for a 10 Mbps... -
Page 62: Rj-45 Connector Pin Assignments
A: S PPENDIX PECIFICATIONS RJ-45 Connector Pin Assignments Figure A-1 shows the RJ-45 connector pin assignments. RD- 6 RD+ 3 TD- 2 TD+ 1 1 2 3 4 5 6 7 8 Figure A-1 RJ-45 Connector Pin Assignments AUI Connector Pin Assignments Table A-1 lists the pin assignments for the AUI (attachment unit interface) connector. -
Page 63: Cable Specifications
Cable Specifications Cable Specifications In order to maintain compliance with the limits of a Class B digital device, 3Com requires that you use quality interface cables when connecting to this device. Changes or modifications not expressly approved by 3Com could void the user’s authority to operate this equipment. -
Page 65: Support
Information contained in this appendix is correct at time of publication. For the very latest, we recommend that you access 3Com Corporation’s World Wide Web site as described below. Online Technical Services 3Com offers worldwide product support 24 hours a day,... -
Page 66: 3Com Bulletin Board Service
UPPORT 3Com Bulletin Board Service 3ComBBS contains patches, software, and drivers for all 3Com products, as well as technical articles. This service is available through analog modem or digital modem (ISDN) 24 hours a day, 7 days a week. Access by Analog Modem To reach the service by modem, set your modem to 8 data bits, no parity, and 1 stop bit. -
Page 67: 3Comforum On Compuserve Online Service
3ComForum on CompuServe Online Service 3ComForum is a CompuServe-based service containing patches, software, drivers, and technical articles about all 3Com products, as well as a messaging section for peer support. To use 3ComForum, you need a CompuServe account. To use 3ComForum: 1 Log on to CompuServe. -
Page 68: Support From Your Network Supplier
If you are unable to receive support from your network supplier, technical support contracts are available from 3Com. Contact your local 3Com sales office to find your authorized service provider using one of these numbers: Regional Sales Office Telephone Number 3Com Corporation P.O. - Page 69 Support from 3Com Regional Sales Office Telephone Number 3Com Asia Limited Australia 61 2 9937 5000 (Sydney) 61 3 9866 8022 (Melbourne) China 8610 68492568 (Beijing) 86 21 63740220 Ext 6115 (Shanghai) Hong Kong 852 2501 1111 India 91 11 644 3974...
-
Page 70: Returning Products For Repair
44 161 873 7717 (Manchester) 44 162 889 7000 (Marlow) Returning Products for Repair Before you send a product directly to 3Com for repair, you must first obtain a Return Materials Authorization (RMA) number. Products sent to 3Com without RMA numbers will be returned to the sender unopened, at the sender’s expense. -
Page 71: Index
NDEX connector Numbers AUI 2-4 3C509B NICs 1-1 BNC 2-4 3Com Bulletin Board Service RJ-45 2-3 (3ComBBS) B-2 conventions 3Com sales offices B-4 notice icons, About This Guide 2 3Com URL B-1 text, About This Guide 2 3ComFacts B-2 crossover cable 5-9... - Page 72 NDEX help 5-7 online technical services B-1 operating voltage requirements A-1 option settings changing 4-7 I/O base address 5-8 default 4-6 IBM LAN Server 3-10 installing drivers NetWare and DOS, Windows 3.1x, and Windows for PACE technology 4-7 Workgroups 3-7 advanced options 4-10 other network drivers 3-10 Concurrent UDP Streams 4-11...
- Page 73 NDEX technical support 3Com URL B-1 bulletin board service B-2 fax service B-2 network suppliers B-4 product repair B-6 using CompuServe B-3 thick Ethernet cable A-3 thin Ethernet cable A-3 Transcend EtherLink SmartAgent software 1-2, 1-3 troubleshooting 5-2 tips 5-11...
- Page 75 ARRANTY ARDWARE 3Com warrants its hardware products to be free from defects in workmanship and materials, under normal use and service, for the following lengths of time from the date of purchase from 3Com or its Authorized Reseller: Network adapters...
- Page 76 IMITATION OF IABILITY TO THE FULL EXTENT ALLOWED BY LAW, 3COM ALSO EXCLUDES FOR ITSELF AND ITS SUPPLIERS ANY LIABILITY, WHETHER BASED IN CONTRACT OR TORT (INCLUDING NEGLIGENCE), FOR INCIDENTAL, CONSEQUENTIAL, INDIRECT, SPECIAL, OR PUNITIVE DAMAGES OF ANY KIND, OR...
- Page 77 TRADE SECRETS; TITLE: You acknowledge and agree that the structure, sequence and organization of the Software are the valuable trade secrets of 3Com and its suppliers. You agree to hold such trade secrets in confidence. You further acknowledge and agree that ownership of, and title to, the Software and all subsequent copies thereof regardless of the form or media are held by 3Com and its suppliers.
- Page 78 ENTIRE AGREEMENT: This License Agreement sets forth the entire understanding and agreement between you and 3Com, supersedes all prior agreements, whether written or oral, with respect to the Software, and may be amended only in a writing signed by both parties.
Need help?
Do you have a question about the EtherLink III and is the answer not in the manual?
Questions and answers