Advertisement
Installation Instructions
Please Leave for Occupant
Table Of Contents
Package Contents .................................................. 1
Important Notes ...................................................... 1
Single Unit Installation ........................................... 1
Multigang Installation-
No side Sections Removed ............................. 2
Multigang Installation-
Side Section Removed .................................... 3
Installation Assistance ........................................... 4
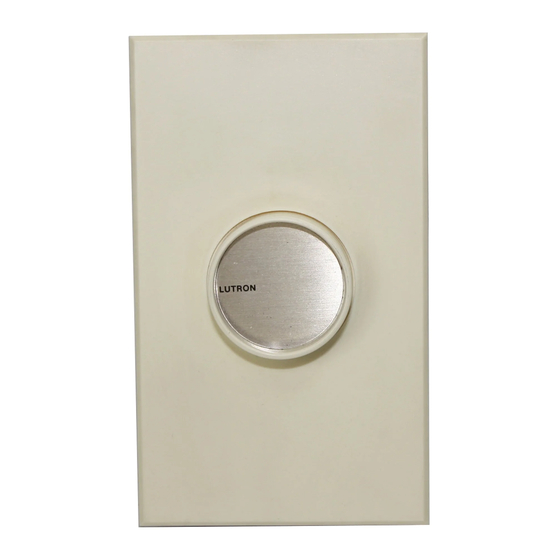
Package Contents:
Knob
Control
Important Notes
Please Read Before Installation
Install in accordance with national and local electrical
codes.
Lamp Type: Use this product with incandescent and
quartz lamps only --120VAC, 60Hz. Do not connect
to low-voltage lamps or any appliance.
Caution: To avoid overheating and possible
damage to other equipment, do not install to
control receptacles, fluorescent lighting fixtures,
motor-operated appliances, or transformer
supplied appliances.
Short Circuit Check: Check new installation for
short circuits prior to installation of dimmer by using a
single pole switch and connecting the appropriate
terminals to the hot wire and the lamp with power
OFF. Turn power on. If lights do not work, or
breaker trips, a short is present. Correct the wiring
and check circuit again. Install dimmer only when
short is no longer present.
Wire Connectors: Wire connectors provided can be
used to join one 10-, 12-, 14-, 16-, or 18-gauge wire
with one or two 12- or 14-gauge wires. Use them with
copper wire only.
Mounting
Screws
Wire
Connectors
Faceplate
Incandescent Dimmers
C-600, C-1000, C-1500, C-2000
120VAC, 60Hz
Switchbox and Location: A single-gang switchbox
1
(3" high x 2" wide x 2
/
" deep) will service all
2
individual Centurion dimmers. These dimmers are
designed to operate in ambient temperatures from
0°C to 40°C (32°F to 104°F). Allow a minimum
space of 4
1
/
" above and below the dimmers for
2
proper heat dissipation.
Single Unit Installation
1.
Turn power OFF at fusebox or circuit breaker.
Wiring with power on can result in personal injury.
Damage to product caused by wiring with power on
voids warranty.
2.
Remove faceplate from dimmer to prevent
damage and to access mounting holes. Pull out at
top and bottom edges, plate will snap off.
3.
Strip insulation from dimmer wires and from wires
to which dimmer is to be connected as follows:
• 1/2" for 10, 12, and 14 gauge wire
• 5/8" for 16 and 18 gauge wire
• Using the wire connectors provided, connect the
green or bare ground wire on the dimmer (if
present) to the green or bare copper ground wire in
the wallbox. Note: If a green or bare copper ground
wire is not in the wallbox, contact a licensed
electrician.
• Connect the 2 dimmer leads to the 2 wallbox leads
(see Figure A). The hot wire may be connected to
either of the dimmer wires. Be sure copper
conductor is not exposed.
Ground
(Green or Bare)
Figure A. Switchbox Wiring
4.
Push wires into switchbox, allowing room for
dimmer backbox to be inserted.
Lutron and Centurion are registered trademarks. © 1999 Lutron Electronics Co., Inc.
1/2" or 5/8"
1
Advertisement
Table of Contents

Related Manuals for Lutron Electronics Centurion C-600


Summary of Contents for Lutron Electronics Centurion C-600
- Page 1 12- or 14-gauge wires. Use them with Figure A. Switchbox Wiring copper wire only. Push wires into switchbox, allowing room for dimmer backbox to be inserted. Lutron and Centurion are registered trademarks. © 1999 Lutron Electronics Co., Inc.
- Page 2 Mount dimmer to switchbox using 2 screws Determine the number of switchboxes necessary provided and center mounting holes. Unit must be by using the Switchbox Requirement Chart (Table A). mounted vertically. See Figure B. When ganging any combination of small dimmers (C-600, C-1000) and large dimmers (C-1500, C-2000), keep all small together at one end of the gang and all large dimmers together at the other end of the gang.
- Page 3 Snap multiple single faceplates onto controls and Remove only inner side sections. Using pliers, adjust up or down for a snug fit. See Figure F. bend side sections as far as you can and then back to their original positions. Repeat several times until side sections break off (See Figure F).
- Page 4 Other countries call (610) 282-3800 Fax (610) 282-3090 Lutron Electronics Co., Inc. 7200 Suter Road Coopersburg, PA 18036-1299 Made and printed in U.S.A. 7/99 P/N 030-088 Rev. C...
Need help?
Do you have a question about the Centurion C-600 and is the answer not in the manual?
Questions and answers