
Subscribe to Our Youtube Channel
Related Manuals for Ametek USB Lab B.O.S.S.


Summary of Contents for Ametek USB Lab B.O.S.S.
- Page 1 ® USB Lab B.O.S.S. OS-100WX and OS-100WX-HD USB Brinell Optical Scanning System Operation Manual Newage hardness testing...
- Page 5 Newage Testing Instruments, Inc. is owned by AMETEK, a publicly traded corporation. Neither the corporation nor AMETEK are affiliated, in any way, with any other group or entity representing themselves or being referred to by the philosophical term “New-Age.”...
-
Page 6: Table Of Contents
SETUP AND BASIC OPERATION 1.1 Introduction ................1 1.2 What’s Included ................1 1.3 System Requirements ..............1 1.4 Principles of Operation ............... 1 1.5 Lab B.O.S.S. Installation, Software, if required ......2 1.6 Initial Software Startup..............3 1.7 Procedures for a Test Measurement ........... 4 FILE FUNCTIONS 2.1 Create a New File ................ -
Page 7: Setup And Basic Operation
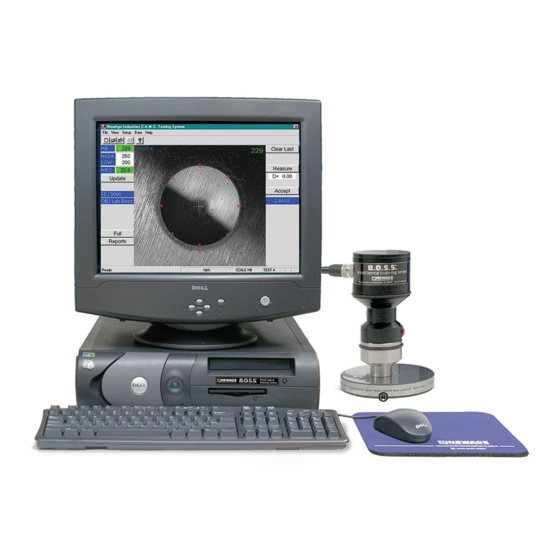
SECTION 1: SETUP AND BASIC OPERATION 1.1 Introduction Welcome to the Newage® Instruments Computer-Assisted Measurement System Program, a Windows™-based image acquisition and measurement software for B.O.S.S. (Brinell Optical scanning System). This software was developed to ® enhance the capabilities of your hardness testers by allowing you to automate the measurement of test impressions, reduce operator influence on test results, and transfer test results directly to a PC for real time, on-screen data management. -
Page 8: Lab B.o.s.s. Installation, Software, If Required
1.5 Lab B.O.S.S. Installation, Software, if required Instructions for software installation, if necessary, on included media. See ReadMe. rtf file. B.O.S.S. Operation Instructions... -
Page 9: Initial Software Startup
1.6 Initial Software Startup Setup automatically sets magnification to be Lab BOSS 1) Double click the icon to start the program. 2) The program will open up to the last file that was in use. If no data files have been created, the operator can create a new file. -
Page 10: Procedures For A Test Measurement
1.7 Procedures for a Test Measurement 1.7.1 For Automatic Measurement (Operator should also refer to following sections for setting up new files) Use your Brinell tester to perform a test and create a test impression. When you move the BOSS head into position over the sample, the image of the impression should appear on the monitor. -
Page 11: File Functions
SECTION 2: FILE FUNCTIONS The Main Menu Bar at the top of the screen contains 5 selections: File, View, Setup, Data, and Help. They can be accessed with the mouse by clicking on the selection. Click on one of them to open up it’s individual menu. The File Menu consists of 7 different functions: New, Open, Close, Print, Print Preview, Print Setup, and Exit, as well as a listing of the last 4 files that have been in use. - Page 12 You will then be prompted for Data Part File Information. This information can be used to keep track of Part Number, Description, Order Number, Comments, etc., related to this file. These headings will appear on printouts. Data entry is not required. Select OK when done. Clicking on the checkbox for “Prompted”...
- Page 13 The scale abbreviations which may be listed are: HB = Brinell Scale for BOSS DIA = Diameter Measurement for BOSS INCH = Measurement in Inches for linear measurement MM = Measurement in Millimeters for linear measurement HRC = Rockwell C scale HV = Vickers Scale for use with B.O.S.S.
- Page 14 calculations and for HI, LO, and OK indications for individual test results. When the Advanced Statistics Option has been purchased the X-Bar/R Chart uses these settings to plot the “high” and “low” test results as red points on the graph; “acceptable” test results are plotted as green points. You may also set a low warning and high warning number - those test results are indicated by a gray color on the Advanced statistics output.
-
Page 15: Open An Existing File
2.1.1 Create a New File - Pin Brinell Testing (Optional feature) If the operator is using the BOSS for testing impressions from the Pin Brinell, the DIA scale should be selected, then the conversion must be PIN for the Pin Brinell. The next pop-up provides the opportunity to select the pin type: D, E, F, G, or H pins, the type of indenter, standard or Carbide... -
Page 16: Basic Screen Operations
SECTION 3: BASIC SCREEN OPERATIONS The buttons on the main screen are used for: • basic testing • calibration and screen setup • accessing certain user adjustable parameters The main screen has many controls. A brief description is as follows NOTE: Select 2x for BOSS HD 3.1 Screen Controls 3.1.1 Result and Tolerance Display... -
Page 17: Measurement Displays
3.1.3 Measurement Displays These displays show the current distance between the lines in the horizontal and vertical axes. If HK, IN or MM scales are selected, only one axis is shown for HB or Diameter, only D is shown. 3.1.4 Reports Selection This function is the same as the View menu selection from the top menu. -
Page 18: Automatic Measuring
3.2.1 Automatic Measuring The measure button always appears when the scale is selected for HB or DIA. Press the Measure Button to automatically perform the measurement of the Brinell impression. With the BOSS system, after the measuring indicators are displayed, if they are not properly positioned, press the right mouse button to clear the indicators and return to a live image. -
Page 19: Update Test Parameters
3.3 Update Test Parameters 3.3.1 Changing Load and Magnification (under Update Button) The Update button at the left of the screen allows the operator to view and change selected test parameters that the computer uses to determine the hardness value: the load and magnification (current selections for load and magnification can be seen under the UPDATE button). -
Page 20: Test Block Verification/Calibration
Standard When testing in Brinell scales with USB "Lab Boss" style the regular BOSS unit you must use the “Lab‑Boss” setting for the objective. With the small nose BOSS you must use the "Lab Small”. These settings are marked on the display. "Lab Small"... -
Page 21: Adjust Camera
3.3.3 Adjust Camera (under Update Button) This allows the operator to make changes to the image in several ways. If these settings are changed, the operator can re-establish the default settings by selecting the RESTORE button. 3.3.4 Selection Line Control Functions (under Update Button) The selection lines that appear when the operator clicks on the edges of the test specimen can be changed to make the measurement process easier. -
Page 22: Full Screen Operation
3.4 Full Screen Operation When the operator selects the Full Button, he is able to see the maximum possible surface area of the test sample. The test operation buttons are repositioned near the top to provide a better view. The operator may also select to view the center area in a magnified view - either 2x (with one click) or 4x (with 2 clicks). -
Page 23: Menu Bar Operations
SECTION 4 MENU BAR OPERATIONS 4.1 View Menu 4.1.1 Advanced Statistics Software (Optional) With this option the View Menu consists of 7 different functions: X Bar/R Chart, Histogram, History Data, Tile, Auto Tile, Tool Bar and Status Bar. When activated, a check mark will appear in front of the function listing. Click on View to display the available functions. -
Page 24: Setup Menu
4.2 Setup Menu The Setup Menu consists of 4 different functions: Average, Test Setup, Tolerances, and Scale Select. 4.2.1 Average Menu (Optional) The operator may select to record averages of multiple tests rather than the individual tests. The data file must be empty to enter or change an average group size. -
Page 25: Test Setup
4.2.2 Test Setup The Test Setup is used to enter the company name, a margin at the top of the page and Comments which will appear on the printouts. The Network Drive Option allows the operator to automatically copy the current data files to an additional location. -
Page 26: Scale Select
4.2.4 Scale Select This is used to select new Primary and/or Converted Scale designations. The function is the same as was described under the "File Open" section The scale can only be changed when setting up a new file, or if the data has all been cleared out of the data file. -
Page 27: Data Menu
4.3 Data Menu The Data Menu consists of 4 different functions: Clear Last Test, Clear Test #, Clear All Tests, Statistics, and Part Information. 4.3.1 Clear Last Test This function is used to clear the last test result from memory. It is the way in which you can delete an erroneous reading caused by machine or operator error and not affect the statistical calculations. -
Page 28: Statistics
4.3.4 Statistics This function provides an on screen listing of statistics . The operator can select a range of results and the statistics will automatically change to reflect the selected range. "No Cpk" will eliminate this value from the reported information. Any selected range of data can be exported to a comma delimited .csv file. - Page 29 Select OK to exit. To return to the original field description select the Use Defaults-button. To make changes permanent for this file press the Change Defaults-button. Newage Testing Instruments, Inc.
-
Page 30: A: Troubleshooting, Repairs
APPENDIX A: TROUBLESHOOTING, REPAIRS FOR MANY VARIOUS FUNCTIONAL PROBLEMS - Make certain that the screen saver is turned off. Turn off screen saver and reboot system to correct problems. (Depending on the exact nature of screen saver, a wide variety of specific problems can results) NO PICTURE OR POOR CLARITY (B.O.S.S. -
Page 31: B: File Layout
APPENDIX B: FILE LAYOUT char LoWarn[7]; filefmt.doc char Comma; char Label3[7]; // "HW:" FILE FORMAT, Version 2.0 char Comma; char HiWarn[7]; Line 1: char Comma; char Label4[7]; // "HI:" char FileSignature Version [14]; char Comma; char Comma; char HiTol[7]; char RecordCount[5]; // count of records in the file char CrLf2[2];... -
Page 32: C: B.o.s.s. Tether Option
APPENDIX C: B.O.S.S. TETHER OPTION Read the tether manufacturer directions to set up the tether. To install the BOSS scan head on the tether, unscrew the nut holding the cable to the scan head. Attach the clip from the cable over the cord between the scan head and the nut (See photo #1 below). Push the clip up against the scan head and reattach the nut to full tightness (See photo #2 below). -
Page 33: W: Limited Warranty
APPENDIX W: LIMITED WARRANTY ONE YEAR LIMITED WARRANTY Should Newage Testing Instruments, Inc. equipment require service, we will repair or replace, at our option, any part or product which upon examination by a NewAge Industries service technician, shows to be defective in material or workmanship. - Page 34 Pub code: OM-USB Lab BOSS & BOSS HD Issue: July 2014 Newage hardness testing 205 Keith Valley Road, Horsham PA 19044, USA Tel: 215-355-6900 • Fax: 215-354-1803 newage.info@ametek.com • www.hardnesstesters.com...
Need help?
Do you have a question about the USB Lab B.O.S.S. and is the answer not in the manual?
Questions and answers