Table of Contents
Advertisement
Quick Links
Advertisement
Table of Contents

Related Manuals for Ametek SPECTRO MIDEX MID04


Summary of Contents for Ametek SPECTRO MIDEX MID04
- Page 1 Das v erk nüpfte Bild k ann nicht angezeigt werden. Möglicherweise wurde die Datei v erschoben, umbenannt oder gelöscht. Stellen Sie sicher, dass die Verk nüpfung auf die k orrek te Datei und den k orrek ten Speicherort zeigt. SPECTRO MIDEX µ-XRF Spectrometer Original operating instructions...
-
Page 3: Table Of Contents
Table of Contents Description of instrument ..................4 Description .......................... 4 Function ..........................4 Overview ..........................5 Safety ........................7 Symbols used ........................7 User information ........................8 ... -
Page 4: Description Of Instrument
Description of instrument Description of instrument Description Designation: SPECTRO MIDEX Model: MID04 Type: 76004854 Function X-rays excite the atoms of the sample, causing them to emit radiation. This radiation is measured by a semiconductor detector. The instrument comes with a preset method of analysis installed. Data are already stored in the instrument's memory. -
Page 5: Overview
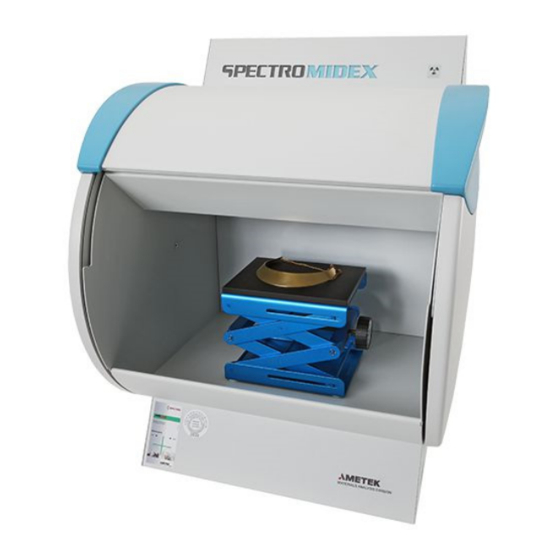
Description of instrument Overview The instrument is available in various configurations. Your instrument is equipped with various optional features, according to the specific application: Measurement distance feature Distance of 2 mm (optional helium gas flushing) Distance of 20 mm (no gas flushing) ... - Page 6 Description of instrument Configuration with scissor lift table Fig. 1 Component Component Rear side Instrument a ON/OFF switch Sample chamber with scissor lift b Fuse table Sample chamber flap Power supply connection point X-ray emitter ON/OFF indicator d Gas inlet connection point Pull-out handles e Video connection point (USB) Key switch with removable key...
-
Page 7: Safety
Safety Safety Every user of the instrument must have understood these operating instructions. This applies in particular to the safety regulations. Symbols used The following symbols are used in these abbreviated operating instructions and/or on the instrument. If required, additional important information is available in connection with these symbols. -
Page 8: User Information
Safety User information Compliance with all safety instructions is mandatory. It's for your own safety. The instrument - in its transport packaging - may only be transported by specialized organizations or by specifically trained personnel. Unpacking, installation, setup and connection of the instrument may only be ... -
Page 9: Intended Use
Safety Intended use Only solid, liquid or powdery substances may be analyzed with this instrument. Prohibited operating conditions Do not operate the instrument if one of the following conditions exists: If the instrument is faulty or damaged. If the instrument is not maintained at regular intervals. ... -
Page 10: Radiation Protection Advice
Safety Caution! Ionizing radiation! This spectrometer operates with ionizing radiation (X-rays). The safety devices ensure that the spectrometer can be operated only in a safe, closed and shielded condition. Never tamper with the safety devices. If you are concerned that the safety devices do not work properly, shut down ... -
Page 11: Technical Data
Technical data Technical data Description Value Instrument height 750 mm (29.5’’) Instrument width 580 mm (22.8’’) Instrument depth 670 mm (26.5’’) Instrument depth (on supporting 560 mm (22.0’’) surface) Instrument weight 55 – 70 kg (120 – 155 lbs), with dependency on the configuration Operating voltage range 90 –... -
Page 12: Transportation/Setting-Up
Transportation/Setting-up Transportation/Setting-up The instrument - in its transport packaging - may only be transported by specialized organizations or by specifically trained personnel. Unpacking, installation, setup and connection of the instrument may only be performed by service personnel that is authorized by the manufacturer. Note! Measurement errors! Shocks to the instrument during the measuring process may result in ... -
Page 13: Storage
Transportation/Setting-up Storage Storage conditions: The instrument must be stored in a dry place Room temperature: +2 °C – +40 °C (36 °F – 104 °F) Gas supply (optional) The optional gas flush is performed using helium. A suitable pressure reducer is required for the gas supply. Output pressure 2 –... -
Page 14: Uninterruptible Power Supply - Ups
Transportation/Setting-up Uninterruptible power supply – UPS Note The first installation of the UPS must be performed by a technician who is authorized by SPECTRO. If you would like to retrofit the instrument, please order the retrofitting set: Part number 71000229: UPS 230V/50-60HZ + accessories ... - Page 15 Transportation/Setting-up When changing or reconnecting the UPS, proceed as follows: Connect all components with the UPS (spectrometer, PC, monitor, etc.) Connect the UPS with the power supply. Switch on the UPS. Switch on the components (spectrometer, PC, monitor, etc.) The UPS is now installed. ...
-
Page 16: Operation
Operation Operation Overview of controls Fig. 3 Control element Function Height-adjustment For height adjustment of the scissor lift table (applies wheel only to configuration with scissor lift table) Key switch with Horizontal position: ON setting removable key Vertical position: OFF setting On/Off switch For switching the instrument on or off —... -
Page 17: Displays
Operation Displays Fig. 4 Display Function X-ray radiation X-ray radiation indicator Center lit green when instrument is on. Lit yellow when X-ray tube is in operation. SPECTRO MIDEX — 31.08.2016 — 17... -
Page 18: Switching On The Instrument
Operation Switching on the instrument Notice! Reduction in service life! If the instrument is switched on and off very frequently, its service life will be reduced (the X-ray tube being particularly affected). Whenever possible, leave the instrument on. Note When turning on the spectrometer after a long period of downtime, the following conditions must be taken into consideration: If the spectrometer was shut down for more than two days, the X-ray tube... - Page 19 Operation If after logging in you are not in “Measurement” mode, please switch to this mode by clicking on “Measurement” (under OPERATION) in the top left half of the screen. Under the video image click on the green “Launch Communication Server” button.
-
Page 20: Switching Off The Instrument
Operation Switching off the instrument Notice! Risk of damage! If the spectrometer is not used for longer than a day (weekends, vacation shutdown), please switch off the instrument. If you do not work with the system for an extended period of time, the X-ray ... -
Page 21: Standby Mode
Operation Standby mode Comply with the following instructions regarding the standby mode: If the instrument has been down for an extensive period (weekends, vacation shutdown), the X-ray tube must be run under standby conditions for at least 20 minutes. Start measuring only after this period. If the instrument has been down for an extensive period ( >... - Page 22 Operation Setting up the height Note When setting up the height, stripe- or point-shaped reflections can occur for samples with a reflecting surface. In such a case, the actual laser point (1) is hard to spot or may be confused with the reflection (2).
- Page 23 Operation Set the correct height for the sample. The laser (2) helps with the setting. If the sample on the scissor lift table is at an incorrect height (3), use the setting dial (4) to adjust its position until it is at the correct height (1).
- Page 24 Operation Start the measurement using the green “Start” button. The measurement is performed automatically. Perform further measurements if required. The measurement is complete. Note Measure a reference sample at regular intervals. This will allow you to identify changes of the measurement results in good time. —...
-
Page 25: Maintenance By The Operator
Maintenance by the operator Maintenance by the operator Note In order to ensure the availability and operational safety of the equipment, we recommend having the system checked for correct operation and performance at least once per year by specialized technicians. To find contact addresses of service organizations authorized by SPECTRO go to www.spectro.com Operator maintenance plan Caution! Ionizing radiation! -
Page 26: Energy Channel Recalibration (Mca)
Maintenance by the operator Energy channel recalibration (MCA) In order to recalibrate the instrument, proceed as follows: In the software program, select the “Recalibration” menu item beneath the green “Start” button and then select “MCA Recalibration”. The corresponding program window is displayed. ... -
Page 27: Global Recalibration
Maintenance by the operator Global recalibration Note An energy channel recalibration procedure (MCA) should always be performed before carrying out a global recalibration procedure. Following this, the control sample should be measured again. A global recalibration procedure only has to carried out if the values still lie outside the tolerance range. -
Page 28: Troubleshooting
Troubleshooting Troubleshooting Notice! Damage to instrument! Improper repairs may damage the instrument. Do not repair the instrument yourself. Contact your immediate supervisor. Fault Cause Remedy The instrument cannot be The power supply plug is Plug in the power supply plug switched on not properly plugged in properly... - Page 29 Troubleshooting Fault Cause Remedy When starting the The instrument has not Switch on the instrument (see spectrometer program, been switched on above). the message “Connect to The network connection Connect the network cable to the instrument” is displayed cable for connecting the PC and the instrument and check continually.
- Page 30 Troubleshooting Fault Cause Remedy The analysis results for There is no proper sample Place a control sample at the the control sample at the measurement measurement position indicate large deviations position or no sample at all No connection for the Make the connection for the helium supply was made helium supply and start the...
-
Page 31: Spare Parts And Consumables
Spare parts and consumables Spare parts and consumables You can find the spare parts and consumables for this instrument under "Support - Parts Catalogue" (Service – Parts Catalogue) on our website at www.spectro.com. Use only genuine spare parts for repairing the instrument. The use of non-genuine spare parts will make the CE Declaration of Conformity null and void. -
Page 32: Ec Declaration Of Conformity
EC Declaration of Conformity EC Declaration of Conformity — 32 SPECTRO MIDEX — 31.08.2016...
Need help?
Do you have a question about the SPECTRO MIDEX MID04 and is the answer not in the manual?
Questions and answers