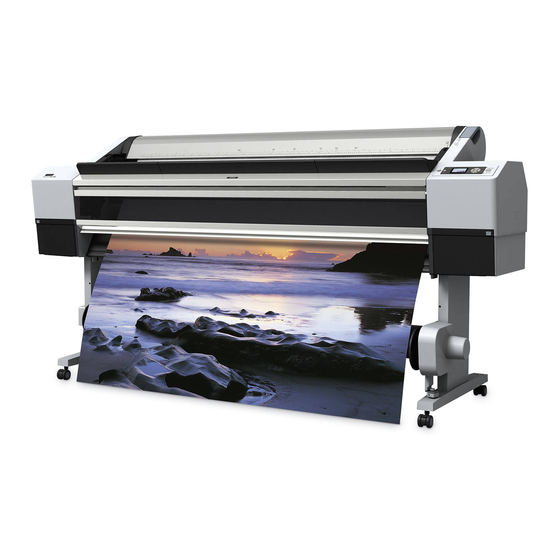
Epson Stylus Pro 11880 User Manual
Professional 64-inch printer
Hide thumbs
Also See for Stylus Pro 11880:
- User manual (180 pages) ,
- Network manual (46 pages) ,
- Unpacking and setup manual (28 pages)
Table of Contents
Advertisement
Quick Links
Advertisement
Table of Contents

Related Manuals for Epson Stylus Pro 11880


Summary of Contents for Epson Stylus Pro 11880
- Page 1 User’s Guide NPD2979-00...
-
Page 2: Copyrights And Trademarks
Seiko Epson Corporation. The information contained herein is designed only for use with this Epson printer. Epson is not responsible for any use of this information as applied to other printers. -
Page 3: Table Of Contents
Printer driver ......61 EPSON Printer Utility2 ....61 EPSON StatusMonitor. - Page 4 Consumable Products .....108 Epson special media ....108 Ink cartridges .
- Page 5 Contacting Customer Support ....168 Before Contacting Epson....168 Help for Users in North America ..169 Help for Users in Europe .
-
Page 6: Safety Instructions
User’s Guide Safety Instructions Important Safety Instructions Read all of these instructions before using the printer. Also be sure to follow all warnings and instructions marked on the printer. Warning, Cautions, and Notes Warning: must be followed carefully to avoid bodily injury. Caution: must be observed to avoid damage to your equipment. -
Page 7: When Using This Product
User’s Guide ❏ Do not use a damaged or frayed power cord. ❏ If you use an extension cord with this product, make sure the total ampere rating of the devices plugged into the extension cord does not exceed the cord’s ampere rating. Also, make sure the total ampere rating of all devices plugged into the wall outlet does not exceed the wall outlet’s ampere rating. -
Page 8: When Handling The Ink Cartridges
User’s Guide When handling the ink cartridges ❏ Keep ink cartridges out of the reach of children and do not drink. ❏ If ink gets on your skin, wash it off with soap and water. If it gets in your eyes, flush them immediately with water. -
Page 9: Introduction
User’s Guide Introduction Printer Parts Front view 1. Roll paper spindle Use the spindle to set the roll paper. 2. Paper roll holder Place the roll paper temporarily. 3. Roll paper cover Open the roll paper cover when you set or remove the roll paper. -
Page 10: Features
See “Black-and-White Photo Printing” on page 77. Support for a range of paper types Epson offers a range of special media for ensuring high-quality printing. By selecting the right paper for the application, whether for indoor or outdoor use (lamination is recommended), you can express a whole new world of art. -
Page 11: The Control Panel
User’s Guide The Control Panel Buttons, Lights, and Messages You can check the ink remaining and printer status on the control panel. Buttons 1. Power button Turns the printer on or off. 2. Pause/Reset button Stops printing temporarily, or restarts printing if pressed when the printer is in the pause mode. -
Page 12: Lights
User’s Guide 5. Enter button ❏ Sets the selected parameter in the selected item in the Menu mode. Executes the item if the selected item is for execution only. ❏ When you press and hold the seconds while REMAINING PPR SETUP is ON:AT ROLL EXCHANGE, a barcode is printed on the roll paper edge and the paper lever is released. -
Page 13: Display
User’s Guide Auto Auto Forward is Forward enabled. light Flashing A taking-up error has occurred. Auto Forward is disabled. Auto Auto Backward is Backward enabled. light Flashing A taking-up error has occurred. Auto Backward is disabled. Display 1. Messages Displays the printer status, operation, and error messages. -
Page 14: Ink Remaining
User’s Guide 6. Platen Gap icon Displays the Platen Gap setting. If the paper number you have selected in the Custom Paper menu is displayed, the Platen Gap icon is not displayed. See “Menu list” on page 18. Icon Explanation None Standard Narrow... -
Page 15: Menu Mode
User’s Guide Menu Mode The Menu mode enables you to make printer settings similar to those you would normally make in the driver or software, as well as other additional settings, directly through the control panel. The control panel shows the printer information, and operations such as nozzle check can be performed using the control panel. -
Page 16: There Are Three Cases Depending On The Items You Have Selected
User’s Guide 2. There are three cases depending on the items you have selected. A. When you can select a parameter Example: When selecting PLATEN GAP in the Printer Setup menu Press the button to select PLATEN GAP. Press the button to enter the Platen Gap item. - Page 17 User’s Guide C. When you want to display the printer information Example: When selecting INK LEVEL in the Printer Status menu. In the Printer Status menu, press the button to select INK LEVEL. Press the button to enter the Ink Level item.
-
Page 18: Menu List
User’s Guide Menu list Menu Item “PRINTER SETUP” on PLATEN GAP page 20 PAGE LINE ROLL PAPER MARGIN PAPER SIZE CHECK PAPER SKEW CHECK REFRESH MARGIN AUTO NOZZLE CHECK PRINT NOZZLE PATTERN INITIALIZE SETTINGS “TEST PRINT” on NOZZLE CHECK page 21 STATUS SHEET NETWORK STATUS SHEET JOB INFORMATION... - Page 19 User’s Guide “PRINTER STATUS” on VERSION page 22 PRINTABLE PAGES INK LEVEL MAINTENANCE TANK USAGE COUNT CLEAR USAGE COUNT JOB HISTORY TOTAL PRINTS EDM STATUS “PAPER SETUP” on PAPER TYPE page 23 ROLL PAPER REMAINING CUSTOM PAPER “HEAD ALIGNMENT” PAPER THICKNESS on page 26 ALIGNMENT “NETWORK SETUP”...
-
Page 20: Details Of Menu Mode
User’s Guide Details of Menu mode PRINTER SETUP Item Parameter PLATEN GAP NARROW STANDARD WIDE WIDER WIDEST PAGE LINE ROLL PAPER MARGIN DEFAULT TOP/BOTTOM15mm TOP 35/BOTTOM 15mm 15mm Explanation You can adjust the distance between the print head and paper. ❏... -
Page 21: Test Print
User’s Guide Item Parameter PAPER SIZE CHECK PAPER SKEW CHECK REFRESH MARGIN AUTO NOZZLE CHECK ON: PERIODICALLY ON: EVERY JOB PRINT NOZZLE PATTERN ON: EVERY PAGE ON: EVERY 10 PAGES INITIALIZE SETTINGS EXECUTE TEST PRINT Item Parameter NOZZLE CHECK PRINT STATUS SHEET PRINT NETWORK STATUS SHEET... -
Page 22: Printer Status
User’s Guide MAINTENANCE You can perform maintenance functions, such as power cleaning. Item Parameter CUTTER ADJUSTMENT EXECUTE CUTTER REPLACEMENT EXECUTE POWER CLEANING EXECUTE CLEAN EACH COLOR C/VM MK/Y LLK/LK VLM/LC CLOCK SETTING MM/DD/YY HH:MM CONTRAST ADJUSTMENT -20 - 0 - +20 PRINTER STATUS This menu shows the printer status. -
Page 23: Paper Setup
If you replace the tank correctly, the counter resets automatically. See “Replacing the Maintenance Tank” on page 127. PAPER SETUP When you use non-Epson media, be sure to make the appropriate settings for the paper. Item Parameter... - Page 24 User’s Guide Item Parameter ROLL PAPER REMAINING PPR SETUP REMAINING *This menu does not appear when the paper is loaded in the printer. ROLL PAPER LENGTH ROLL LENGTH ALERT CUSTOM PAPER PAPER NO.1 - 10 Explanation You can set a paper remaining counter function only if the paper is not loaded in the printer.
- Page 25 User’s Guide CUSTOM PAPER When using the non-Epson media, you need to make the settings suitable for the media. After you have selected the paper number, make the following settings. To set the custom paper, see the following section. “Setting the custom paper in the printer” on page 100...
-
Page 26: Head Alignment
EXECUTE Explanation When using Epson special media, select the paper type. If you use non-Epson special media, enter the paper thickness in the range of 0.1 to 1.5 mm. When you select AUTO, the adjustment pattern for output is read by the sensor and the optimum adjustment value is registered automatically in the printer. -
Page 27: Maintenance Mode
User’s Guide Maintenance Mode You can change the language or unit used on the display or return all the setting values to their factory default. Turn off the printer by pressing the button. Press both the button and the at the same time to turn on the printer. The first menu appears on the LCD panel. -
Page 28: Paper Handling
❏ When you use paper other than Epson special media, see the instructions included with the paper, or contact your supplier for more information. -
Page 29: Using Roll Paper
User’s Guide Using Roll Paper When using roll paper, prepare the spindle, and install the roll paper onto the spindle, and then set it on the printer. Because the roll paper is heavy, have two people set the roll paper. Warning: The paper roll is heavy so have two people set the roll paper. -
Page 30: Loading Roll Paper
Note: We recommend that you switch the tension to high tension when using roll paper other than Epson's special paper, such as cloth or thin roll paper of less than 100 g/m2. In this case, paper is fed in smaller increments than usual. - Page 31 User’s Guide Aligning it with the rails on both sides, slowly roll the paper roll into place and set it on the mounting brackets inside the printer. Turn on the printer by pressing the button. Make sure that the Pause light is not flashing, and then set the paper lever to the released position.
- Page 32 User’s Guide Holding the bottom edge of the paper, turn the roll paper to remove slack. Make sure that the bottom edge of the paper is straight, and that it is aligned with the horizontal line. When using thick, heavy, or curled paper, press the button to increase the power.
-
Page 33: Cutting The Roll Paper
User’s Guide Cutting the roll paper There are two ways to cut the roll paper. Method Operation Auto cut Cut the roll paper after printing each page automatically. Manual Cut the roll paper manually, or cut the roll paper using cutter sold at a store. -
Page 34: Removing The Roll Paper From The Spindle
User’s Guide Removing the roll paper from the spindle Note: ❏ When REMAINING PPR SETUP is set to ON:AT ROLL EXCHANGE, the paper lever is locked. Press and hold the button for 3 seconds so the barcode is printed on the edge of the roll paper and the paper lever is released. -
Page 35: Using Cut Sheet Media
❏ If roll paper is loaded, rewind it first before loading single sheet paper. ❏ When you use paper other than Epson special media, see the instructions included with the paper, or contact your supplier for more information. -
Page 36: Loading Cut Sheet Media Longer Than Super
User’s Guide Loading cut sheet media longer than Super A3/B (483 mm) Turn on the printer by pressing the button. Press the button repeatedly until Sheet appears. Make sure that the roll paper cover is closed. Make sure that the Paper Check light is on, and then set the paper lever to the released position. - Page 37 User’s Guide Make sure that the right and bottom edges of the sheet are straight and in line with the horizontal line and the vertical line. Note: ❏ Align the paper correctly with the vertical and horizontal setting positions. If the leading edge of the paper extends beyond the paper setting position or is short of it, it will cause an error.
-
Page 38: Loading Cut Sheet Media With A Length Of Super A3/B (483 Mm) Or Below
User’s Guide Loading cut sheet media with a length of Super A3/B (483 mm) or below Turn on the printer by pressing the button. Press the button repeatedly until Sheet appears. Make sure that the roll paper cover is closed. Make sure that the paper lever is in the secured position, and then load the sheet into the paper insertion slot until it meets... - Page 39 User’s Guide Make sure that the Paper Check light is on, and then set the paper lever to the released position. LEVER RELEASED. LOAD PAPER appears on the LCD panel. The paper lever may be locked if REMAINING PPR SETUP is set to ON: AT ROLL EXCHANGE. In this case, press and hold the for 3 seconds to print the barcode, so you can release the paper lever.
-
Page 40: Ejecting Paper
User’s Guide Set the paper lever to the secured position, and then close the front cover. BUTTON appears on the LCD PRESS THE panel. Press the button. The print heads move and the sheet feeds into the printing position automatically. If DO YOU WANT TO USE THE FOLLOWING PAPER? appears on the LCD panel, press the button to select the media, and then... -
Page 41: Using Auto Take-Up Reel Unit
User’s Guide Release the paper lever while holding the paper to remove it from the printer. Caution: When you release the paper lever, the paper may fall. Be sure to hold the paper to avoid falling and damaging the paper. Using Auto Take-up Reel Unit When you want to print your data on roll paper and do not want to cut it or feed it out onto the... -
Page 42: Winding Paper Backward
User’s Guide Tape the leading edge of the roll paper to the take-up reel core in three places. Press the button to feed the paper forward and create a loop of slack. Hold down the Auto Forward button to take up the roll paper for one or more revolution of the take-up paper core. -
Page 43: Taking Up Your Prints
User’s Guide After taking up the paper, ensure that there is adequate slack between the roll paper and the take-up reel core. About paper basket ❏ When using the Auto Take-up Reel Unit, rewind the paper basket and push back the upper hooks fully. -
Page 44: Removing Paper After Take-Up
User’s Guide Removing paper after take-up After paper take-up, follow the steps below to remove the take-up reel core. Cut the roll paper. ❏ Press the button to select Roll Auto Cut On ❏ Press the button for 3 seconds to cut the roll paper automatically. -
Page 45: Installing A Take-Up Reel Core
User’s Guide Reverse the flange so that the smaller knob is positioned on the outside, then replace it on the drive unit by pinching the knob. Remove the flange by pinching the knob. Reverse the flange so that the smaller knob is positioned on the outside, then replace it on the movable unit by pinching the knob. -
Page 46: Using The Paper Basket
User’s Guide Turn the lock lever to the front to lock the movable unit. The installation of the 3-inch auto take-up reel unit is complete. Using the paper basket To avoid your printouts getting dirty or crinkled, set the paper basket as explained below. You can use the paper basket when the paper length is less than 914 mm and the thickness is less than 0.5 mm. -
Page 47: Printable Area
User’s Guide Gently and horizontally pull the shaft of the paper basket out to its full length. Note: Pull out the paper basket completely until it is locked. Please note that, while being pulled out, the basket may get caught and be seemingly locked several times. - Page 48 User’s Guide Parameter TOP/ 15mm BOTTOM 15mm TOP35/ 35mm BOTTOM 15mm 15mm 15mm 15mm Note: ❏ The print area does not change even when the margins are changed. ❏ The printer automatically detects the dimensions of the paper that is loaded. Print data that exceeds the printable area of the paper cannot be printed.
-
Page 49: Using The Printer Software (Windows)
See the Unpacking and Setup Guide for installing the software, and see its online help for detailed information for each software. ❏ Printer driver ❏ EPSON Status Monitor 3 ❏ EPSON LFP Remote Panel Printer driver The printer driver lets you print documents from applications to the printer. -
Page 50: Epson Status Monitor 3
EPSON Status Monitor 3 is installed with the printer driver automatically. EPSON LFP Remote Panel EPSON LFP Remote Panel gives the user a broad range of control over the printer, to obtain better print quality in printing on various media. -
Page 51: From The Printer Icon
User’s Guide Example: The printer driver window appears. Make the settings as necessary, and then start printing. From the Printer icon When you make common settings or perform printer maintenance, such as Nozzle Check, Head Cleaning, access the printer driver from the Printer icon. -
Page 52: Getting Information Through Online Help
User’s Guide Right-click your printer icon, and click Printing Preferences. The printer driver window appears. The settings you make here become the default settings of the printer driver. Getting Information Through Online Help You can view a detailed explanation using the following ways. -
Page 53: Basic Settings
Basic Settings button This section describes how to print your data from an application using the Epson printer driver. Setting the printer driver First, make the print data using the application software. -
Page 54: Checking The Printer Status
“Canceling printing by the computer” on page Canceling printing by the computer Canceling printing Click Stop on the EPSON Progress Meter dialog box. Note: ❏ The Progress Meter shows the progress of the current print job. It disappears when the job has been sent to the printer. -
Page 55: When Problem Occurs During Printing
If a problem occurs during printing, an error message appears in the EPSON Status Monitor 3 window. Click How to, and EPSON Status Monitor 3 will lead you step by step through a procedure to solve a problem. Using the Printer Software (Windows) -
Page 56: Using The Printer Utilities
User’s Guide Using the Printer Utilities The Epson printer utilities let you check the current printer status and perform printer maintenance from your screen. Nozzle Check This utility checks the print head nozzles to see if they are clogged and need to be cleaned. Check... -
Page 57: Using Epson Status Monitor 3
In the Monitoring Preferences dialog box, select the Shortcut Icon check box to display a shortcut icon on your Windows taskbar. Right-click the shortcut icon, and select the printer name to display the EPSON Status Monitor 3 dialog box. See “Viewing information in Monitoring Preferences”... - Page 58 User’s Guide Using Monitoring Preferences This function lets you specify the monitoring feature of EPSON Status Monitor 3. Accessing Monitoring Preferences Open the printer driver window, click the Utility tab, and then click Monitoring Preferences. Note: In the Monitoring Preferences dialog box, select the Shortcut Icon check box to display a shortcut icon on your Windows taskbar.
-
Page 59: Uninstalling The Printer Software
Add/Remove Programs) in the Control Panel. For Windows Vista, click Programs, and then Programs and Features in the Control Panel. Select EPSON Printer Software, and then click Change/Remove (or Uninstall/Change). Select the target printer icon, and then click Follow the on-screen instructions to complete uninstallation. -
Page 60: Uninstalling Epson Lfp Remote Panel
User’s Guide Uninstalling EPSON LFP Remote Panel EPSON LFP Remote Panel can be uninstalled from Add or Remove Programs (or Add/Remove Programs) in the Control Panel. For detailed information, see the EPSON LFP Remote Panel online help. Using the Printer Software (Windows) -
Page 61: Using The Printer Software (Mac Os X)
EPSON Printer Utility2 You can execute the printer maintenance functions, such as Nozzle Check, Head Cleaning. EPSON Printer Utility2 is installed with the printer driver automatically. EPSON StatusMonitor This utility provides you with printer status information, such as the ink cartridge status, the free space of the maintenance tank, and a printer error. -
Page 62: Epson Lfp Remote Panel
User’s Guide EPSON LFP Remote Panel EPSON LFP Remote Panel gives the user a broad range of control over the printer, to obtain better print quality in printing on various media. Accessing the Printer Driver To access the printer driver, follow the steps below. -
Page 63: Accessing The Print Dialog
User’s Guide Accessing the Print dialog To access the Print dialog, click Print on the File menu of your application. The Print dialog is displayed. Make the settings as necessary, and then start printing. Getting Information Through Online Help To access the online help, click the the dialog of the printer driver. -
Page 64: Basic Settings
User’s Guide Basic Settings This section describes how to print your data from an application using the Epson printer driver. Setting the printer driver First, make the print data using the application software. Before printing, open the printer driver window, and confirm the print settings such as the media type, paper size. -
Page 65: Canceling Printing
If a problem occurs during printing, an error message appears. If you are not sure how to solve the problem, cancel printing, and then start EPSON StatusMonitor that leads you step by step through a procedure to solve a problem. Using the Printer Software (Mac OS X) -
Page 66: Using Printer Utilities
User’s Guide Using Printer Utilities The Epson printer utilities let you check the current printer status and perform printer maintenance from your screen. EPSON StatusMonitor This utility provides you with printer status information, such as the ink cartridge status, the free space of the maintenance tank, and a printer error. -
Page 67: Using Epson Statusmonitor
Note: The printer error message appears automatically on your screen even if EPSON StatusMonitor is not opened. Accessing EPSON StatusMonitor Open the EPSON Printer Utility2 window, and then click EPSON StatusMonitor. -
Page 68: Uninstalling The Printer Software
Software To uninstall the printer software, follow the steps below. Uninstalling the printer driver To uninstall the printer driver and EPSON Printer Utility2, follow the steps below. Turn off the printer, and unplug the interface cable connected with the computer and printer. -
Page 69: Uninstalling Epson Lfp Remote Panel
Follow the on-screen instructions to uninstall the printer driver. Uninstalling EPSON LFP Remote Panel Drag the EPSON LFP Remote Panel folder to the Trash. See the EPSON LFP Remote Panel online help for more information. Using the Printer Software (Mac OS X) -
Page 70: Variety Of Printings
User’s Guide Variety of Printings Using Color Management The printer driver provides a setting for performing color management to printing data and a color adjustment that produces better looking prints by using only the printer driver. Color adjustment is performed without adjusting the color of the original data. -
Page 71: Color Management By Application
User’s Guide Methods for color management Color management by printer driver Application Color management by Driver ICM (Windows only) Color management is performed by specifying the input profile and the printer profile by the printer driver. Color management can be performed even if you print data from an application that does not support ICM color management. -
Page 72: Color Management By Driver Icm (Windows Only)
User’s Guide Color management by Driver ICM (Windows only) The following procedures are for Adobe Photoshop CS2 running on Windows XP. When using this function with an application which does not support a color management function, you need to perform the color matching process from step 4. -
Page 73: Color Management By Host Icm Or Colorsync
User’s Guide Intent Explanation Saturation Performs conversion, keeping the current saturation unchanged. Perceptual Performs conversion so that a more visually natural image is produced. This feature is used when a wider gamut of color is used for image data. Relative Performs conversion so Colorimetric that a set of color gamut... -
Page 74: Color Management By Application
User’s Guide Open the printer driver window (Windows) or the Print dialog (Mac OS X). Windows See “From Windows applications” on page 50. Mac OS X See “Accessing the Printer Driver” on page 62. For Windows, select Custom for the Mode in the Main menu, and select ICM, and then click Advanced. -
Page 75: Color Adjustment By The Printer Driver
User’s Guide Open the printer driver window (Windows) or the Print dialog (Mac OS X). Windows See “From Windows applications” on page 50. Mac OS X See “Accessing the Printer Driver” on page 62. For Windows, select Custom for the Mode in the Main menu, and then select No Color Adjustment. - Page 76 User’s Guide For Windows, select Custom for the Mode in the Main menu, and select Color Controls, and then click Advanced. For Mac OS X, select Printer Color Management, and click Color Controls, and then click Advanced Settings. Windows Mac OS X Make the necessary settings.
-
Page 77: Auto Color Adjustment By Photo Enhance (Windows Only)
User’s Guide Auto color adjustment by Photo Enhance (Windows only) This setting provides a variety of image-correction settings that you can apply to your photo images before printing. Photo Enhance does not affect your original data. Open the printer driver window. See “Accessing the Printer Driver”... - Page 78 User’s Guide Mac OS X For Windows, click Custom for the Mode in the Main menu, and select Color Controls, and then click Advanced. For Mac OS X, select Printer Color Management. Windows Mac OS X Make the necessary settings, and then start printing.
-
Page 79: Borderless Printing
User’s Guide Mac OS X Borderless Printing You can print your data without margins on paper. There are two types of borderless printing. Note: If you are using roll paper, all four sides can be borderless, and if you are using a sheet of paper, only left and right sides can be borderless. -
Page 80: Supported Media Type
User’s Guide Supported media type The following media sizes are supported for borderless printing. Paper width 254 mm/10 inch 300 mm 329 mm/13 inch/Super A3 406 mm/16 inch 432 mm/17 inch 610 mm/24 inch/Super A1 914 mm/36 inch/Super A0 1118 mm/44 inch/Super B0 1200 mm 1270 mm/50 inch 1372 mm/54 inch... -
Page 81: Printer Driver Settings
User’s Guide Printer driver settings To print your data with this feature, follow the steps below. For Windows Open the printer driver window. See “Accessing the Printer Driver” on page 50. In the Main menu, select the media type, paper source, page size, or paper size. When you print on roll paper, click Roll Paper Option, and select the Auto Cut setting. - Page 82 User’s Guide For Mac OS X Open the Page Setup dialog. See “Accessing the Printer Driver” on page 62. Select the paper size and borderless printing such as Auto Expand or Retain Size, and then click OK. Open the Print dialog. See “Accessing the Printer Driver”...
-
Page 83: Roll Paper Cut For Borderless Printing
User’s Guide Roll paper cut for borderless printing When you use roll paper for borderless printing, the paper cut operation is different according to the Borderless and Auto Cut settings of the printer driver. No margins for left and right Printer Borderless: Enable driver... -
Page 84: Enlarge Or Reduce Size Printing
User’s Guide Enlarge or Reduce Size Printing You can fit the size of your data to the size of paper you print on. There are three ways to enlarge or reduce the size of your data. ❏ Fit to Page (Windows only) Proportionally enlarges or reduces the size of your data to make it fit the paper size you have selected in the Output Paper list. -
Page 85: Fit To Page (Windows Only)
User’s Guide Fit to Page (Windows only) You can fit the size of your data to the size of paper you to print on. Open the printer driver window. See “Accessing the Printer Driver” on page 50. Click the Page Layout tab, and then select the same paper size as the paper size of the data. -
Page 86: Fit To Roll Paper Width (Windows Only)
User’s Guide Fit to Roll Paper Width (Windows only) Open the printer driver window. See “Accessing the Printer Driver” on page 50. Click the Page Layout tab, and then select the same paper size as the paper size of the data. -
Page 87: Custom
User’s Guide Custom Lets you define the percentage you want to reduce or enlarge. For Windows Open the printer driver window. See “Accessing the Printer Driver” on page 50. Click the Page Layout tab, and then select the same paper size as the paper size of the data. -
Page 88: Pages Per Sheet Printing
User’s Guide Pages Per Sheet Printing You can print two or four pages of your document on one sheet of paper. If you print continuous layout data prepared at A4 size, it will be printed as shown below. Note: ❏ For Windows users, use the printer driver's function for layout printing. -
Page 89: For Mac Os X
User’s Guide For Mac OS X Open the Print dialog. See “Accessing the Printer Driver” on page 62. Select a target printer, and then select Layout from the list to specify the order in which the pages will be printed. Note: If you select other than None for Border, the frames around the pages are printed on each... - Page 90 User’s Guide paper together to make a poster. Open the printer driver window. See “Accessing the Printer Driver” on page 50. Click the Page Layout tab, select the Multi-Page check box, select Poster, and then click Settings. In the Poster Settings dialog box, select the number of printed pages you want the poster to cover.
-
Page 91: Joining The Sheets Together Along The Guide
User’s Guide If you want margins around the poster, make sure the Borderless Poster Print check box is cleared, and make the other settings as necessary. Note: Regarding the size when the parts are joined together: The finished size whether Trim Lines is selected or not is the same. - Page 92 User’s Guide For poster printing with margins When you select Overlapping Alignment Marks, the following marks are printed on the paper. See the procedures below to join the four printed pages together using the alignment marks. The four sheets are joined together by the following order.
- Page 93 User’s Guide Cut the bottom of upper sheets along the alignment mark (horizontal blue line). The guide is black for the black-and-white printing. Lay the upper sheets on top of the lower sheets. The X marks should be matched as in the illustration below, and join the upper sheets and lower sheets together with cellophane tape temporarily.
-
Page 94: Printing On Custom Paper
User’s Guide Printing on Custom Paper You can also print on a custom paper, using the steps below. The size you can register is as follow. Paper width 89 to 1626 mm Paper height Windows: 127 to 15000 mm Mac OS X: 127 to 15240 mm ✽... -
Page 95: For Mac Os X
User’s Guide ❏ If the ratio is same as the defined paper size, select the ratio from the Fix Aspect Ratio and select either Landscape or Portrait for the Base. In this case, you can only adjust either the Paper Width or Paper Height. - Page 96 User’s Guide Enter the paper width, paper height, and margins, and then click OK. The paper size and printer margin you can set is as follow. Page setup Paper size Sheet Supported paper size Roll Paper Supported paper size Roll Paper Supported (Banner) paper size...
-
Page 97: Banner Printing On Roll Paper
User’s Guide Banner Printing on Roll Paper This section explains how to print a banner and panorama pictures. There are two ways to print a banner. Paper source Application Roll Paper Document preparation tool, image and editing software Roll Paper (Banner) Software that supports banner printing The following are the available printing sizes. - Page 98 User’s Guide Select Roll Paper or Roll paper (Banner) from the Source list. Note: Roll Paper (Banner) can be used for an application that supports banner printing. Click Roll Paper Option, and then select Normal Cut or Off from the Auto Cut list. Click the Page Layout tab, and select Reduce/Enlarge, and then select Fit to Page or Fit to Roll Paper Width.
- Page 99 User’s Guide Paper width 89 to 1626 mm Paper height 127 to 15000 mm Note: If you are using an application that supports banner printing, you do not need to set the user-defined size if you select Roll Paper (Banner) for the Source. Select the paper size from the Output Paper list, and make sure the Optimize Enlargement check box is selected.
-
Page 100: Printing With Non-Epson Media
Configuration dialog box have priority over the settings you make on the printer's control panel. ❏ You can register the custom paper or printer settings on your computer by using EPSON LFP Remote Panel. See the EPSON LFP Remote Panel online help for detailed information. - Page 101 3. Press the 4. Press the previous menu. Note: You can get a high-quality result if you print a sample image using EPSON LFP Remote Panel to set the value for Paper Feed Adjustment. button to select button to print the paper button to select the button.
-
Page 102: Customize The Items Of The Printer Driver
User’s Guide Set drying time, if necessary. You can set the ink drying time for each print head pass. The range is 0.0 to 10.0 seconds. 1. Press the button to select DRYING TIME, and then press the 2. Press the button to select the time in seconds. - Page 103 User’s Guide Enter the name in the Name box, and then click Save. You can choose a setting you have registered from the Select Setting list box. Saving as a custom media You can save the items of the Media Settings in the Main menu.
-
Page 104: Menu Arrangement
User’s Guide Menu arrangement You can arrange the Select Settings, Media Type, and Paper Size items. Click the Utility tab, and then click Menu Arrangement. Select the edit item. In the List box, arrange the items as you prefer, or classify the items into groups. ❏... -
Page 105: Exporting Or Importing
User’s Guide Exporting or Importing You can export or import the settings you have registered as a file. Exporting the settings Open the Save or Deletes Select Settings dialog box or the Saves or deletes Custom Media dialog box. Select the setting in the List box, and click Export. -
Page 106: Changing The Black Ink
User’s Guide Exporting or importing all settings You can export or import the all of the printer driver settings as a file. Click the Utility tab, and then click Export or Import. Click Export or Import. To export the setting, enter the file name and then click Save. - Page 107 User’s Guide Open the Main menu (Windows) or the Print Settings dialog (Mac OS X). Select the paper from the Media Type, and then select the black ink. The black ink is displayed according to the media type. Check the other settings, and then start printing.
-
Page 108: Options And Consumable Products
(as of May, 2007). Epson special media See the following section for more detailed information on Epson special media. “Paper Information” on page 110 For the latest information on the media, see the Epson Web site. -
Page 109: Options
User’s Guide Options Maintenance tank Name Product code Maintenance Tank C12C890191 See the following section to replace the maintenance tank. “Replacing the Maintenance Tank” on page Paper cutter Name Product code Auto Cutter Spare Blade C12C815291 See the following section to replace the paper cutter. -
Page 110: Paper Information
User’s Guide Paper Information Paper Information Epson offers specially designed media for ink jet printers to meet most high-quality printing needs. Item Media name Recommended application Size Thickness Core diameter Spindle tension Borderless ICC profile Media type of the printer driver... -
Page 111: Roll Paper
User’s Guide Roll paper Premium Glossy Photo Paper (250) Recommended application Size 406 mm 16" 610 mm 24" 914 mm 36" 1118 mm 44" 1524 mm 60" ICC profile Photo Black High Speed High Speed Enabled Disabled Pro11880 Pro11880 PGPP250 PGPP250 Bi-D.icc Uni-D.icc... - Page 112 User’s Guide Premium Luster Photo Paper (260) Recommended application Size 406 mm 16" 508 mm 20" 610 mm 24" 914 mm 36" 1118 mm 44" 1524 mm 60" ICC profile Photo Black High Speed High Speed Enabled Disabled Pro11880 Pro11880 PLPP260 PLPP260 Bi-D.icc...
- Page 113 60" ICC profile Photo Black High Speed High Speed Enabled Disabled Pro11880 Pro11880 PSPP170 PSPP170 Bi-D.icc Uni-D.icc Epson Proofing Paper White Semimatte Recommended application Size 432 mm 17" 610 mm 24" 914 mm 36" 1118 mm 44" 1524 mm 60"...
- Page 114 User’s Guide Epson Proofing Paper Publication Recommended application Size 432 mm 17" 610 mm 24" 914 mm 36" 1118 mm 44" ICC profile Photo Black High Speed High Speed Enabled Disabled Pro11880 Pro11880 Proof_Pub_Bi- Proof_Pub_Uni D.icc -D.icc Doubleweight Matte Paper...
- Page 115 User’s Guide Enhanced Matte Paper Recommended application Size 432 mm 17" 610 mm 24" 914 mm 36" 1118 mm 44" 1626 mm 64" ICC profile Photo Black Pro11880 EMP_PK.icc Watercolor Paper - Radiant White Recommended application Size 610 mm 24" 914 mm 36"...
- Page 116 User’s Guide Textured Fine Art Paper Recommended application Size 432 mm 17" 610 mm 24" 914 mm 36" 1118 mm 44" ICC profile Photo Black Pro11880 TFAP_PK.icc Canvas Recommended application Size 610 mm 24" 914 mm 36" 1118 mm 44" ICC profile Photo Black Pro11880 Canvas_PK.icc...
-
Page 117: Cut Sheet
User’s Guide Cut sheet Premium Glossy Photo Paper Recommended application Size Super A3/B ICC profile Photo Black High Speed High Speed Enabled Disabled Pro11880 Pro11880 PGPP_Bi-D.icc PGPP_Uni-D.icc Premium Semigloss Photo Paper Recommended application Size Super A3/B ICC profile Photo Black High Speed High Speed Enabled... - Page 118 User’s Guide Archival Matte Paper Recommended application Size Super A3/B ICC profile Photo Black Pro11880 ARMP_PK.icc Watercolor Paper - Radiant White Recommended application Size Super A3/B ICC profile Photo Black Pro11880 WCRW_PK.icc UltraSmooth Fine Art Paper Recommended application Size Super A3 ICC profile Photo Black Pro11880 USFAP_PK.icc...
- Page 119 User’s Guide Textured Fine Art Paper Recommended application Size 24" × 30" 36" × 44" ICC profile Photo Black Pro11880 TFAP_PK.icc Enhanced Matte Posterboard Recommended application Size 24" × 30" 30" × 40" ICC profile Photo Black Pro11880 EMPB_PK.icc Photograph / Fine Art Reproduction Borderless Thickness Possible...
-
Page 120: Maintenance
Notes for handling paper See the instructions below and the handling instructions of the paper for more details. ❏ Use Epson special media under the following conditions (temperature is 15 to 25°C and humidity is 40 to 60%). ❏ Do not bend the paper or scratch on the surface of the paper. -
Page 121: Notes For After Printing
Typically, prints and photos fade over time (change color) due to the effects of light and various constituents in the air. This also applies to Epson special media. However, with the correct storage method, the degree of color change can be kept to the minimum. -
Page 122: Replacing Ink Cartridges
When the Ink Check light is flashing, this indicates that the ink level is low. If EPSON Status Monitor is installed, a message appears on the computer’s display that tells you the ink is low. If the ink is low, you need to replace the ink cartridge as soon as possible. -
Page 123: Using The Printer Driver
In the Monitoring Preferences dialog box, select the Shortcut Icon check box to display a shortcut icon on your Windows taskbar. Right-click the shortcut icon, and select the printer name to display the EPSON Status Monitor 3 dialog box. See “Viewing information in Monitoring Preferences”... -
Page 124: About Ink Cartridges
User’s Guide About ink cartridges Be sure to use the following ink cartridges with this printer. Slot Ink color Product code Stylus 11880 Vivid Light T591600 Magenta Light Light T591900 Black Matte Black T591800 Light Black T591700 Light Cyan T591500 Cyan T591200 Vivid... -
Page 125: Notes For Storing The Ink Cartridges
User’s Guide ❏ If you reinstall a used ink cartridge, prepare a new one also. You may need to replace it with a new one if there is not much ink left for ink charging. ❏ If you repeat the ink cartridge replacement or perform head cleaning within a short period of time, the maintenance tank may soon become full. - Page 126 User’s Guide Push the expended cartridge so the cartridge is slightly pushed out. Carefully pull the expended cartridge straight out of the slot. Warning: If ink gets on your hands, wash them thoroughly with soap and water. If ink gets into your eyes, flush them immediately with water.
-
Page 127: Replacing The Maintenance Tank
See “PRINTER STATUS” on page 22. Using the printer driver You can check the free space of the maintenance tank on your computer by using EPSON Status Monitor. The instructions are the same as confirming the ink cartridge remaining. See “Using the printer driver” on page 123. -
Page 128: Replacing The Cutter
User’s Guide Insert the new maintenance tank into place as far as it will go. Caution: Do not touch the green chip on the side of the maintenance tank. Doing so may prevent normal operation. Replacing the Cutter When the paper cutter does not cut cleanly, it may be blunt and require replacement. - Page 129 User’s Guide Press the button. The paper cutter holder stops at the replacement position. OPEN FRONT COVER TO SEE CUTTER REPLACEMENT LABEL appears on the LCD panel. Open the front cover. Push in the side pin while turning the paper cutter cover to the right to open the casing.
- Page 130 User’s Guide Note: Put the used cutter in a bag or the like, and dispose of it in accordance with local regulations. Take the new paper cutter out of the package and insert it as shown. Fully insert the cutter in alignment with the guide.
-
Page 131: Adjusting The Print Head
Function AUTO NOZZLE CHECK Self-cleaning Capping Print head alignment function Functions Printer driver ✓ Print head alignment EPSON LFP Printer Explanation Remote Panel ✓ ✓ Checks the print head nozzles for clogging by printing a nozzle check pattern. ✓ ✓... -
Page 132: Nozzle Check
This section explains how to check the print head nozzle using the Window printer driver. Use EPSON Printer Utility2 for Mac OS X. See “Accessing EPSON Printer Utility2” on page 66. Make sure that roll paper or A4/Letter size or larger is loaded in the printer. -
Page 133: Checking The Print Head Nozzles Using The Printer's Control Panel
If the nozzles are still clogged, contact your Epson dealer. ❏ If CLEANING ERROR appears on the LCD panel, see the following section to solve the problem. “Error Messages on the LCD Panel” on page button to display NOZZLE button. -
Page 134: Head Cleaning
This section explains how to clean the print head using the Window printer driver. Use EPSON Printer Utility2 for Mac OS X. See “Accessing EPSON Printer Utility2” on page 66. Open the Utility menu of the printer driver. -
Page 135: Cleaning The Print Head Using The Printer's Control Panel
If the nozzles are still clogged, contact your Epson dealer. ❏ If the CLEANING ERROR appears on the LCD panel, see the following section to solve the problem. -
Page 136: Power Cleaning
❏ EPSON LFP Remote Panel ❏ Printer’s control panel Power cleaning using EPSON LFP Remote Panel Click Power Cleaning in the EPSON LFP Remote Panel dialog box. Select the printer, and then click Power Head Cleaning. Follow the on-screen instructions. -
Page 137: Automatic Maintenance Function
User’s Guide Automatic maintenance function This printer has a self-cleaning function and capping function for maintaining the print head in consistently good condition to ensure the best print quality. AUTO NOZZLE CHECK function By using the AUTO NOZZLE CHECK function, the printer performs a nozzle check without printing a pattern and if there are missing dots, it performs cleaning automatically. -
Page 138: Print Head Alignment
❏ printer’s control panel Usually perform print head alignment using the printer driver. If the print quality does not improve, use EPSON LFP Remote Panel. If you do not have a computer or software, use the printer’s control panel. Note: Align the print head for the paper width loaded in the printer. -
Page 139: Aligning The Print Head Using The Control Panel
First, set the paper type and paper thickness of the paper that is loaded in the printer. Make sure that Epson special roll paper or one sheet of A4/Letter size or larger paper is loaded in the printer. Make sure to set the paper correctly according to the paper. - Page 140 User’s Guide Aligning the print head manually Because there is a distance between the print head and paper, the misalignment may occur by the humidity or temperature or moving the print head bidirectionally. In this case, try UNI-D first, and then BI-D 2-COLOR. If you want to perform a highly accurate adjustment, try BI-D ALL.
- Page 141 User’s Guide Bi-D ALL alignment Press the button to select BI-D ALL, and then press the button to print a pattern. Note: When you print the pattern on a cut sheet media such as A3, you need to prepare several sheets.
- Page 142 The table below illustrates which parameter is available for the media type and print quality. If you are not sure of the media type and print quality, check all numbers from BI-D #1 to BI-D #4. EPSON Stylus Pro 11880/11880C for Windows: Media Type...
- Page 143 User’s Guide EPSON Stylus Pro 11880/11880C for Mac OS X: Media Type Automatic Speed Premium Luster Photo Paper (260) Premium Glossy Photo Paper (250) Premium Semigloss Photo Paper (250) Premium Glossy Photo Paper (170) Premium Semigloss Photo Paper (170) Epson Proofing Paper...
-
Page 144: Cleaning The Roller
User’s Guide Cleaning the Roller If the print is soiled with ink on the roller, follow the steps below to clean the roller by feeding the plain paper. Turn on the printer, and set the roll paper of 64 inches width. See “Using Roll Paper”... -
Page 145: Cleaning Inside Of The Printer
User’s Guide Cleaning inside of the printer Make sure the printer is turned off and all the lights are off, and then unplug the power cord from the electrical outlet. Leave the printer for a minute. Open the front cover and use a soft, clean cloth to carefully clean away any dust or dirt inside the printer. -
Page 146: Keeping The Printer
❏ If the nozzles are still clogged after trying the instructions above, contact your Epson dealer. Protecting the print head This printer has a capping function that automatically puts a cap on the print head to keep it away from drying. -
Page 147: Transporting The Printer
User’s Guide Transporting the Printer When transporting the printer, repack the printer using the original box and packing materials to protect from shock and vibration. Caution: ❏ Do not remove the ink cartridges; otherwise, the print head nozzles may dry ❏... -
Page 148: Setting Up The Printer After Transporting
User’s Guide Setting up the printer after transporting The steps you need to take to set up the printer after transporting it are almost identical to the steps carried out the first time you set up the printer. When you set up the printer again, refer to the Unpacking and Setup Guide. -
Page 149: Problem Solver
User’s Guide Problem Solver Error Messages on the LCD Panel Error messages Messages are either status messages or error messages. Many common printer problems can be identified by the lights and messages on the LCD panel. See the following messages to solve problems. Error messages INK LOW MAINTENANCE TANK... - Page 150 See “Replacing the Maintenance Tank” on page 127. Non-genuine Select NO (press the maintenance tank is maintenance tank with a genuine Epson installed. maintenance tank. See “Replacing the Maintenance Tank” on page 127. button) to replace the Problem Solver...
- Page 151 See “Replacing ink cartridges” on page 125. Non-genuine ink Select NO (press the cartridge is installed. ink cartridge with a genuine Epson ink cartridge. See “About ink cartridges” on page 124. See “Replacing ink cartridges” on page 125. button) to button) may void EPSON’s...
- Page 152 Select DECLINE (press the cartridge is installed. replace the ink cartridge with a genuine This may void EPSON’s Epson ink cartridge. Selecting ACCEPT (press warranty. button) may void EPSON’s warranty. See “About ink cartridges” on page 124. See “Replacing ink cartridges” on page 125.
- Page 153 User’s Guide Error messages PAPER ERROR LOAD PAPER PROPERLY REFER TO THE MANUAL TAKE-UP ERROR SET PAPER PROPERLY IN AUTOMATIC TAKE-UP REEL SYSTEM TAKE-UP ERROR IS ANYTHING OBSTRUCTING THE TAKE-UP REEL SENSOR SYSTEM? LOAD PAPER AGAIN BORDERLESS ERROR LOAD THE SUPPORTED PAPER SIZE OR LOAD PAPER PROPERLY PAPER OUT LOAD PAPER...
- Page 154 The printer fails to Restart the printer, and then update the update the firmware. firmware using EPSON LFP Remote Panel again. The paper is jammed. Remove the jammed paper. See “Feeding or ejecting troubles” on page 164.
-
Page 155: When The Maintenance Call Error Occurs
User’s Guide Error messages CARRIAGE LOCKED RELEASE THE CARRIAGE LOCK PRINTER ERROR RESTART THE PRINTER MAINTENANCE REQUEST NNNN SERVICE CALL ERROR NNNN PLEASE CONTACT TO THE REPAIR CENTER When the maintenance call error occurs A maintenance call warns you to replace the consumables with a new one very soon. If MAINTENANCE CALL XXXX is displayed on the LCD panel, contact your dealer and tell them the maintenance call code. -
Page 156: When The Service Call Error Occurs
User’s Guide When the service call error occurs A service call error occurs when: ❏ The carriage lock is not removed from the print head. ❏ The power cord is not plugged properly into the electrical outlet or the power connector of the printer. -
Page 157: Work)
User’s Guide Cause The printer driver is not installed properly (Mac OS X). The printer is not correctly connected to the computer. The printing is not available under the network environment. What to do Is the printer added to the printer list? Follow the steps below to open Print Center or Printer Setup Utility to check whether the printer driver is installed. - Page 158 See “You cannot print (because the printer does not work)” on page 156. * "Driver Version" shown on the test page is the version of the driver installed in Windows. It is not the Epson printer driver version that you installed. Problem Solver...
-
Page 159: The Printer Sounds Like It Is Printing, But Nothing Prints
User’s Guide The printer sounds like it is printing, but nothing prints Cause The ink cartridges may have a problem. What to do If the print head moves, but nothing prints, confirm the printer operation. Print a nozzle check pattern. You can check the printer’s operation and status without connecting the printer to the computer. -
Page 160: The Prints Are Not What You Expected
See “Print head alignment” on page 138. Are you using a genuine Epson ink cartridge? If you use the non-Epson ink cartridge, the prints may smear, or the color of the printed image may be changed because the ink end is not correctly detected. - Page 161 The printer driver of this product has a color matching function. If you print with Epson's recommended settings the print colors will differ between printer models. If you want to print with closely matched colors, try using color management.
- Page 162 When using paper other than Epson special media, have you set the paper characteristics? When using paper other than Epson special media, set the paper characteristics (custom paper) before printing.
- Page 163 User’s Guide Cause The back of the printed paper is soiled. Too much ink is being released. Margins appear with borderless printing. What to do Set PAPER SIZE CHECK to ON in the Menu mode. If the print image is bigger than the paper width and the PAPER SIZE CHECK is OFF, the image is still printed extending beyond the print area, causing the inside of the printer to become soiled.
-
Page 164: Feeding Or Ejecting Troubles
Do not use old paper or paper with folds in it. Always use new paper. Is the paper damp? Do not use paper that is damp. Also, Epson special media should be left in the bag until you intend to use it. If it is left out for a long time the paper curls up and gets damp so that it does not feed properly. - Page 165 User’s Guide Cause The paper is jammed. What to do To remove jammed paper, follow the steps below: 1. If roll paper is jammed, open the roll paper cover and cut the paper at the paper insertion slot. 2. Make sure that the Pause light is not flashing, and then set the paper lever to the released position to release the paper.
- Page 166 User’s Guide Cause The paper is jammed What to do 4. Open the front cover if the paper is jammed inside the printer. Caution: Be careful not to touch the cables around the print head; otherwise, the printer may be damaged. See “Replacing the Cutter”...
-
Page 167: Other Troubles
Normally the printer driver packaged with the printer can be used without any problems. However, when applications are upgraded, it may be necessary to upgrade the printer driver. In this case, access the Epson Web site to obtain the latest printer driver. -
Page 168: Where To Get Help
Epson Web site. Contacting Customer Support Before Contacting Epson If your Epson product is not operating properly and you cannot solve the problem using the troubleshooting information in your product New :Only inkjet, SPC, and Scanner products are used in this section. -
Page 169: Help For Users In North America
Dial: (562) 276-1300 (U.S.), or (905) 709-9475 (Canada), 6 am to 6 pm, Pacific Time, Monday through Friday. Toll or long distance charges may apply. Before you call Epson for support, please have the following information ready: ❏ Product name ❏ Product serial number ❏... -
Page 170: Epson Helpdesk
User’s Guide Epson Helpdesk Epson Helpdesk is provided as a final backup to make sure our clients have access to advice. Operators on the Helpdesk can aid you in installing, configuring and operating your Epson product. Our Pre-sales Helpdesk staff can... -
Page 171: Help For Users In Thailand
World Wide Web (http://www.epson.co.th) Information on product specifications, drivers for download, Frequently Asked Questions (FAQ), and e-mail are available. Epson Hotline (Phone: (66)2-670-0333) Our Hotline team can help you with the following over the phone: ❏ Sales enquiries and product information ❏... -
Page 172: Help For Users In Hong Kong
Epson Hong Kong Limited. Internet Home Page Epson Hong Kong has established a local home page in both Chinese and English on the Internet to provide users with the following information: ❏ Product information ❏... -
Page 173: Help For Users In India
Help for Users in the Philippines New :For all products To obtain technical support as well as other after sales services, users are welcome to contact the Epson Philippines Corporation at the telephone and fax numbers and e-mail address below: Phone: Fax: E-mail: World Wide Web (http://www.epson.com.ph) -
Page 174: Product Information
32 GB or more free disk space space Connection requirements The connection requirements differ depending on the connection you use. See the Epson Web site for the latest supported operating system. USB connection Windows The following conditions must be met: ❏... -
Page 175: Printer Specifications
Resolution Print direction Bidirectional Control code ESC/P Raster, ESC/P3 256 MB Character tables PC 437 (US, Standard Europe) Character sets EPSON Courier 10 cpi Paper feed Friction method Paper path Roll paper Cut sheet (manual insertion) Dimensions Weight Electrical Rated voltage... -
Page 176: Ink Cartridges
User’s Guide Ink cartridges Colors Photo Black Matte Black Light Black Light Light Black Cyan Vivid Magenta Yellow Light Cyan Vivid Light Magenta Cartridge life 2 years from production date if unopened. Within 6 months after opening package. Temperature Storage (uninstalled) Storage (installed) -
Page 177: Environmental
150 mm (6") maximum when 2/3 dual roll feed spindle is set as 3 inch roll paper spindle Plain paper, special papers distributed by Epson 0.08 to 0.5 mm 64 gf/m to 260 gf/m Width: 210 to 1118 mm (8.27 to 44") Length: 279.4 to 1580 mm (11 to 62.2") when... -
Page 178: Standards And Approvals
❏ Since the quality of any particular brand or type of paper may be changed by the manufacturer at any time, Epson cannot attest to the quality of any non-Epson brand or type of paper. Always test samples of paper before purchasing large quantities or printing large jobs. -
Page 179: Ethernet Interface
User’s Guide Interface Your printer is equipped with a USB interface and an Ethernet interface. USB interface The printer’s built-in USB interface is based on the standards specified in the Universal Serial Bus Specifications Revision 2.0 and the Universal Serial Bus Device Class Definition for Printing Devices Version 1.1. - Page 180 Dual Tension Roll Feed Spindle EDM status Enlarge size printing EPSON LFP Remote Panel EPSON Printer Utility2 Epson special media EPSON StatusMonitor (Mac OS X) EPSON Status Monitor 3 (Windows) Error message Fit to Page Front cover Head cleaning Help (Mac OS X)
- Page 181 User’s Guide Job history Job information Language Maintenance menu Maintenance mode Maintenance tank Maintenance tank status icon Menu setting Messages Network interface connector Network setup Network status sheet Nozzle check Options Page line Pages per sheet printing Paper basket Paper feed adjust Paper jam Paper lever Paper roll holder...
- Page 182 User’s Guide Unit Usage count USB cable USB interface connector Using roll paper Version Index...
Need help?
Do you have a question about the Stylus Pro 11880 and is the answer not in the manual?
Questions and answers