Advertisement
Advertisement
Table of Contents

Related Manuals for fantastic furniture Replica Cesca


Summary of Contents for fantastic furniture Replica Cesca
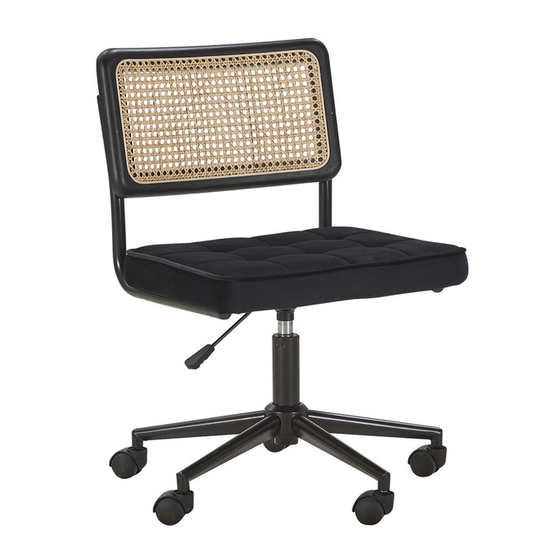
- Page 1 Version 1.0 Replica Cesca Office Chair fantasticfurniture.com.au...
- Page 2 We’re thrilled you’ve chosen Fantastic Furniture to help create a home you’ll love! Love it? Share it! Fantastic buy! Share how it looks at home on Instagram for your chance to win a $250 Fantastic Furniture Gift Card! @fantasticfurniture fantasticfurniture.com.au fantasticfurniture.com.au...
-
Page 3: Assembly Checklist
Assembly checklist Read through the instructions carefully Make sure you have all the required tools. before you begin. Never use power tools unless instructed. Identify and lay out all of the components Unless instructed, do not fully tighten screws before you begin assembly. until the item is fully assembled. -
Page 4: What You Need
What you need to assemble the product Backrest (P1) Seat (P2) Metal Frame (P3) Seat Plate Parts list (P4) Backrest (P1); Seat (P2); Metal Frame (P3); Seat Plate (P4); Gas Lift Gas Lift (P5); (P5) Cap (P6); Star Base (P7); 5 x Castors (P8) (P6) Star Base... - Page 5 Step 1 (P7) (P8) (P8) (P8) (P8) (P8) Insert 5 x Castors (P8) into the Star Base (P7) as shown. Push firmly on each castor to ensure they are fixed in position. Step 2 Note: Please make sure you remove the plastic cap from the top of the gaslift before fitting to the Seat Plate.
- Page 6 Step 3 You will need 4 x Bolts Allen Key M6 x 35 (H4) (H1) (P2) (P3) Place Seat (P2) on a soft and clean surface upside down. Put Metal Frame (P3) onto Seat (P2) with the holes aligned as shown. Fasten with 4 x Bolts (H1) using Allen Key (H4).
- Page 7 Step 5 (P2) (P3) Note: Please make sure you remove the plastic cap from the top of the gaslift before fitting to the Seat Plate. (P5) Position the centre hole in the Seat Plate (P4) over the Gas Lift (P5). Carefully lower the Seat Unit onto the Gas Lift (P5).
- Page 8 Step 6 You will need 4 x Bolts Allen Key M6 x 35 (H4) (H1) Bottom Please note the position of the bolt holes (P1) Put Backrest (P1) onto Metal Frame (P3) with the holes aligned as shown. Fasten with 4 x Bolts (H1) using Allen Key (H4). Press seat down firmly in position and check the connection is secure before sitting on the chair.
-
Page 9: Job Complete
Step 7 Job complete! In the interest of our environment please dispose of all packaging thoughtfully. fantasticfurniture.com.au Page 9...
Need help?
Do you have a question about the Replica Cesca and is the answer not in the manual?
Questions and answers