Table of Contents
Advertisement
Advertisement
Table of Contents

Subscribe to Our Youtube Channel
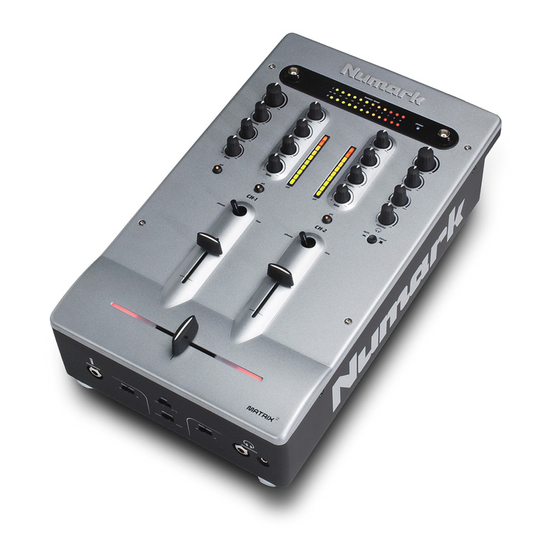
Related Manuals for Numark MATRIX2


Summary of Contents for Numark MATRIX2
- Page 1 Matrix 2 Operating Instructions...
-
Page 2: Safety Precautions
Thank you for buying this Numark product. Please read these operating instructions so you will know how to operate this equipment properly. After you have finished reading these instructions, keep them for future reference. WARNING: TO PREVENT FIRE OR SHOCK HAZARD, DO NOT EXPOSE THIS APPLIANCE TO RAIN OR MOISTURE. -
Page 3: Handling And Care
HANDLING AND CARE Location Install the mixer in a well-ventilated location where it will not be exposed to high temperatures or humidity. Do not install the mixer in a location that is exposed to direct rays of the sun, or near stoves or radiators. -
Page 4: Setup Diagram
SETUP DIAGRAM Power the mixer before powering the amplifier. Turn off the amplifier before turning off the mixer. TO REC TO AMP TO CH2 SETUP DIAGRAM TO CH2 TO CH1 TO CH1 PAGE 4... -
Page 5: Table Of Contents
CAUTION! TO PREVENT THE RISK OF ELECTRIC SHOCK, DO NOT REMOVE COVER (OR BACK). NO USER-SERVICEABLE PARTS INSIDE. REFER SERVICING TO QUALIFIED SERVICE PERSONNEL. IMPORTANT The lightning flash with arrowhead symbol, within an equilateral triangle, is intended to alert the user to the presence of un-insulated "dangerous voltage" within the product's enclosure that may be of sufficient magnitude to constitute a risk of electric shock to persons. -
Page 6: Controls
CONTROLS 1. Microphone Controls "Mic" (Microphone Trim) This knob adjusts the volume of the main microphone. When turned all the way to the left, the volume is off. When turned to the right, the volume is at a maximum. The Microphone Trim should be turned completely to the left when connecting and disconnecting a microphone from the Quarter-Inch "Microphone"... - Page 7 SECTION 1 MICROPHONE CONTROLS PAGE 6...
- Page 8 CONTROLS 2. Primary Mixing Input Controls for CH-1 and CH-2 "Gain" (Input Level Trim) This rotary control adjusts the input signal levels of the inputs. Turning the knob completely to the right (clockwise) increases the level. Turning the knob completely to the left (counter clockwise) decreases the level.
- Page 9 SECTION 2 PRIMARY MIXING INPUT CONTROLS PAGE 8...
-
Page 10: Meters And Lighting
CONTROLS 3. Meters and Lighting "Master Level" (Master Level Meter) This meter displays the stereo output levels of the master signal. The display ranges from -40dB to +10dB. Dual BNC Style Light Connectors Two BNC style lights can be connected simultaneously to these 12V receptacles. 4. - Page 11 SECTION 3 SECTION 4 METERS+ LIGHTING, CUEING CONTROLS PAGE 10...
-
Page 12: Master Output Controls
CONTROLS 5. Master Output Controls "Master" (Main Output Level Control) This rotary control adjusts the main output levels for any equipment connected to the Master Output on the rear panel (Section 9 "Inputs and Outputs".) Turning the knob completely to the right increases the level to +10dB and turning the knob completely to the left mutes the signal. - Page 13 SECTION 5 SECTION 6 MASTER OUTPUT, CROSSFADER CONTROLS PAGE 12...
-
Page 14: Special Crossfader Related Controls
CONTROLS 7. Special Crossfader Related Features "Fader Start" (Fader Start On/Off switches) When engaged the fader start can be used to instantly start a fader-start compatible device (See "Inputs and Outputs" Section 9) by moving the Crossfader away from the endpoints. The behavior of this control is largely dependent on the settings of your fader start compatible device. - Page 15 SECTION 7 SPECIAL CROSSFADER RELATED FEATURES PAGE 14...
-
Page 16: Inputs And Outputs
"Player A/B" (Fader Start Eighth Inch Terminals) These two eighth inch terminals allow Fader/Remote Start Compatible devices (Numark CD Players) to be connected to the unit using eighth inch fader start cables (not included.) Any connected device can then be remotely started using the Crossfader (Section 7 "Special Crossfader Related Features.) "Fader Start"... - Page 17 AC In and Power Switch This mixer uses an IEC type power cable. Make sure that the Internal Voltage Selector Switch is properly set before inserting the power cable into the mixer. The mixer should be switched on after all devices are already connected to prevent damage to your equipment.
-
Page 18: Customizing And Servicing Your Mixer
CONTROLS 10. Customizing and Servicing Your Mixer Replacing the Crossfader This mixer features a replaceable Crossfader. The Crossfader can be removed from the mixer by loosening the two screws at the endpoints of the fader (See illustrations at right.) Follow the steps below for removing the top panel to have access to the Crossfader. Customizing the Direction of the Input Selector Switches This mixer features multi directional Input Switches that can be removed and rotated to one of eight positions (See illustrations at right.) Each Input Selector Switch is secured to the mixer by two adjacent... - Page 19 Replacing the Crossfader 1. After removing the top panel, remove the two screws that secure the crossfader using a #2 Philips Screwdriver. Customizing the Direction of the Input Selector Switches 1. After removing the top panel, remove the two screws that secure the selector switch you want to rotate using a #2 Philips Screwdriver.
-
Page 20: Specifications
SPECIFICATIONS Inputs: Line: 10K ohm input impedance 63mV rms sensitivity for 1.22V output Mic: 600 ohm input impedance unbalanced 1.5mV rms sensitivity for 1.22V output 180mV rms max input Phono: 47Kohm input impedance 1mV rms sensitivity @ 1KHz for 1.22V output Outputs: Line: 9V rms max... -
Page 21: Limited Product Warranty
To obtain an RA# and assistance on where to return the mixer, contact NUMARK customer service at 401-295-9000. Upon receipt, NUMARK will repair or replace the defective products. NUMARK may, at NUMARK'S sole option, use rebuilt, reconditioned, or new parts or components when repairing any product or replace a product with a rebuilt, reconditioned or new product. -
Page 22: Return Information
Numark will not accept COD shipments and no call tags will be issued for merchandise return. f) Numark will not return repaired merchandise to customers by priority service, unless by written request at the customer's cost. -
Page 23: Troubleshooting
If the problem continues to persist, refer to the connected component's troubleshooting guides. If the problem is not resolved after checking these items, contact the nearest authorized Numark dealer. Cause? Disconnected Power Cord? Connect Power Cord.
Need help?
Do you have a question about the MATRIX2 and is the answer not in the manual?
Questions and answers