Table of Contents

Related Manuals for Diesse VES MATIC 5


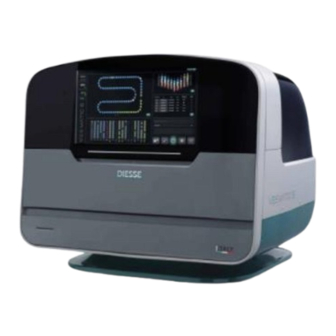
Summary of Contents for Diesse VES MATIC 5
- Page 1 INSTALLATION GUIDE Rev. 1 Bench top analyser for automated determination of the erythrocyte sedimentation rate (ESR) with Westergren modified method SOFTWARE VERSION 1.xx.xx VES-MATIC 5 (REF. 10360) FOR IN VITRO DIAGNOSTIC USE ONLY...
- Page 2 This page is intentionally left blank...
- Page 3 VES-MATIC 5 models: This manual applies to the following models of VES-MATIC 5. Catalogue number Description 10360 VES-MATIC 5 List of manual revisions Manual revision Description of changes 0 dated 07/2022 First issue Guide update in accordance with the new software release Rev 1 VES-MATIC 5 - INSTALLATION GUIDE...
- Page 4 Phone +39 0577 307109, Fax. + 39 0577 307106 Toll-free number: 800 606932 email: technicalsupport@diesse.it No part of this manual may be reproduced in any form or by any means, electronic, mechanical or otherwise, for any use whatsoever without the prior written permission of DIESSE Diagnostica Senese S.p.A.
- Page 5 Functional accessories: Catalogue number Description 10292 TEST DEVICE 1K (1000 tests) 10291 TEST DEVICE 5K (5000 tests) 10290 TEST DEVICE 10K (10000 tests) 10293 TEST DEVICE NEXT 500 (500 tests) 10294 TEST DEVICE NEXT 1K (1000 tests) 10296 TEST DEVICE NEXT 5K (5000 tests) 10297 TEST DEVICE NEXT 10K (10000 tests) 10403...
-
Page 6: Table Of Contents
Index TECHNICAL SPECIFICATIONS ........................8 STORAGE AND TRANSPORT ........................9 PREPARATION AND CHECKS BEFORE INSTALLATION ............10 UNPACKING..............................10 PLACEMENT ..............................13 INSTALLATION ..............................15 Removing locks ............................15 Commissioning the instrument ......................17 Personal protection equipment (PPE) ..................19 VES-MATIC 5 MODELS ..........................20 Compatibility with blood cell counter racks ................ - Page 7 10.3 Software calibration tool transfer ....................58 10.4 Opening the application ........................58 10.5 Calibration procedure ..........................60 10.6 Error codes ..............................68 Rev 1 VES-MATIC 5 - INSTALLATION GUIDE...
-
Page 8: Technical Specifications
1 TECHNICAL SPECIFICATIONS FIELD VALUE Mains voltage Europe: 230VAC@50Hz; US/Canada: 110- 120Vac@60Hz Electrical energy consumption 420VA Fuse block 2 x 5.0 AT (delayed) (5 x 20 mm) UL Dimensions (mm) 850 x 750 x 830 mm (W x H X D) Weight 80 kg Temperature range in operation... -
Page 9: Storage And Transport
Installation category 2 STORAGE AND TRANSPORT Given the size and weight of the device, any movement of the instrument has to be executed by at least two people. The VES-MATIC 5 is a precision instrument and has to be handled as such. Inappropriate handling can harm the internal components and cause mechanical damage. -
Page 10: Preparation And Checks Before Installation
It is STRICTLY FORBIDDEN to remove or modify the safety and protection devices of the instrument. INSTALLATION must be carried out by an installation technician authorised by Diesse Diagnostica Senese S.p.A. as stated in the Installation Report. Refer to the Installation Guide. 4 UNPACKING Given the size and weight of the device, any movement of the instrument has to be executed by at least two people. - Page 11 Figure 4.1 – Quick couplings removal • Remove the lid. The inside of the box appears as shown in the figure below. Figure 4.2 – Inside the packaging In addition to the machine, covered with scratch-resistant film, the following accessories are located inside the box: 2 guides (to be installed in the loading compartment once the machine is placed on the bench and the corresponding blocks have been removed)
- Page 12 1 USB pendrive 00416 2 Tp-link Wireless N Nano USB Adapter Figure 4.3 – Accessories inside the box Depending on the type of shipment, inside the box there may also be the accessories listed in the following table: Accessory Photo Rack models set (19 rack each –...
-
Page 13: Placement
• With a 6mm and 8mm hexagonal screwdriver (Allen), unscrew respectively the 4 and 2 screws of the 2 side brackets and remove them completely. Figure 4.4 – Side bracket • For each of the two holes in the black side bars which are installed under the two green bottom shells of the instrument, screw the handles tubular element as shown in the figure. - Page 14 It is advisable to use a table with a capacity suitable for the weight of the instrument, with a height of not more than 80 cm, in order to guarantee that the operator has an ergonomically correct position when entering the commands on the Touch Panel and introducing and extracting the sample racks.
-
Page 15: Installation
PACKAGING DIMENSIONS - TROLLEY Width (box) 100 cm Height (box) 60 cm Length (box) 100 cm Gross Weight (including EuroPallet) 70 Kg 2. Once the instrument has been positioned in its final position, unscrew the tubular handles and remove them from the side bars. 3. - Page 16 Figure 6.1 – Loading floor lock Remove the rubber tube that protects the Z axis. Then, using a 2.5mm Allen key, remove the red block stopping the clamp by unscrewing its 4 screws. See the photo below for indications of the parts to be removed. Figure 6.2 –...
-
Page 17: Commissioning The Instrument
Finally, using again a 2.5mm Allen key, remove the lock stopping the Y-axis on the X-axis by unscrewing its 2 screws (See figure below) Figure 6.3 – Y-axis lock The instrument is ready for commissioning. 6.2 Commissioning the instrument Make sure that the power switch is in the OFF « 0 » position before continuing. Before connecting the instrument to the mains, make sure that the mains voltage is compatible with what is specified on the serial label on the back of the instrument. - Page 18 Figure 6.5 – Female RS-232 host connector on the rear panel If the VES-MATIC 5 installation is performed to replace an existing Ves-Matic Cube 200, the Cube 200 host cable will be used on the VES-MATIC 5. Since Cube 200 has a DB9 Male Host connector while VES-MATIC 5 has a DB9 Female connector, that reflexes inverted pin-outs, the 2 host cable adaptors provided as accessories must be used.
-
Page 19: Personal Protection Equipment (Ppe)
Figure 6.8 – Cube 200 host cable with adaptors for VES-MATIC 5 Connect the external barcode reader to the USB host dual port on the rear panel (see Figure below) Figure 6.9 – USB host dual port on the rear panel The instrument is ready to be switched on. -
Page 20: Ves-Matic 5 Models
7 VES-MATIC 5 MODELS Compatibility with blood cell counter racks The VES-MATIC 5 is currently produced in a single model that can ensure compatibility with different types of blood cell counter racks present in the various laboratories. The current supported rack models are as follow: Rack for S blood cell counter YSMEX... - Page 21 Rack Model DVIA IEMENS These racks are gray with 10 positions. Figure 7.4 – Advia/Siemens Rack Holder Figure 7.3 – Advia/Siemens Rack Rack Model YSMEX WITH DAPTERS These racks are white with 10 positions with adapters (indicated by the arrow). Figure 7.6 –...
-
Page 22: Compatibility With The Test Tubes
Rack Model ECKMAN OULTER These racks are black with 12 positions. Figure 7.10 – Backman Coulter Rack Holder Figure 7.9 – Beckman Coulter Rack 7.2 Compatibility with the test tubes The VES-MATIC 5 is configured for using the same test tubes coming from the blood cell counters present in the laboratory in standard tubes (13x75 mm). -
Page 23: Combinations Between Rack Models And Test Tubes
REQUIRED ACCESSORIES NOTE Sysmex, Mindray Standard test tubes (13x75 mm) Sarstedt S - Monovette 2,6mL, 1,8mL and 3,4mL Rack DIESSE Sysmex, Mindray, Horiba Sarstedt S - Monovette 1,6mL, 2,7mL [Ref: R10609340] Insert the test tubes in the rack Greiner Minicollect... - Page 24 RACK COMPATIBLE TEST TUBE REQUIRED ACCESSORIES NOTE Horiba Standard test tubes (13x75 mm) Sarstedt S - Monovette 2,6mL, 1,8mL and 3,4mL Sarstedt S - Monovette ,6mL, Insert the test tubes in the rack with Greiner Minicollect Greiner Tube Extender the barcode corresponding to the Greiner Minicollect Complete rack window PLEASE NOTE: it is not possible to insert different test tube types in the same rack.
- Page 25 Insert the test tubes in the rack with Greiner Minicollect Greiner Tube Extender the barcode corresponding to the Greiner Minicollect Complete rack window Rack DIESSE Sysmex Sarstedt S - Monovette 2,6mL, with adapter 1,8mL and 3,4mL [Ref: R10609340] Sarstedt S - Monovette 1,6mL, 2,7mL PLEASE NOTE: it is not possible to insert different test tube types in the same rack.
- Page 26 PLEASE NOTE: it is not possible to insert different test tube types in the same rack. Each type must be inserted in a dedicated rack and if it is different from the default type of the instrument it is necessary to specify the slot in which the rack will be inserted. For more details, refer to the User Manual.
-
Page 27: Functional Startup Procedure
8 FUNCTIONAL STARTUP PROCEDURE Once the instrument has been placed on the laboratory bench or dedicated trolley and all the locks has been removed (see Chapter 5 and 6), please follow the procedure below for the functional startup of the instrument: After ensuring that the front panel door is closed, turn the power switch, located to the left of the power cable on the right side of the instrument, to the ON position «... -
Page 28: Instrument Configurations And Settings
During the initial check, use the log window displayed on screen to access the main menu of the program and to be able to use the instrument. Since no users are registered on the instrument yet, it is necessary to use the technical support credentials Select the empty bar of the “Usercode”... - Page 29 Figure 9.1 – Barcode labelling: compatible heights The sensors of the reading units correctly read the levels of sedimentation of the samples inside the test tube through a maximum of three layers of paper along the reading axis. Therefore, a maximum of two labels can be attached and they must be attached with angles differing by at least 90°...
- Page 30 Figure 9.3 – Barcode labelling: incorrect labelling of the samples For the analysis and labelling of pediatric test tubes, proceed as follows: Greiner Minicollect: insert the adapter and apply the label on the adapter following the instructions described above; Greiner Minicollect Complete: apply the label on the sample following the instructions above.
-
Page 31: Rack Models Setting
Figure 9.4 – Rack models settings in the Installation Settings item From the drop-down menu it is also possible to disable a specific position ([DISABLED SLOT]), specify if the rack is a 3D printed Diesse standard rack or whether the rack is chosen to hold particular pediatric test tubes. -
Page 32: Clamp Configuration For Correct Handling Of Test Tubes
9.4 Clamp configuration for correct handling of test tubes The configuration for correct handling of test tubes can be done in the common user setup with the front touch panel lowered and blocked. Nonetheless, for a better visualization, the configuration can also be carried out with the front touch panel raised. In this case, before carrying out the tests from the Diagnostic item, make sure that the connector bridge inside the right-side internal panel (Figure 9.5) of the instrument is inserted, otherwise the instrument will signal an error as soon as any movement of the... - Page 33 To verify the mechanical handling of the test tubes, it is recommended to start with the type of test tube most commonly used in the laboratory, which in the instructions of this document will be called the "default test tube". The steps to check that the clamp handles the different types of test tubes in the correct way are as follows: Select the Setting button...
- Page 34 Figure 9.8 – Correct handling of the test tubes by the clamp To reposition the test tube inside the rack, press the “From Clamp to Rack” button. In this case, verify that the test tube does not hit the edges of the rack opening when reinserting The checks from step 4 to step 7 must be repeated for all the 10 samples contained in the rack and for at least positions 1, 9 and 18 of the loading...
- Page 35 If during the abovementioned checks on different test tubes in different rack positions, the extraction of the test tubes from the rack or the reinsertion in the rack or the insertion in the chain link proved to be problematic or incorrect, change the configuration parameters in the Service menu.
- Page 36 Rows from Id0 to Id6 represent the types of cell counter racks that can be managed by the instrument. Rows from Id7 to Id14 represent the types of test tubes that can be managed by the instrument. To adjust the default test tube grip, refer to the row of the type of rack installed on the instrument (if the instrument has several guides installed, repeat the procedure for each type) and manage the following parameters: o Clamp X Pos1 tmm: adjusts the centering of the clamp on the tube cup, along...
- Page 37 Z Pos tmm must be adjusted for each type of tube Select the Config Parameters item. To adjust the insertion of the test tube into the chain link, manage the following parameter, valid for all types of racks and all types of test tubes : o clamp_x_on_chain_pos_tmm: adjusts the centering of the test tube on the chain link, along the x-axis, when inserting the test tube in the chain.
-
Page 38: Ejector Settings
Select the Mechanical Parameters item. To adjust the drift of the clamp or the lifter along the loading compartment, manage the following parameters: o Tmm Per Round – clamp_x: adjusts the drifting of the clamp on the tube cup, along the x-axis, when extracting or reinserting the test tube into the rack. Specifically, the drift is characterized by a progressive decentralization of the clamp, left or right, moving from the rack in position 1 to the rack in position If the drifting is towards the left of the x-axis, to adjust the clamp centering on... - Page 39 Modify the parameters set in the EEprom as shown in the following table. Once the parameter values have been changed, press the Update Data key to save the changes. Value Value Address Description Function (Hex) (dec) 0x08 Motor Home offset Defines how much to press the test 00A0 steps (step Unit)
- Page 40 PLEASE NOTE: At this point it is essential to determine the actual number of strokes from HOME to END, and from HOME to PH3, which could depend on the assembly tolerances of the machine. Select Boards Commands in the Technical Assistance menu Select the “0x13 –...
-
Page 41: Tubetypeparamidx Parameter Check
The modification of this value is needed because, being the position of the ejector higher, a shorter stroke is sufficient to lift any tubes pressed into the chain and prevents the ejector from bumping into the reference tube Set the “insertion_clampz_chain_tmm” parameter value to at least 1145. The modification of this value is needed to set the insertion of the Sarstedt S and BD MAP test tubes so that the clamp does not touch the side noses of the chain links but allows a sufficient thrust in the chain to allow them to pass under the... -
Page 42: Chain Reference Settings
Figure 9.13 – TubeTypeParamIdx parameter management 9.7 Chain reference settings Select the Setting button , then press the Service item Select the Technical Assistance menu and enter the Password “9-8-5-2-1” Select the Reference Settings item This menu, by analyzing the reading curves (light intensity function) determined by the Reference Tube and represented in the graph, allows the verification and adjustment of the settings to mechanically align the 4 reading groups with each other. - Page 43 Figure 9.14 – Chain Reference Settings window in the Technical Assistance menu The measurable light values (0-4095) are shown on the ordinate axis (Y). The index of the readings (0-1110) is shown on the abscissa axis (X). The red horizontal lines in the graph represent the minimum value L_LVL ...
-
Page 44: Vision System Calibration
Figure 9.15 – Correct alignment of the 4 readings curves If one or more reading curves proved to be misaligned, press the “Chain Step Forward” button until the Reference Tube (i.e. chain link n°0 in the view analysis module) is positioned in correspondence with the relative reader group Press “Test Reader #”... -
Page 45: Host Settings And Barcode Reading
9.9 Host settings and barcode reading Select the Setting button , then press the Service item Select the Technical Assistance menu and enter the Password “9-8-5-2-1” Select the Host Settings item Figure 9.16 – Host settings window in the Technical Assistance menu In this window it is possible to modify the different Host protocols and check the relative settings. - Page 46 Black label: stand-by condition. It is displayed after the instrument is switched on during the motor reset operations, during the reference search in the analysis module and if there are no results to send to the host. Red label: there is no communication between instrument and host. In this case it is necessary to check if the cable is connected correctly on the instrument or on the host computer and if the laboratory system is working correctly.
-
Page 47: Analytical Startup
For this sample there is a result. The read barcode is associated with a "QC" (Quality Control) according to Diesse decoding, of a “normal" type”. The read barcode is associated with a "QC"... - Page 48 Close the front door and wait for the vision system to detect the number of test tubes contained in the rack Figure 9.17 – Detection of the number of test tubes contained in the rack Press the “Start” button to initiate the analytical cycle Test tubes are collected from the rack, their barcodes are read by the barcode reader and then they are inserted into the chain links (for more details, see Paragraph 9.7)
- Page 49 Figure 9.19 – Typically correct sample reading curves On the vertical axis there is the light intensity measured by the light sensor while on the horizontal axis there are the incremental steps of the reading group during its run from Home to End (and vice versa).
- Page 50 Figure 9.20 – Reading curves when the light is unable to adequately pass through the test tube Conversely, there may also be cases in which light mistakenly passes through sedimented blood as well. This can happen, for example, when the light intensity set on the instrument is too high or in the specific case in which the final part of the factory label causes a “guide effect”...
-
Page 51: User Management Settings
To mitigate the problem and increase or decrease the light intensity set on the instrument, proceed as follows: Select the Setting button , then press the Service item Select the Technical Assistance menu and enter the Password “9-8-5-2-1” Select the Edit Parameters item Press the Test Tube Type Parameters button: increase or decrease the value of "lightLevel2", "lightLeve3", "lightLevel4", which corresponds to the light intensity of each reading (3 of the 4 acquisitions) performed by the reading groups. - Page 52 Fill in the other highlighted fields, respecting the 6-digit maximum and verifying the password Press the “SAVE” button to save the information relating to the new user Figure 9.23 – Add User window in the Users Management setting Go back to the main menu and select the “Logout” item on the top-right section of the screen Figure 9.24 –...
-
Page 53: Rack Sensors Calibration
The log window will be displayed on screen Access the main menu using the Usercode and Password defined for the new Technical Support or administrator user at step 5 As an administrator or Technical Support user, it is always possible to create additional users by accessing the Users Management window in the setting menu and following the steps described above. -
Page 54: Annex - Vision System Calibration
Exit the Service menu and access the Home window. The calibration procedure is concluded. 10 ANNEX – VISION SYSTEM CALIBRATION 10.1 Introduction This annex is intended to guide the operator in the correct use of the application “Calibration tool”, in order to adequately calibrate the vision system for a correct classification of the number of sample tubes inserted in the racks. - Page 55 In the Hotspot mobile window, go to the section with the information relating to the internet connection to be shared via Wi-Fi and press the “Modify” button; • Insert the following information (Figure 10.3): o Network name: DIESSE Wi-Fi_Ext o Password: 123diesse321 o Network bandwidth: 2,4 GHz To save the changed information, press the “Save”...
- Page 56 • Once connected, the IP address shared by the USB Wi-Fi pendrive will appear in the bottom part of the screen (usually in the range 192.168.XXX.XXX) together with its specific MAC address XX-XX-XX-XX-XX-XX (Figure 10.4); The USB Wi-Fi pendrive will be identified with the device name “imx8mq-var-dart”; PLEASE NOTE: if the pendrive fails to connect to the PC, insert another Wi-Fi USB pendrive (also supplied as an accessory, see Chapter 4) into the USB port of the PC and repeat the connection procedure...
- Page 57 Figure 10.7 – Barcode camera switched on illuminators • Open the PuTTY application and connect via ssh to the minicarrier using the previously identified IP (e.g. 192.168.XXX.XXX), username = root and password = root; • Once successfully accessed the instrument, enter the following commands in order: cd visionProgram cd src...
-
Page 58: Software Calibration Tool Transfer
10.3 Software calibration tool transfer Copy the folder “Elaboration” from Distribution_v30 in C:/user/Documents on your PC. In this folder you should find the following files: Figure 10.8 – Elaboration folder from Distribution_v30 Copy the “Calibration Tool v31” folder on your Desktop. 10.4 Opening the application Open “Calibration... - Page 59 From the store you can download the suitable file for Windows. Figure 5 Figure 10.10 – Download .NET desktop app Once the download is complete, open the installation file. PLEASE NOTE: download the desktop app also on a local PC. Make sure you always download the latest version available.
-
Page 60: Calibration Procedure
Select the rack type. Available rack types are: Sysmex/MindRay (01), Sysmex_H (02) [with adapters], Bayer (03) [Advia/Siemens], Horiba (04), Beckman12 (05), Beckman5 (06), Diesse_Old (07) and Diesse (08). Figure 10.12 – Selection of the rack type Step 2 Enter the optimal configuration parameters and click the "SAVE" button. - Page 61 “Culture” is the language of the LOG file. Figure 10.13 – Default configuration parameters Step 3 Copy the “default_config” file from the PC folder Documents/Elaboration/ to the minicarrier board /root/visionProgramMacs/Elaboration/. It is mandatory to reboot the instrument so to acquire any modified parameters. Figure 10.14 –...
- Page 62 Figure 10.15 – Steps relating to loading the rack into the instrument and launching the command ‘Training rack rpocedure’ Step 5 At this step, the operator has to copy the “training_set” folder from the minicarrier board to the folder Documents/Elaboration/Frames/ on the PC. Figure 10.16 –...
- Page 63 Step 7 If from viewing the images, the exposure level of the racks is not considered suitable (e.g. image too dark), the "CameraExposure" value can be manually changed from the configuration parameter box referred to in Step 2. If any value is changed, all the steps from Step 2 to Step 7 must be redone. In particular, remember to refresh the minicarrier software before sending command 0x4A.
- Page 64 Figure 10.19 – ROI positioning image Figure 10.20 – ROI on Sysmex/MindRay/Horiba racks Figure 10.21 – ROI on Advia/Siemes rack Figure 10.22 – ROI on Sysmex with adapters rack...
- Page 65 Figure 10.23 – ROI on Diesse_Old rack Figure 10.24 – ROI on Beckman Coulter (5) rack Figure 10.25 – ROI on Beckman Coulter rack Figure 10.26 – ROI on Beckman Coulter rack (with test tubes) Step 9 Copy the “ConfigFile_##.json” file from the PC Documents folder to the minicarrier board (/vroot/visionProgramMacs/Elaboration/).
- Page 66 Close the front door and let the instrument send the command 0x48 to the board. This command will activate the function that acquires one frame, elaborates it, and classifies the presence of the tubes. The results will be displayed automatically on screen. Figure 10.28 –...
- Page 67 After loading the racks, to send the command 0x4D to the board, go to the “Settings” area of the VES-MATIC 5, then enter the “Service” section and access the “Technical support” section (password: 9-8-5-2-1). Select the “Vision Server”, insert the correct rack position, then press the button “Rack Training Procedure with Position”...
-
Page 68: Error Codes
Note: always rename the file that is being replaced as "model _ ## _ OLD.tflite" so as not to lose the progress of the previous classifier if the algorithm training proves to be worse In order to verify the correctness of the classification, repeat the procedure described in Step 11, always loading racks with random sample tube configurations. - Page 69 InvalidSerialPort = 2003; the port address is invalid. Check the port address otherwise please contact the technical service. ElaborationGenericError = 3000; the image elaboration is not working. Try to reboot the VesMatic5 Instrument otherwise please contact the technical service. VisionProgramError = 3001; vison program is not working. Try to reboot the VesMatic5 Instrument otherwise please contact the technical service.
Need help?
Do you have a question about the VES MATIC 5 and is the answer not in the manual?
Questions and answers