Diesse MINI-CUBE Service Manual
Hide thumbs
Also See for MINI-CUBE:
- User manual (59 pages) ,
- Quick start manual (3 pages) ,
- User manual (55 pages)

Related Manuals for Diesse MINI-CUBE


Summary of Contents for Diesse MINI-CUBE
- Page 1 SERVICE MANUAL Rev. 1.2 – December 2021 Automatic instrument for ESR determination with modified Westergren method Software version 1.xx FOR IN VITRO DIAGNOSTIC USE ONLY...
- Page 2 This page is intentionally left blank. Rev. 1.2 (12.2021) MINI-CUBE SERVICE MANUAL...
- Page 3 First issue Updated manual with new manual layout and new logo. 1.1 of 23.04.2021 Replaced MINI-CUBE figures due to new graphic design with updated brand colors. Manual update following the latest FW release (V. 1.26) and new set of service parameters.
- Page 4 Numero Verde: 800 606932 e-mail: technicalsupport@diesse.it No page in this manual may be reproduced in any form or by any means, electronic, mechanical or otherwise, for any use whatsoever without prior written permission from DIESSE Diagnostica Senese S.p.A Rev. 1.2 (12.2021) MINI-CUBE...
- Page 5 UNI EN ISO 22870 Point of care testing (IOCT) – Requirements for quality and competence Clinical and Laboratory Standards Institute, H02, Procedures for the Erythrocyte Sedimentation Rate Test; Approved Standard—Fifth Edition Rev. 1.2 (12.2021) MINI-CUBE SERVICE MANUAL...
- Page 6 N.B. important information. BIOHAZARD: risk of contamination with potentially infected substances. Instrument that complies with MET standards for the Canadian and US markets Rev. 1.2 (12.2021) MINI-CUBE SERVICE MANUAL...
- Page 7 LIMITATIONS AND WARNINGS Revision 1.2 of this manual corresponds to the MINI-CUBE model of the instrument with 1.x.x family of installed software. It was drafted and carefully reviewed and this version is closely related to the instrument model (data can be obtained from the instrument’s ID plate) and the version of the software that controls it (data can be obtained through a procedure on the instrument itself).
-
Page 8: Table Of Contents
EXPLODED VIEWS OF THE INSTRUMENT ..................45 ATTACHMENT A: EXTERNAL CONNECTIONS ..................52 General specifications for connecting to a barcode reader ..........52 ATTACHMENT B: CONNECTION TO A HOST COMPUTER ............53 ATTACHMENT C: SPARE PARTS LIST ...................... 60 Rev. 1.2 (12.2021) MINI-CUBE SERVICE MANUAL... -
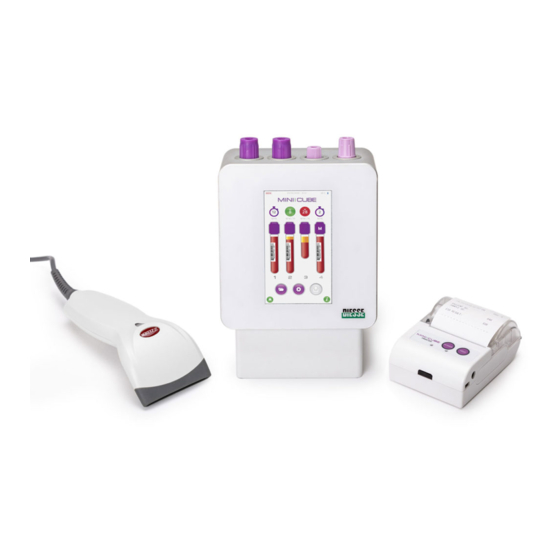
Page 9: General Description Of The Instrument
Microtainer®, BD Microtainer® MAP, Greiner MiniCollect® or Sarstedt Microvette® APT EDTA tubes). The function of the beeper is to alert the operator during various stages of the operating cycle or in the event of errors. Rev. 1.2 (12.2021) MINI-CUBE SERVICE MANUAL... -
Page 10: Updating Software
USB mass storage device • With the instrument switched off, insert the USB device into the appropriate port Power on the instrument and wait for a few seconds. The instrument will update automatically. Rev. 1.2 (12.2021) MINI-CUBE SERVICE MANUAL... -
Page 11: Technical Specifications
Content and package dimensions The instrument is packed in: An external cardboard box. 2. Molded housing in CFC and HCFC-free expanded, closed cell polyethylene. The box has the following characteristics Dimensions 33x23x15 Weight Rev. 1.2 (12.2021) MINI-CUBE SERVICE MANUAL... -
Page 12: Shutting Down And Shipping
A) The instrument must be turned off and cleaned internally of all residues or spillage with a liquid detergent and left to dry. B) Use one of the ready-to-use spray cans of isopropyl alcohol available on the market. C) Spray well on the sample-holder. Rev. 1.2 (12.2021) MINI-CUBE SERVICE MANUAL... - Page 13 Put the instrument into its plastics bag and place the two the expanded polyethylene blocks to hold the instrument. Figure 4 Place the Unit contained between the expanded polyethylene blocks and the power supply into the box. Rev. 1.2 (12.2021) MINI-CUBE SERVICE MANUAL...
-
Page 14: Preventive Maintenance
Clean the motor motion screw with WD40. e) Lubricate the motor motion screw with CRC66-6. f) Clean with compressed air the motor home sensor and the emitter and receiver of the reading sensors unit. Rev. 1.2 (12.2021) MINI-CUBE SERVICE MANUAL... -
Page 15: Disassembly Procedure (And Reassembly)
5.5mm Plug socket spanner. 2.3 Disassembly and reassembly procedures Disassembly procedure Follow the instructions in paragraph 2.1 points a) and b). Remove the rear plastics panel by unscrewing the four screws in the corners. Figure 6 Rev. 1.2 (12.2021) MINI-CUBE SERVICE MANUAL... - Page 16 Figure 7 To open the front panel, use a screwdriver from the rear side to unscrew the 4 screws anchoring the front panel to the main metal body: Figure 8 Rev. 1.2 (12.2021) MINI-CUBE SERVICE MANUAL...
- Page 17 It is now possible to access the CPU Board and the cables can be disconnected to replace To Access to the Interconnection Board and the Transponder Antenna, remove the plastics panel from the bottom side by unscrewing the 5 screws: Figure 10 Rev. 1.2 (12.2021) MINI-CUBE SERVICE MANUAL...
- Page 18 Unscrew the two screws that fix the board and remove it to access to its connectors and cables and to access the screw to remove the Base Block Figure 12 To remove the base block unscrew the 4 screws visible below: Rev. 1.2 (12.2021) MINI-CUBE SERVICE MANUAL...
- Page 19 Sample Holders. At this point, pull-up the bottom part out from its site to free it, then make it pass through the upper round hole on the metal block. Figure 14 Rev. 1.2 (12.2021) MINI-CUBE SERVICE MANUAL...
- Page 20 CPU board Reassembly procedure Follow the steps of the disassembly procedure in reverse. During this phase, make sure to prevent the wires from becoming entangled in the mechanical parts. Rev. 1.2 (12.2021) MINI-CUBE SERVICE MANUAL...
-
Page 21: Service Menu
2. When the instrument turns on, it shows the following menu: Figure 16 3. Press the Settings Button to access the Settings Menu 4. Press the Right Arrow Button (NEXT PAGE) to access the second Page of the Settings Menu. Figure 17 Rev. 1.2 (12.2021) MINI-CUBE SERVICE MANUAL... - Page 22 5. Press the SERVICE item to access to the ACCESS CODE Input Page: Figure 18 In the top part of this page, are shown the current Firmware Version and its release date. Figure 19 ACCESS CODE LIST: 98521 14785 74159 78952 SERVICE PARAMETERS VIEWER SPECIAL Figure Rev. 1.2 (12.2021) MINI-CUBE SERVICE MANUAL...
-
Page 23: Service Menu
OVERFILL If ON, when there is a sample with high blood level condition, it is assumed that the sample blood level starts exactly at the leftmost point of the reading curve (as on Cube200). Rev. 1.2 (12.2021) MINI-CUBE SERVICE MANUAL... - Page 24 ARCHIVES DELETE: Delete all archives. LOG DELETE: Delete all log files. SD BACKUP: Copy all internal MINI-CUBE files in a USB key. It is advisable to do this operation in a completely empty key. SD RESTORE: Copy all files in a USB key on the µSD inside the MINI- CUBE SD FORMAT: Formats the internal µSD of the MINI-CUBE.
- Page 25 Using a special rack (i.e. Pan flute), it was possible to check the accuracy TEST RACK > of the bottom level measurement and to adjust it by setting an offset value. Note: this check is no longer performed, therefore this functionality is no longer used. Rev. 1.2 (12.2021) MINI-CUBE SERVICE MANUAL...
-
Page 26: Diagnostics Functions
The Top-Left corner has coordinates (0; 0); • The Bottom-Right corner has coordinates (272; 480); If there is a misalignment between the point touched and the dot draw on the display, a touch calibration is needed. Rev. 1.2 (12.2021) MINI-CUBE SERVICE MANUAL... - Page 27 Press the center of the small circles, drawn using a pen; at the end of the procedure, the new values will be saved. 3.1.3.3 Buzzer test Press Buzzer from the Diagnostics menu to hear the sound generated by the Buzzer. Rev. 1.2 (12.2021) MINI-CUBE SERVICE MANUAL...
- Page 28 EEPROM content will be lost! Pay attention to export the EEPROM on a USB PENDRIVE before starting this test. 3.1.3.5 Sd card test Press SD CARD to access the internal SD CARD test page, then press START to execute the procedures shown in the picture below: Figure 26 Rev. 1.2 (12.2021) MINI-CUBE SERVICE MANUAL...
- Page 29 Type "create partition primary"; • Type "format quick fs=fat32"; • Type "exit". 3.1.3.7 Transponder test Press TRANSPONDER to access the internal TRANSPONDER test page, then press START to execute the procedures shown in the picture below: Rev. 1.2 (12.2021) MINI-CUBE SERVICE MANUAL...
- Page 30 3.1.3.9 Sensor tube test By accessing this menu, it is possible to set the light level of the 4 white LEDs emitters (Range 0- 1000) and view the light level read by the corresponding Light Sensors. Rev. 1.2 (12.2021) MINI-CUBE SERVICE MANUAL...
- Page 31 Be sure that all the LEDs are OFF (see LEDS TEST). Activate one LED by pressing the corresponding button with the label “OFF” and check that the corresponding Sensor reading is higher than 3500 and that all the other sensors are less than 600. Rev. 1.2 (12.2021) MINI-CUBE SERVICE MANUAL...
- Page 32 Remove the rear panel in order to check the positioning and adjust the Home steps value, then press “TEST” to move the motor to the new Home Position. Once the correct positioning has been reached, press SAVE to store the new value. Rev. 1.2 (12.2021) MINI-CUBE SERVICE MANUAL...
- Page 33 ON). This function can be useful to check the integrity of the unit’s hardware. The suggested number of cycles is 200 maximum, with a pause of 5 seconds between each cycle. Figura 31 Rev. 1.2 (12.2021) MINI-CUBE SERVICE MANUAL...
-
Page 34: Reading Parameters
+/- 2 points. (Pre/Post processing filter values). M1.N_RISING_BOTTOM For the research of the tube bottom: starting from right to left, we search for 12 consecutive steps in which the value of light decreases. The first one is taken. Rev. 1.2 (12.2021) MINI-CUBE SERVICE MANUAL... - Page 35 If the difference is above this limit, the sample is marked with ERR (-14) PERC_CORR_ESR Corrects the ESR VALUE by increasing it by this percentage VES_ADJ 1000 Multiplication factor to adjust the ESR result for normal tubes Rev. 1.2 (12.2021) MINI-CUBE SERVICE MANUAL...
- Page 36 DELTA_TSH: minimum samples Delta value (see paragraph 3.1.5 Reading viewer – Pag. 2/4) to perform ESR correction according to volume. N_VCF: for normal test tubes. P_VCF: for pediatrics test tubes. M_VCF: for MAP test tubes. Rev. 1.2 (12.2021) MINI-CUBE SERVICE MANUAL...
-
Page 37: Reading Viewer
Note: the temperature is only stored in the second reading. In case of a single reading, the temperature is not displayed. The temperature is always displayed in degrees Celsius and it is green or red depending on whether the correction is respectively enabled or disabled. Rev. 1.2 (12.2021) MINI-CUBE SERVICE MANUAL... - Page 38 In the graphs, the blue squares (for the first reading) and the red squares (for the second reading) identify the bottom level and the blood level. MINI-CUBE - ERROR TABLE Generic error The leading edge of the tube bottom was not found Tube bottom is out of range (both for pediatric and normal test tubes) Rev.
- Page 39 Unexpected test tube: error related to the insertion of an anomalous tube *The -10 is not an error but denotes that the value of ESR is above 140 and is displayed with "> 140" Rev. 1.2 (12.2021) MINI-CUBE SERVICE MANUAL...
- Page 40 1.00 SW version, since the ReadViewer will apply the filter twice. During saving, all possible file system errors are managed and saving the acquisition in the log is attempted for a maximum of 3 times. Rev. 1.2 (12.2021) MINI-CUBE SERVICE MANUAL...
- Page 41 From the original curve, the curve 1 is generated by a moving average (default) of 20 + 1 + 20 = 41 data. From the original curve, the curve 2 is generated by a moving average (default) of 50 + 1 + 50 = 101 data. Rev. 1.2 (12.2021) MINI-CUBE SERVICE MANUAL...
-
Page 42: Special
(BLD.L.) is lower (greater n° steps) than the LEV LOW BLOOD threshold, the tube is considered to contain pediatric sample (P appears on screen) and the examination continues by carrying out the second reading with the pediatric light value (LIGHT_PEDIATRIC). Rev. 1.2 (12.2021) MINI-CUBE SERVICE MANUAL... -
Page 43: Learning About The Unit- Description Of The Main Modules
4 LEARNING ABOUT THE UNIT- DESCRIPTION OF THE MAIN MODULES CPU board connections Figure 30 Rev. 1.2 (12.2021) MINI-CUBE SERVICE MANUAL... -
Page 44: Interconnection Board
J4: Barcode RS232 port • CN3: Transponder Antenna • CN2: USB PORTS input from CPU board • CN1: POWER Supply out for the CPU Board + RS232 signals for the Barcode reader and the RF Antenna. Rev. 1.2 (12.2021) MINI-CUBE SERVICE MANUAL... -
Page 45: Exploded Views Of The Instrument
5 EXPLODED VIEWS OF THE INSTRUMENT Description 30007310 MINI CUBE Rev. 1.2 (12.2021) MINI-CUBE SERVICE MANUAL... - Page 46 Description 30228880 MINI-CUBE BASEMENT ASS’Y Rev. 1.2 (12.2021) MINI-CUBE SERVICE MANUAL...
- Page 47 Description Q.ty Reference 30229430 MINI-CUBE NEW ANALYSIS MODULE ASS'Y 001 (30007310) 10806820 MATRICULAR LABEL VES MATIC MINI CUBE 10809040 MINI-CUBE BASEMENT SCREEN PRINTED 001 (30228880) 20920550 CLIP FOR PIPE FIXING VM-1004 ESSENTRA (exRICHCO) 1110H84Z SCREW TC ECO-SYN BN 82428 2,2x12 Xtermopl NOTE: for the actually orderable part numbers refer to the official spare parts list Rev.
- Page 48 Description 30228890 MINI-CUBE FRONTAL PLATE ASS’Y Rev. 1.2 (12.2021) MINI-CUBE SERVICE MANUAL...
- Page 49 Q.ty Reference 10606890 FRONT PANEL MINI-CUBE 10602780 DISPLAY FRAME 10809060 MINI-CUBE FRONTAL PANEL 30147940 CPU CORTEX M4 180MHz TFT + 1 STEP MOT + 4 SENS v.MINI CUBE 20510950 DISPLAY LCD TFT 4.3" 480X272 TOUCH DLC0430EZG-T-2 [DLC] /DLC0430BCP07RF-R-1 1110H85Z SCREW TC ECO-SYN BN 82428 3x8 xTERMOPL.
- Page 50 Description 30229430 MINI-CUBE ANALYSIS MODULE ASS’Y Rev. 1.2 (12.2021) MINI-CUBE SERVICE MANUAL...
- Page 51 WEEE LABEL 15x20 UL 10803880 "BIO HAZARD" LABEL 25x25 UL 10807390 MINI-CUBE TRANSPONDER INSERTION LABEL 10809890 MINI-CUBE CENTRAL BODY SCREEN PRINTED 1110393G SCREW PZAB 2,9X19 UNI 6954 ZN 1110H85Z SCREW TC ECO-SYN BN 82428 3x8 xTERMOPL. 1110H86Z SCREW TC ECO-SYN BN 82428 4x10 xTERMOPL.
-
Page 52: Attachment A: External Connections
The communication protocol is of the ASCII type; the barcode read must be terminated with the Carriage Return (0x0d). Connect the instrument to the external barcode. Use the Barcode Model Z-3080 [Zebex] (or equivalent) with a connection cable type CAB 50607-R9 [Zebex] (or equivalent). Rev. 1.2 (12.2021) MINI-CUBE SERVICE MANUAL... -
Page 53: Attachment B: Connection To A Host Computer
7 ATTACHMENT B: CONNECTION TO A HOST COMPUTER Foreword: Hardware data The Communication between the MINI-CUBE and an external PC may be done in two possible ways: Using the Direct USB Connection: In this case, connect a standard USB Cable A-B between the PC Host USB Port... - Page 54 Message for sending Results: Command 0x51 The MINI-CUBE host protocol is a one-way protocol without query. In particular, the MINI-CUBE send a message to the host computer, which contains the results of the analyses carried out on one or more tubes.
- Page 55 0x20, 0x20, 0x20, 0x31 “ 100” 0x20, 0x31, 0x30, 0x30 >140 “>140” 0x3E, 0x31, 0x34, 0x30 H-FLAGS / L-FLAGS: Bitmap with 8-bit of the sample errors, represented in HEX-ASCII. The following table illustrates the errors: Rev. 1.2 (12.2021) MINI-CUBE SERVICE MANUAL...
- Page 56 NACK reply to indicate that the message contains one of more errors: inexact checksum, incorrect length of the data field, etc… ACK Message Rev. 1.2 (12.2021) MINI-CUBE SERVICE MANUAL...
- Page 57 The host computer must only reply to this message with an ACK or NACK type message to notify the successful receipt of the results or the presence of errors in the message. Command: MINI-CUBE sends the following frame: H-BLK L-BLK...
- Page 58 “YY” = Year of the century, from “00” to “99” ASCII. TIME ANALYSES: string of 4 characters without terminator, “hhmm” where: • “hh” = hour of the day, from “00” to “23” ASCII. • “mm” = Minutes, from “00” to “59” ASCII. Rev. 1.2 (12.2021) MINI-CUBE SERVICE MANUAL...
- Page 59 H-COM bytes with the value of 0x44 instead of 0x35. In this case the two bytes of the checksum are still sent but their value will be insignificant. The Host computer must also manage any possible cases in which the checksum is disabled. Rev. 1.2 (12.2021) MINI-CUBE SERVICE MANUAL...
-
Page 60: Attachment C: Spare Parts List
30138200 CHASSIS GROUND WIRING MINI CUBE 30221140 MINI-CUBE READING CART ASS'Y 10603810 MINI-CUBE READING SENSOR BOARD SUPPORT 10603820 MINI-CUBE READING SENSOR BOARD SUPPORT CLAMP 30136081 READING SENSORS 4x BOARD 10603711 MINI-CUBE READING SENSOR COVER 30136090 SINGLE READING SENSOR BOARD 30136110... - Page 61 10606890 FRONT PANEL MINI-CUBE 10809060 MINI-CUBE FRONTAL PANEL DISPLAY LCD TFT 4.3" 480X272 TOUCH DLC0430EZG-T-2 [DLC] /DLC0430BCP07RF- 20510950 30136470 MOLEX 5264 6P - MOLEX 5264 6P PIN TO PIN L=200mm CABLE 30136480 CABL. MOLEX 5264 8P - MOLEX 5264 8P PIN TO PIN L=220mm 30136491 CABL.
- Page 62 Rev. 1.2 (12.2021) MINI-CUBE SERVICE MANUAL...
Need help?
Do you have a question about the MINI-CUBE and is the answer not in the manual?
Questions and answers