Page 1
USER MANUAL Rev. 2.3 Automated instrument for ESR determination with modified Westergren method Software version 2.xx.xx FOR IN VITRO DIAGNOSTIC USE ONLY Rev. 2.3 CUBE 30 TOUCH USER MANUAL...
Page 2
This page is intentionally left blank. Rev. 2.3 CUBE 30 TOUCH USER MANUAL...
Page 3
CUBE 30 TOUCH models: This manual is applicable to the following CUBE 30 TOUCH instrument models: Catalog number Description 10395 CUBE 30 TOUCH CUBE 30 TOUCH Accessories: Catalog number Description 10293 Test device NEXT 500 (500 tests) 10294 Test device NEXT 1K (1000 tests)
Page 4
2.1 – 05/2022 Update of the intended purpose Update of: list of accessories technical features (power input) label layout installation procedure sample preparation procedure quality control paragraph references Disclaimer added at Paragraph 2.1 Rev. 2.3 CUBE 30 TOUCH USER MANUAL...
Page 5
Manufacturer DIESSE DIAGNOSTICA SENESE SpA Strada dei Laghi 39, 53035 Monteriggioni (SI) Italy Tel. +39 0577 307109, Fax. + 39 0577 307106 www.diesse.it TECHNICAL SUPPORT Strada dei Laghi 39, 53035 Monteriggioni (SI) Italy Tel. +39 0577 307109, Fax. + 39 0577 307106...
Page 6
CAUTION: potential risk of damage to the instrument; all the conditions indicated in the relative text must be read and understood before proceeding. N.B. important information. BIOHAZARD: risk contamination with potentially infected substances. Rev. 2.3 CUBE 30 TOUCH USER MANUAL...
Page 7
In the case of leakage of biological material, during the working cycle, use 70% isopropyl alcohol to clean external surfaces of the instrument using appropriate personal protective equipment and observe regulations on sanitization. All supplied materials must be disposed of in accordance with local laws. Rev. 2.3 CUBE 30 TOUCH USER MANUAL...
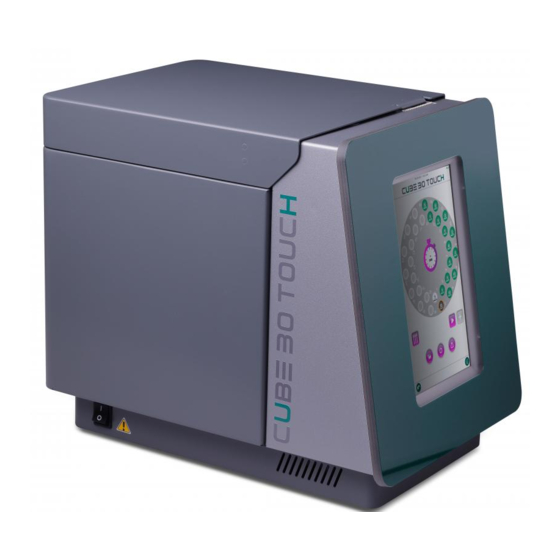
The instrument is to be used only by professional laboratory users. Presentation of the instrument The CUBE 30 TOUCH (Figure 1) is an instrument designed to measure the erythrocyte sedimentation rate (ESR) of blood samples anticoagulated with EDTA, directly from the EDTA tube in only 20 minutes, modify Westergren method (Ref.13) The instrument can...
(myocardial infarction, tumours). ESR is useful for predicting a diagnosis of some diseases, such as polymyalgia rheumatica, temporal arteritis, rheumatoid arthritis, and Hodgkin’s disease, and is useful as an effective marker Rev. 2.3 CUBE 30 TOUCH USER MANUAL...
ESR testing performed on anomalous samples using manual or automated methods are subject to a high degree of variability. In the CUBE 30 TOUCH, these samples may be undetected, or they may yield varying results; for this reason, a visual inspection of the sample at the conclusion of the test is recommended, to verify the presence of a clear interface between the plasma and sedimented cells.
Warnings While the CUBE 30 TOUCH system provides a high level of safety in handling biological samples, please take all necessary precautions when handling potentially infected material. Waste material at the end of the cycle must be processed in accordance with the local waste requirements.
2. Leave the instrument turned off for at least 1 hour before starting a new operating cycle or performing any other operation on the instrument. For assistance with the inside of the instrument not easily accessible to the operator, contact Technical Services. Rev. 2.3 CUBE 30 TOUCH USER MANUAL...
2 TECHNICAL DATA Technical description Figure 3 - Instrument Layout The CUBE 30 TOUCH consists of a single body containing all the operating functions necessary for analyzing the sample. Test Tube Carousel The instrument has 30 positions arranged in two concentric circles of 15 positions each.
The power connector is on the back of the instrument (Figure 4). Figure 4 - Power connector The ON/OFF switch is on the left side of the instrument’s base (Figure 5). Figure 5 - Power button Rev. 2.3 CUBE 30 TOUCH USER MANUAL...
With the instrument switched off, insert the USB device into the appropriate port • Figure 7) Power on the instrument and wait for a few seconds. The instrument will update • automatically. Figure 7 - USB port Rev. 2.3 CUBE 30 TOUCH USER MANUAL...
PROTECTION CLASS EN 61010-1:2010; EN 61010-2-081:2015; EN SAFETY STANDARDS 61010-2-101:2015 EN 61326-1:2013; EN 61326-2-6:2013 INSTALLATION CATEGORY Alphanumeric with 57 mm wide thermal paper, 36 PRINTER characters / line, speed XX mm / sec. Rev. 2.3 CUBE 30 TOUCH USER MANUAL...
4. Mark of declaration that the instrument is to be used for in vitro diagnosis only 5. Declaration of the power requirements for the US, Canada and Europe 6. Specification of the maximum power consumed and the characteristics of the protection fuses at the input of the instrument Rev. 2.3 CUBE 30 TOUCH USER MANUAL...
Page 20
7. Serial number and production date Rev. 2.3 CUBE 30 TOUCH USER MANUAL...
3 INSTALLATION The CUBE 30 TOUCH is a precision instrument and must be handled as such. Inappropriate operations may damage the internal optoelectronic components and cause mechanical damage. Follow the instructions in this chapter in order to ensure the safety of the instrument and of the operator.
Open the box from the top. Figure 10 - Unpack instrument: opening box Remove the block of polyethylene foam covering the instrument. Remove the accessories stored inside. Remove the instrument from the box. Rev. 2.3 CUBE 30 TOUCH USER MANUAL...
The mains must be compatible with the voltage and current specifications indicated on the metal plate affixed on the rear of the instrument. Verify the compatibility of external accessories such as a BC reader or USB devices • prior to connecting. Rev. 2.3 CUBE 30 TOUCH USER MANUAL...
UNPLUG THE POWER CABLE. 3.7 Disposal The CUBE 30 TOUCH instrument, to be functional, relies on the use of an electrical power source and therefore, in compliance with the EUROPEAN DIRECTIVE 2012/19/CE of July 04, 2012 and later amendments by the European parliament, it is classified as Electrical- Electronic Equipment.
Figure 17 – Replacement of the fuses: repositioning box 5. Reconnect the instrument to the power supply 6. Turn on the instrument again. If at the time of turning on the fuses they trip again, contact the Technical Assistance. Rev. 2.3 CUBE 30 TOUCH USER MANUAL...
3.9 Printer paper replacement procedure The following paragraph describes the correct procedure to replace the paper roll in the thermal printer, on board of CUBE 30 TOUCH instrument. When red lines appear on the printed receipt, it is time to replace the paper roll.
Page 27
( ). Incorrect position of the black bar ( ) would Figure 20 Figure 19 Figure 18 in fact compromise the normal functioning of the printing procedure. Rev. 2.3 CUBE 30 TOUCH USER MANUAL...
• 500uL for MAP Microtainer® tube 3. Whether using the CUBE 30 TOUCH system in the batch or random access mode, be sure to mix the samples before starting the test. The sample must be mixed gently by complete inversion of the tube for a minimum of 8 times, so that any air bubble move along the entire tube from one end to the other.
BD Microtainer® MAP (Microtube for Automated Process). 4.3 Test tube labelling The CUBE 30 TOUCH’s optical sensors can detect blood sample levels in test tubes with a maximum of one secondary label. Excessive thickness and possible wrinkles on secondary labels, may increase the test tube’s external diameter, increasing the risk of a tube becoming lodged in the instrument.
Page 30
Figure 22 Figure 23 – Labeling test tubes Rev. 2.3 CUBE 30 TOUCH USER MANUAL...
4.4 Home page Turn on the CUBE 30 TOUCH with the switch on the left side of the instrument. When the instrument is turned on, the LEDs around the screen will activate. Initially the colors will follow each other, then each color will have its own meaning to help the user to understand the status of the instrument even from a distance.
Page 32
Temperature: indicates the instrument internal temperature in °C or °F. The green color indicates that the temperature correction is active (default setting). Red indicates that the temperature correction is not active. • Instrument logo: presentation of instrument logo identifying the commercial name Rev. 2.3 CUBE 30 TOUCH USER MANUAL...
START: Access the START cycle screen • • ARCHIVE: Access archived data SETTING: Review/edit system some settings • 4.5 START Performing an analysis cycle Click START to enter the analysis mode (Carousel view). Figure 26 – Plate view Rev. 2.3 CUBE 30 TOUCH USER MANUAL...
Page 34
PRINT: prints the results of the last cycle. If the instrument is turned on or restarted for the first time, pressing the button requires no action. Settings: selectable button when the instrument is stopped. Enables the 'Settings' screen to be displayed. Rev. 2.3 CUBE 30 TOUCH USER MANUAL...
The instrument performs a verification on each position to determine the number of samples present, the type of test tubes and barcode reading. Each position containing a sample is colored in purple (see Figure 28). Rev. 2.3 CUBE 30 TOUCH USER MANUAL...
Page 36
Press the text field and insert the code manually (keyboard will appear on the • screen Figure 31) and then press “OK” or enter the code using the external barcode reader. Rev. 2.3 CUBE 30 TOUCH USER MANUAL...
Page 37
Figure 32 – Mixing phase At the end of the mixing phase, the instrument will perform a scan of each test tube to determine the level of blood at time zero of sedimentation. Rev. 2.3 CUBE 30 TOUCH USER MANUAL...
Page 38
With reference to Figure 33, the two positions of the black and white circle in the samples plate represent two Quality Controls, respectively, Pathological (Abnormal) QC and Normal QC The user may switch from the “Carousel view” to the “Tube view” (Figure 34) with button. Rev. 2.3 CUBE 30 TOUCH USER MANUAL...
If the tube identified by the instrument is different from Normal, the initial letter of the type will be displayed in the circle that identifies the sample in the carousel Figure 35): S identifies a Sarstedt S type tube (default is Sarstedt type 2,7ml) Rev. 2.3 CUBE 30 TOUCH USER MANUAL...
Page 40
If the user selects ‘CANCEL’ button, he can modify the type of tube with the following procedure: 1) Select the sample position whose type of tube must be changed. The window with the sample details (position, type of tube, sample ID ESR result) is displayed on the screen. Rev. 2.3 CUBE 30 TOUCH USER MANUAL...
Page 41
Figure 37 will be displayed. The tube type can only be changed at this stage. The sample information window can still be displayed but the 'SET' button cannot be selected. Rev. 2.3 CUBE 30 TOUCH USER MANUAL...
During the testing phase, one can insert a new sample by random access at any time. In this case, it is critical to ensure the sample is carefully and properly mixed prior to inserting. The CUBE 30 TOUCH does not perform mixing for samples which are added in the random-access mode.
Page 43
Figure 42 - Barcode insertion at the end of the cycle A cycle has ended when the message 'Cycle xx complete - Ready' can be read at the bottom of the display. The instrument is ready for a new work session. Rev. 2.3 CUBE 30 TOUCH USER MANUAL...
Troubleshooting). The ‘HR’ string (Host Rejected) means that the sample was rejected by the host computer because it is not in the list of samples that needed to be processed for the ESR test. Rev. 2.3 CUBE 30 TOUCH USER MANUAL...
At the top of the receipt there is the header, the results follow. The information is as follows: • Name of the manufacturer: Diesse Diagnostica Senese • Name of the instrument: CUBE 30 TOUCH • The software release (V 2.01.00), • The serial number of the instrument (SN 2021-06-1299) •...
Page 46
• the range of acceptability (MIN / MAX) • The outcome of the control test (FAIL / PASS) DIESSE Diagnostica senese CUBE 30 TOUCH - V 2.01.00 SN 2021 – 06 – 1999 ReD STRUMENTI Date/Time: 11/01/2022 14:28 Cycle Temperature: 23.1°C ON...
Page 47
Sample ID • HCT value expressed as a percentage (optional) • ESR result with the reference method DIESSE Diagnostica senese CUBE 30 TOUCH - V 2.XX SN 2021 – 06 – 1999 11/01/2022-11:45 POS.23 SAMPLE ID: 030047877……….. ESR RESULT: 5 mm/h [W]...
For QC samples the printing from the archive does not have any changes. 4.5.7 Interruption of a work session In the CUBE 30 TOUCH it is possible to interrupt the work cycle at any time by pressing the ‘STOP’ button. If the interruption is confirmed (Figure 48) the relative red status string “Cycle xx canceled- Ready”...
ESR value (mm/hr). The reference method is displayed in square brackets: W for Westergren, P for Pachenkov. A red ESR value indicates that the result is outside the normal range (20 mm/hr by default) Rev. 2.3 CUBE 30 TOUCH USER MANUAL...
Filter the data in the archive by sample. By selecting this item, all the barcodes • of the samples are visible (Figure 57) and it is possible to search for the sample using the white box of the 'SEARCH' function (red box in Figure 51). Rev. 2.3 CUBE 30 TOUCH USER MANUAL...
Page 51
If the user selects the barcode of a sample, a new screen opens: it contains all sample processing sorted by decreasing date. By holding down the single line it is possible to view the details of the sample. Rev. 2.3 CUBE 30 TOUCH USER MANUAL...
Page 52
If ‘OK button is pressed the samples are filtered and it is possible to view the details of the samples and carry out the operation described above. Figure 53 - Filter by cycle Rev. 2.3 CUBE 30 TOUCH USER MANUAL...
Send the selected samples to host • Print the results • Delete the selected samples • By pressing and holding a sample, it is possible to access the information details window (Figure 55) Rev. 2.3 CUBE 30 TOUCH USER MANUAL...
Page 54
When the 'BACK' button is pressed, confirmation of the record change is requested. • HCT, hematocrit value. The CUBE 30 TOUCH instrument corrects the ESR value based on the hematocrit value, when present, according to the Fabry formula (correction limited to values of 15% <...
Page 55
, it is possible to print the sample. The button , in the Archive screen, allows the user to view the QC Archive page in which the results of the quality controls are displayed (see chapter 7) Rev. 2.3 CUBE 30 TOUCH USER MANUAL...
USER MANAGEMENT: allows the administrator user to manage other users TEMPERATURE CORRECTION: Enable or disable Temperature Correction. AUTO PRINT: disable the automatic printing of the results at the end of each cycle Rev. 2.3 CUBE 30 TOUCH USER MANUAL...
Page 57
QC DIESSE DECODE: Deactivating (OFF) this function, the instrument will NOT recognize (in automatic mode) a DIESSE control by reading only the label applied on the tube. In this case, the QC must first be registered as described in the registration procedure in Chapter 5 to be recognized.
Page 58
SERVICE: by selecting this item the user can access to the page that allows authentication for the Service Menu. This page contains information on the firmware installed on the instrument on the left: type of firmware, instrument name, firmware Rev. 2.3 CUBE 30 TOUCH USER MANUAL...
Page 59
(Figure 59). Figure 59 - Service The service menu is accessible only to personnel authorized by DIESSE Diagnostica Senese S.p.A .; for all the details on access and service functions, refer to the Service Manual.
For this reason, registration of the control material is not necessary. QC vials may be run with or without the plastic adaptor. In case of use of Quality Control materials not supplied by DIESSE Diagnostica Senese S.p.A, refer to section 7.1 for the registration procedure.
Control materials are loaded and processed in the same manner as patient samples (See chapter 4). The CUBE 30 TOUCH will recognize the barcoded test tube as a QC sample and display it on the screen as shown in Figure 61:...
In the QC archive, it is possible to view the data of the controls over time (Figure 63). In this screen, the following are indicated for each sample: date and time of examination, barcode, position in the sample holder plate, type of control and ESR result (ESR). Rev. 2.3 CUBE 30 TOUCH USER MANUAL...
Page 63
(Figure 64 - Qc detail) where the details of the control are shown: type, name, barcode, lot, expiry, limits. Information on the analysis of the sample is also reported: date, time, cycle number and the result of the ESR analysis. Rev. 2.3 CUBE 30 TOUCH USER MANUAL...
Page 64
Levey-Jennings graph (Figure 65). Figure 65 - Qc history This page shows the details of the QC (barcode, lot and limits), the number of measurements performed, the mean, the standard deviation and the CV%. The Levey- Rev. 2.3 CUBE 30 TOUCH USER MANUAL...
Page 65
By pressing the export button , it is possible to: • print QC data: QC details, mean, standard deviation, CV%, date, time and result of each analysis (Figure 66) • Filter by lot Rev. 2.3 CUBE 30 TOUCH USER MANUAL...
(see Figure 25). After the logout confirmation, the user is directed to the login page; page that will also be presented to the user every time the instrument is switched on (Figure 68). All registered users are displayed on this page. Rev. 2.3 CUBE 30 TOUCH USER MANUAL...
Page 68
"Wrong Access Code" (wrong access code) and the login screen is shown again (Figure 68). Rev. 2.3 CUBE 30 TOUCH USER MANUAL...
Page 69
If the logged in user is different from the Administrator (Figure 70), the 'Settings' button will not be displayed on the home screen because he is not allowed to use the functions it contains. Figure 70 - User home page Rev. 2.3 CUBE 30 TOUCH USER MANUAL...
Zero tests remaining. Reloading required with a new test device, as described in chapter 4. The instrument does not Remove and reinsert the USB device not found recognize the USB device. device or replace it. Rev. 2.3 CUBE 30 TOUCH USER MANUAL...
To proceed with the analysis, the operator must confirm, otherwise the instrument does not start processing the samples. ATTENZION: The results of samples processed with temperatures outside the range of 15-35 ° C (operating temperature range) may not comply with the declared performance. Rev. 2.3 CUBE 30 TOUCH USER MANUAL...
Page 72
At the end of the analysis, for the samples analyzed in this condition, the ESR value is followed by the "!" in the print report and in the archive. Rev. 2.3 CUBE 30 TOUCH USER MANUAL...
CUBE 30 TOUCH’s USB port (type-B square connector). The driver (STM32 SW; download from www.diesse.it) for MS Windows will need to be installed to establish communication with the CUBE 30 TOUCH through a virtual COM port on USB.
11 PERFORMANCES 11.1 CUBE 30 TOUCH precision Test Protocol: Sixty vials of ESR-Chex Plus control (30 vials of level 1 and 30 vials of level 2) were used in the study. The level 1 vials were inserted in each well of the instrument and tubes were analyzed 3 times over the course of the 7-day open-vial stability of the control.
Therefore, CV% is not reported for this value. All the values obtained during the precision evaluation experiment fell within the expected range and confirmed the precision and repeatability of the CUBE 30 TOUCH instrument. 11.2...
Page 76
Identification numbers assigned to each donor were entered into the CUBE 30 TOUCH systems. When prompted, the tubes were inserted into a free position in the CUBE 30 TOUCH to initiate testing. Results in mm/hr automatically printed at the conclusion of the 20-minute measurement.
Einsatz Krankenhaus. Berichte der OGKC 1988; 11:112-114. 6. Vatlet M., Brasseur M., Poplier M. et al.: Evaluation of the DIESSE VES-MATIC for the Automated Determination of the Erythrocyte Sedimentation Rate (ESR). Belgian Hematological Society Meeting 1989, Abstract. 7. Vallespì Solè T.: Valor Actual de la Velocidad de Sedimentación Globular. Lab 2000 1989;...
Page 78
2, 85-87 26. C. Franzini, R. Mozzi: VES anni 2000.Biomedia Source Books (2003):39 27. Pieri M. et All. Evaluation of the Diesse CUBE 30 TOUCH erythrocyte sedimentation method in comparison with Alifax test 1 and the manual Westergren gold standard method. Scand J Clin Lab Invest (2021) May;81(3):181- 186.
Page 79
29. Mario Plebani, MD, Elisa Piva, MD, Erythrocyte Sedimentation Rate: Use of Fresh Blood for Quality Control, American Journal of Clinical Pathology, Volume 117, Issue 4, April 2002, Pages 621–626. Rev. 2.3 CUBE 30 TOUCH USER MANUAL...
Need help?
Do you have a question about the CUBE 30 TOUCH and is the answer not in the manual?
Questions and answers