Diesse Mini-Cube User Manual
Automatic instrument for esr determination with modified westergren method
Hide thumbs
Also See for Mini-Cube:
- Service manual (62 pages) ,
- User manual (55 pages) ,
- Quick start manual (3 pages)

Related Manuals for Diesse Mini-Cube


Summary of Contents for Diesse Mini-Cube
- Page 1 USER MANUAL Software Release No. 1.xx Rev. 1.3 issued on June 2018 Automatic instrument for ESR determination with modified Westergren method Only for in vitro diagnostic use Rev 1.3 06/2018 1/59...
- Page 2 M I N I - C U B E – U S E R M A N U A L Rev 1.3 06/2018 2/59...
- Page 3 M I N I - C U B E – U S E R M A N U A L MANUFACTURER DIESSE DIAGNOSTICA SENESE S.p.A. Via delle Rose 10, 53035 Monteriggioni (SI), Italy Tel. ++39 0577 587111 Fax. ++39 0577 318690 WWW.DIESSE.IT REGISTERED AND ADMINISTRATIVE OFFICE Via A.
- Page 4 M I N I - C U B E – U S E R M A N U A L This manual is applicable to the following MINI-CUBE instrument models: Catalog Number Description 10392 MINI-CUBE MINI-CUBE accessories: Catalog Number Description...
- Page 5 The information contained in this manual may be subject to modifications without prior notice. No page in this manual may be reproduced in any form or by any means, electronic, mechanical or otherwise, for any use whatsoever without prior written permission from DIESSE DIAGNOSTICA SENESE S.p.A. 5/59...
- Page 6 M I N I - C U B E – U S E R M A N U A L SYMBOLS Legend of symbols used: The instrument meets the requirements of the European Directive on in vitro diagnostic medical devices (98/79/EC). In vitro diagnostic medical device Date of manufacture Serial number...
- Page 7 BIO-CONTAMINATION HAZARDS When an analysis system like the MINI-CUBE is used, all precautions must be taken regarding biological risks. The samples do not require preparation. The samples must be disposed of in accordance with laboratory instructions and with local laws.
-
Page 8: Table Of Contents
ISPOSAL USE ............................22 ........................22 OMPATIBLE TEST TUBES ......................22 REPARATION OF THE SAMPLE ........................23 EST TUBE LABELLING MINI-CUBE ....................24 ESCRIPTION OF THE MENU PERFORMING AN ANALYSIS ......................25 ........................ 26 NSERTING THE TEST TUBES ......................27 TARTING THE ANALYSIS CYCLE ARCHIVE ........................... -
Page 9: Introduction
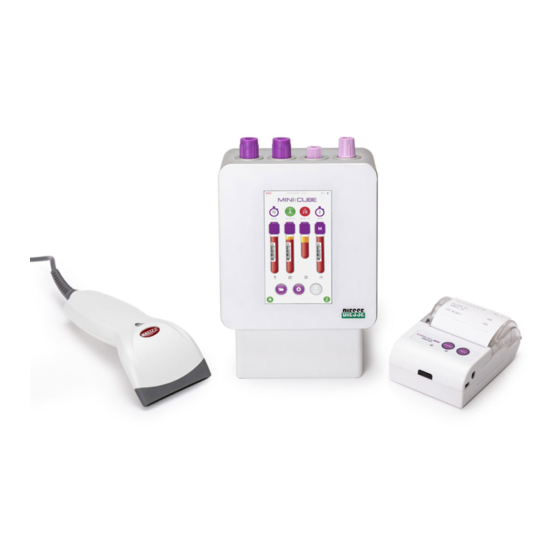
Chapter INTRODUCTION Presentation of the instrument he MINI-CUBE (Fig 1.0) is an automated instrument designed to measure the erythrocyte sedimentation rate (ESR) of blood samples anti-coagulated with EDTA, directly from the EDTA tube. The instrument analyzes four blood samples simultaneously on a random access and continual loading basis. -
Page 10: Clinical Meaning Of Esr
M I N I - C U B E – U S E R M A N U A L The instrument is designed with the temperature correction always activated and relates the results to a temperature of 18°C according to Manley’s Nomogram (graph 1.0) (ref. -
Page 11: Normal Esr Values (Westergren Citrated)
M I N I - C U B E – U S E R M A N U A L of the sedimentation phenomenon, and increased immunoglobulins observed with oncological/haematological diseases and acute infections. The ESR is therefore a non-specific measurement of an inflammatory state; the rate is high in numerous, different pathological conditions such as inflammatory diseases (infections, rheumatic diseases), a relative/absolute increase in globulins (nephrotic syndrome, myeloma), tissue necrosis (myocardial infarction,... -
Page 12: Materials Required For Use Of The Instrument
M A N U A L Materials required for use of the instrument Exclusively use the materials of the MINI-CUBE line manufactured by DIESSE DIAGNOSTICA SENESE S.p.A. (Always read the instructions for use that accompany each product before operating); any other part or accessory used in the instrument may cause damage or incorrect results. -
Page 13: External Cleaning Of The Instrument
M I N I - C U B E – U S E R M A N U A L External cleaning of the instrument External cleaning is required for safety reasons. 1. With the instrument turned off, clean with liquid detergent and leave to DECONTAMINATION dry. -
Page 14: Technical Data
Chapter TECHNICAL DATA Technical description Fig. 2.0 The MINI-CUBE module consists of a single body containing all the operating functions necessary for analyzing the sample. The motor lifts the reading unit which utilizes four optical sensors (one per Reading unit position) to verify the suitability of the sample and detect the level at baseline and level after 20 minutes of sedimentation. -
Page 15: External Connections Of The Instrument
External connections of the instrument The MINI-CUBE has a Bluetooth 4.0 connection for an external printer (optional accessory) or for connection to a mobile device. The power supply, serial/USB port for connection to the computer, a USB port... -
Page 16: Technical Features
M I N I - C U B E – U S E R M A N U A L Technical features Internal use Input: 100-240 Vac, 50-60Hz, 0.5A Output: 9Vdc@2A marked UL POWER SUPPLY LPS, DC output shall be provided a reinforced insulation between primary and secondary circuits DIMENSIONS 135x191x125... -
Page 17: Installation
M A N U A L Chapter INSTALLATION The MINI-CUBE is a precision instrument and must be handled with appropriate care and precautions. Inappropriate operations may damage the internal optoelectronic components and cause mechanical damage. Follow the instructions in this chapter in order to guarantee the operation of the instrument and safety of the operator. -
Page 18: Materials Provided
M I N I - C U B E – U S E R M A N U A L Materials provided The MINI-CUBE is supplied with the following materials: User Manual. USB mass storage with multi-lingual manual. -
Page 19: Unpacking The Instrument
M I N I - C U B E – U S E R M A N U A L Unpacking the instrument 1. Open the box from the top (see the packing labels) and remove the accessories Fig.3.1 2. Remove the instrument and power supply unit from the box Remove the expanded polyethylene blocks containing the instrument and power supply unit Fig. -
Page 20: Setup
Connect the power supply unit cable to the mains. 4. Optional - connect the barcode scanner and Bluetooth printer. Once the MINI-CUBE is powered on, a series of beeps will be heard indicating that Rev 1.3 06/2018 20/59... -
Page 21: Limitations And Warnings
Cadmium Others (No Latex) Disposal The MINI-CUBE instrument relies on the use of an electrical power source and therefore, in compliance with the EUROPEAN DIRECTIVE of 27 January 2003 and later amendments by the European parliament, it is classified as Electrical-Electronic Equipment. -
Page 22: Use
M I N I - C U B E – U S E R M A N U A L Chapter Instructions for the operator Before reading this section of the Manual, it is important to read the previous chapters in order to avoid problems with the operation of the instrument. Compatible test tubes ... -
Page 23: Test Tube Labelling
M A N U A L Test tube labelling The MINI-CUBE can accept sample tubes with a maximum of 1 secondary label adhered as close to the lavender EDTA cap as possible and with a label-free gap one side. As the samples are loaded, it is important to align the label-free gap with the dot on the insertion ring so the label-free gap is towards the right of the analyzer (fig. -
Page 24: Description Of The Mini-Cube Menu
U S E R M A N U A L Description of the MINI-CUBE menu Slide the power switch on the back of the instrument to turn on the MINI-CUBE. HOME Fig. 4.1 It is recommended to use a stylus on the touch screen display. -
Page 25: Performing An Analysis
The counter in the top left-hand corner of the screen shows the number of tests remaining in the MINI-CUBE. For each result produced, the instrument decreases the number of tests available by one. The counter font colour will change depending on the number of tests remaining; green font indicates that more than 50 tests are available, red font indicates less than 50 tests are available. -
Page 26: Inserting The Test Tubes
M I N I - C U B E – U S E R M A N U A L Date/Time: Indicates the current date and time. Bluetooth: This symbol indicates that the Bluetooth connection is enabled and the system is ready to communicate with accessories (e.g. a printer), or connect to a tablet or smartphone. -
Page 27: Starting The Analysis Cycle
M I N I - C U B E – U S E R M A N U A L the test tube in a position, the window closes and the screen displays the sample tube with a barcode label (Fig.4.3.). Fig. - Page 28 M I N I - C U B E – U S E R M A N U A L with the “VERIFYING TEST TUBE” message and the display shows the type of test tube (normal or pediatric) and the blood level detected. The 20 minute countdown begins at this point.
-
Page 29: Archive
M I N I - C U B E – U S E R M A N U A L that has exceeded the set threshold value. The results are reported in mm/hr according to the Westergren method (the option to change to the Panchenkov reference system is available in the Settings menu). - Page 30 M I N I - C U B E – U S E R M A N U A L In the Results Archive, samples can be sorted by date (default) and by name or code (based on the selection made in the item organisation, in the settings menu).
- Page 31 M I N I - C U B E – U S E R M A N U A L From the Archive menu, one can select several samples and by clicking on the export icon, the user has the option to print or permanently delete sample results.
- Page 32 M I N I - C U B E – U S E R M A N U A L SAMPLE ID: This is a unique code that identifies a specific sample analyzed. HCT: Options to enter the haematocrit value (Hct correction is limited to values <...
-
Page 33: Settings
M I N I - C U B E – U S E R M A N U A L Fig. 4.8 SETTINGS Fig. 4.9 33/59 Rev 1.3 06/2018... - Page 34 M I N I - C U B E – U S E R M A N U A L From the Settings menu, you can customize various functions: BLUETOOTH: Enable or disable the Bluetooth connection with other devices. BLUET. VISIBLE: Enables visibility for Bluetooth connections such as a Smartphone.
- Page 35 In this sub-menu, the user can load more tests by inserting the transponder in the slot at the base of the instrument, and following the instructions displayed on the screen (fig.4.10). Fig. 4.11 SERVICE: Service menu that can only be accessed by personnel authorized by DIESSE Diagnostica Senese S.p.A. 35/59 Rev 1.3 06/2018...
-
Page 36: Quality Control
It’s recommended to run two levels of control each day of patient testing with the Diesse MINI-CUBE. In the QC archive, the user can view the historical QC data. Results are stored by the position in the instrument and may be viewed by clicking on the corresponding number. - Page 37 M I N I - C U B E – U S E R M A N U A L to print the QC list or filter it by bar code or date. Click and hold down a control string to enter the record displaying details (name, lot, expiry, expected results ranges).
-
Page 38: Performing Qc Analysis
(See chapter 4). To run a QC sample, scan the QC barcode (previously recorded in the settings menu), and then load in any free position. The MINI-CUBE will recognize a QC tube by the registered lot number, and will display an image on the screen with a barcode label, whether the QC sample is manually entered or barcoded, as shown in Fig. -
Page 39: Troubleshooting
M I N I - C U B E – U S E R M A N U A L Chapter TROUBLESHOOTING ERROR MESSAGES CAUSE/REMEDY A cycle was started up with the test tubes already inserted. Remove the test tubes and start the cycle again. -
Page 40: Measuring Abnormal Samples
M I N I - C U B E – U S E R M A N U A L Measuring Abnormal Samples The clinical significance of an ESR result obtained from an abnormal sample, including but not limited to icteric, lipemic, cold agglutinins, anemic conditions, low hemoglobin concentrations, hemolysis, or any pathological condition that interferes or prevents a clear red blood cell to plasma interface, should be determined by the clinician ordering the test. -
Page 41: Calculating The Das 28
M I N I - C U B E – U S E R M A N U A L Chapter CALCULATING THE DAS 28 Clinical significance of Rheumatoid Arthritis Rheumatoid Arthritis (RA) is a chronic inflammatory disorder of autoimmune origin that affects the joints. - Page 42 M I N I - C U B E – U S E R M A N U A L Erythrocyte Sedimentation Rate (ESR), as individuals with Rheumatoid Arthritis often have an elevated ESR. If a diagnosis of Rheumatoid Arthritis is made, the disease activity needs to be defined, in order to choose the treatment and evaluate its effectiveness.
- Page 43 Ref (http://www.das-score.nl/das28/nl/uitleg-das28/de-das28-score.html). evaluation of the modification of disease activity over time Besides measuring the ESR, the MINI-CUBE can also calculate the DAS28. This feature makes the MINI-CUBE even more functional for small laboratories and in rheumatology testing. The two parameters, which are assessed at the same time, can be extremely useful for evaluating the progress of the disease and monitoring treatment.
-
Page 44: Das 28
M I N I - C U B E – U S E R M A N U A L DAS 28 Fig. 7.0 The operator can access the DAS28 function, for each patient by going to the Results archive and hold down the string containing the result (Patient Data menu). - Page 45 M I N I - C U B E – U S E R M A N U A L Fig. 7.1 An enlarged image is displayed to identify the points. Touch the right or left hand images for details of the joints, as shown in the figure (Fig. 7.2). Fig.
- Page 46 M I N I - C U B E – U S E R M A N U A L The light blue circles will indicate the sensitive parts. Touch the appropriate areas on the screen to indicate painful areas, and these will turn orange on the display.
- Page 47 M I N I - C U B E – U S E R M A N U A L Fig. 7.4 The light blue circles will indicate the sensitive parts. Touch the appropriate area on the screen to indicate painful areas, and these will turn purple. Lastly, the patient must rate their general well-being on a scale from 0 (very well) to 100 (very poor).
- Page 48 M I N I - C U B E – U S E R M A N U A L From the DAS28 home page, click on the chart to go to the page with historical data on the sample (Fig.7.5) Fig.
-
Page 49: Connection To A Host Computer
USB Port (Square Type B Connector). In this case a software Driver (STM32_SW) has to be installed on the PC. To set the communication with the MINI-CUBE through a virtual COM port over USB. On the MINI CUBE the parameter “HOST BY USBH” has to be set OFF in the Service Menu. - Page 50 1 second on the reply. Message for sending Results: Command 0x51 This message is sent by the MINI-CUBE to the host computer. The message contains the results of the analyses carried out on one or more tubes. The host Rev 1.3 06/2018...
- Page 51 “Send to Host” key on the Database of Pending Samples menu. Command: MINI-CUBE sends the following frame: L-BLK L-ADD Data- ...
- Page 52 M I N I - C U B E – U S E R M A N U A L Record Tubes: TIME BarCode Terminator DATA RACK ID POSITION ANALYSES ANALYSES FLAGS FLAGS (ASCII of the string ASCII ASCII ASCII ASCII string string ASCII string...
- Page 53 M I N I - C U B E – U S E R M A N U A L Reading Error Generic reading error QC PASS Reserved for samples with control blood QC FAIL Reserved for samples with control blood Reserved EXAMPLES: In the case of a “Sample High”...
- Page 54 M I N I - C U B E – U S E R M A N U A L On receiving the message, the Host computer may send an ACK reply to acknowledge correct receipt and interpretation of the message, meaning that all the fields have the correct values and the checksum is correct;...
- Page 55 M I N I - C U B E – U S E R M A N U A L Command: MINI-CUBE sends the following frame: L-BLK L-ADD Data- ... Data- (0x0D) (0x3E) (0x30) (0x31) (0x30) (0x30) (0x32) (0x35) The hexadecimal values indicated in brackets are constant values for this message.
- Page 56 M I N I - C U B E – U S E R M A N U A L H-VALMIN / L-VALMIN: Value lower than the acceptability range for the control blood, represented in HEX- ASCII. H-VALMAX / L-VALMAX: Value higher than the acceptability range for the control blood, represented in HEX- ASCII.
- Page 57 M I N I - C U B E – U S E R M A N U A L “ 100” 0x20, 0x31, 0x30, 0x30 “>140” >140 0x3E, 0x31, 0x34, 0x30 H-FLAGS / L-FLAGS: Bitmap with 8-bit of the sample errors, represented in HEX-ASCII.
-
Page 58: Bibliography
M I N I - C U B E – U S E R M A N U A L Chapter BIBLIOGRAPHY 1. Westergren A.: The Technique of the red cell sedimentation reaction. Am. Rev. Tuberc. 1926; 14: 94-101. 2. Fabry TL.: Mechanism of erythrocyte sedimentation and aggregation. Blood 1987;... - Page 59 M I N I - C U B E – U S E R M A N U A L The current version of the CE Declaration of Conformity may be downloaded from the DIESSE website: http://www.diesse.it/en/action/action:download-file/id:7693/ 59/59 Rev 1.3 06/2018...
Need help?
Do you have a question about the Mini-Cube and is the answer not in the manual?
Questions and answers