
Subscribe to Our Youtube Channel
Related Manuals for Husqvarna Automower Aspire R4


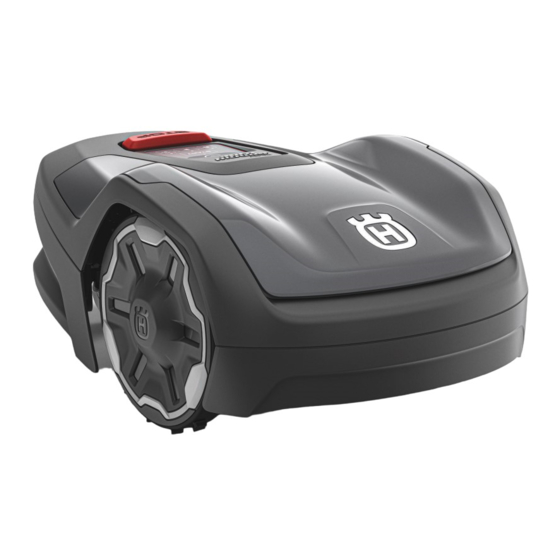
Summary of Contents for Husqvarna Automower Aspire R4
- Page 1 Operator's manual ® ™ Automower Aspire Read the operator's manual carefully and make sure that you EN, English understand the instructions before you use the product.
-
Page 2: Table Of Contents
Contents 5.6 To charge the battery.......... 26 1 Safety 5.7 Cutting height adjustment........26 1.1 Safety definitions...........3 6 Maintenance 1.2 General safety instructions........3 1.3 Safety instructions for installation......4 6.1 Introduction - maintenance........28 1.4 Safety instructions for operation......4 6.2 Maintenance schedule........28 1.5 Safety instructions for maintenance...... -
Page 3: Safety
• If there is a risk of thunderstorm, Husqvarna or mental capabilities or lack of experience and recommends that the power supply and all the knowledge, if they have been given supervision... -
Page 4: Safety Instructions For Installation
Park until further notice in the work area. Refer to on page 25 . Husqvarna recommends to set the product to operate when the work area has no activity. The product can cause injury to animals at 4 - Safety 1886 - 001 - 01.02.2023... -
Page 5: To Lift And Move The Product
1.7 To lift and move the product WARNING: The product must be set to OFF before you lift the product. The product is disabled when the indicator on the ON/OFF button goes off. CAUTION: Do not lift the product when it is parked in the charging station. -
Page 6: Introduction
The serial number and the product number are on the product rating plate and on the product carton. • Register your product on www.husqvarna.com. Enter the serial number of the product, the product number and the date of purchase to register your product. -
Page 7: Product Overview
2.2 Product overview ON/OFF button 13. Blade disc Keypad 14. Rear wheel Stop button 15. Torx key for cutting height adjustment Top cover 16. Rating plate Body 17. Drilling template (the drilling template is removed from the carton of the product) Front wheels 18. -
Page 8: Symbols On The Product
23. Maintenance tool The chassis contains components which 24. Screws to attach the storage hook are sensitive to electrostatic discharge 25. Storage hook (ESD). The chassis must only be opened 26. Stakes and sealed by an authorized service technician. The warranty will not be 27. -
Page 9: Led Indicator On The Keypad
keypad with flashing lights are the available operating • The ON/OFF button (A) is used to set the product modes for the product that you can select. You must to ON or to OFF. enter the PIN code for the product before you can select •... - Page 10 Schedule or Cutting main area as specified in the set Waiting for PIN code. Override Schedule . Next schedule or until Further notice . Secondary area . Parked, until Cutting Firmware installation in progress. Error. LED indicator flashes continuously. 10 - Introduction 1886 - 001 - 01.02.2023...
- Page 11 Firmware installation error. The LED indicator flashes quickly 4 times, stops and then flashes quickly 4 times Charging again continuously. 1886 - 001 - 01.02.2023 Introduction - 11...
-
Page 12: Installation
3 Installation 3.1 Introduction - Installation CAUTION: Holes with water in Refer to www.husqvarna.com for more information the lawn can cause damage to the about installation and instruction videos. product. We recommend you to update the firmware before you •... - Page 13 60- cm / 24- in. 3.4.2 To examine where to put the power • Put the charging station near a power outlet. supply • Put the charging station on a level surface. WARNING: • The baseplate of the charging station must not be Do not cut or extend bent.
- Page 14 CAUTION: Do not let the product operate on gravel. CAUTION: Do not make sharp bends when you install the boundary wire. CAUTION: For careful operation without noise, isolate all obstacles such as trees, roots and stones. The boundary wire should be put as a loop around the work area.
- Page 15 The recommended minimum distance between the guide wire and the boundary wire is 30 cm / 12 in. The product always runs to the left of the guide wire as seen facing the charging station. It is recommended to have as much free area as possible to the left of the guide wire (A).
- Page 16 To make an island, isolate areas in the work area with the boundary wire. We recommend to isolate all stable objects in the work area. Note: The product must be manually moved between Some obstacles are resistant to a collision, for example, the main area and the secondary area.
-
Page 17: Installation Of The Product
To set the starting point • Starting point (C). Refer to on page 22 . • Minimum distance 60 cm / 2 ft. from the starting point to perpendicular to the boundary wire (D). Support on page 6 . Refer to •... - Page 18 When connecting the power supply, only use a power Open the connector and put the boundary wire in outlet that is connected to an residual-current (RCD) the connector. device. Read and understand the instructions about the To examine where to put charging station.
-
Page 19: To Put The Wire Into Position With Stakes
not cause disruptions until several weeks or months later. Put the boundary wire and the guide wire on the ground. Put the stakes at a maximum of 75 cm / 30 in. distance from each other. Attach the stakes to the ground with a hammer or a plastic mallet. -
Page 20: After The Installation Of The Product
Connect app ® Download the Automower Connect app on your mobile device. Sign up for a Husqvarna account in the ® Automower Connect app. An e-mail is sent to the registered e-mail address. Follow the instructions in the e-mail in less than 24 hours to validate your account. -
Page 21: Settings
4 Settings ® Operation you can change the operation settings of Use the Automower Connect app for product settings. The factory settings are applicable for almost all work the product. areas, but the settings can be adapted to the conditions for each work area. -
Page 22: Installation
Accessories you can change the settings of the product accessories. 4.4.1 Avoid collisions with Husqvarna mower house If you have installed a Husqvarna mower house , the wear on the product and the mower house decreases Avoid house collisions . In the factory when you select setting this function is disabled. -
Page 23: General
® 4.7 Automower Connect Note: Avoid house collisions is selected it can result in grass that is not cut around the charging station. 4.4.2 FlexiFence If you install the FlexiFence accessory, you must enable ® Automower Connect you can enable or disable the ®... -
Page 24: Operation
5 Operation 5.1 To use the ON/OFF button Secondary area • Park • WARNING: Park / Schedule • Read and understand the Override schedule • safety chapter before you use the product. 5.3.1 Main area • Push the ON/OFF button for 3 seconds to set the Main area is the standard operating mode where the product to ON. -
Page 25: To Stop The Product
Push the STOP button. Push the Park button for 2 seconds. Push the START button. 5.3.3 Park Operating mode Park / Schedule means that the product Push the START button. goes back to the charging station where it stays until the Note: next schedule. -
Page 26: To Set The Product To Off
prevent damage to the loop wire. You can then lower the cutting height each week. You can select between 3 different cutting height steps. The blade disc has marks for each step. Step 1 is the lowest height, step 2 is the middle height, and step 3 is the highest height. - Page 27 10. Attach the torx key on the body of the product. 11. Attach the top cover on the product. 1886 - 001 - 01.02.2023 Operation - 27...
-
Page 28: Maintenance
6 Maintenance 6.1 Introduction - maintenance It is important that the blade disc rotates easily and that the edges of the blades are not damaged. The usual lifetime of the blades are 4 to 7 weeks. The conditions WARNING: Set the product to OFF that follow can increase or decrease the lifetime of the before you do maintenance on the product. -
Page 29: Clean The Product
Push the maintenance tool into the 2 holes to Husqvarna recommends to use a special cleaning and loosen the body of the product. maintenance kit. Speak to your Husqvarna service for more information. -
Page 30: Replacement Of The Blades
Remove grass, twigs and other objects from the charging station. 6.4 Replacement of the blades WARNING: Husqvarna can only guarantee safety if you use Husqvarna original blades with the embossed crowned H-mark logotype. Remove each blade and screw. Attach new blades and screws. -
Page 31: Winter Service
6.6 Winter service Take your product to your Husqvarna service for service prior to winter storage. Regular winter service will maintain the product in good condition and create the best conditions for a new season without any disruptions. Service usually includes the following: •... -
Page 32: Troubleshooting
In this chapter you can find information and help about faults and symptoms of the product. You can find more information and FAQ (Frequently Asked Questions) on www.husqvarna.com. 7.2 Fault messages The fault messages in the table below are shown in the app. Speak to your Husqvarna service if the same message shows frequently. Message... - Page 33 PIN code, go to blocked for a period of time. www.husqvarna.com to get information about how to get the PIN code or speak to your Husqvarna service. No drive...
- Page 34 Remove or cre- ate an island around objects that can cause the chassis to be lifted. If the prob- lem stays speak to your Husqvarna serv- ice. Wheel drive problem, right/ Grass or other object around the drive Clean the wheels and around the wheels.
- Page 35 Invalid firmware con- The firmware in the product is not updated. Put the product in the charging station and figuration update the firmware via FOTA. If the problem stays speak to your Husqvarna service. 1886 - 001 - 01.02.2023 Troubleshooting - 35...
-
Page 36: Information And Warning Messages
7.3 Information and warning messages The information messages in the table below are shown in the app. Speak to your Husqvarna service if the same message shows frequently. Message Cause Action Settings restored Reset all user settings has been done. -
Page 37: Indicator Lamp In The Charging Station
7.4 Indicator lamp in the charging station The indicator lamp in the charging station must show a solid or flashing green light for a correct installation. If not, follow the instructions in the troubleshooting table below. Speak to your Husqvarna service for more information. Light Cause... -
Page 38: Symptoms
7.5 Symptoms If the product does not operate as usual, follow the symptoms table below. Speak to your Husqvarna service if you cannot find the cause for the fault. Symptoms Cause Action The product has diffi- The guide wire is not put straight in a line... -
Page 39: Find Breaks In The Loop Wire
Push a button on the display to start the firm- the installation of new ware installation again. If the problem stays firmware via FOTA. speak to your Husqvarna service. The product is The product has operated the maximum cut- Usual operation for the product. Refer to... - Page 40 Check that the indicator lamp in the charging station flashes blue, which indicates a break in Indicator lamp in the the boundary loop. Refer to charging station on page 37 . Check that the boundary wire connections to the charging station are properly connected and not damaged.
-
Page 41: Transportation, Storage And Disposal
• Keep the product with all wheels on level ground • Speak to your Husqvarna service agent for or hang it on the wall with the storage hook. Refer information about available storage accessories for To install the storage hook on the wall on page your product. - Page 42 Carefully lift the lower section of the chassis and put it adjacent to the upper chassis. CAUTION: Be careful, the cable is connected to the main board. Disconnect the battery cable from the main circuit board. Use a screwdriver to push the clips on each side of the battery to remove it.
-
Page 43: Technical Data
9 Technical data 9.1 Technical data ® ™ Dimensions Automower Aspire Length, cm / in. 55 / 21.7 Width, cm / in. 33 / 13.0 Height, cm / in. 22 / 8.7 Weight, kg / lb 5.9 / 13.0 ® ™... - Page 44 ® ™ Sound data Automower Aspire Sound level, perceived, dB (A) Measured sound power noise level, dB (A) Noise emissions uncertainties K , dB (A) Sound pressure noise level at the operator’s ear , dB (A) ® ™ Mowing Automower Aspire Area capacity m²...
-
Page 45: Registered Trademarks
Husqvarna AB does not guarantee full compatibility between the product and other types of wireless systems such as remote controls, radio transmitters, hearing loops, underground electric animal fencing or similar. The products are made in England or the Czech Republic. Refer to information on the rating plate. Refer to Introduction on page 6 . -
Page 46: Warranty
The blades and wheels are seen as disposable and are not covered by the warranty. If an error occurs with your Husqvarna product, please contact Husqvarna service for further instructions. Please have the receipt and the product’s serial number at hand when contacting Husqvarna service. - Page 47 1886 - 001 - 01.02.2023 Warranty - 47...
- Page 48 Original instructions 1143079-26 2023-02-17...
Need help?
Do you have a question about the Automower Aspire R4 and is the answer not in the manual?
Questions and answers