Ltl Acorn Ltl-6630M Series User Manual
1080p hd video low power consumption infrared scouting camera less than 0.8s trigger time in actual application
Hide thumbs
Also See for Ltl-6630M Series:
- User manual (33 pages) ,
- User manual (30 pages) ,
- User manual (31 pages)

Related Manuals for Ltl Acorn Ltl-6630M Series


Summary of Contents for Ltl Acorn Ltl-6630M Series
- Page 1 Ltl-6630M Series 1080P HD Video Low Power Consumption Infrared Scouting Camera Less Than 0.8S Trigger Time in Actual Application USER’S MANUAL...
-
Page 2: Table Of Contents
TABLE OF CONTENTS General Information ..................1 1.1 Features ..................... 1 1.2 Application ....................2 1.3 Illustration ....................2 1.4 Keypad ....................... 4 Getting Started ....................5 2.1 Load Batteries ................... 5 2.2 Insert SD Card ................... 5 2.3 Enter Test Mode ..................6 2.4 Automatic Infrared Sensing Shooting ............. -
Page 3: General Information
General Information This manual applies to model Ltl-6630M. The cameras use a high-end image processor, work with a Japanese 14 megapixels BSI CMOS image sensor and a 130 degrees wide-angle lens (60 degrees lens models optional)that captures up to FHD 1080P (1920X1080) 30fps HD video with audio and 30 megapixels high-definition photos, the delicate and clear image offers users different visual experience. -
Page 4: Application
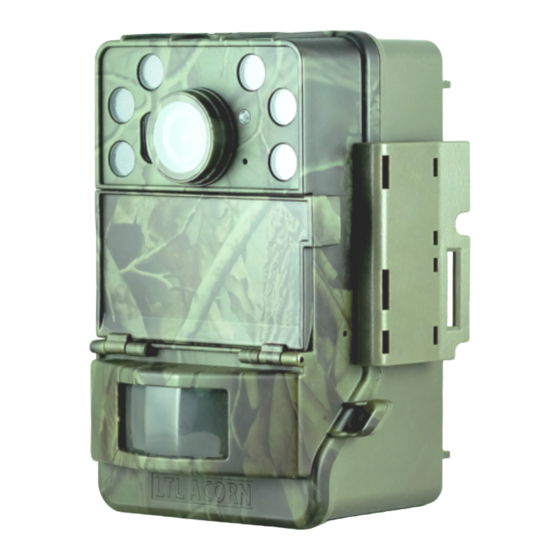
camera detects animals in advance from wide scope in two stages, then quickly trigger to shoot, standby current is about 80uA, makes it to be the pioneer in the industry. Quick trigger time (0.8 seconds). Two high accuracy timers make the camera work in two specified periods as request. - Page 5 mode: boot working mode, press TEST key to enter TEST test mode or ON auto record mode. ) Motion Indicator IR LED Light Lens Light Sensor LED display Keypad Lock Buckle Lock Hole Low Power PIR Pyroelectric Infrared Sensor Figure 1.1Front View of the Camera Electrode contact Battery container...
-
Page 6: Keypad
1.4 Keypad Keypad Keypad Function Power mode OFF: power off. ON: automatic shooting. In the ON position, switch press the TEST key to enter the boot preview test mode. MENU key Enter/exit menu. The TEST (test) mode and ON (auto record) mode can be TEST key switched when the power switch is in the ON position. -
Page 7: Getting Started
Getting Started 2.1 Load Batteries The battery box on the back of the camera can load 6 18650 lithium batteries. Please be aware that the battery polarity should correspond to the mark on the battery box. Please follow the positive and negative mark on battery box to load 6x18650 lithium batteries. -
Page 8: Enter Test Mode
Insert SD card The camera does not come with internal memory. It will not work without a SD (Secure Digital) memory card or SDHC (High Capacity) card. Before inserting the SD card, please make sure the write-protect switch is at “OFF” side (NOT at the “LOCK” position), format the SD card on camera before using. -
Page 9: Automatic Infrared Sensing Shooting
Press SHOT key to manually take picture or video and save in SD card. Furthermore, press SHOT key to play or stop playing video when replying. Press REPLAY key to enter Replay mode (confirmation function in menu mode). At this moment, press up and down arrow key to turn page, left and right key to zoom in and restore the picture. -
Page 10: Advanced Settings
ADVANCED SETTINGS 3.1 Set up Parameters on Camera LTL ACORN hunting camera comes with default settings. Users can change the setting parameters as required. After installing 6 fully charged 18650 lithium batteries in the camera, turn the switch outwards to the ON position,... - Page 11 01 Photo, 02 Select the number of burst shooting Picture No. Photos, 03 Photos at per trigger. Set length of video as required, camera will start recording video as preset length after it is automatically triggered in ON mode and stop recording till preset length is reached.
- Page 12 Select ON the camera or video will automatically mark the time stamp and the photo can show the camera ID, coordinates, temperature and moon phase. On, Off Notice: the temperature shown is the Time Stamp internal temperature of the camera, the camera will heat at work, it makes the difference between internal and external...
- Page 13 Select On to assign an ID for the camera with digits and/ Serial No. Off, On alphabets, 0~9 and A~Z, the ID will be imprinted on photo with time stamp On. Select On, you can set the time period of automatic cycle shooting, and the camera will automatically take pictures/videos...
-
Page 14: File Format
The AVI video file can be played on most popular media players. If it cannot be played by the player you used, please try another. 3.3 Set up Camera on PC Visit the website of LTL ACORN directly and download the software CameraSetup.exe. According to the link http://www.ltlacorn.cn (Download — >PC SETUP Download—>... - Page 15 Double click the CameraSetup.exe icon, you will see below page : Click to choose the camera model as request. Click to choose the software language of the interface. Click to enter camera setting interface:...
- Page 16 Set the camera as your requirements. Please refer to section 3.1 Set up Parameters on Camera for better operation. Click choose the save directory, SD card root directory is recommended (connect SD card to computer with SD card reader first). Click and the below window will pop out:...
- Page 17 Then click to exit. A file named menu.dat has been created and saved in the selected directory, before inserting the SD card into camera, please copy the menu.dat file to the root directory of the SD card if you didn’t choose SD card to save the file before. Click to restore to default settings, generate menu.dat file.
-
Page 18: Ltl-6630 Series Products
LTL-6630 Series Products Ltl-6630M series camera uses a high-end image processor, work with a 14 megapixels BSI CMOS image sensor and 130 degrees wide-angle lens, 850nm visible IR exposure LED, 940nm invisible IR exposure LED and white light LED are available for option. -
Page 19: Important Information
IMPORTANT INFORMATION 5.1 Power Supply Ltl-6630 series camera battery box can load with 6x18650 lithium batteries and connect with external power for charging by external power socket. It is recommended to use our company's LTL-SUN-5.5W or LTL-SUN (built-in lithium battery) solar charger to charge 6x18650 lithium batteries, which can greatly extend the working time of the camera. -
Page 20: 850Nm And 940Nm Ir Led
Therefore, our LTL ACORN infrared induction self timer camera can take more 2~3 times than the similar products, so that users can obtain more useful information. Attention: The camera performs at extreme cold environment as low as -40° C, in which the battery power capacity deteriorates drastically. Therefore, the number of video clips decreases accordingly. -
Page 21: Precautions
Precautions 6.1 Battery safety The camera can hold 6 18650 lithium batteries, about the use and storage of batteries, please note: Do not short-circuit the battery. Do not soak the battery in the water. Do not approach and place the battery in the fire. ... -
Page 22: Use Camera Outdoors
6.2 Use Camera Outdoors When the camera needs to work outdoors for a long time, please note: Properly install 6x18650 lithium batteries camera battery compartment. Switch the camera to ON mode, then connect the camera and battery compartment, clasp buckles tightly (please be careful not to hurt the hands or get stuck by foreign matter during assembly). -
Page 23: Firmware Upgrades
FIRMWARE UPGRADES The manufacturer reserves the right to upgrade the camera firmware and wireless module program, please consult with the local distributor for the website to download the program. Make sure the camera with enough power before upgrade to avoid the unsuccessful upgrade or the fault caused by low battery after upgrade. -
Page 24: Limited Warranty
It does not cover normal wear of the product. Please contact our tech support department to determine the nature of the problem before you return a LTL ACORN product under this warranty for repair or exchange. -
Page 25: Appendix I: Technical Specification
Appendix I: TECHNICAL SPECIFICATION Model Parameters Image Sensor 14 Mega Pixels BSI sensor FOV=60° ; F=1.6 Auto IR-Cut Lens FOV=130° ; F=1.8; Auto IR-Cut; 6 ultra-high brightness LED lights (940nm, IR Flash 850nm, white light; optional) Automatically adjust brightness of IR LED in Auto IR Adjustment black and white video, reduce current after about 10s to lower power consumption. - Page 26 DC charging voltage: 12V~24V Supply (optional) (DC power supply standard of customized camera: 7.4V~8V,1~2A) LTL ACORN weak light solar panel can be used Solar panel charging to charge the rechargeable battery in the (optional) camera, saving energy and the battery can work for long time without changing.
-
Page 27: Appendix Ii: Package Contents
Working Temperature -40℃ ~ +70℃ Working Humidity 5% ~ 95% Certificate CE & RoHS Appendix II: PACKAGE CONTENTS Part name Quantity (PCS) Digital Camera Strap External DC Power Cable (Optional) Warranty Card Note: About the part of the battery (6 x 18650 3.7V lithium battery), consumers need to buy on their own. -
Page 28: Appendix Iii: Illustration Of Battery Box Installation
Appendix III: Illustration of Battery Box Installation 1、Please follow the positive and negative labels on battery box to load the 6x18650 lithium batteries. 2、Close the camera with battery box. Align and close both sides... - Page 29 3、Hook camera body with two lock buckles on side of battery box. Hook up the camera catching groove 4、 Snap on lock buckles.
-
Page 30: Appendix Iv: Place And Install Camera
Appendix IV: Place and Install Camera 1、 Mount on tripod There is a 1/4" nut hole on the back of the camera battery box, fix the camera to tripod by screw up the nut, and then adjust shooting angle. Nut hole 2、... - Page 31 Plastic pillar hole Conical Plastic Pillar Cable hole...
Need help?
Do you have a question about the Ltl-6630M Series and is the answer not in the manual?
Questions and answers