Advertisement
Quick Links
Table of Contents
Receiving Instructions
After delivery, remove the packaging from the product. Inspect the product closely to determine
whether it sustained damage during transport. If damage is discovered, record a complete description of it on the
bill of lading. If the product is undamaged, discard the packaging.
NOTE: The end-user is solely responsible for confirming that product design, use, and maintenance comply with
laws, regulations, codes, and mandatory standards applied where the product is used.
Technical Service & Replacement Parts
For answers to questions not addressed in these instructions and to order replacement parts, labels, and
accessories, call our Technical Service and Parts Department at (260) 665-7586. The department can also be
contacted online at https://www.vestil.com/page-parts-request.php.
Electronic copies of Instruction Manuals
This instruction manual may be downloaded from
Signal
Words.................................................................................................................................................
Safety
Instructions.................................................................................................................................
Specifications........................................................................................................................................
Boom
Attachment...............................................................................................................................
HDC-305-60 Exploded View and Bill of
HDC-305-72 Exploded View and Bill of
HDC-305-84 Exploded View and Bill of
HDC-305-96 Exploded View and Bill of
Hydraulic System - Autoshifter Foot
Autoshifter Foot Pump Exploded View and Bill of
Inspections and Maintenance (Autoshifter Foot
Troubleshooting (Autoshifter Foot
Electrically Powered Drum Carriers (Options HDC-DC and
DC Modular Power Unit Exploded View and Bill of
DC Manifold Assembly Exploded View (Item 24 on p.
12VDC Modular Power Unit Electrical Circuit
12VDC Modular Power Unit
AC Modular Power Unit Exploded View and Bill of
Electrical Box and Manifold Exploded View (Items 2 and 12 on p.
115VAC Modular Power Unit Electrical Circuit
115VAC Modular Power Unit
Hydraulic Circuit Diagram (Powered
Operating a Powered HDC-305 (Raising and Lowering the Pivot
Bleeding Air from the MPU Hydraulic
Using the Battery Charger (HDC-DC Units
Using the Boom
Attachment.................................................................................................................
Lifting Drums (Standard and Powered
Inspections &
Maintenance...........................................................................................................................
Troubleshooting (HDC-DC &
Labeling
Diagram.................................................................................................................................
Limited
Warranty...................................................................................................................................
*NOTE:
Pages 12–19 address the composition and operation of the modular power unit. These pages only apply to
powered HDC-305 units manufactured before 12-01-2018. Units manufactured on or after 12-01-2018 receive a 2
generation modular power unit (MPU GEN2). Diagrams and operating instructions for GEN2 power units are provided in
Table of Contents
2999 North Wayne Street, P.O. Box 507, Angola, IN 46703
Telephone: (260) 665-7586 -or- Toll Free (800) 348-0868
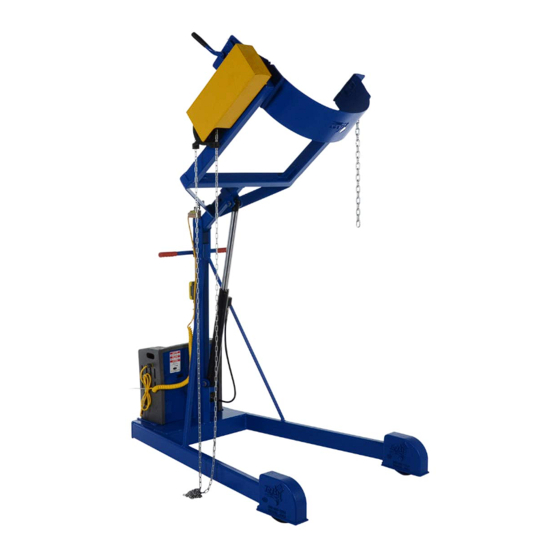
HDC-305 SERIES DRUM LIFTERS
Table of Contents
Materials..........................................................................................
Materials.......................................................................................
Materials........................................................................................
Materials.......................................................................................
Pump...............................................................................................
Materials........................................................................
Pump).............................................................................
Pump).................................................................................................
Materials......................................................................
Diagram.............................................................................
Layout........................................................................................................
Materials......................................................................
Diagram...........................................................................
Layout......................................................................................................
Units)..............................................................................................
Circuit............................................................................................
Only).......................................................................................
Units)............................................................................................
HDC-AC)....................................................................................................
Copyright 2022 Vestil Manufacturing Co.
Rev. 10/13/2022
Vestil Manufacturing Co.
Fax: (260) 665-1339
Web:
www.vestil.com
NOTE: If your HDC-305 is powered
(AC or DC), you should receive a
separate owner's manual for the
onboard power unit:
MPU-AC-GEN2
MPU-DC-GEN2
https://www.vestil.com/page- manuals.php
HDC-AC).........................................................
12)..........................................................................
15)........................................................
Arm)........................................................
HDC-305, MANUAL
e-mail:
info@vestil.com
(plugs into wall socket)
(battery powered)
Page 1 of 24
Page
2
2
3
3
4
5
6
7
8
9
–
10
10
–
11
11
*12
*12
*13
*13
*14
*15
*16
*16
*17
*17
*18
*18
*19
19
20
21
22
23
24
nd
Advertisement

Subscribe to Our Youtube Channel
Related Manuals for Vestil HDC-305 Series


Summary of Contents for Vestil HDC-305 Series
- Page 1 Telephone: (260) 665-7586 -or- Toll Free (800) 348-0868 Fax: (260) 665-1339 Web: www.vestil.com e-mail: info@vestil.com HDC-305 SERIES DRUM LIFTERS NOTE: If your HDC-305 is powered (AC or DC), you should receive a separate owner’s manual for the onboard power unit: MPU-AC-GEN2...
- Page 2 • DO NOT modify the product in any way UNLESS you first obtain written approval from Vestil. Unapproved modifications might make the lift unsafe to use and automatically void the Limited Warranty (see p. 24).
- Page 3 Table of Contents Rev. 10/13/2022 HDC-305, MANUAL SPECIFICATIONS Documents that provide specifications for HDC-305 series drum lifters are available online to anyone who visits Vestil’s website. Specifications include dimensions, net weight, and capacity information. To access the appropriate specifications document,...
- Page 4 11119 09-514-031 WELDMENT, FRAME, BOOM 16 x 4" FLAT WASHER, LOW CARBON, USS, 33008 15-023-001 RESERVOIR, NON-STRUCTURAL ZINC PLATED, 3/8" BOLT W/GREASE ZERK, 1/2-13 X 3 1/2 16-145-031 Table of Contents Copyright 2022 Vestil Manufacturing Co. Page 4 of 24...
- Page 5 09-514-031 WELDMENT, FRAME, BOOM 99-021-904- CYLINDER, HYDRAULIC, Ø1 1/2" x 18", 09-514-092 WELDMENT ASS'Y, PIVOT ARM RAM STYLE 09-002-004 DRUM SADDLE,ASSEMBLY,PULL CHAIN 15-023-001 RESERVOIR, NON-STRUCTURAL HYDRAULIC FOOT PUMP, AUTO-SHIFTER, 99-640-005 2-SPEED Table of Contents Copyright 2022 Vestil Manufacturing Co. Page 5 of 24...
- Page 6 4" SPLIT LOCK WASHER, CARBON STEEL, 33622 09-514-031 WELDMENT, FRAME, BOOM MEDIUM ZINC FINISH, 3/8" NYLON INSERT LOCK NUT, GRADE 2, ZINC 37024 15-023-001 RESERVOIR, NON-STRUCTURAL FINISH, 3/8"-16 Table of Contents Copyright 2022 Vestil Manufacturing Co. Page 6 of 24...
- Page 7 4" SPLIT LOCK WASHER, CARBON STEEL, 33622 09-514-031 WELDMENT, FRAME, BOOM MEDIUM ZINC FINISH, 3/8" NYLON INSERT LOCK NUT, GRADE 2, ZINC 37024 15-023-001 RESERVOIR, NON-STRUCTURAL FINISH, 3/8"-16 Table of Contents Copyright 2022 Vestil Manufacturing Co. Page 7 of 24...
- Page 8 Repeat step 3 until air is completely removed from the cylinder, i.e. only oil flows from the bleeder screw. Check all of the hydraulic lines for oil leaks. Return the unit to service. Table of Contents Copyright 2022 Vestil Manufacturing Co. Page 8 of 24...
- Page 9 The unused pressure and OR-904-N70 O-ring, #4 SAE port intake/return ports are each plugged OR-906-N70 O-ring, #6 SAE port with an SAE #6 port plug. 01-111-013 Bearing, self-lubricating, ” x ” Table of Contents Copyright 2022 Vestil Manufacturing Co. Page 9 of 24...
- Page 10 This record establishes satisfactory condition of the pump and cylinder. During subsequent inspections, compare observations to this record to determine whether the pump and cylinder are in satisfactory condition. Table of Contents Copyright 2022 Vestil Manufacturing Co. Page 10 of 24...
- Page 11 10. Pivot arm rises part way r. Air trapped in small pump chamber r. Perform “Purging air from the pump” on and then stops Table of Contents Copyright 2022 Vestil Manufacturing Co. Page 11 of 24...
- Page 12 – 20 x 1in. TPHMS 29185 zinc-plated 23255 SHCS utility grade 33687 High collar lock washer 152400-03 Molded cord Connector, charge 150CCTM.OEM 3MT ST3540 1in. hook and loop press 10” Table of Contents Copyright 2022 Vestil Manufacturing Co. Page 12 of 24...
- Page 13 *Refer to MPU-GEN2 manual if your unit was manufactured on or after 12-01-2018.* NOTE: Overcurrent & short-circuit protection as well as system disconnect must be provided. Limit switch or jumper wire used where applicable. Table of Contents Copyright 2022 Vestil Manufacturing Co. Page 13 of 24...
- Page 14 *Refer to MPU-GEN2 manual if your unit was manufactured on or after 12-01-2018.* 12VDC MODULAR POWER UNIT LAYOUT (PART 2 OF 2) *Refer to MPU-GEN2 manual if your unit was manufactured on or after 12-01-2018.* Table of Contents Copyright 2022 Vestil Manufacturing Co. Page 14 of 24...
- Page 15 – 20 x 1in. TPHMS zinc- 29185 plated 23255 SHCS utility grade 33687 High collar lock washer 152400-03 Molded cord Connector, charge 150CCTM.OEM 3MT ST3540 1in. hook and loop press 10” Table of Contents Copyright 2022 Vestil Manufacturing Co. Page 15 of 24...
- Page 16 *Refer to MPU-GEN2 manual if your unit was manufactured on or after 12-01-2018.* NOTE: Overcurrent & short-circuit protection as well as system disconnect must be provided. Limit switch or jumper wire used where applicable. Table of Contents Copyright 2022 Vestil Manufacturing Co. Page 16 of 24...
- Page 17 Rev. 10/13/2022 HDC-305, MANUAL 115VAC MODULAR POWER UNIT LAYOUT *Refer to MPU-GEN2 manual if your unit was manufactured on or after 12-01-2018.* HYDRAULIC CIRCUIT DIAGRAM (POWERED UNITS) Cylinder Table of Contents Copyright 2022 Vestil Manufacturing Co. Page 17 of 24...
- Page 18 Jog the motor to push air out of the system. 3. Only clear hydraulic fluid will flow from the bleeder screw opening when air has been completely removed. At that point, reinstall the bleeder screw. Table of Contents Copyright 2022 Vestil Manufacturing Co. Page 18 of 24...
- Page 19 Lower the boom completely; then close the release valve. • Always tighten the shackle pin before each use. See BOOM ATTACHMENT on p. 3. Table of Contents Copyright 2022 Vestil Manufacturing Co. Page 19 of 24...
- Page 20 Once the drum rests on the ground, press down on the clamp release (refer to step 3) and rotate the handle counterclockwise to release the chain. Table of Contents Copyright 2022 Vestil Manufacturing Co. Page 20 of 24...
- Page 21 Keep the product clean & dry. Lubricate moving parts at least once per month. o If repairs are necessary, only install manufacturer-approved replacement parts. Vestil is not responsible for issues or malfunctions that result from the use of unapproved replacement parts.
- Page 22 Binding cylinders. See 4 (r). ii. Air present in the hydraulic system causing To unlock, pressurize the hydraulic system. the velocity fuse to activate Table of Contents Copyright 2022 Vestil Manufacturing Co. Page 22 of 24...
- Page 23 D: label 206 applied inside MPU cover D: label 206 is applied to metal frame inside MPU cover Label 295 (on MPU cover) Label 248; 249; 250; or 251 electrical system specifications Table of Contents Copyright 2022 Vestil Manufacturing Co. Page 23 of 24...
- Page 24 After Vestil receives your request for warranty service, an authorized representative will contact you to determine whether your claim is covered by the warranty. Before providing warranty service, Vestil will require you to send the entire product, or just the defective part (or parts), to its facility in Angola, IN.
Need help?
Do you have a question about the HDC-305 Series and is the answer not in the manual?
Questions and answers