Table of Contents
Advertisement
Table of Contents
FM-0648, FM-2066, FM-2072, FM-2078, FM-2566, FM-2572, FM-3066, FM-3072
Receiving instructions:
After delivery, remove the packaging from the product. Inspect the product to determine whether it
sustained damage during transport. If damage is discovered, record a complete description of it on the bill of
lading and file a claim with the carrier immediately! If the product is undamaged, discard the packaging.
NOTE:
The end user is solely responsible for confirming that product design, use, and maintenance comply with
laws, regulations, codes, and mandatory standards applied where the product is used.
Replacement Parts and Technical Assistance:
If you have questions that are not addressed in these instructions, or to order replacement parts, labels,
and accessories, call (260) 665-7586 and ask for the Service and Parts Department. You can also reach
Service and Parts online at http://www.vestilmfg.com/parts_info.htm.
Table of Contents
A company dedicated to solving loading dock and material handling
2999 North Wayne Street, P.O. Box 507, Angola, IN 46703
Telephone: (260) 665-7586 -or- Toll Free: (800) 348-0868
http://www.vestil.com/
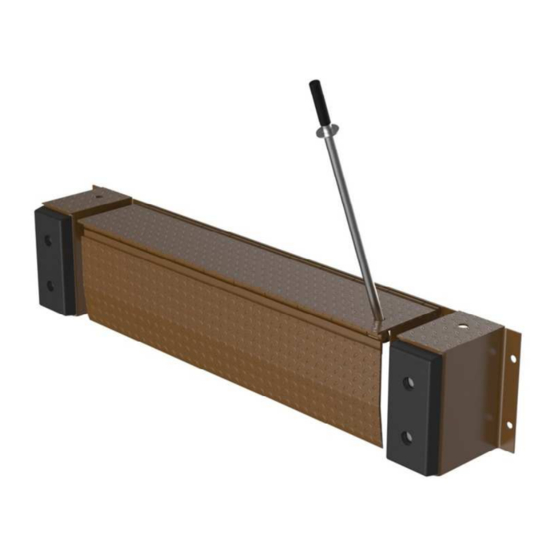
Mechanical Edge-O-Dock Levelers
Model FM-2066
Copyright 2020, Vestil Manufacturing Corp.
12/2/20
Vestil Manufacturing Corp.
problems since 1955.
Fax: (260) 665-1339
FM MANUAL.DOCX
email:
info@vestil.com
Page 1 of 20
Advertisement
Table of Contents

Subscribe to Our Youtube Channel
Related Manuals for Vestil FM-0648


Summary of Contents for Vestil FM-0648
- Page 1 Mechanical Edge-O-Dock Levelers FM-0648, FM-2066, FM-2072, FM-2078, FM-2566, FM-2572, FM-3066, FM-3072 Model FM-2066 Receiving instructions: After delivery, remove the packaging from the product. Inspect the product to determine whether it sustained damage during transport. If damage is discovered, record a complete description of it on the bill of lading and file a claim with the carrier immediately! If the product is undamaged, discard the packaging.
-
Page 2: Signal Words
HAZARDS Vestil Manufacturing strives to identify all foreseeable hazards associated with the use of its products. However, material handling is dangerous and no manual can address every risk. Ultimately, the most effective way to prevent injury is for persons who use this dock leveler to apply sound judgment whenever using this device. - Page 3 19 is in place, undamaged, and easily readable. • DO NOT modify the dock leveler in any way without express, written approval from Vestil Manufacturing. Unapproved modifications automatically void the Limited Warranty on page 20 and can make the product unsafe to use.
- Page 4 Refer to this drawing to identify the major components of your Edge-O-Dock Leveler. In this manual, “right” and “left” will always correspond to the right and left sides of a trailer parked at the dock. EXPLODED PARTS DIAGRAM AND BILL OF MATERIAL Table of Contents Copyright 2020, Vestil Manufacturing Corp. Page 4 of 20...
-
Page 5: Installation Instructions
DO NOT use a dock leveler that has not been welded to the dock. FAILURE TO FOLLOW THE PROPER INSTALLATION PROCEDURE WILL DECREASE THE CAPACITY OF DOCK LEVELER. Table of Contents Copyright 2020, Vestil Manufacturing Corp. Page 5 of 20... - Page 6 1 ½” lengths of 6-inch channel, welded inside the channel at a 12-inch pitch. The CE curb edge option is available through your Vestil distributor. TOOLS AND SUPPLIES NEEDED. The following tools and supplies will be needed for the installation. These are not supplied with the product.
- Page 7 Proceed to Steps 8-14 (p.9) No steel dock edge present … … … … Proceed to Steps 15-26 (p. 11) All installations will conclude with steps 27-37 (p. 13). Table of Contents Copyright 2020, Vestil Manufacturing Corp. Page 7 of 20...
- Page 8 Follow the manufacturer’s instructions for installation. Contact your Vestil distributor to select the approach ramp that best fits your application. STEP 4. Remove all material and protrusions from the dock face.
- Page 9 STEP 10. Center the leveler in the doorway of the dock, with the top edge of the mounting plate even with the edge of the dock or the approach ramp (if installed). Tack weld the mounting plate at each end. Table of Contents Copyright 2020, Vestil Manufacturing Corp. Page 9 of 20...
- Page 10 STEP 14. Install a single ¾”×5” anchor into the dock through the flange of each bumper box. Proceed to Step 27 to complete the installation. Table of Contents Copyright 2020, Vestil Manufacturing Corp. Page 10 of 20...
- Page 11 Select the approach ramp that sets the dock height to 50”±1”. DO NOT operate a dock leveler that has not been welded to the dock. Contact your supplier or Vestil Manufacturing to select the approach plate suitable for your application.
- Page 12 STEP 23. Use four ¾”×5” anchor bolts with four ¾” flat washers to attach the dock leveler to the dock face. Do not tighten the bolts at this time. Table of Contents Copyright 2020, Vestil Manufacturing Corp. Page 12 of 20...
- Page 13 STEP 32. The Edge-O-Dock leveler incorporates a spring counterweight to reduce the effort required to lift the dock plate. The spring must be tensioned at initial installation. This task requires two people to complete. Table of Contents Copyright 2020, Vestil Manufacturing Corp. Page 13 of 20...
- Page 14 STEP 36. Test the tension. If the lip plate does not completely rise, more tension is needed. If the lip plate bounces or floats when the lip is extended, there is too much lifting tension. Repeat Steps 34 and 35 until the proper spring tension is achieved. Table of Contents Copyright 2020, Vestil Manufacturing Corp. Page 14 of 20...
- Page 15 Position wheel chocks and trailer jacks (not included with this product) per OSHA requirements to prevent trailer movement. 2. Remove the handle from the bumper box. Insert it into the socket on the left side of the leveler plate. Table of Contents Copyright 2020, Vestil Manufacturing Corp. Page 15 of 20...
- Page 16 5. Remove the handle from the leveler plate and return it to the bumper box. 6. When finished unloading and loading the trailer, simply remove the chocks and drive the trailer away. The Edge-O-Dock will return to its stowed position. Table of Contents Copyright 2020, Vestil Manufacturing Corp. Page 16 of 20...
-
Page 17: Inspection And Maintenance
The Edge-O-Dock leveler incorporates a spring counterweight to reduce the effort required to lift the dock plate. It may be necessary to adjust the spring tension occasionally. This task requires two people to complete. Table of Contents Copyright 2020, Vestil Manufacturing Corp. Page 17 of 20... -
Page 18: Replacement Parts
REPLACEMENT PARTS Vestil Manufacturing takes pride in using the finest available parts for our equipment. We are not responsible for equipment failure resulting from the use of unapproved replacement parts. To order replacement or extra parts for your equipment contact Customer Service at the factory. In any correspondence with the factory please include the Serial Number inscribed on the nameplate of the piece of equipment. -
Page 19: Labeling Diagram
(e.g. faded). To order replacement labels, contact the technical service and parts department online at http://www.vestilmfg.com/parts_info.htm; or by calling (260) 665-7586 and asking the operator to connect you to the Parts Department. … Table of Contents Copyright 2020, Vestil Manufacturing Corp. Page 19 of 20... -
Page 20: Limited Warranty
The warranty period for original dynamic components is 1 year. For wearing parts, the warranty period is 90 days. Both warranty periods begin on the date Vestil ships the product to the Warrantee. If the product was purchased from an authorized distributor, the periods begin when the distributor ships the product.
Need help?
Do you have a question about the FM-0648 and is the answer not in the manual?
Questions and answers