
Related Manuals for Smiths Medical CADD-MS 3


Summary of Contents for Smiths Medical CADD-MS 3
- Page 1 Operator’s Manual This online version differs from the printed version. Certain information that is not intended for patients has been removed. CADD-MS™ 3 Ambulatory Infusion Pump Model 7400...
- Page 2 For your safety, review the manual carefully, including all warnings and cautions. If you don’t understand something, contact your clinician, your pump provider, or Smiths Medical. Summary of updates Pages Warning regarding 3, 10, 16, 62, 80...
- Page 3 Our staff is available to help you 24 hours a day with cover. If your manual is a year or more old, contact programming and operation of the pump. Smiths Medical MD, Inc. (or check the web site at U.S. Distribution www.smiths-medical.com) to see if a newer manual is available.
-
Page 4: Table Of Contents
Table of contents Watertight ................11 History .................11 Important Information Description of pump display and menus ........12 Screensaver and backlight ............13 Important safety information ............1 Menus ..................13 Warnings ..................1 Editing values ...............13 Cautions ..................3 Timeout feature ..............13 Explanation of symbols...............4 Home screen example ............14 Introduction ..................6 Sample screens ..............14 Indications ................6... - Page 5 Technical Information 2. Attaching an infusion or extension set and loading a filled cartridge into the pump ....32 Pump development standards ............63 3. Fill the tubing ..............36 Specifications..................69 4. Fill cannula ...............37 General specifications (nominal) ..........69 5. Set site change reminder and restart delivery ....38 Delivery specifications ..............71 Stopping and starting the pump ............39 Main Menu ................71...
- Page 6 Collect Separately ................81 Limited Warranty ................82 Index ....................84...
-
Page 7: Important Information
This manual describes how to use and troubleshoot the Important safety information CADD-MS™ 3 pump. Smiths Medical MD, Inc. does not, however, make any recommendations about any specific WARNING: Read this entire manual before using the programming related to any therapy. Whether certain CADD-MS ™... - Page 8 Important Information If there are any system problems during the self tests, The CADD-MS™ 3 pump and cartridge are not a secure system. Patient must be assessed for appropriateness of the pump will stop the tests and display an alarm screen letting you know there is a problem.
-
Page 9: Cautions
15.4 psi (106 kPa). If you experience prob- using the pump immediately. Contact Smiths Medical lems, remove the pump from use. MD, Inc. for information on servicing the pump. -
Page 10: Explanation Of Symbols
Important Information Explanation of symbols Use only Smiths Medical MD, Inc. 3 ml Medication Car- tridges; other manufacturers’ products will not work with Below is a list of symbols you will see on the CADD-MS ™ 3 the CADD-MS ™ 3 pump. - Page 11 Appears in pump display, with a message, to indicate Empty cartridge or low battery a question you must answer before programming Keep dry can continue Fragile, handle with care Appears in pump display, along with a message, as an indicator of an alarm condition. Keep away from sunlight Collect separately Temperature limitation...
-
Page 12: Introduction
Important Information Introduction Doses The pump can deliver two types of doses, an Automatic Dose The CADD-MS ™ 3 Ambulatory Infusion Pump provides (programmed to deliver a specific dose at a preprogrammed measured medication therapy to patients in hospital or out- time) as well as Demand Dose (delivered by the patient as patient settings. -
Page 13: Glossary Of Terms
Continuous Rate: The amount of medication delivered continu- The pump requires the use of the Smiths Medical 3 ml Medi- cation Cartridge and an infusion set (any manufacturers’ ously over 24 hours a day, providing delivery of medication at all times. - Page 14 Important Information Infusion pump: A small electromechanical medical device designed specifically for delivering precise amounts of medi- cation into the body. The CADD-MS ™ 3 pump systems are controlled by two microprocessors (computer chips) which continuously monitor each other to make sure the systems are working properly.
-
Page 15: Programming The Pump
Pump illustrations Figure 1 Figure 2 Battery cap Cartridge O-ring Cartridge IR windows viewing (not used window on this model Display pump) Up key Demand Dose Left button program Down key Right program key (backlight) Programming the Pump... -
Page 16: Description Of Features And Buttons
Programming the Pump Description of features and the display right above each key is a short description of what happens if you press it. (Always look to the display buttons above each key to see what the key is used for.) keys (Figure 1) Battery cap with o-ring (Figure 1) keys are used to move around in menus,... -
Page 17: Features
Features Vibration alert Watertight If you don’t want the pump to beep during alarms and As long as the pump’s labels and outer shell are intact the alerts, you can program it to vibrate instead. This feature CADD-MS ™ 3 pump is watertight to a depth of 8 feet can be used in meetings, classrooms, etc. -
Page 18: Description Of Pump Display And Menus
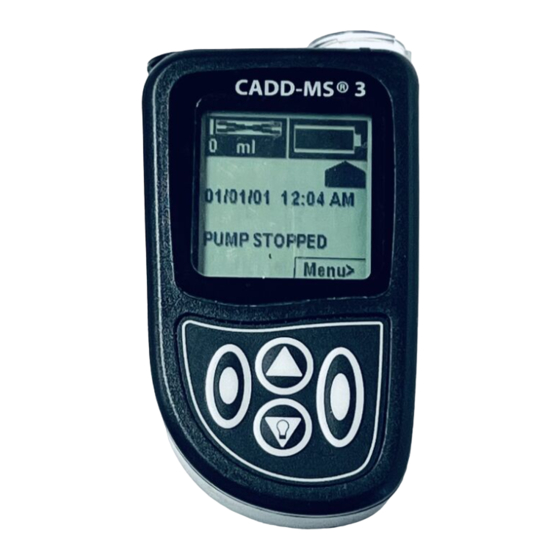
Programming the Pump Description of pump display • The Automatic Dose (AD) home screen 2.988ml shows when the next automatic dose is and menus scheduled to be delivered. This home Next Auto Dose: 12:00 AM 0.05 ml screen is only visible if Automatic Dose is All programming, operating and alarm/alert information set to Yes (in use) in both the Setup and Menu>... -
Page 19: Screensaver And Backlight
A variety of symbols appear on the screen. For example, Editing values any time you have to answer a question before proceed- Screens with a single field: press the key to ing, the question appears on the screen accompanied change a value, then press the < or > key to save it or . -
Page 20: Home Screen Example
Programming the Pump Medication remaining in the In a menu, press Power remaining in the battery Main Menu cartridge (approximate) to highlight the item you (approximate) want, then press Select Start Delivery Setup Delivery Programs 2.988 ml Load When at the top or bottom History of a menu, only the The home screen... -
Page 21: Accessories
Accessories Smiths Medical offers a variety of products for use with your pump. Cartridge You must use the Smiths Medical 3 ml Medication Cartridge (catalog number 21-7450) with the pump. Smiths Medical cartridges are latex free. Caution: Use only Smiths Medical 3 ml Medication Cartridges. -
Page 22: Before Using The Pump For The First Time
Programming the Pump Before using the pump for the 2. Insert one AAA (IEC LR03) alkaline D. Zurn, 2001-08-29 battery into the compartment, making needle-attach.ai first time sure the + side goes in first (see Figure 4); if you insert the battery Inserting a battery, programming the regional settings (if wrong, the pump will not start. - Page 23 Pump is used. Contact your Pump press on the battery cap the pump does provider or Smiths Medical for a replacement battery cap. not produce a “chirp” (see Figures 5 If you insert a new battery and the pump doesn’t turn and 6).
-
Page 24: Self Tests
Programming the Pump Self Tests The first time you insert a battery and a new pump per- forms the self tests, you will see the following alert screens: During the self tests, the pump’s internal computer performs tests on all the major hardware, computer, and •... -
Page 25: Setup
Setup Warning: Do not allow the patient to learn the pass code. The pass code allows access to all delivery pro- The Setup menu is where you perform certain setup gramming and security settings. functions, such as determining which delivery types Once inside the menu, you can choose between the vari- should be available, setting the time and date, setting a ous items. -
Page 26: Opening The Setup Menu
Programming the Pump Opening the Setup Menu If setup security Choose the menu is set to Yes: Enter Start at any item you want to the Pass Code (- - - ), Choose Setup, Home screen enter, then press then press Next** then press Select (pump stopped*) Select... -
Page 27: Setup Menu - Time And Date
Setup Menu - Time and Date NOTE: If the pump is programmed to display a site re- minder alert (see page 23), resetting the time may cause Warning: The time and date must be set correctly, that alert to occur sooner or later than expected (up to since delivery factors are time-based, and all his- 24 hours), depending on how far forward or back you tory is stored based on time and date. -
Page 28: Setup Menu - Local Formats
Programming the Pump Setup Menu - Local Formats Local Formats determine how certain things are When the pump is built, the default settings are: Time displayed on the pump. format: 12 Hour; Date format: mm/dd/yy; and decimal symbol: Period. If these are correct for your location, •... -
Page 29: Setup Menu - Alerts
Setup Menu - Alerts Display site reminder in menu: optional alert deter- The pump allows you to set up certain alerts associated mines whether a screen is added to the Load menu to with treatment considerations, personal preference and set a reminder for when it is time to change the patient’s safety, and can be personalized uniquely for each user. - Page 30 Programming the Pump Choose when to give alert (0.05 Starting at to 0.5 ml) then Setup Menu press Next screen Setup Menu Low Cartridge Site Reminder Alert Alert Choose Alerts, Choose Yes or No Delivery In Menu Time and Date then press Select then press Next New Patient...
-
Page 31: Setup Menu - New Patient
Setup Menu - New Patient Before beginning to program the delivery specifics, it Choosing “yes” to mark New Patient will record an event is recommended that you ready the pump for a new in the History Log and clear all entries from the daily patient. -
Page 32: Setup Menu - Delivery
Programming the Pump Setup Menu - Delivery Before programming Delivery for a new patient it is The Dose Lockout time is the minimum amount of recommended that you first use the New Patient feature time that can pass between the start of one dose and the (as shown on page 25). - Page 33 Starting at Choose Yes or Choose Yes or Choose Yes or Choose 0 to Setup Menu No then press No then press No then press 1 ml/hr then screen Next Next Next press Next Setup Menu Enable Delivery Enable Delivery Enable Delivery Max Continuous Choose Delivery,...
-
Page 34: Setup Menu - Security
Programming the Pump Setup Menu - Security Warning: If you choose not to require pass codes to Security allows you to decide if you want to require pass access the Setup and Delivery Program menus, the codes to access the Setup and Delivery Program menus. patient will have full access to all programming and Security can be accessed when the pump is running or delivery functions. -
Page 35: Delivery Program
Delivery Program In Delivery Program you program the delivery specifics for your patient: Continuous Rate schedule, Automatic Dose schedule and Demand Dose amount. Delivery Program only appears in the main menu when the pump is stopped. Programming the Pump... - Page 36 If program security is set Start at Home to Yes: Enter the Choose Delivery Choose Yes or Choose Yes or screen (pump Program, then passcode (- -), then No then press No then press Choose Yes or must be stopped) press Select press Next Next...
-
Page 37: Using The Pump
Supplies required In addition to the pump, you will need: • One filled Smiths Medical 3 ml Medication Cartridge • One infusion or extension set with standard female luer connection (for connecting to cartridge) Using the Pump... -
Page 38: Attaching An Infusion Or Extension Set And Loading A Filled Cartridge Into The Pump
Using the Pump 2. Thread the infusion set tub- 2. Attaching an infusion or extension set and loading ing through the cartridge cap; a filled cartridge into the pump remove the protective cap from Warning: To avoid accidentally infusing medication the luer end of the infusion or causing backflow of blood from the access device set and insert the luer through... - Page 39 4. Choose Load from main menu and open the cartridge NOTE: You will not be able to load a cartridge that menu. contains less than 0.2 ml (the sensor may have trouble sensing the cartridge amount). Start at any Home screen Choose Load, then 0.025 ml press Select...
- Page 40 Using the Pump * In order for the pump to assure that the cartridge is correctly connected FastForward Not ready to the pushrod, the pushrod must start in a forward position. If it is not far enough forward when you press Load, or if you attempt to load a Pushrod must move Please wait forward...
- Page 41 5. Verify, by looking through the cartridge viewing window, that the cartridge is properly attached to the pushrod. Fasten Align the cartridge cap back onto the pump. Make sure the rib on the cap lines up with the rib on the pump, indicating the cap is secured (see Figure 10).
-
Page 42: Fill The Tubing
Using the Pump the tubing is not counted as medication delivered to the 3. Fill the tubing patient. Filling forces medication from the cartridge and pushes air out of the tubing. Filling is complete when you see Warning: Never use Fill Tubing when the infusion medication come out of the end of the tubing and all set is connected to the body, or an unintended dose air is removed. -
Page 43: Fill Cannula
4. Fill cannula Filling the cannula is an important step if using an infusion set that has a separate needle or cannula that needs priming prior to use. If you do not fill the cannula, there is a delay in medication delivery once the pump is started. -
Page 44: Set Site Change Reminder And Restart Delivery
Using the Pump 5. Set site change reminder and restart delivery The Site Change reminder screen appears here if turned on in Setup / Alerts (see page 23). Setting the site change reminder will cause the pump to beep (or vi- brate) as a reminder that it is time to change the tubing or access site. -
Page 45: Stopping And Starting The Pump
Stopping and starting the pump You can stop and start the pump from any of the Home Shown below is how to stop from the CR home screen, screens or in the main menu. The Delivery Program and although stopping from any of the Home screens will certain items in the Setup Menu (those having an effect use the same procedure. -
Page 46: Starting The Pump
Using the Pump Starting the pump Start at any Home screen 2.988 ml Main Menu Continuous PUMP STOPPED Press Press Rate Menu Start Delivery CR Menu Menu Setup Start Delivery CR Menu Menu> Delivery Program Review Rates Load History <Home Select>... -
Page 47: Delivering A Demand Dose
Delivering a Demand Dose In order to deliver a Demand Dose, the pump must be programmed to allow them in the Setup menu (where you will need to program a Lockout time limit and dose duration) as well as in the Delivery Program menu (where you will program the amount). -
Page 48: Canceling Doses
Using the Pump Canceling doses Doses can be canceled while in progress. The next scheduled Automatic Dose can also be canceled. NOTE: Instruct the patient under what circumstances they can cancel a dose. Stopping the pump will stop any dose in progress. Use the procedures on the following pages to stop delivering a dose without stopping the pump (and any continuous rate delivery). -
Page 49: Canceling A Dose (Demand Or Automatic) While In Progress
Canceling a dose (Demand or Automatic) Canceling next Automatic Dose while in progress Choose Cancel Choose Cancel Start at Next Dose, then Dose, then Automatic Dose (AD) Start at any press Select Home screen press Select Home screen Automatic Dose Main Menu Press Press... -
Page 50: History
Using the Pump History Delivery Summary: this is a daily breakdown of medi- The pump stores history in two ways: cation delivery, and may include the Demand Doses, • As events. The pump stores information for the previ- Automatic Doses, and Continuous Rate delivered and ous 4000 events. - Page 51 Choose Complete Choose History, History, then press Start at any then press Select Home screen Select Complete History History Main Menu Press 2.988ml A sample Complete History report 10/05/05 01:41 PM Stop Delivery Menu Menu screen. You can press the keys Setup Continuous rate...
-
Page 52: Beep Or Vibrate
Using the Pump Beep or Vibrate Choose Beep or Vibrate* to signal alarms and alerts. a key. Low is quietest and High is loudest. It is factory Then, if using Beep, decide how loud the beep is and preset to High. whether you want the pump to beep each time you press Choose Beep/ Choose Beep/... -
Page 53: Continuous Rate Menu
Continuous Rate Menu If the pump is programmed with a continuous rate, a Continuous Rate Home screen is added. A Continuous Rate Menu is also added, where you can view (but not change) the Continuous Rate schedule. Start at Choose Review Continuous Rate Rates, then press (CR) -
Page 54: Automatic Dose Menu
Using the Pump Automatic Dose Menu If the pump is programmed to deliver automatic doses, an Automatic Dose Home screen is added. An Automatic Dose Menu is also added, where you can view (but not change) the dose schedule and cancel doses. Canceling the next Auto Dose is discussed on page 43. -
Page 55: Demand Dose Menu
Demand Dose Menu If the pump is programmed to allow demand doses, a Demand Dose Home screen is added. A Demand Dose Menu is also added, where you can view (but not change) the dose amount and duration and cancel doses. Start at Demand Choose Review Dose (DD) - Page 56 Using the Pump...
-
Page 57: Help
About alarms (Beep/Vibrate • Attention alarm: Indicates a problem that you need to see to, however it is not serious enough to have settings) stopped delivery. Examples include low cartridge volume, low battery, etc. The pump can be set to Beep or Vibrate when an alert Beep: 4 double-beeps, repeated once per minute. -
Page 58: Troubleshooting
Help Troubleshooting Alarms Message in display What it means / Alarm How to make it stop Battery Delivery stops. The battery does not You must change the battery immediately. Power depleted have enough power for the pump to may be so low that the display goes blank or the Delivery stopped. - Page 59 Call for service. pump. Siren alarm. Smiths Medical MD, Inc. to initiate pump service. Do not use the pump. This alert occurs only during Press OK. Change the battery as soon as possible.
-
Page 60: Alerts
Help Alerts Message in display What it means / Alarm How to make it stop Press OK. Replace the cartridge as soon as practical. The amount of medication left in Cartridge Volume Low the cartridge is low. Alert repeats at Change cartridge intervals until Cartridge Very Low soon. -
Page 61: Other Messages
Alerts - continued Message in display What it means / Alarm How to make it stop Press OK. Reprogram all pump settings. All pump settings are reset to default Program Defaulted values (usually seen with new pumps You must program or when internal battery is discharged). - Page 62 Help Other messages - continued Message in display What it means / Alarm How to make it stop Press OK. If necessary, go to the Delivery Program You have attempted to start the pump and the Demand Dose menu and program the amount for the Demand Demand Dose amount is programmed to zero.
- Page 63 Other messages - continued Message in display What it means / Alarm How to make it stop You attempted to deliver a Demand Press OK. The Demand Dose home screen displays No dose allowed Dose during the lockout period. the time that the next dose will be available. Demand dose is Single alarm.
- Page 64 Help Other messages - continued Message in display What it means / Alarm How to make it stop You have allowed Demand Doses, If you want to leave the amount at zero, press but programmed the amount to OK. If you want to reprogram the amount, press This will result in a zero.
-
Page 65: Cleaning The Pump
Cleaning the pump • PDI — Super Sani-Cloth® • Mada Medical — MadaCide Routinely clean the pump to prevent buildup of dirt or 1. Dampen a soft, lint-free cloth with cleaning solu- dried fluids. Try to wipe spills off the pump right away to tion and wipe the exterior surface of the pump. -
Page 66: Servicing The Pump
If the pump becomes damaged or broken, or if it is not working properly, you will need to call Smiths Medical MD, Inc. Before contacting Smiths Medical, please be sure that... -
Page 67: The Pump And
The pump and: If the pump is dropped or hit hard Extreme temperatures If outside in very cold temperatures for any length of If the pump is dropped or hit against something hard, it will time, instruct the patient to keep the pump next to their need to be immediately looked over carefully to make sure body and covered by warm clothing. - Page 68 Warning: If the display has missing or incomplete characters, or if the pump does not seem to be working correctly, stop using the pump immediate- ly. Contact Smiths Medical MD, Inc. for information on servicing the pump. Warning: Make sure that the battery cap is fully...
-
Page 69: Technical Information
Pump development IEC 60601-2-24 (1998-02) - Medical Electrical Equipment, Part 2–24: Particular requirements for safety of infusion pumps standards and controllers. IEC 878 (First Edition, 1988) - Graphical symbols for electrical equipment in medical practice. AAMI ID26: 1998 - Medical Electrical Equipment — Part 2: IEC 61000-4-2 (1995) - Electromagnetic Compatibility (EMC), Particular requirements for the safety of infusion pumps and controllers. - Page 70 Technical Information IEC 529 - Degrees of protection provided by enclosures (IP Code). RTCA/DO-160D (7/97) - Environmental conditions and test procedures for airborne equipment: SECT 21 — Emissions of radio frequency energy (Radiated Emissions Only — Category M Limit). UL2601-1 (1998) - Medical Electrical Equipment, Part 1: General requirements for safety.
- Page 71 Guidance and Manufacturer’s Declaration Electromagnetic Emissions — The pump is intended for use in the electromagnetic environment specified below. The customer or the user of the pump should assure that it is used in such an environment. Emissions Test Compliance Electromagnetic Environment —...
- Page 72 Technical Information Guidance and Manufacturer’s Declaration Electromagnetic Immunity — The pump is intended for use in the electromagnetic environment specified below. The customer or the user of the pump should assure that it is used in such an environment. Immunity Test IEC 60601 Test Level Compliance Level Electromagnetic Environment —...
- Page 73 Guidance and Manufacturer’s Declaration — Electromagnetic Immunity The pump is intended for use in the electromagnetic environment specified below. The customer or the user of the pump should assure that it is used in such an environment. Immunity IEC 60601 Compliance Electromagnetic Environment Guidance...
- Page 74 Technical Information Recommended Separation Distances Between Portable and Mobile RF Communications Equipment and the Pump The pump is intended for use in an electromagnetic environment in which radiated RF disturbances are controlled. The customer or the user of the pump can help prevent electromagnetic interference by maintaining a minimum distance between portable and mobile RF communications equip- ment (transmitters) and the pump as recommended below, according to the maximum output power of the communications equipment.
-
Page 75: Specifications
Specifications Maximum time to blockage (occlusion) alarm: Minimum Maximum General specifications (nominal) Intermediate rate: 0.124 ml/hr 12 min 15 min Minimum increment of resolution: Minimum rate: 0.002 ml/hr 9.5 hr 19 hr 0.005 ml per activation Bolus volume at blockage (occlusion) release: Size: Minimum rate: approximately 0.04 ml 3.2 in ×... - Page 76 Technical Information internal battery maintains pump programming and his- System definition: tory for approximately 30 days. The life of the internal bat- CADD-MS ™ 3 Ambulatory Infusion Pump with Smiths tery is 10 years minimum under normal use conditions. Medical 3 ml Medication Cartridge and a Unomedical Comfort ™...
-
Page 77: Delivery Specifications
Delivery specifications Dose Lockout Time: 00:15 minutes to 24:00 hours in 00:15 (15 minute) increments Default: 01:00 (1 hour) Main Menu Time and Date: Setup Allows user to set time and date Delivery Methods: New Patient: Choose to have the following delivery methods available: Mark for new patient: Yes or No Continuous Rate: Yes or No Default: No... -
Page 78: Delivery Program
Technical Information Regional Settings: Rate: 0.000 ml/hr to Continuous Rate Maximum Time Format: 12-hour or 24-hour (up to 1.000 ml/hr) in 0.002 ml increments Default: 12-hour Default: 0.000 ml/hr Date Format: mm/dd/yy or dd/mm/yy Automatic Dose Schedule: Programmable (with a possible 24 time/dose segments) Default: mm/dd/yy Time: 12:00 am to 11:30 pm in 00:30 increments or Decimal Symbol: Decimal shown as Period or... -
Page 79: History
Site change alert (if displayed - see Alert Specifications): 1 to 5 days in 1 day increments Default: 3 days 12:30 am (00:30) to 11:30 pm (23:30) in 00:30 minute increments Default: 8:00 am History User selects displayed report for viewing Complete History: last 4000 events, arranged from most recent to oldest Delivery Summary: last 90 days, arranged from most... -
Page 80: Accuracy Test Results
The following graphs are designed to show flow accuracy Mean flow error: – 0.01% of a pump against given time periods. All graphs were plotted using a Smiths Medical 3 ml Medication Cartridge 10.0 (21-7450) and Unomedical Comfort ™ Infusion Set. Flow rate from startup... - Page 81 Flow rate from startup Flow rate error Time interval: 15 minutes Programmed rate: 0.002 ml/hr Total time: 1530 minutes Average flow rate: 0.0021 ml/hr Programmed rate: 0.002 ml/hr Mean flow error: 2.59% 0.004 CADD-MS3 Startup Curve 0.003 Epmax T (min) 0.002 % Error Flow...
-
Page 82: Safety Features And Fault Detection
Technical Information Safety features and fault out. After being reset, the microprocessor checks the status flag to see if this was a time out test. If it was, the detection microprocessor continues its normal power up routine. If the reset occurred when the microprocessor was not expecting it, the microprocessor traps the event, an Hardware safety features alarm is given (either beep or vibrate), and an error mes-... -
Page 83: Voltage Detector Circuit
Voltage detector circuit battery shutdown, only replacing the depleted battery with a new battery will clear the condition. Low voltage detection is performed by part of the watch- dog circuit and by the microprocessor via software. Software safety features Three low voltage levels are detected. The first two levels are detected by software and the third by hardware. -
Page 84: Motor Circuit Check
Technical Information Data handling and Motor circuit check At power up and at regular intervals thereafter, the mo- software safety features tor circuit is checked to ensure that no power is being applied to the motor unless the motor is actually on. If the software detects power being applied to the motor Data stored in RAM at any other time, it initiates an alarm (either beep or... -
Page 85: Data Used In Calculations
Data used in calculations Calculations on data used in some way to control deliv- ery of medication are performed redundantly. The two calculated values are then compared. If the two values do not match, the software stops medication delivery, initiates an alarm (either beep or vibrate) and a system fault alarm message appears in the display. -
Page 86: Inspecting The Pump
Pump is used. Contact your Pump are clean and free of foreign objects/materials. provider or Smiths Medical for a replacement battery cap. • Visually inspect the display. If there are missing or incomplete Reference the Cleaning the pump and Servicing the pump sections... - Page 87 Collect Separately This product contains electrical and electronic components (including batteries) that may contain materials, which if disposed of with general waste, could be damaging to the environment. In accordance with Directive 2002/96/EC Waste Electrical and Electronic Equipment, residents of the European Union must follow specific disposal or recycling instructions for this product.
- Page 88 This warranty is valid only if the Pump is used in accordance with this Operator’s Manual. The warranty will be void in the following cases: Smiths Medical MD, Inc. (the “Manufacturer”) warrants to the Original Purchaser that the CADD-MS™ 3 Ambulatory Infusion Pump (the 1.
- Page 89 Warranty Procedure Notice of the claimed warranty defect must be made in writing, fax or by telephone to the Manufacturer as follows: Smiths Medical MD, Inc., 1265 Grey Fox Road, St. Paul, MN 55112 U.S.A. Telephone: 1 800.426.2448, or if outside the USA contact your local distributor.
- Page 90 Index Index Demand Dose button 10 Dose 7 Canceling a dose 43 Menus Dose Duration 26, 71 Cartridge 11, 15, 23, 52, 53, 54 Beep/Vibrate 19 Dose Lockout 26, 71 Loading 31 Delivery Program 29 sensor 11, 33 History 44 changing the battery 16 Load 33 Accuracy test results 74...
- Page 91 Specifications 69 Delivery 71 Safety features and fault General 69 detection 76 Stopping the pump 39 hardware 76 Symbols 4 motor drive 76 System fault 53 voltage detection 77 watchdog 76 Screensaver 13 Time and Date 21, 71 Security 28, 71 Troubleshooting 52 Self tests 18 alarms 52...
- Page 93 Tel. +44 (0)1923 246434 www.smiths-medical.com CADD-MS 3 and the CADD and Smiths Medical design marks are trademarks of the Smiths Medical family of companies. The symbol ® indicates the trademark is registered in the U.S. Patent and Trademark Office and certain other countries.
Need help?
Do you have a question about the CADD-MS 3 and is the answer not in the manual?
Questions and answers