Advertisement
Available languages
Available languages
Quick Links
`
Part No. 22106ZX, 22107X, 22107ZX, 22110X, TG05X, TG06X, TG16X
Do not over tighten as screws can be stripped out.
REMOVE CONTENTS FROM BOX. VERIFY ALL PARTS ARE PRESENT.
READ INSTRUCTIONS CAREFULLY BEFORE STARTING INSTALLATION.
DO NOT OVER TORQUE. STANDARD OPERATING LOAD FOR TIGHTEN
BODY MOUNT NUTS & BOLTS VARIES FROM 45 TO 65 FOOT POUND.
Phillips Head Screwdriver
1. INSTALLATION PROCEDURE:
WARNING:
Do not transport a pickup truck facing backward with a liner installed.
Air can get under the liner which may result in the liner coming out of the truck and causing damage or injury.
Truck Box Preparation:
Clean truck box of all foreign matter and open any floor drains to ensure ventilation and moisture drainage.
NOTE:
Bed liner can be installed by one person. However, using two people is recommended by the manufacturer.
2. Dodge Tailgate Cover Installation Steps using Scrivets
NOTE: Your tailgate cover kit may have more or less hardware than shown.
Your truck May Not use Scrivet Fasteners in your Tailgate
Page 1 of 10
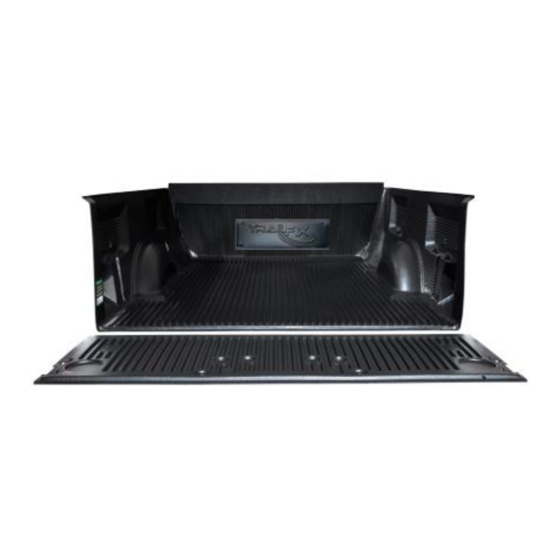
BEDLINER & TAILGATE COVER
Tools Required
Phillips Head Screwdriver, Power Screwdriver with Phillips bit
30-60 min
support@trailfx.com
1 866 638 4870
Limited Lifetime
STEP 1 (FIGURE 1)
Remove plastic screws (FIGURE 1A) from all Scrivet locations
in the Tailgate Cover. Remove Scrivet bases (FIGURE 1B)
from all Scrivet locations in the Tailgate Cover. Re-assemble
Scrivet screw and base two or three threads. (Hand turn)
(FIGURE 1C).
STEP2:
Place the Tailgate Cover on Truck Tailgate, lining up the holes
in the plastic Tailgate Cover with the holes in the truck
tailgate.
STEP 3 (FIGURE 2)
Place Scrivet Fastener in hole.
PRESS DOWN FIRMLY on the Scrivet Fastener to Seat in
Hole. Repeat Procedure for the 7 Other Scrivet Fasteners.
STEP 4 (FIGURE 3)
Using Phillips Screwdriver, Tighten the 8 Scrivet Screws.
DO NOT OVER-TIGHTEN. DO NOT USE POWER TOOLS.
www.TrailFX.com
CUTTING NOT
DRILLING
REQUIRED
REQUIRED
Rev 062816
Advertisement

Related Manuals for TrailFX 22106ZX


Summary of Contents for TrailFX 22106ZX
- Page 1 BEDLINER & TAILGATE COVER Part No. 22106ZX, 22107X, 22107ZX, 22110X, TG05X, TG06X, TG16X Do not over tighten as screws can be stripped out. CUTTING NOT DRILLING 30-60 min REQUIRED REQUIRED REMOVE CONTENTS FROM BOX. VERIFY ALL PARTS ARE PRESENT.
- Page 2 2A. Tailgate Cover Installation (with pre-drilled holes) without Factory Fasteners NOTE: Your tailgate cover kit may have more or less hardware than shown. STEP 1 Center tailgate cover on truck tailgate. (See FIGURE 1) STEP 2 Using a power screwdriver, center a self tapping screw in a pre-drilledhole in tailgate cover and fasten to truck tailgate.
- Page 3 3. Under Rail Bedliner Installation Steps STEP 1 (Figure 1) Place bedliner in the truck bed, such that the front rail retainer fits over the front rail of the truck bed. While standing on the side of the truck, lift one side of the bedliner and slip the sidewall of the bedliner under the opposite wall of truck box.
- Page 4 COUVERTURE DE BOÎTE ET DE HAYON Part No. 22106ZX, 22107X, 22107ZX, 22110X, TG05X, TG06X, TG16X Outils nécessaires puissance Srewdriver avec le peu Phillips Tournevis principal Phillips, 1. Préparation pour installation: AVERTISSEMENT: Ne transportez pas, dans le sens contraire de la marche, un camion équipé d’une doublure de caisse ...
- Page 5 2b. Les étapes d’installation pour le protecteur de hayon (sans trous perforés). ÉTAPE 1 Centrer la doublure sur le hayon de la camionette. (FIGURE 1) ÉTAPE 2 Le placement de la première vis devrait être centré le long du rebord inférieur de la couverture de hayon.
- Page 6 (NOTE: La doublure de caisse a été conçu pour tenir Doublure de caisse à poser sous les longerons compte d’expansion/contraction dans les températures ambiantes extrêmes. Par conséquent il est impossible d’avoir un ajustement parfait à tout moment. ÉTAPE 1 (FIGURE 1) Installez la doublure sur le plateau du pick-up de sorte que le rebord avant recouvre la paroi avant du plateau du pick-up.
- Page 7 DE LA CUBIERTA DEL CAJON/COMPUERTA Part No. 22106ZX, 22107X, 22107ZX, 22110X, TG05X, TG06X, TG16X Herramientas necesarias: Destornillador Eléctrico con broca de estrella Destornillador de estrella Preparación para la instalación ADVERTENCIA No transporte una camioneta apuntando hacia atrás con un forro instalado.
- Page 8 2b. Pasos para la instalación de la cubierta de la puerta posterior (sin agujeros pretaladrados). PASO 1 Centre la cubierta de la compuerta trasera plástica en la compuerta trasera de la camioneta. PASO 2 El primer tornillo debería colocarse centrado a lo largo del limite inferior de la cubierta de la compuerta.
- Page 9 PAS0 1 4. Bedliner Sobre El Riel Con el Bedliner fuera de la caja de la camioneta: 1. Monte los sujetadores del Bedliner “Liner-Lok”, deslizando el clip metálico sobre la tuerca girante plástica (Vea Figura 1). 2. Inserte los tornillos através de los orificios provistos en la pared del Bedliner, con la cabeza del tornillo hacia el interior de la caja de la camioneta.
- Page 10 Product not installing properly. Ensure make model year, cab length and bed size of your vehicle is listed in the application. All installation steps are followed correctly. Check out these other TrailFX Products!! www.TrailFX.com Keystone Automotive Operations Inc. (KAO) warrants this product to be free of defects in material and workmanship at the time of purchase by the original retail consumer.
Need help?
Do you have a question about the 22106ZX and is the answer not in the manual?
Questions and answers