Table of Contents
Advertisement
Quick Links
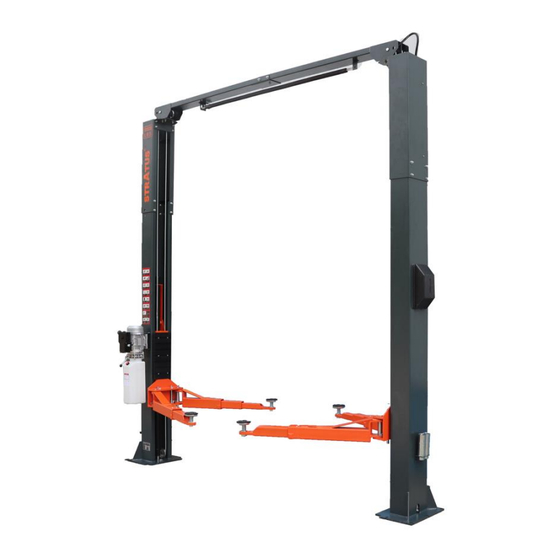
Model No. SAE-C10P
Direct drive 2 post Lift
Single Point Manual Release
Lifting Capacity 10,000 lbs
Important Note
1. This equipment can not be installed, operated or repaired without reading instructions.
2. Electricity must be hooked up by certified electrician.
3. Do not use this equipment beyond its rated capacity.
Installation & Operation &
Maintenance Instructions
Advertisement
Table of Contents

Related Manuals for Stratus SAE-C10P


Summary of Contents for Stratus SAE-C10P
- Page 1 Model No. SAE-C10P Installation & Operation & Maintenance Instructions Direct drive 2 post Lift Single Point Manual Release Lifting Capacity 10,000 lbs Important Note 1. This equipment can not be installed, operated or repaired without reading instructions. 2. Electricity must be hooked up by certified electrician.
-
Page 2: Table Of Contents
STRATUS Clear Floor 2 post Lift Installation & Operation & Maintenance Instructions TABLE OF CONTENTS 1. Packing, transport and storage ............................5 1.1 Packing ....................................5 1.2 Transport ................................... 5 1.3 Storage ....................................5 2. Technical specifications ..............................6 3. Safety ...................................... 9 3.1 Important notices ................................ - Page 3 STRATUS Clear Floor 2 post Lift Installation & Operation & Maintenance Instructions 9. Special notes ..................................42 9.1 Environmental damage ..............................42 9.2 Dismantling ..................................42 9.3 Disposal ..................................42 9.4 Noise declaration ................................43...
- Page 4 STRATUS Clear Floor 2 post Lift Installation & Operation & Maintenance Instructions Foreword Notes on the operating instructions The present ORIGINAL OPERATING INSTRUCTIONS are designed to provide sufficient instruction for the safe operation of the product. The information is provided clearly and concisely. The chapters are arranged by letter and the pages are numbered continuously.
-
Page 5: Packing, Transport And Storage
STRATUS Clear Floor 2 post Lift Installation & Operation & Maintenance Instructions 1. Packing, transport and storage All packing, lifting, handling, transport and unpacking operations are to be performed exclusively by expert personnel with knowledge of the lift and the contents of this manual. -
Page 6: Technical Specifications
STRATUS Clear Floor 2 post Lift Installation & Operation & Maintenance Instructions 2. Technical specifications Model SAE-C10P Symmetric Installation Asymmetric Installation Lifting capacity 10,000lbs(4,500KG) 10,000lbs(4,500KG) Lifting height 74 13/16"(1900mm) 74 13/16"(1900mm) Min. height 3 15/16"(100mm) 3 15/16"(100mm) Column inside 118 1/8"(3000mm) 115 3/8"(2930mm) - Page 7 STRATUS Clear Floor 2 post Lift Installation & Operation & Maintenance Instructions Symmetric Installation Fig. 2...
- Page 8 STRATUS Clear Floor 2 post Lift Installation & Operation & Maintenance Instructions Asymmetric Installation Fig. 3...
-
Page 9: Safety
STRATUS Clear Floor 2 post Lift Installation & Operation & Maintenance Instructions 3. Safety 3.1 Important notices This 2-posts lift is specially designed for lifting motor vehicles that weighs within its outmost lifting capacity. Users are not allowed to use it for any other purposes. Otherwise, we, as well as our sales agency, will not bear any responsibility for accidents or damages of the lift. -
Page 10: Warning Signs
STRATUS Clear Floor 2 post Lift Installation & Operation & Maintenance Instructions 3.5 Warning signs All safety warning signs attached on the machine are for the purpose of drawing the user’s attention to safety operation. The labels must be kept clean and need to be replaced when they are worn-out or have dropped. Read... -
Page 11: Installation
STRATUS Clear Floor 2 post Lift Installation & Operation & Maintenance Instructions 4. Installation Only skilled technicians, appointed by the manufacturer, or by authorized dealers, must be allowed to carry out installation. Serious damage to people and to the lift can be caused if installations are made by unskilled personnel. -
Page 12: Checking For Room Suitability
STRATUS Clear Floor 2 post Lift Installation & Operation & Maintenance Instructions 4.2 Checking for room suitability The lift has been designed to be used in covered and sheltered places free of overhead obstructions. The place of installation must not be next to washing areas, painting workbenches, solvent or varnish deposits. -
Page 13: Assemble Columns
STRATUS Clear Floor 2 post Lift Installation & Operation & Maintenance Instructions Fig. 5 Asymmetric Installation Floor Plan 4.6 Assemble columns Assemble main column & extension column, and then stand up the 2 columns (the column with the power unit base plate is the main column and the other one is the vice column) (Fig 6)... -
Page 14: Installation Overhead Top Beam
STRATUS Clear Floor 2 post Lift Installation & Operation & Maintenance Instructions 4.7 Installation overhead top beam 1. Assemble overhead top beam (See Fig.7) NOTE: The bolts run from inside of the column and then fasten the nuts from outside of the column. - Page 15 STRATUS Clear Floor 2 post Lift Installation & Operation & Maintenance Instructions Fig. 9 Asymmetric Installation C. Mounting position of cable pulley (Fig.10) Note: During the installation, the positions of the cable pulley at both ends of the overhead beam should be installed correspondingly.
-
Page 16: Position Columns
STRATUS Clear Floor 2 post Lift Installation & Operation & Maintenance Instructions 4.8 Position columns Check if the columns are vertical to the ground with level, insert thin shims (come with package) to adjust when necessary Fig. 11 Symmetric installation... -
Page 17: Install Overhead Top Beam
STRATUS Clear Floor 2 post Lift Installation & Operation & Maintenance Instructions 4.9 Install overhead top beam 1.When symmetrical installation method is adopted, cable pulley (refer to Fig. 10) should be installed according in a symmetrical manner and fix the 6 screws underneath the overhead beam (Fig. 13) 2.When asymmetrical installation is adopted, cable pulley (refer to Fig. -
Page 18: Install Limit Switch
STRATUS Clear Floor 2 post Lift Installation & Operation & Maintenance Instructions 4.10 Install limit switch 1. View of the two limiter switches (Fig.15): Limiter switch B is Limiter switch A is installed on the main installed on the cross... - Page 19 STRATUS Clear Floor 2 post Lift Installation & Operation & Maintenance Instructions 3. Install the limiter switch B inside of the main column (Fig. 17): Fig. 17 4. Connect the limiter switch connector to the motor (Fig. 18): Fig. 18...
-
Page 20: Adjust Carriage
STRATUS Clear Floor 2 post Lift Installation & Operation & Maintenance Instructions 4.11 Adjust carriage Raise the carriage to the 1st locking position located at the bottom of the column (Fig. 19). Note: You can hear “click” once locked (the 1st locking position is about 11.8” from the ground). -
Page 21: Routing The Safety Release Cable
STRATUS Clear Floor 2 post Lift Installation & Operation & Maintenance Instructions Fig. 21 Asymmetric Installation Cable Routing 4.13 Routing the safety release cable 1.The safety lock has been pre-installed. 2. Install safety lock release cable to connect the safety lock on the main column and vice column. (Fig 22) 3.Install safety lock cover. -
Page 22: Installation Of Power Unit
STRATUS Clear Floor 2 post Lift Installation & Operation & Maintenance Instructions 4.14 Installation of power unit • Attach the power unit onto the bracket on the power side column; • Secure it using nuts M10X20, the locking washers D.10 and washers D. 10. -
Page 23: Make The Electrical Connection
STRATUS Clear Floor 2 post Lift Installation & Operation & Maintenance Instructions 4.16 Make the electrical connection Make sure all wiring are same as below circuit diagram (Fig 25). Attention: electrical system connection must be done by licensed electrician. Warning:When installing the power cord for the first time, remove the test cable (short wire) from the motor and replace it with a cable(wire) less than #12 gauge. -
Page 24: Installation Of Lifting Arms And Adjustment Of Arm Locks
STRATUS Clear Floor 2 post Lift Installation & Operation & Maintenance Instructions Fig 26 **Important Information** 7 Pressure Valve: Clockwise adjustment increases pressure to make the power unit to have more power, counterclockwise adjustment decreases pressure to make the power unit to have less power. - Page 25 STRATUS Clear Floor 2 post Lift Installation & Operation & Maintenance Instructions Loosen the Socket Bolt Fig. 27 Snap ring Fig. 28 Use the 8# socket head wrench Install lifting arms to loosen the socket bolt Locking the bolts after moon...
-
Page 26: Check Before Start-Up
STRATUS Clear Floor 2 post Lift Installation & Operation & Maintenance Instructions 4.19 Check before start-up 4.19.1 General checks • Make sure that the columns are plumb; Make sure the lift anchored to the ground and all anchor bolts tightened. -
Page 27: Operation And Use
STRATUS Clear Floor 2 post Lift Installation & Operation & Maintenance Instructions 5. Operation and use NEVER operate the lift with any person or equipment below. NEVER exceed the rate lifting capacity. NEVER lift a vehicle in any manner with less than four arms. Always ensure that the mechanical locks are engaged before any attempt is made to work on or near the vehicle. -
Page 28: Standing
STRATUS Clear Floor 2 post Lift Installation & Operation & Maintenance Instructions 5.4 Standing Press the lowering lever to engage the nearest lock position; • • Always ensure that the lock in each column is engaged before any attempt is made to work on or near the vehicle. -
Page 29: Maintenance
STRATUS Clear Floor 2 post Lift Installation & Operation & Maintenance Instructions 6. Maintenance Only trained people who know how the lift works, can be allowed to service the lift. To service properly the lift, the following has to be carried out: •... -
Page 30: Troubleshooting
STRATUS Clear Floor 2 post Lift Installation & Operation & Maintenance Instructions 7. Troubleshooting Troubleshooting and possible repairs require absolute compliance with ALL THE SAFETY PRECAUTIONS indicated in chapter 6 “MAINTENANCE” and chapter 3 “SAFETY”. Problem Possible cause Solution The lift does non rise... -
Page 31: Parts List
STRATUS Clear Floor 2 post Lift Installation & Operation & Maintenance Instructions 8. Parts list 8.1 Explosive view and parts list... - Page 32 STRATUS Clear Floor 2 post Lift Installation & Operation & Maintenance Instructions Name Quantity Remark Specification Cross beam Bolt M10×30 GB/T 5781 Nut M10 GB/T 6170 Flat washer 10 GB/T 95 Spring washer 10 GB/T 93 Extension column ON-7214DK-A1-B3 Bolt M12×30...
-
Page 33: Hydraulic System And Parts List
STRATUS Clear Floor 2 post Lift Installation & Operation & Maintenance Instructions 8.2 Hydraulic system and parts list Name Specification Quantity Remark Oil hose 450 ON-7214ZK-A18 Power unit fitting Composite bush Straight angle fitting G1/4 ON-7224E-A4-B15 Oil hose 4350 ON-7215DT-50-02... -
Page 34: Steel Cable Assembly And Parts List
STRATUS Clear Floor 2 post Lift Installation & Operation & Maintenance Instructions 8.3 Steel cable installation and parts list Name Specification Quantity Remark Steel cable 10800 ON-7214ZK-A6 Nut M16 GB/T 6170... -
Page 35: Safety Lock System And Parts List
STRATUS Clear Floor 2 post Lift Installation & Operation & Maintenance Instructions 8.4 Safety lock system and parts list... - Page 36 STRATUS Clear Floor 2 post Lift Installation & Operation & Maintenance Instructions Name Specification Quantity Remark Shaft ring 30 GB/T 894.2 Safety lock hook shaft ON-7216EL-10-06 Lock spring cushion ON-7216EL-10-05 Power side safety lock ON-7214DK-A4-B2 Torsional spring ON-7224D-36 Nut M10...
-
Page 37: Cross Beam Assembly And Parts List
STRATUS Clear Floor 2 post Lift Installation & Operation & Maintenance Instructions 8.5 Cross beam assembly and parts list... - Page 38 STRATUS Clear Floor 2 post Lift Installation & Operation & Maintenance Instructions Name Quantity Remark Specification Slide wheel ON-7224-A1-B2 Composite bush 2516 SF-2Y Short shaft ON-7214DTK/4.5-A10- Spacer sleeve 32 ON-7214DTK/4.5-A10- Shaft ring 25 GB/T 894.2 30° cross beam I ON-7214DTK/4.5-A10- Spacer sleeve 12 ON-7214DTK/4.5-A10-...
-
Page 39: Lifting Carriage And Parts List
STRATUS Clear Floor 2 post Lift Installation & Operation & Maintenance Instructions 8.6 Lifting carriage and parts list Name Specification Quantity Remark 30° ON-7214DTK/4.5-A3-B1 Lifting carriage Socket head screw M10×16 GB/T 70.1 Spring washer 10 GB/T 93 Slider pressure plate... -
Page 40: Arm Assembly And Parts List
STRATUS Clear Floor 2 post Lift Installation & Operation & Maintenance Instructions 8.7 Arm assembly and parts list 1. Three stage arm assembly Name Specification Quantity Remark Screw adapter ON-7224G-A7-B3 Front arm ON-7224K/4.5-A18-B3 Orifice plate ON-7224K/4.5-A18-B5 Hexagon socket screw M8×8... - Page 41 STRATUS Clear Floor 2 post Lift Installation & Operation & Maintenance Instructions 2. Two stage arm assembly Name Specification Quantity Remark Screw adapter ON-7224G-A7-B3 Front arm ON-7224K/4.5-A7-B2 Hexagon socket screw M8×10 GB/T 70.2 Rear arm ON-7224K/4.5-A7-B1 Tooth block ON-7224-A7-B5 Socket head screw M10×20 GB/T 70.1...
- Page 42 STRATUS Clear Floor 2 post Lift Installation & Operation & Maintenance Instructions 9. Special notes 9.1 Environmental damage Only appropriately trained personnel may dismantle and dispose of the unit. 9.2 Dismantling To dismantle the product, proceed as follows: ELECTRICAL HAZARD! When carrying out any decommissioning and dismantling work on the unit, switch off all power supply connections, ensure they cannot be switched on unintentionally and verify that they have been disconnected.
- Page 43 STRATUS Clear Floor 2 post Lift Installation & Operation & Maintenance Instructions separately according to material and in line with local laws and environmental regulations. 9.4 Noise declaration Sound power level: LWA<85dB Accompanied uncertainly K=4 dB This measurement made in according with EN ISO 3746:1995 Applied operating conditions are: With the rated load, the pump motor rotate.
Need help?
Do you have a question about the SAE-C10P and is the answer not in the manual?
Questions and answers