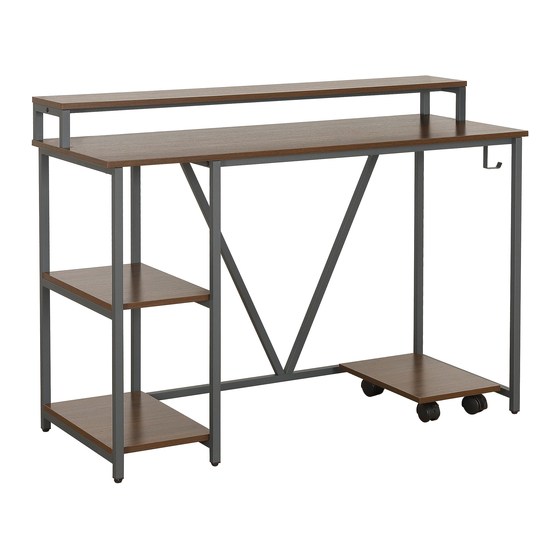
Summary of Contents for RTA Products TECHNI MOBILI RTA-7310D
- Page 1 INDUSTRIAL WRITING DESK MODEL RTA-7310D ASSEMBLY INSTRUCTIONS Thank you for purchasing our product Scan QR to view full assembly video REV.PFT-7059-1222...
- Page 2 RTA-7310D • Do not discard this manual or any of the packaging material until the unit has been completely assembled. • Please read carefully the assembly instructions before the installation. • The assembly might require of 2 persons for certain steps. Before you start the instalation, make sure there is someone else nearby to help you.
-
Page 3: Main Parts List
RTA-7310D The replacement parts service is limited to Do a quick inventory Missing, damaged and defective the 48 contiguous United States. parts can be replaced at no cost of all the parts and If you reside in AK, HI, PR, U.S. territories to you. - Page 4 RTA-7310D MAIN PARTS LAYOUT (For reference) HARDWARE LIST INCLUDED TOOLS Phillips Screwdriver SIZE ITEM PART M6x12 M4 Allen Wrench M10 Spanner M6x30 M6x45 M3.5x12 M6, 10x11mm Locking caster Non-locking caster...
- Page 5 RTA-7310D BEFORE YOU START THE ASSEMBLY, PLEASE READ THE FOLLOWING TIPS AND WARNINGS. • Do not discard this manual or any of the packaging material until the unit has been completely assembled. • If during assembly you find an issue or need clarification, please contact our Customer Service for assistance.
-
Page 6: Assembly Steps
RTA-7310D ASSEMBLY STEPS STEP 1 Assemble the first left shelf 12 to the middle bars on the frames 1 and 2 Hardware with screws B from underneath. M6x30 Tools (included) Scan QR to view step Make sure to place the frame with this hole towards the back of the unit, it is needed for step 3. - Page 7 RTA-7310D STEP 3 Bring the cabinet built in step 2 to the upright position, then with the This step help of another person: requires of • Assemble the tubes 4, 5 and 6 to the middle frame 2 in their 2 persons respective positions with screws C.
- Page 8 RTA-7310D STEP 5 Assemble the top shelf support tubes 8 to the shelf horizontal tube 9 with Hardware screws C. M6x45 Tools (included) Please pay attention to Scan QR to view step the orientation of the holes on the tubes STEP 6 Assemble the tubes 8 and 9 to the top shelf panel 14 with screws B.
- Page 9 RTA-7310D STEP 8 With the help of another person, assemble the main panel 13 to the This step frames 1, 2 and 3 and to the tubes 5 and 6 with screws B from requires of underneath. 2 persons Note: If you don’t see holes for the screws on the tubes 5 and 6, review Hardware step 3 for the correct assembly of those tubes.
-
Page 10: Weight Limits
RTA-7310D WEIGHT LIMITS 88 Lbs (40 Kg) 44 Lbs (20 Kg) 66 Lbs (30 Kg) 2.2 Lbs (1 Kg) 44 Lbs (20 Kg) WARNINGS Do not exceed the indicated weight limits. Do not expose the surfaces to direct sunlight or to extreme environmental conditions. Do not use solvents or abrasive materials to clean the unit. - Page 11 RTA Products LLC will replace any defective part, at its discretion, and without charge to the original purchaser other than the freight from the end consumer to RTA Products.
- Page 12 Your satisfaction is very important to us. Our Support agents can help you with any issues you may have, please feel free to contact us with any questions you have about our products, or to request replacement parts. FOR ADDITIONAL INFORMATION PLUS HELP OPTIONS VISIT: WWW.TECHNIMOBILI.COM CLICK ON SUPPORT TAB...


Need help?
Do you have a question about the TECHNI MOBILI RTA-7310D and is the answer not in the manual?
Questions and answers