Advertisement
Quick Links
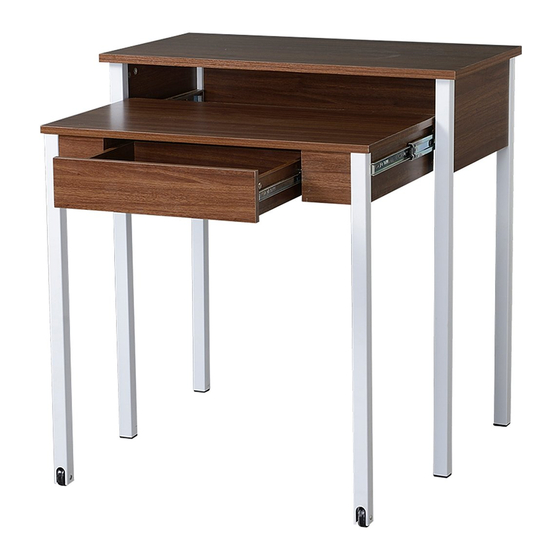
ASSEMBLY INSTRUCTIONS
MODEL RTA-1459
Thanks for purchasing one of our products. Please read carefully the assembly
instructions before the installation. (Attention: Do not tighten the screws until all are in place)
WARNING:
DO NOT EXPOSE THE SURFACES TO DIRECT SUN LIGHT. EXPOSURE WILL DAMAGE
IT SURFACES, WHICH WILL NOT BE COVERED UNDER THE PRODUCT'S WARRANTY.
D06 080906
Advertisement

Related Manuals for RTA Products Techni Mobili RTA-1459


Summary of Contents for RTA Products Techni Mobili RTA-1459
- Page 1 ASSEMBLY INSTRUCTIONS MODEL RTA-1459 Thanks for purchasing one of our products. Please read carefully the assembly instructions before the installation. (Attention: Do not tighten the screws until all are in place) WARNING: DO NOT EXPOSE THE SURFACES TO DIRECT SUN LIGHT. EXPOSURE WILL DAMAGE IT SURFACES, WHICH WILL NOT BE COVERED UNDER THE PRODUCT'S WARRANTY.
- Page 2 MAXIMUM WEIGHT CAPACITIES...
-
Page 3: Parts List
RTA-1459 P. 3 PARTS LIST Back structure Front left structure Front right structure Left pane l Back panel Right pane l Main tabletop Front left structure with wheel Auxiliary tabletop Back panel Left pane l Front right structure with wheel Right panel Left connecting pane l Right pane l... - Page 4 RTA-1459 P. 4 SCREW S PART QTY. ITEM Wooden pin Cam Bolt 6x40 mm Cam Lock 6x40 mm 4X12 MM 4X40 MM 4X14 MM Allen wrench 6X40MM BOLT INSTALLATION AS BELOW: ALIGNING THE CAM LOCK CORRECT INCORRECT Cam bolt Cam lock Longer groove on cam lock must be pointing to the hole where the cam bolt enters in the panel.
- Page 5 RTA-1459 P. 5 Attention:Do not tighten the screws until all of them are in right positions WARNING:HOLES ON PANELS MAY BE HIDDEN UNDERNEATH PVC LAMINATE!!! STEPS Sliders are separated into parts "a" and "b": To separate the sliders,hold them in your hand opened as shown, and press the lever in the direction indicated.Press the lever hard and closer to the beginning instead of its end,at the same time that the two parts of the slider are pulled apart.
- Page 6 RTA-1459 P. 6 STEPS Instructions on page 4 Instructions on page 4 Instructions on page 4...
- Page 7 RTA-1459 P. 7 STEPS Instructions on page 4...
- Page 8 RTA-1459 P. 8 STEPS Instructions on page 4 Instructions on page 4...
- Page 9 RTA-1459 P. 9 STEPS Instructions on page 4 Instructions on page 4 Instructions on page 4 Instructions on page 4...
- Page 10 RTA-1459 P. 10 STEPS...
- Page 11 RTA-1459 P. 11 STEPS Instructions on page 4...
- Page 12 RTA-1459 P. 12 STEPS Instructions on page 4...
- Page 13 RTA-1459 P. 13 STEPS ATTENTION: Insert the auxiliary table slowly. ATTENTION: Insert the drawer slowly.
Need help?
Do you have a question about the Techni Mobili RTA-1459 and is the answer not in the manual?
Questions and answers