
Related Manuals for Krone BiG X 600-3


Summary of Contents for Krone BiG X 600-3
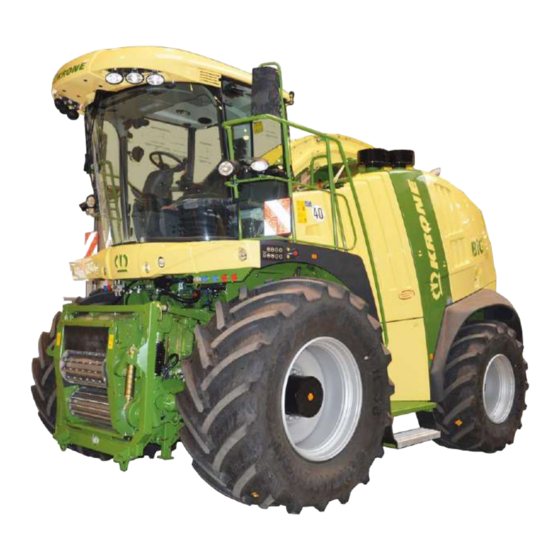
- Page 1 Exact forage harvester BiG X 600-3 BiG X 700-3 BiG X 770-3 (from serial no.: 1 007 182) Order no.: 150 000 744 04 us Status: 23.09.2019...
- Page 2 Table of Contents...
-
Page 3: Table Of Contents
Table of Contents Table of Contents Table of Contents ........................... 3 To this Document ..........................14 Validity .............................. 14 Re-Ordering ............................14 Further applicable documents ......................14 Target group of this document ......................14 How to use this document ........................ 15 2.5.1 Directories and References ...................... - Page 4 Position and meaning of the safety stickers on the machine ............44 3.7.1 Reordering the safety stickers ....................56 3.7.2 Attaching the safety stickers ..................... 56 3.7.3 Contact for KRONE NORTHAMERICA ..................56 Safety Equipment ..........................57 3.8.1 Ladder ............................57 3.8.2 Main battery switch ........................58 3.8.3...
- Page 5 Table of Contents 6.1.2 Total Weights and Axle Loads ....................97 6.1.3 Technical data of the air conditioning system ................. 103 Consumables ..........................104 Control and Display Elements ......................107 Roof Panel ............................108 7.1.1 Roof Panel Switch Group ......................109 Lighting ............................
- Page 6 Table of Contents 7.14.1 OBD diagnostic socket ......................153 7.14.2 CAN diagnostic socket, USB connection and ISOBUS socket ..........154 7.15 Outside mirrors ..........................155 7.15.1 Left Outside Mirror ........................155 7.15.2 Right outside mirror and anti-collision mirror ................155 7.15.2.1 Setting the right outside mirror ..................
- Page 7 Table of Contents 8.4.13 Menu 1-10 Memory keys......................251 Main menu 2 Counters ........................252 8.5.1 Deleting the day counter ......................253 8.5.2 Switching to Customer DataCounters ..................253 Main Menu 3 Maintenance ......................254 8.6.1 Unfulfilled switching-on conditions and CAN bus disturbances ..........255 8.6.2 Menu 3-1 Central lubrication/cleaning ..................
- Page 8 Table of Contents 8.8.1.21 Menu 4-1-20 Diagnostics RockProtect ................400 8.8.1.22 Menu 4-1-21 Diagnostics moisture .................. 404 Menu 4-2 Error List ......................... 406 8.10 Menu 4-3 "Service level" ........................ 412 8.11 Menu 4-4 Information ........................413 8.11.1 Menu 4-4-1 Multi-function lever ....................413 8.11.2 Menu 4-4-2 Software .......................
- Page 9 Table of Contents 12.3.1 Removing/installing the NIR sensor for moisture measurement..........479 12.4 Converting the pendulum frame cylinder for maize mode ............. 485 12.5 Further conversion work ......................... 487 Start-up – additional axle ........................491 13.1 Additional axle ..........................491 13.1.1 Removing the additional axle ....................
- Page 10 Table of Contents 17.12.2 Folding/raising the front attachment into the transport position ..........537 17.12.3 Swivelling the discharge chute into transport position ............540 17.13 Behaviour when driving downhill ....................541 17.14 Towing ............................541 17.14.1 Releasing the holding brake manually ..................543 17.15 Preparing the machine for transport ....................
- Page 11 Table of Contents 20.1 Tightening torques .......................... 607 20.1.1 Metric Thread Screws with Control Thread................607 20.1.2 Metric Thread Screws with Fine Thread ................. 608 20.1.3 Metric Thread Screws with Countersunk Head and Hexagonal Socket ......... 608 20.2 Maintenance table .......................... 609 20.3 General maintenance work ......................
- Page 12 Table of Contents 22.8.1.2 Replacing safety cartridge ....................654 Maintenance – compressed air system ................... 655 23.1 Compressed-air reservoir ....................... 655 23.1.1 Checking the drain valve ......................656 23.2 Cleaning the silencer ........................656 Maintenance – supply system ......................657 24.1 Feed Attachment ..........................
- Page 13 Table of Contents 27.1 Battery ............................737 27.1.1 Removing and Installing Battery ..................... 738 27.1.2 Servicing the battery ....................... 740 27.2 Three-phase generator........................740 27.3 Starter ............................. 742 Maintenance – lubrication ......................... 743 28.1 Manual lubrication chart ......................... 744 Maintenance – central lubrication system ..................746 29.1 Overview of the distributor blocks of the central lubrication system ..........
-
Page 14: To This Document
If this document has become unusable in whole or in part, you can order a replacement, quoting the document number on the cover sheet. Contact data can be found in the chapter “Contact persons”. The document can additionally be downloaded via the KRONE Media Center http://www.mediathek.krone.de//. Further applicable documents... -
Page 15: How To Use This Document
To this Document How to use this document 2.5.1 Directories and References Table of contents/headers: The table of contents as well as the headers in this instruction are used for quick navigation in the chapters. Index directory: In the index directory, you can find information on the desired subject via catchwords which are in alphabetical order. -
Page 16: Scope Of Document
To this Document 2.5.5 Scope of Document In addition to standard equipment, accessories kits and versions of the machine are described in this document. Your machine may deviate from this document. 2.5.6 Means of representation Icons in the text In this document, the following means of representation are used: Action step A bullet point (•) designates an action step you have to perform, as for example: •... - Page 17 To this Document Symbols in figures To visualize parts and actions steps, the following icons are used: Icon Explanation Reference sign for part Position of a part (e.g. move from pos. I to pos. II) Dimensions (e.g. B = width, H = height, L = length) Action step: Tighten screws with torque key with specified tightening torque Direction of motion Direction of travel...
- Page 18 To this Document Warning signs Warning WARNING! - Type and source of hazard! Effect: Injuries, serious material damage. • Measures for hazard prevention. Caution CAUTION! - Type and source of hazard! Effect: Damage to property. • Measures for risk prevention. Notes with information and recommendations Note Note...
-
Page 19: Conversion Table
To this Document 2.5.7 Conversion table By means of the following table, metric units can be converted into US units. Quantity SI Units (Metric) Factor Inch-Pound Units Unit Name Abbreviation Unit Name Abbreviation Area hectare 2.47105 acre acres liters per US gallon per Flow L/min... -
Page 20: Safety
Safety Safety Intended use This machine is a forage harvester and is used to forage crops. The crops designated for the intended use of this machine is in conjunction with – a maize header for harvested thin-stemmed crops, – a direct cutting system for mown stalk and leaf crops, –... -
Page 21: Improper Use
Attachment of unauthorised or unapproved additional equipment – Use of spare parts which are not KRONE original spare parts Unauthorised modifications to the machine may affect the properties of the machine and/or jeopardise safe use or disrupt proper operation. For this reason, unauthorised modifications will... -
Page 22: Service Life Of The Machine
Safety Service life of the machine – The service life of this machine strongly depends on proper use and maintenance as well as the operating conditions. – Permanent operational readiness as well as long service life of the machine can be achieved by observing the instructions and notes of these operating instructions. -
Page 23: Basic Safety Instructions
Safety Basic safety instructions Non-compliance with the safety instructions and warnings Non-compliance with the safety instructions and warnings may result in injuries and damage to the environment and property. 3.4.1 Importance of the operating instructions The operating instructions are an important document and a part of the machine. They are aimed at the user and contain safety-relevant information. -
Page 24: Children In Danger
Safety 3.4.4 Children in danger Children cannot assess danger and behave unpredictably. As a result, children are especially at risk. – Children are especially at risk when climbing up and down the machine. – Children cannot be adequately secured on the self-propelled harvester. –... -
Page 25: Additional Equipment And Spare Parts
Safety 3.4.7 Additional equipment and spare parts Additional equipment and spare parts which do not comply with the requirements of the manufacturer may impair the operational safety of the machine and cause accidents. • To ensure operational safety, use original parts or standard parts which correspond to the requirements of the manufacturer. -
Page 26: Operational Safety: Technically Perfect Condition
Safety 3.4.9 Operational safety: Technically perfect condition Operation only when the machine has been started up correctly If the machine is not started up correctly according to these operating instructions, the operational safety of the machine is not ensured. As a result, accidents may occur and people may be seriously injured or killed. -
Page 27: Danger Zones
Safety Technical limit values If the technical limit values of the machine are not observed, the machine may be damaged. As a result, accidents may occur and people may be seriously injured or killed. Observance of the following technical limit values is particularly important for safety: –... - Page 28 Safety Danger zone between precision forage harvester and header People staying between precision forage harvester and header could be seriously hurt or killed caused by precision forage harvester rolling away, carelessness or machine movements. • Before working between precision forage harvester and header: Shut down and safeguard the machine, see chapter Safety, “Shutting Down and Safeguarding the Machine”.
-
Page 29: Keeping Safety Devices Functional
Safety Danger zone due to coasting machine parts When the drives have been switched off, the following machine parts will coast: – Universal shaft – Header – Feed drive rollers – Chopping drum – Corn conditioner – Discharge accelerator – Drive belts As long as the machine parts are coasting, an alarm sounds. -
Page 30: Personal Protective Equipment
Safety 3.4.12 Personal Protective Equipment The wearing of personal protective equipment is an important safety measure. Missing or unsuitable personal protective equipment increases health risks and injuries. Personal protective equipment is for example: – Suitable protective gloves – Safety boots –... -
Page 31: Traffic Safety
Safety 3.4.14 Traffic safety Dangers for road travel If the machine exceeds the maximum dimensions and weights specified by national law and is not correctly lit when travelling on public roads, other road users may be endangered. • Before driving on roads, ensure that the maximum permitted dimensions, weights and axle, drawbar and trailer loads are not exceeded which apply to driving on public roads according to national law. - Page 32 Safety • Before adjusting, repairing, servicing and cleaning the machine, ensure that it is securely positioned. • In the chapter "Driving and Transport", observe the section "Parking the Machine". • Before parking: Shut down and safeguard the machine. Unattended parking Adults and especially children are at risk from an inadequately secured and unattended parked machine.
-
Page 33: Consumables
Safety 3.4.16 Consumables Unsuitable consumables Consumables which do not comply with the requirements of the manufacturer may impair the operational safety of the machine and cause accidents. • Use consumables only which correspond to the requirements of the manufacturer. For the requirements of fuels, see chapter Description of Machine, “Consumables”. Fuel is harmful Fuels are carcinogenic. -
Page 34: Chemicals
Safety 3.4.17 Chemicals Keep cabin free of chemicals Harmful and aggressive chemicals will pollute the air in the cabin. Harmful and aggressive reactive substances are for example: – Solvents – Fuels – Oils and greases – Detergents – Acids These chemicals may stick to clothing and enter the cabin in this way. Gases and liquids may escape even from closed tanks. -
Page 35: Dangers Associated With The Operational Environment
Safety 3.4.18 Dangers associated with the operational environment Danger of fire To reduce the risk of fire, regularly check the machine for crop or dirt deposits and clean as required. In very dry operating conditions, when crop or dust is being swirled up, the accumulation of grass, crop and other deposits may increase. -
Page 36: Sources Of Danger On The Machine
Safety 3.4.19 Sources of danger on the machine Noise may damage your health The noise development of the machine during operation may cause health damage such as hardness of hearing, deafness or tinnitus. When using the machine at high rotational speed, the noise level also increases. - Page 37 Safety Hot liquids If hot liquids are drained, people may burn and/or scald themselves. • When draining hot consumables, wear personal protective equipment. • If required, leave liquids and machine parts to cool down before performing repair, maintenance and cleaning work. Damaged compressor unit Damaged compressed air hoses of compressor unit may tear off.
-
Page 38: Dangers Associated With Certain Activities: Climbing Up And Down
Safety 3.4.20 Dangers associated with certain activities: Climbing up and down Climbing up and down safely People who behave carelessly when climbing up and down may fall off the ladder. People, who climb onto the machine without using the designated ladders, may slip, fall and seriously injure themselves. - Page 39 Chassis or supporting components – Running gear • Before carrying out welding work on the machine, obtain the consent of KRONE customer service and, if required, identify alternatives. • Disconnect header from the forage harvester before carrying out welding work. Observe...
-
Page 40: Dangers Associated With Certain Activities: Checking And Charging Batteries
The fitting of wheels and tyres requires adequate knowledge and approved tools. • If there is a lack of knowledge, have the wheels and tyres fitted by the KRONE dealer or by a qualified tyre service. •... -
Page 41: Safety Routines
Safety Safety routines 3.5.1 Stopping and securing the machine WARNING Risk of injury due to movement of the machine or machine parts! If the machine has not been shut down, machine or machine parts may move unintentionally. People may be seriously injured or killed, as a result. •... -
Page 42: Safely Checking The Oil Level And Changing The Oil And Filter Element
Safety 3.5.3 Safely checking the oil level and changing the oil and filter element WARNING! Perform oil level check, oil change and filter element change safely! If oil level check, oil change and filter element change are not performed safely, the operational safety of the machine may be affected. - Page 43 Safety This page has been left blank deliberately.
-
Page 44: Safety Stickers On The Machine
Safety Safety stickers on the machine Position and meaning of the safety stickers on the machine 2 7 0 2 2 5 5 8 0 BX770059 Fig. 1... - Page 45 Safety 1) Order no. 27 022 558 0 (1x) This label contains the following warning: CAUTION! To avoid serious injury or death. Read and understand the operator’s manual before operating equipment. Lower the implement, stop the tractor engine and remove the key before leaving the operator’s platform.
- Page 46 Safety 2 7 0 2 2 5 5 8 0 BX770059 Fig. 2...
- Page 47 Safety DANGER To avoid injury or death, do not contact overhead electric power lines. –– WARNING Do not operate the machine unless an approved fire extinguisher is installed. WARNING High pressure oil easily punctures skin. Causing serious injury, gangrene or death •...
- Page 48 Safety 2 7 0 2 2 5 5 8 0 BX770059 Fig. 3...
- Page 49 Safety 2) Order No. 27 014 824 0 (1x) Make cer tai n every WARNING To avoid serious injury or death. Do not ride on platform or ladder. Do not carry passengers. 3) Order no. 27 018 121 0 (2x) ––...
- Page 50 Safety BX770060 Fig. 4...
- Page 51 Safety 8) Order No. 942 538 0 (1x) WARNING Avoid severe injury to eyes and skin from sulfuric acid. Avoid severe injury t o eyes and skin f rom sulfuric acid. Wear face mask, gloves and goggles when servicing battery. Wear face mask, gloves and goggles when servicing bat ter y.
- Page 52 Safety BX770061 Fig. 5...
- Page 53 Safety 12) Order No. 942 551 0 (1x) CAUTION 1. Keep all shields in place. 1. Keep all shields in place. Disengage and shut off all engine and/or motor power before 2. Disengage and shut off all servicing or unclogging machine. engine and/or motor power before serv icing or unclog- 3.
- Page 54 Safety BX770062 Fig. 6...
- Page 55 Safety 15) Order no. 27 018 052 0 (1x) WARNING High pressure oil easily punctures skin. Causing serious injury, gangrene or death • If injured, seek emergency medical help. • Immediate surgery is required to remove oil. • Do not use finger or skin to check for leaks. •...
-
Page 56: Reordering The Safety Stickers
When attaching safety stickers, the contact surface on the machine must be clean and free of dirt, oil and grease to ensure optimum adhesion of the stickers. 3.7.3 Contact for KRONE NORTHAMERICA Mailing address Physical address Krone North America, Inc. -
Page 57: Safety Equipment
Safety Safety Equipment 3.8.1 Ladder WARNING Risk of injury when climbing up and down. Careless behaviour when climbing up and down can result in people falling from the ladder. Persons climbing onto the machine outside the designated ladders can slip, fall and seriously injure themselves. -
Page 58: Main Battery Switch
Safety 3.8.2 Main battery switch BX851052_1 Fig. 8 Position I Position 0 The circuit is closed. The circuit is interrupted. The main battery switch (2) is located on the left side of the machine behind the cover beside the battery compartment. The main battery switch (2) is used to switch on or interrupt the machine’s power supply. -
Page 59: Seat Switch In The Driver's Seat
Safety BX851054 Abb. 9 The battery compartment is located on the left-hand machine side behind the cover (1). Opening the battery compartment Pre-condition: – The side flap at the front left is open. • Open the lock (2) on both sides. •... -
Page 60: Fire Extinguisher
Safety 3.8.4 Fire extinguisher Fig. 10 The machine must not be operated without an on-board fire extinguisher which contains at least 6 kg of extinguishing agent. The manufacturer recommends a powder fire extinguisher for fire classes A, B and C. The support (1) for the fire extinguisher is located in the direction of travel at top left of the machine and can be reached via the ladder and platform. -
Page 61: Wheel Chocks
Safety 3.8.5 Wheel chocks Fig. 11 The machine is equipped with two wheel chocks (1) which are located at the front left behind the side hood. • Ensure that the wheel chocks are always carried on the machine. When parking the machine, always secure it from rolling away using both wheel chocks. •... -
Page 62: Emergency Exit
Safety 3.8.6 Emergency exit Fig. 12 In case of an emergency, the side window on the RH side in the direction of travel, next to the driver's seat, can be opened as an exit door. To exit the machine in an emergency: •... - Page 63 Safety If the optional silage tank is installed on the right mudguard, the right side window cannot be used as an emergency exit. Fig. 14 • In case of danger, strike a cabin window with an emergency hammer (1) stored in the cabin. •...
-
Page 64: Instantaneous Stop Switch In The Cab
Safety 3.8.7 Instantaneous stop switch in the cab Fig. 15: The instantaneous stop switch in the cab (1) stops the working functions of the machine, the diesel engine continues running. To actuate the instantaneous stop switch: • Press the instantaneous stop switch (1) until it engages. To re-activate the machine after the instantaneous stop switch has been pressed: •... -
Page 65: Smv Emblem
Safety 3.8.9 SMV Emblem Fig. 17 The SMV emblem (Slow-Moving Vehicle) (1) is attached to slow-moving machines or vehicles travelling on public highways at a speed less than 40 km/h (25 mph). The SMV emblem (1) is at the rear in the centre or at the rear on left. When driving the machine on public highways, the SMV emblem must be mounted. -
Page 66: Data Memory
Data memory Data memory A variety of electronic components of the machine contains data memories that save temporarily and permanently technical information on machine condition, events and errors. This technical information generally documents the condition of a part, module, system or of the environment: –... -
Page 67: Machine Description
Machine Description Machine Description Machine overview Fig. 18 Item Component Item Component Cabin with control console Air filter Front left side flap Cooler Hydraulic oil tank Spout Left side flap Battery compartment with batteries Components for crop flow Left ladder Connection console for front Grinding device attachments... - Page 68 Machine Description Fig. 19 Item Component Item Component Right side flap Traction drive pump Coolant compensation tank Rear ladder Front right side flap Trailer coupling Working hydraulics block Tailgate Fuel tank Engine Tool box with cover. Folded out, it Intake/front attachment pump is used as a step for an emergency exit and for filling the optional silage tank.
-
Page 69: Overview Of Crop Flow
Machine Description 5.1.1 Overview of crop flow Fig. 20 Item Component Item Component Feed drive rollers, bottom Feed drive rollers, top Chopping drum Counterblade Drum base Transfer shaft Corn conditioner/grass chute Discharge accelerator (not shown) Rear wall discharge accelerator Channel support... - Page 70 Machine Description Overview of main valve block The main valve block is located behind the front side flap on the right side of the machine. Fig. 21 Valve Function Valve Function Turn spout "left" Extend supporting wheels/lower plant divider Turn spout "right" Grinding device "Cylinder in"...
-
Page 71: Identification Plate
NOTE Original KRONE spare parts and accessories authorised by the manufacturer help to ensure safety. The use of spare parts, accessories or additional equipment not manufactured, tested or approved by KRONE will exclude any liability for consequential damage. -
Page 72: Contact For Krone Northamerica
Machine Description 5.3.1 Contact for KRONE NORTHAMERICA Mailing address Physical address Krone North America, Inc. Krone North America, Inc. P.O. Box 18880 3363 Miac Cove Memphis, TN 38181-0880 Memphis, TN 38118 Phone +1 901 842-6011 +1 901 842-6016 E-mail info@krone-northamerica.com Internet www.krone-northamerica.com... -
Page 73: Picking Up The Crops
Machine Description Picking up the crops The crops are picked up by front-mounted front attachments which can be changed for the corresponding application depending on the season. All front attachments approved by the manufacturer, see page 96. – "EasyFlow" pick-up Fig. -
Page 74: Feed Drive
Machine Description Feed drive The feed drive compresses the crops and conveys them to the chopper unit. The feed drive consists of a housing with six rollers. The lower three rollers are permanently mounted in the housing and the upper roller pack is spring-mounted. The spring force allows the upper rollers to exert a defined prebaling pressure on the crops. -
Page 75: Cutting Drum Unit
Machine Description Cutting Drum Unit In the chopper unit the crops are cut to a set chop length. Design The chopping drum unit consists of a cutting drum housing in which the chopping drum is mounted. The chopping drum is a closed cylindrical body, on which the chopping blades are arranged in a V-shape. -
Page 76: Main Drive Brake
Machine Description Main drive brake Fig. 27 To reduce the coast down time of the chopping drum, the main drive is equipped with a hydraulically controlled brake (1). If the chopping drum is switched off in field mode, the engine brakes from full speed to the idle speed of 1100 rpm. -
Page 77: Discharge Chute
Machine Description 5.11 Discharge chute The accelerated crops are conveyed out of the forage harvester via the discharge chute. The discharge bend can be rotated via a hydraulic motor and the discharge angle can be adjusted to obtain different discharge widths of the crops. 5.12 Travelling gear The traction drive is fully hydraulic and is driven by hydraulic motors with wheel motors on the... -
Page 78: On-Board Power Supply Voltage
Machine Description 5.15 On-board power supply voltage The wiring system consists of two voltage levels. The diesel engine components are primarily operated with 24 V. For further details, refer to the circuit diagram. 5.16 Silage additive system (option) Fig. 28 The silage additive system consisting of the silage additives tank (2) including a pump unit for rough dosing of silage additives is mounted on the right mudguard of the machine. -
Page 79: Ladders And Flaps
Machine Description 5.17 Ladders and flaps WARNING Risk of injury when climbing up and down. Careless behaviour when climbing up and down can result in people falling from the ladder. Persons climbing onto the machine outside the designated ladders can slip, fall and seriously injure themselves. -
Page 80: Ladder To The Cab
Machine Description 5.17.1 Ladder to the cab WARNING Risk of injury due to falling from a great height! The ladder allows operators to climb to heights from which a fall could lead to severe to fatal injuries. • Do not climb up or down the ladder while the machine is moving. •... -
Page 81: Opening The Cabin Door
Machine Description 5.17.2 Opening the cabin door BX480270 Fig. 30 To open the cab door from outside: • Use the door key to unlock the door lock (1); press in the button (2) and open the door. To open the cab door from inside: •... -
Page 82: Opening And Closing Flaps
Machine Description 5.17.3 Opening and closing flaps WARNING Risk of injury from moving parts! If the flaps for the engine compartment and crop flow are opened while the diesel engine is running, people may be injured by moving machine parts. •... -
Page 83: Right Side Flap
Machine Description 5.17.4 Right side flap Fig. 32: The right side of the engine compartment is located under the right side flap. 5.17.5 Left side flap Fig. 33: The left side of the engine compartment is located under the left side flap. 5.17.6 Tailgate engine compartment Fig. -
Page 84: Front Right Side Flap
Machine Description 5.17.7 Front right side flap Fig. 35: To access the hydraulic block behind the open front right side flap: • Open the lock (2) of the tool box (1) and fold down the lid (3). • Use the lid and top of the tool box as steps. Do not use the step when the tool box is swivelled open. -
Page 85: Technical Data
Technical Data Technical Data Technical Data of the Machine Fig. 37 Machine dimensions Length (L) 8335-9440 mm Width (B) 3000-3920 mm Height (H) 3915-3980 mm Centre distance (A) 3250 mm Centre distance front axle-additional axle 1060 mm (not shown)* for 3-axle machines •... - Page 86 Technical Data Fig. 38 Max. working height of the machine Spout 8 rows 6668 +50 mm Spout 10 rows 6928 +50 mm Spout 12 rows 7126 +50 mm Spout 14 rows 7305 +50 mm...
- Page 87 Technical Data Lashing points Fig. 39 To connect lashing equipment, appropriate lashing points are available on the axles and bumper of the machine. Item Explanation Front axle left Front axle right rear axle, left side Rear axle right Bumper left Bumper right...
- Page 88 Technical Data Engine data BiG X 600-3 Manufacturer Liebherr Type of engine D9508 A7 Design Emissions level TIER 3 Displaced volume 16.16 l Engine performance (ECE R120) 568 kW (772 HP) Max. continuous chopping output X-Power 441 kW (600 HP)
- Page 89 Technical Data Travelling gear Type Hydrostatic drive with axial piston adjusting motor with wheel motor Forward speed in field mode 0-25 km/h Forward speed in road mode 0-40 km/h Suspension Hydropneumatic All-Wheel Drive Standard equipment Traction control system Standard equipment Tyres Equipment Tyre dimensions...
- Page 90 Technical Data Tyre pressure for model with 2 axles Reference values for tyre pressure: Tyre EasyFlo Max. [km/h] XDisc * EasyCollect / XCollect Axle type w or perm 6000/ 7500/ 903/ 9000 */ solo itted 900-3 1053 * 600-2/ 753/ machin tyre 603/...
- Page 91 Technical Data Tyre pressure for model with 3 axles Reference values for tyre pressure: Tyre type [km/h] EasyCollect / XCollect Max. Axle permitted 6000/ 7500/ 903/ tyre 900-3 600-2/ 753/ pressure 603/ 750-2/ 600-3 750-3 [bar] [bar] [bar] [bar] 710/75 R42 Front axle 800/65 R32 800/70 R38...
- Page 92 Technical Data Wheel nuts Tightening torque front axle 510 Nm Tightening torque rear axle 270 Nm Tow coupling permitted D-value 82 kN permitted drawbar load at the coupling point max. 2,000 kg 1, 2 max. trailing load (braked) 11,000 kg Permitted drawbar eyes DIN11026,11034,74053 Observe maximum permitted rear axle load!
- Page 93 Technical Data Maximum permitted speed Technically permitted maximum speed 40 km/h The maximum permitted speed may be restricted by legal requirements in the country of use.
- Page 94 Technical Data Chopper unit Drum width / 800 mm/660 mm drum diameter Blade arrangement V-shaped Number of blades Chopping length range 5-29 mm 4-21 mm 3-17 mm 2.5-15 mm 2-12 mm Cuts per minute 12,500 17,500 22,500 25,500 30,000 Stepless drum adjustment / Standard suspension of the drum base With VariLOC gearbox...
- Page 95 Technical Data Corn conditioner 105 teeth Roller at front with 105 teeth: Standard profile / Option chrome-plated saw tooth profile Roller at rear with 105 teeth: Standard profile / chrome-plated saw tooth profile 123 teeth Roller at front with 123 teeth: Standard profile / Option chrome-plated saw tooth profile Roller at rear with 123 teeth: Standard profile /...
-
Page 96: Authorised Headers
Technical Data 6.1.1 Authorised Headers Header type Version Maize header EasyCollect 600-2 EasyCollect 750-2 EasyCollect 600-3 EasyCollect 750-3 EasyCollect 900-3 EasyCollect 1050-3 EasyCollect 603 EasyCollect 753 EasyCollect 903 EasyCollect 1053 EasyCollect 6000 EasyCollect 7500 EasyCollect 9000 BV301-10 (XCollect 600-3) BV301-20 (XCollect 750-3) BV301-30 (XCollect 900-3) Pick-up EasyFlow 300 S... -
Page 97: Total Weights And Axle Loads
Technical Data 6.1.2 Total Weights and Axle Loads Depending on the type of machine, whether an additional axle is used and the front attachment used, the front axle load allows the following to be derived: – the rear axle load –... - Page 98 Technical Data BiG X 600-3 / 700-3 / 770-3 (2 axles) Ballasting on a front axle load of 11500 kg Without header/ With EasyFlow Permitted axle load at 8250 kg rear Permitted total weight 18000 kg Number of basic —...
- Page 99 Technical Data Ballasting on a front axle load of 12500 kg Without header/ With EasyFlow Permitted axle load at Refer to table "Ballasting on a front rear axle load of 11500 kg" Permitted total weight Number of basic weights Number of additional plates With EasyCollect EC 600-2...
- Page 100 Technical Data Ballasting on a front axle load of 12650 kg Without header/ With EasyFlow Permitted axle load at Refer to table "Ballasting on a front rear axle load of 11500 kg" Permitted total weight Number of basic weights Number of additional plates With EasyCollect EC 600-2...
- Page 101 Technical Data Ballasting on a front axle load of 13000 kg Without header/ With EasyFlow Permitted axle load at Refer to table "Ballasting on a front rear axle load of 11500 kg" Permitted total weight Number of basic weights Number of additional plates With EasyCollect EC 753...
- Page 102 Technical Data BiG X 600-3 / 700-3 / 770-3 (3 axles) Ballasting on a front axle load of 11500 kg Without With EasyCollect header/ With EC 600-2 EC 750-2 EC 6000 EasyFlow 300 Permitted axle load at rear 8250 kg...
-
Page 103: Technical Data Of The Air Conditioning System
Technical Data Ballasting on a front axle load of 12000 kg Without header/ With EasyCollect With EasyFlow EC 750-2 EC 7500 EC 900-3 Permitted axle load at rear 8250 kg 8,250 kg 9000 kg Permitted axle load 2300 kg 2300 kg 2,300 kg Refer to table additional axle... -
Page 104: Consumables
Technical Data Consumables Designation Filling Specification Initial filling ex works quantit • European Standard EN Fuel tank 960 l Diesel fuel 590 DIN EN 590 Additional fuel tank 330 l Is not filled ex works. (Germany) (optional) • ASTM D 975 No. 1 D (USA) •... - Page 105 Technical Data The following oil types may be used for the hydraulic oil tank List of mineral oils of quality class HLP (HM) and environmentally friendly HEPG pressure fluids that decompose quickly. ISO viscosity class HEPG VG 46 HLP VG 46 Manufacturer ADDINOL Hydraulic oil HLP 46...
- Page 106 Technical Data Lubricant types NLGI class 2 Manufacturer Type designation Saponification Minimum conveying temperature [°C] AGIP Spec. Ca Autol Top 2000 ARAL Long-term grease H BECHEM High–Lub L4742 Energrease LS EP 9346 Energrease LS-EP2 CASTROL Spheerol EP L2 Exxon multi-purpose ESSO grease ELF Multi 2...
-
Page 107: Control And Display Elements
Control and Display Elements Control and Display Elements Fig. 40 Item Control Item Component Automatic climate control operation Operation console unit (Climatronic) Roof Panel Switch Group Control lever Camera monitoring system (optional) Steering column Driver's seat with operating elements Service brake Info centre... -
Page 108: Roof Panel
Control and Display Elements Roof Panel Fig. 41 Item Control Automatic climate control operation unit (Climatronic) Roof Panel Switch Group Interior lamp Air nozzle ISO compartment for radio Spotlight on control lever... -
Page 109: Roof Panel Switch Group
Control and Display Elements 7.1.1 Roof Panel Switch Group Fig. 42 Item Control Working light on cabin roof Front guard working light Working light on cabin platform/rear wheel light Mirror adjustment (right rear view mirror only) Working light on rear parking light/dipped beam Warning beacons Hazard lights... -
Page 110: Lighting
Control and Display Elements Lighting 7.2.1 Direction indicator, hazard lights and brake light NOTE In road traffic the change of travelling direction is indicated by a flashing light. Fig. 43 Switching on the direction indicator • Actuate the direction indicator on the steering wheel; the flashing lights (1, 2, 3) will flash on one side (right/left). -
Page 111: Side Light/Dipped Beam
Control and Display Elements Hazard lights If the hazard lights have been switched on, all flashing lights (1, 2, 3) will flash at the same time. Switching on the hazard warning flasher The switch (1) for the hazard warning flasher is located in roof panel switch group. Fig. - Page 112 Control and Display Elements Fig. 46 When the parking light is switched on, the following light up: Item Designation Explanation Front side marker lamps In specific countries, side marker lamps are mounted on both sides of the platform for certain tyre sizes. Lateral side marker lamps Number plate illumination Clearance lamp at the rear...
-
Page 113: Working Floodlights
Control and Display Elements 7.2.3 Working floodlights The switches for the working lights are located in the roof panel switch group. Fig. 47 Item Designation Switch working light for cabin roof Switch working light for front guard Switch working light for cabin platform Switch working light for rear Switch working light spout Prerequisite for releasing the working light:... -
Page 114: Reversing Lights
Control and Display Elements 7.2.4 Reversing lights Fig. 49 The reversing lights (1) light up when reversing, and an acoustic warning signal sounds at the same time. 7.2.5 Ladder lighting optional Fig. 50 • To turn on the ladder lightning (2) press button (1). The ladder lighting turns off automatically after a short time. -
Page 115: Warning Beacons
Control and Display Elements 7.2.6 Warning beacons The switch (1) for the warning beacons is located in the roof panel switch group. Fig. 51 Item Designation Explanation – Warning beacons In some countries the allround lights must be switched on in road traffic. •... -
Page 116: Interior Lighting/Reading Lamp
Control and Display Elements 7.2.7 Interior lighting/reading lamp Fig. 53 The interior lighting (1) and the reading lamp (2) are located on the cab roof. Item Designation Explanation On/Off switch Switches the interior lighting (1) on and off. On/Off switch Switches the lighting for the reading lamp (2) on or off. -
Page 117: Spotlight On Control Lever
Control and Display Elements 7.2.8 Spotlight on control lever The switch for lighting the multi-function lever is located in the roof panel switch group. Fig. 54 The switch (1) can be switched to three positions: 30% brightness II Off III 100% brightness •... -
Page 118: Climatronic / Heating
Control and Display Elements Climatronic / heating 7.3.1 Control and display elements The Climatronic is the control unit for the air conditioning and heating systems which the driver can operate via the Climatronic control unit. NOTE If the electrical power supply to the control unit is interrupted, the control unit automatically performs a self test after power is restored. - Page 119 Control and Display Elements Functions of the keys Item Control Explanation Air conditioning key Switches air conditioning on/off Plus key In automatic mode: increases the value for the required cab temperature In manual mode: increases the rotational speed of the evaporator fan Minus key In automatic mode: reduces the value for the required cabin temperature...
-
Page 120: Operation
Control and Display Elements 7.3.2 Operation 7.3.3 Switching on the system Fig. 57 Press the NOTE After the system is switched on, the control unit performs a self-test and the software version is displayed for approx. 5 sec. Then the operating hours of the air conditioning system are displayed for 5 s (e.g. 6 operating hours). -
Page 121: Switch Air Conditioning On / Off
Control and Display Elements 7.3.5 Switch air conditioning On / Off Fig. 59 You can switch on the air conditioning with the key. Air conditioning is now turned on; icon indicates air conditioning. The compressor is turned on by the control unit if necessary. Pressing the key again turns off air conditioning (compressor is deactivated). -
Page 122: Switching Reheat Mode On/Off
Control and Display Elements 7.3.6 Switching REHEAT mode on/off Fig. 60 REHEAT mode = (demoisturising the cab air) Switching on REHEAT mode: • Press the The symbol (REHEAT mode on) is indicated on the display. NOTE In REHEAT mode, –... -
Page 123: Manually Setting The Evaporator Fan Speed
Control and Display Elements 7.3.7 Manually setting the evaporator fan speed Fig. 61 Switch on manual evaporator fan speed with the key. The manual setting for fan speed is now active. The currently set fan speed appears in bar display (full bar display = 100%). -
Page 124: Switching The Temperature Display To ° Fahrenheit
Control and Display Elements 7.3.8 Switching the Temperature Display to ° Fahrenheit Fig. 62 The current set-point temperature is shown in ° Celsius. Press and hold the covered key (8) and press the key as well. The display switches to ° Fahrenheit. The current set-point temperature is shown in °... - Page 125 Control and Display Elements Error code (FI) Fig. 64 Error in blow-out temperature sensor is indicated by flashing indicator (F1). NOTE The control unit has recorded an error in the blow-out temperature sensor. The controller is no longer ready for operation. Cause of sensor fault: Short circuit or interruption in the sensor line, plug connection on the sensor or control unit, temperature sensor defective.
-
Page 126: Air Comfort Seat
Control and Display Elements Air comfort seat WARNING Danger to life due to brief distraction of the driver! If the driver adjusts the driver's seat while driving, he cannot pay adequate attention to his driving and endangers people as a result. •... -
Page 127: Activo Design (Optional)
Control and Display Elements 7.4.1 ACTIVO design (optional) BX480217 Fig. 65 Pos. Part Pos. Part Air comfort seat ACTIVO Seat depth adjustment Seat angle adjustment Longitudinal adjustment Horizontal suspension ON / OFF Weight and height adjustment Adjustment of the backrest Left armrest Seat heating and climate control ON Headrest... - Page 128 Control and Display Elements The air-cushioned comfort seat (1) can be individually adapted to the requirements of the driver. Seat depth adjustment • Pull the right key (2) up and at the same time bring the sitting surface into the required position by pushing forward and backward.
- Page 129 Control and Display Elements Weight adjustment The weight adjustment is made automatically when the driver sits down on the seat. There is no need to additionally actuate the handle. Height adjustment The height can be adjusted continuously by means of a hydraulic system. In order to prevent damage, actuate the compressor for a maximum of 1 minute.
- Page 130 Control and Display Elements Seat heating and seat climate control BX480268 Fig. 68 Heating and climate control of the seat are switched with switch (9). The switch has three positions: Pos. Explanation Seat heating and seat climate control OFF Seat climate control ON (seat heating OFF) Seat heating ON (climate control of the seat OFF) The seat surface can be vented via seat climate control so that a cool and dry seating is enabled.
- Page 131 Control and Display Elements Setting the left armrest BX480219 Fig. 69 • Tilt the armrest (8) up or down as requested. • Remove the cover cap (11) to adjust the height of the armrest. • Undo the hexagon nut; move the armrest into the requested position and tighten the hexagon nut again.
-
Page 132: Verstellbare Lüfterdüsen
Control and Display Elements Verstellbare Lüfterdüsen BM 500 0184 Abb. 71 Lüfterdüsen (1), verstellbar HINWEIS Lüfterdüsen so einstellen, dass das Beschlagen der Scheiben vermieden wird. -
Page 133: Operation Console
Control and Display Elements Operation console BX851100 Fig. 72 Item Control Membrane keyboard Quick-stop switch Indicator lamps Cigarette lighter Ignition lock Release switch... -
Page 134: Switches And Control Lamps
Control and Display Elements 7.6.1 Switches and control lamps BX851101 Fig. 73 Item Control Explanation Release switch road/field Switches between road mode and field mode. Release switch intake/header Releases the drive for intake rollers/header. Parking brake switch Engages the parking brake or releases it again. Charging warning light 12 V Lights up if the 12 V battery is not charged. -
Page 135: Functions Of The Release Switches And Keys
Control and Display Elements Actuating the release switch Every release switch (1) is assigned different functions in position I (initial position) and position II (pressed). Fig. 74 Example The release switches (1) are locked against unintentional actuation. • To unlock the release switch (1), push the lock (2) forwards and switch the release switch (1) to the other position. - Page 136 Control and Display Elements Release switch "Intake/front attachment" Actuating the "feed drive/front attachment" release switch releases the feed drive rollers and the corresponding attachment. Fig. 76 Prerequisite for switching on the feed drive/front attachment: – The release switch road/field (2) is set to field mode (II). Feed drive/front attachment off Feed drive/front attachment on "Parking brake"...
- Page 137 Control and Display Elements "Travelling gear" release switch Actuate the release switch "traction drive" to release traction drive. The machine can only be moved with the help of the multi-function lever following the release. When the travelling gear is switched on, the maintenance functions for manual operation on the left platform are not released.
- Page 138 Control and Display Elements Release switch "automatic steering system" For the selected mode, the automatic steering system guides the machine along the row of plants with the help of the row tracer at the maize header. If there are short gaps in the maize crop, the autopilot keeps the machine driving straight ahead.
-
Page 139: Membrane Keyboard
Control and Display Elements 7.6.3 membrane keyboard Fig. 82 Pos. Operating element Explanation “Rear wall of discharge Moves the rear wall of discharge accelerator accelerator +” key into the crop flow. The discharge distance of the spout increases. “Rear wall of discharge Moves the rear wall of discharge accelerator out accelerator –”... -
Page 140: Control Lever
Control and Display Elements Control lever The control lever is used to make important settings and issue commands for road and field mode of the machine. Fig. 83... - Page 141 Control and Display Elements Item Explanation Memory keys (M1) Memory keys (M2) Activating/deactivating the automatic steering system • Mirror spout (with main coupling switched on) • Move spout to transport position (with main coupling switched off) Ejector flap open Turn spout clockwise. Ejector flap shut Turn spout anticlockwise.
- Page 142 Control and Display Elements Fig. 84...
- Page 143 Control and Display Elements Pos. Explanation • Acceleration (during forward travel) • Deceleration (during reverse travel) • Start travelling gear with activation key pressed (18) Control lever in central position • Acceleration (during reverse travel) • Deceleration (during forward travel) •...
-
Page 144: Steering Column And Foot Pedals
Control and Display Elements Steering column and foot pedals Fig. 85 Item Control Item Component Button for horn Full beam warning light Pilot lamp – trailer function Indicator Switches Indicator lamp for direction indicator Release lever for horizontal and vertical steering column adjustment Release lever for horizontal steering Full beam column adjustment... -
Page 145: Steering Column Adjustment
Control and Display Elements 7.8.1 Steering column adjustment The steering column can be adjusted 3-fold – Tilt adjustment around the lower pivot point (a). – Tilt adjustment around the upper pivot point (b). – Height adjustment of the steering wheel (c). BX480418 Fig. -
Page 146: Full Beam
Control and Display Elements 7.8.2 Full beam Fig. 87 NOTE Full beam does not function until the dipped beam has been switched off. If a vehicle is approaching, switch off full beam to prevent dazzling the driver. To switch on full beam: •... -
Page 147: Horn
Control and Display Elements 7.8.4 Horn Fig. 89 To actuate the horn: • Press the push-button (1) for the horn on the steering column switch. As long as the push-button is pressed, the horn sounds. 7.8.5 Direction indicator Fig. 90 To switch on the direction indicator on the right: •... -
Page 148: Service Brake
Control and Display Elements 7.8.6 Service brake BX480366 Fig. 91 The machine brakes if the brake pedal (1) is activated. The braking effect is increased as increased pressure is applied on the brake pedal. 7.8.7 Trailer Brake BX851040 Fig. 92 The optionally installed trailer brake (two-line brake) is only intended for the operation with trailer. -
Page 149: Monitor For Camera Monitoring System (Optional)
Control and Display Elements Monitor for camera monitoring system (optional) Fig. 93 • Manually adjust the monitor (1) for the camera monitoring system so that the road and the working area at the side and behind the machine are in full view. 7.9.1 Drawer for first-aid kit/operating instructions Fig.94... -
Page 150: Guide's Seat
Control and Display Elements 7.10 Guide's seat WARNING Danger to life due to brief distraction of the driver! The driver may be distracted by a second person in the cab, possibly causing him not to pay adequate attention to his driving and to endanger people as a result. •... -
Page 151: Ignition Lock
Control and Display Elements 7.12 Ignition lock Fig. 97 The ignition lock (1) has four positions: Position Explanation • 0 (STOP) The ignition is off • The circuit is interrupted. The circuit for the electronics is switched on. The ignition is switched on Start position... -
Page 152: Cigarette Lighter / 12 Volt Socket
Control and Display Elements 7.13 Cigarette lighter / 12 volt socket Fig. 98 CAUTION Risk of burns from the hot cigarette lighter! During operation the cigarette lighter generates such high temperatures that it may cause burns if it is held in the depressed position. •... -
Page 153: Socket And Usb Connection
7.14.1 OBD diagnostic socket NOTE Exclusively for the use of authorised technicians from KRONE for engine diagnostics purposes. BX770227 Fig. 99 The OBD diagnostic socket (2) is located in the cabin behind the guide's seat under the pocket (2). -
Page 154: Can Diagnostic Socket, Usb Connection And Isobus Socket
NOTICE The CAN diagnostics socket and the ISOBUS socket must only be used by authorised technicians who use devices approved by KRONE company. The CAN diagnostic socket (1) is used to perform diagnostic work and software updates. It is possible to connect a printer. -
Page 155: Outside Mirrors
Control and Display Elements 7.15 Outside mirrors WARNING Danger to life of persons next to and behind the machine due to impaired view of the driver! If the outside mirror has not been set correctly, the driver does not have a proper view around the machine, possibly placing people in danger when the machine is being driven. -
Page 156: Inside Mirror
Control and Display Elements 7.16 Inside mirror Fig. 103: • Manually set the interior mirror according to the operation requirements. 7.17 Sun blind Fig. 104 Adjust the sun blind according to requirements. -
Page 157: Wind Shield Wiper
Control and Display Elements 7.18 Wind shield wiper The switch (1) for the wind shield wiper is located in the roof panel switch group. Fig. 105 It can be switched to three positions: Interval III Continuous operation Washer system – windshield 7.19 Fig. -
Page 158: Radio Installation
Control and Display Elements 7.20 Radio installation Fig. 107 The ISO slot for installing the radio (1) is located in the roof panel. See circuit diagram for information about the connections. NOTE Telephones and radio equipment not connected to the outside antenna may lead to functional troubles in the vehicle's electronic system, thus jeopardising the operational safety of the vehicle. - Page 159 Control and Display Elements Item Control Explanation "Right counterblade towards" key Moves the right counterblade towards the chopping drum. "Left counterblade towards" key Moves the left counterblade towards the chopping drum. "Close grinding flap" key The grinding flap closes. "Open grinding flap" key The grinding flap opens.
-
Page 160: Trailer Coupling
Control and Display Elements 7.22 Trailer coupling CAUTION Damage to the tow coupling and the components of the drive! If stuck vehicles are retrieved using the tow coupling or are towed over prolonged distances, components on the machine may be damaged. •... -
Page 161: Info Centre "Easytouch
Info centre "EasyTouch" Info centre "EasyTouch" Overview Fig. 110 Item Designation Display Keys 1 to 8 Incremental encoder Menu button Keys A to... - Page 162 Info centre "EasyTouch" BX500000 Fig. 111 The Info Centre informs you about the current actions and the current operating condition of the machine. You can use the Info Centre to make settings for the machine and start or stop functions. Its main components are: Keys 1-8 (1) You can use keys 1-8 to make settings shown in the information area (IV).
- Page 163 Info centre "EasyTouch" Fig. 112 Incremental encoder (1) The incremental encoder can be turned and inched to the left/right. Operation of the incremental encoder is interpreted differently depending on the display/mode. In the main menu: • To scroll up/down the menu, turn the incremental encoder to the left/right. •...
-
Page 164: Information Section
Info centre "EasyTouch" Information Section BX500001 Fig. 113 After the ignition is switched on, the working screen appears in the display. The display is divided into the following information sections: Information Section Designation Status line Engine data Drive data Settings General Machine Settings... -
Page 165: Status Line
Info centre "EasyTouch" 8.2.1 Status line BX500002_2 Fig. 114 Status line (1) displays the current operating states and general information for the machine. With the help of the incremental encoder, one of the following types of information can be assigned to the left field of the status line: •... - Page 166 Info centre "EasyTouch" BX851013 Fig. 115 Statuses of the pendulum frame Position of pendulum Status of pendulum Icon Explanation frame frame Horizontal Free The pendulum frame can be Actuated. Raised to the right Free The pendulum frame can be Actuated. Raised to the left Free The pendulum frame can be...
-
Page 167: Engine Data Information Section
Info centre "EasyTouch" 8.2.2 Engine data information section The current engine data is displayed in the engine data information section (II). BX500650 Fig. 116 Engine speed (1) Road mode: 1000 - 1700 min Field mode: 1100 – 1950 min Coloured display of the engine speed (1) in field mode Black •... - Page 168 Severe engine fault! – Bring the machine to a standstill immediately and switch off the diesel engine. – Notify your KRONE dealer or the KRONE customer service department. Engine warning light Minor engine fault! – Visit a qualified service centre as soon as possible.
-
Page 169: Drive Data Information Section
Info centre "EasyTouch" 8.2.3 Drive data information section The drive data information section (III) displays values and the current status of the traction drive, automatic steering system and lifting unit control. BX850863 Fig. 118 Cruise control Icon Explanation Cruise control active The number after the icon is the stored cruise control speed in km/h. - Page 170 Info centre "EasyTouch" Acceleration ramp The greater the run-up time of the diesel engine, the flatter the acceleration ramp. Icon Explanation Low acceleration. High acceleration Direction of travel Icon Explanation Forward travel Neutral (standstill) Reverse travel...
- Page 171 Info centre "EasyTouch" Electric discharge distance adjustment (optional) To operate the electric discharge distance adjustment, see page 582. Icon Explanation The electric discharge distance adjustment is active. Level I (low discharge capacity) is approached. The electric discharge distance adjustment is active. Level II (medium discharge capacity) is approached.
- Page 172 Info centre "EasyTouch" Status displays BX850871_1 Fig. 120 Icon Explanation Error on additional axle Parking brake is applied No pressure on the trailer brake, The error message 2214 is shown on the working screen. Emergency mode Allows the driver to drive the vehicle out of the danger zone at reduced driving speed even if there are serious drive problems.
- Page 173 Info centre "EasyTouch" Traction control system Traction Control (TC) Icon Explanation Traction Control TC I (maize) active The traction control system is currently active to prevent the wheels from spinning. Traction Control TC I (maize) ready for operation The traction control system is switched on. All wheels are currently synchronised, and regulation is not necessary.
- Page 174 Info centre "EasyTouch" automatic steering system (optional, only in maize field mode) If one of the following displays appears in white, the automatic steering system for this function is ready (inactive). Icon Status Explanation Automatic The row tracer left is evaluated. steering system active (outer tip).
- Page 175 Info centre "EasyTouch" Lifting gear control (only in field mode) Setting the control type, see page 567. Icon Explanation Lifting unit ground pressure control active Lifting unit ground pressure control ready Lifting unit distance control active Lifting unit distance control ready Lifting unit position control active Lifting unit position control ready...
-
Page 176: Settings Information Section
Info centre "EasyTouch" 8.2.4 Settings information section 8.2.4.1 Menu field working width The settings information section (IV) displays the current working width in the Working width menu field. The working width setting is needed to calculate the area. BX500005_1 Fig. 122 Icon Designation Explanation... -
Page 177: Menu Area Header
Info centre "EasyTouch" 8.2.4.2 Menu Area Header The header menu area displays the status and the set setpoint speed of the header in the settings information section (IV). BX500099 Fig. 123 Status (1) Icon Designation Explanation Header error An error has occurred. Header inactive The switching-on conditions are not met. - Page 178 Info centre "EasyTouch" Foreign object detection (2) Icon Designation An error has occurred in metal detection and RockProtect Metal detection Metal detection is deactivated. Metal detected in intake. --x--- Indicates the position of the metal in the intake: x-----: Metal in direction of travel left -x---- --x--- ---x--...
- Page 179 Info centre "EasyTouch" Setting the setpoint speed (3) The setpoint speed must be adjusted to the operating and harvesting conditions in order to guarantee optimum crop flow. BX500006_2 Fig. 124 • To reduce the setpoint speed, press the key. • To increase the setpoint speed, press the key.
-
Page 180: Intake Menu Area
Info centre "EasyTouch" 8.2.4.3 Intake menu area The chop length is determined by the speed of the intake rollers and the number of blades that are used. The settings information section (IV) displays the current chop length and the status of the maturity level detection in the intake menu area. - Page 181 Info centre "EasyTouch" Adjusting the chop length • To reduce the chop length, press the key. • To increase the chop length, press the key. Alternatively, you can also make the setting with the incremental encoder, see page 163. Two different chop lengths (value 1/value 2) can be saved and retrieved via the control lever, see page 577.
-
Page 182: Lifting Unit Menu Area
Info centre "EasyTouch" 8.2.4.4 Lifting unit menu area In field mode, the current control type status of the lifting unit is displayed in the drive data information section (III). The actual height of the lifting unit and the corresponding setpoint pressure or setpoint height are displayed in the settings information section (IV) in the Lifting unit menu area. -
Page 183: General Machine Settings Information Section
Info centre "EasyTouch" 8.2.5 General machine settings information section 8.2.5.1 Memory keys On delivery, the keys M1 and M2 on the multi-function lever are not assigned any functions. BX500011_1 Fig. 127 • To call up the "Memory keys" mask, press the key in the working screen. - Page 184 Info centre "EasyTouch" Assigning occupancy of memory keys BX850991 Fig. 128 • You can use the incremental encoder to choose M1 and/or M2 choose, the selection box is highlighted in colour. • Press the incremental encoder to jump to the selection box. •...
- Page 185 Info centre "EasyTouch" After the start BX850992 Fig. 129 The setting mask appears each time the machine is started and displays the occupancy of keys M1 and M2. • Press the key to release the setting. The lock icon turns off. Only than can the corresponding function be executed using the memory keys on the multi- function lever.
-
Page 186: Grass Pick-Up Mode
Info centre "EasyTouch" 8.2.5.2 Grass pick-up mode BX770170 Fig. 130 • You can use the incremental encoder to choose the operating mode setting. The selection box is highlighted in colour. • Press the incremental encoder to jump to the selection box. •... - Page 187 Info centre "EasyTouch" To adjust the lifting gear control Three lifting unit controls, see page 567, can be selected: – Lifting unit ground pressure control – Lifting unit distance control – Lifting unit position control BX500017_1 Grass mode Maize mode Fig.
- Page 188 Info centre "EasyTouch" Setting the number of blades After changing the number of blades, see page 707, the current number of blades must be set. When the number of blades is set, the setting area for the chop length is adjusted. BX500018_1 Grass mode Maize mode...
- Page 189 Info centre "EasyTouch" Setting the automatic steering system BX770172 Fig. 134 Icon Designation Explanation automatic steering system The automatic steering system is inactive or not inactive fitted. automatic steering system The automatic steering system is active. The active machine is activated by the ISO bus. •...
-
Page 190: Maize Header
Info centre "EasyTouch" 8.2.5.3 Maize header To set the operating mode of the maize header BX500014_1 Fig. 135 • You can use the incremental encoder to choose the operating mode setting. The selection box is highlighted in colour. • Press the incremental encoder to jump to the selection box. •... - Page 191 The following header types can be set: Icon Explanation KRONE EasyCollect, two-part KRONE EasyCollect, three-part KRONE XCollect, three-part Not a KRONE product BX500166 Fig. 136 • Use the incremental encoder to select the header type setting. The selection box is highlighted in colour.
- Page 192 Info centre "EasyTouch" Setting the maize header working width BX500019 Fig. 137 • You can use the incremental encoder to choose the setting for the number of rows. The selection box is highlighted in colour. • Press the incremental encoder to jump to the selection box. •...
- Page 193 Info centre "EasyTouch" To adjust the lifting gear control Three lifting unit controls, see page 567, can be selected: – Lifting unit ground pressure control – Lifting unit distance control – Lifting unit position control BX500017_1 Grass mode Maize mode Fig.
- Page 194 Info centre "EasyTouch" Setting the number of blades After changing the number of blades, see page 707, the current number of blades must be set. When the number of blades is set, the setting area for the chop length is adjusted. BX500018_1 Grass mode Maize mode...
- Page 195 Info centre "EasyTouch" Select the row tracer for the automatic steering system This mode determines which row tracer on the maize header will be evaluated for control of the automatic steering system. – For the row tracer outer tip, always activate the left or right. The recommendation is always the side towards the crop, specifically for harvesting.
- Page 196 Info centre "EasyTouch" If one of the following displays appears in white, the automatic steering system for this function is ready (inactive). Icon Status Explanation Automatic The row tracer left is evaluated. steering system active (outer tip). The row tracer right is evaluated. Both row tracers are evaluated The row tracer left is evaluated (depending on the position of the spout).
- Page 197 Info centre "EasyTouch" Setting the row tracer • You can use the incremental encoder to choose the row tracer setting. The selection box is highlighted in colour. • Press the incremental encoder to jump to the selection box. • You can use the incremental encoder to set the desired mode. •...
- Page 198 Info centre "EasyTouch" Setting the response sensitivity of the row tracer The response sensitivity can be used to set the response (inertia) of the control system for the row tracer. With an even crop edge, slow driving speed and dry ground conditions, a low (slower) response sensitivity can be set.
- Page 199 Info centre "EasyTouch" Automatic setting of the chop length by maturity level detection (AutoScan) The system uses the AutoScan sensor to detect the degree of maturity of the maize plant. The AutoScan control electronics calculate the optimum cutting length of the maize plant from the previously entered minimum and maximum chopping length and control the speed of the pre-compression rollers accordingly.
- Page 200 Info centre "EasyTouch" Switching on maturity level detection • Set whether the degree of maturity sensor is present or not. • Set the maximum (1) and minimum (2) chop length. The values for the minimum and maximum chop length are checked for plausibility. For example, it the maximum value is set to 4.6 mm and the minimum value is set to 4.7 mm, the minimum value is automatically set to 4.5 mm.
- Page 201 Info centre "EasyTouch" Graphical representation of AutoScan sensor settings in expert mode The ex-works default values for minimum and maximum degree of maturity can only be changed in expert mode. By changing the percentage values, you are influencing the ability of the AutoScan to detect colour.
-
Page 202: Direct Cut Header
Info centre "EasyTouch" 8.2.5.4 Direct cut header Set the operating mode to direct cutting system BX500049 Fig. 146 • You can use the incremental encoder to choose the operating mode setting. The selection box is highlighted in colour. • Press the incremental encoder to jump to the selection box. •... - Page 203 Info centre "EasyTouch" Arbeitsbreite Direktschneidwerk einstellen BX500026_1 Abb. 147 • Mit dem Inkrementalgeber die Einstellung Arbeitsbreite anwählen. Das Auswahlfeld wird farblich hervorgehoben. • Den Inkrementalgeber drücken, um in das Auswahlfeld zu springen. • Mit dem Inkrementalgeber die gewünschte Arbeitsbreite einstellen. •...
- Page 204 Info centre "EasyTouch" Setting the number of blades for the direct cutting system After changing the number of blades, see page 707, the current number of blades must be set. When the number of blades is set, the setting area for the chop length is adjusted. BX500028_1 Fig.
- Page 205 Info centre "EasyTouch" Setting the automatic steering system BX770174 Fig. 150 Icon Designation Explanation Automatic steering system The automatic steering system is inactive or not inactive fitted. Automatic steering system The automatic steering system is active. The active machine is activated by the ISO bus. •...
- Page 206 Info centre "EasyTouch" Protection for wild animals information mask Fig. 151 If the XDisc operating mode is set, an information screen regarding the correct mowing behaviour appears briefly in the display when you start the front attachment. If a field is mowed from the outside inwards, animals are slowly driven from the safe edge sections into the middle of the field, making it more difficult or impossible for them to flee.
-
Page 207: Customer Data Counter
Info centre "EasyTouch" 8.2.5.5 Customer Data Counter BX500169 Fig. 152 • Press the key below to call up the customer counter. is displayed green if a customer counter is active. BX500047_3 Fig. 153... - Page 208 Info centre "EasyTouch" Pos. Icon Designation Explanation Customer data record Enter the customer data The customer counter was Counter switched off stopped. The currently displayed Counter switched on counter is activated. Another counter as the Counter inactive displayed counter is activated. An active counter is highlighted in colour Active if the diesel engine is Operating hours counter (h)
- Page 209 Info centre "EasyTouch" Modifying and/or creating a customer data record A total of 30 customer records can be created. BX500170_1 Fig. 154 • To modify or create a customer record, select the corresponding customer data record using the keys. • You can use the incremental encoder to choose the required input field (name, street, domicile).
- Page 210 Info centre "EasyTouch" Activating the additional counter BX850943 Fig. 155 • Press the key to call up the additional counter. • You can use the incremental encoder to select the required additional counter. • Press the incremental encoder to confirm your selection. Icon Meaning Explanation...
- Page 211 Info centre "EasyTouch" Selecting/deleting the area(s) of a customer counter BX850942 Fig. 156 Up to 10 areas can be assigned to every customer counter (1). However, only one area can be selected. All counters shown under (2) are assigned to the selected area. Either single or all areas of a customer counter can be deleted.
- Page 212 Info centre "EasyTouch" Deleting all areas of a customer counter A prerequisite for this is that the right customer record is selected. • Press key until the sigma sign ( ) appears in the input field (1). • , an information message “Delete To delete all areas, press key under the softkey all areas?”...
- Page 213 Info centre "EasyTouch" Exporting the customer counter To use the customer data records for other evaluations, you can save them to a USB flash drive. • Insert the USB flash drive into the USB connection on the operation console, see page 154. Fig.
-
Page 214: Silage Additives Unit
Info centre "EasyTouch" 8.2.5.6 Silage additives unit In field mode, the Settings info area (V) displays the setting for the silage additives unit (1). BX850944 Fig. 159 Automatic mode Prerequisites: – Diesel engine switched on – Release switch road/field in field mode –... - Page 215 Info centre "EasyTouch" Possible status displays (1) Icon Designation Automatic mode switched on, silage additives unit active Automatic mode switched on, silage additives unit inactive Silage additives unit deactivated Continuous operation switched on, silage additives unit continuously active Crop flow cleaning headland, silage additives unit inactive Crop flow cleaning headland, silage additives unit active Filling level indicator of the silage additives unit (optional) Flow rate in L/t or USA: gal/t...
- Page 216 Info centre "EasyTouch" Display of unfulfilled switching-on conditions BX500150 Fig. 160 The menu field (I) displays unfulfilled conditions that must be fulfilled for setting the silage fodder addition. An appropriate remedy must be found. Icon Meaning Lower lifting unit Vehicle must drive Switch on main coupling Switch on feed drive Turn the travelling gear release switch on or off...
- Page 217 Error CAN* to CUC (CUC= Control Unit Console) Error CAN* to DIOM Error CAN* to multi-function lever Error CAN* to KMC2 (KMC = KRONE Machine Controller) Error CAN* to KMC3 (KMC = KRONE Machine Controller) Error CAN* to metal detection...
- Page 218 Info centre "EasyTouch" Setting internal silage additives unit BX500149_1 Fig. 162 Setting options for internal silage additives unit (1) To s et silage fodder addi tion Icon Designation Automatic mode active Silage additives unit deactivated Continuous operation active Crop flow cleaning headland active Activating / deactivating the filling level indicator of the silage additives unit (optional) (2) To s et silage fodder addi tion Icon...
- Page 219 Info centre "EasyTouch" Setting external silage additives unit • To access the settings of the external silage additives unit, press the key. Setting options for the external silage additives unit To s et silage fodder addi tion Icon Designation Automatic mode active External silage additives unit deactivated Continuous operation active Crop flow cleaning headland active...
-
Page 220: Setting The Corn Conditioner Distance
Info centre "EasyTouch" 8.2.5.7 Setting the corn conditioner distance If one of the modes maize header or XDisc is set, the info area settings (V) in the display shows icon and the current actual value of the corn conditioner distance. BX500012_2 Fig. -
Page 221: Menu Level
Info centre "EasyTouch" Menu level Short Overview Main menu Menu Menu Designation Settings Parameter 1-1-1 Intake 1-1-2 Header 1-1-3 Spout 1-1-4 Grinding Device 1-1-5 Counterblade 1-1-8 EasyFlow 1-1-9 EasyCollect 1-1-10 XDisc 1-1-11 Metal Detection 1-1-12 Diesel Engine 1-1-13 Traction Drive 1-1-14 Automatic Steering System 1-1-15... - Page 222 Info centre "EasyTouch" Main menu Menu Menu Designation Setting Machine Units Diesel Engine PowerSplit Language Display 1-7-1 Setting Background Colour 1-7-2 Beeper 1-7-4 Direction of Rotation 1-7-5 Configuring Status Line Settings Date/Time Owner’s Address 1-10 Memory Keys Counters...
- Page 223 Info centre "EasyTouch" Main menu Menu Menu Designation Maintenance Central Lubrication Grinding/Counterblade Calibrating Pendulum Frame Calibrating Automatic Steering System Calibrating Spout Calibrating Corn Conditioner Calibrating Intake/Header Calibrating Travel Path RockProtect (optional) 3-10 Calibrating Main Coupling 3-11 Maintenance Additional Axle (optional) 3-12 Automatic Calibration Lifting Unit...
- Page 224 Info centre "EasyTouch" Main menu Menu Menu Designation Service Diagnostics 4-1-1 Intake 4-1-2 Header 4-1-3 CAN Bus 4-1-4 Spout 4-1-5 Lifting Unit 4-1-6 Traction Drive 4-1-7 Metal Detection 4-1-8 Diesel Engine 4-1-9 Automatic Steering System (option) 4-1-10 AutoScan Maturity Level Detection (option) 4-1-11 Electronics...
- Page 225 Info centre "EasyTouch" Main menu Menu Menu Designation Service 4-1-14 Counterblade 4-1-15 Corn Conditioner 4-1-16 Control Lever 4-1-17 Control Unit Console 4-1-18 Manual Operation 4-1-19 Terminal 4-1-20 RockProtect (option) 4-1-21 Moisture Measurement (option) Working Screen...
-
Page 226: Access A Menu Level
Info centre "EasyTouch" 8.3.1 Access a menu level Fig. 164 • Press the key beside the incremental encoder to call up the menu level. The display indicates the menu level. The menu level is divided into five main menus: Icon Designation Main Menu 1 "Settings"... -
Page 227: Main Menu 1 Settings
Info centre "EasyTouch" Main menu 1 Settings Fig. 165 The main menu level is active. • You can use the incremental encoder to choose main menu 1. • Press the incremental encoder. The display shows menu level 1 Settings. The main menu, Settings, is divided into the following menus: Designation Icon Menu 1-1 Parameters... -
Page 228: Menu 1-1 Parameters
Info centre "EasyTouch" 8.4.1 Menu 1-1 Parameters BX500031_1 Fig. 166 Main menu 1 Settings is opened. • You can use the incremental encoder to choose menu 1-1 Parameters. • Press the incremental encoder. The display indicates the menu level Parameters. •... - Page 229 Info centre "EasyTouch" The menu is divided into the following sub-menus: Icon Designation Menu 1-1-1 Feed Drive Menu 1-1-2 Front attachment Menu 1-1-3 Upper Discharge Chute Menu 1-1-4 Grinding device Menu 1-1-5 Counterblade Menu 1-1-8 EasyFlow Menu 1-1-9 EasyCollect Menu 1-1-10 XDisc Menu 1-1-11 Metal Detection Menu 1-1-12 Diesel Engine Menu 1-1-13 Travelling gear...
-
Page 230: Entering Parameters
(password-protected). Press the key to call up the control panel for optional components, this can only be done by KRONE customer service. Press the key to go back to the previous mask. •... - Page 231 Info centre "EasyTouch" BX750018 Fig. 168 The mask for parameter entry appears with the following displays: Item Explanation Shows the designation of the selected parameter. Visual display of the possible range of the parameter value. Parameter data: (from top to bottom): Parameter number, min.
-
Page 232: Menu 1-2 Machine Setting
Info centre "EasyTouch" BX750018 Fig. 169 • Enter the new setpoint value in the input field (5) using the incremental encoder or keyboard (7). • Press the key to delete the setpoint value. • Press the key to accept the modified value and/or to exit the parameter input mask. •... -
Page 233: Menu 1-3 Units
Info centre "EasyTouch" 8.4.3 Menu 1-3 Units BX500033_1 Fig. 170 Main menu 1 Settings is opened. • Use the incremental encoder to select menu 1-3 Units. • Press the incremental encoder. The display shows 4 selection windows in which the measuring unit for various measured values can be converted. - Page 234 Info centre "EasyTouch" BX851001 Fig. 171 Item Explanation Setting the chop length unit Setting the unit for the gap distance from the corn conditioner Setting the unit for the speed display Carrying out the setting • You can use the incremental encoder to select the required selection window, the selection box is highlighted in colour.
-
Page 235: Menu 1-4 Powersplit (Option)
Info centre "EasyTouch" 8.4.4 Menu 1-4 PowerSplit (Option) The PowerSplit is used to increase efficiency. The continuous engine output is adjusted to the operating conditions thereby helping to optimise fuel consumption. BX500163_2 Fig. 172 The current PowerSplit mode is displayed in area (II) Icon Designation Diesel engine in max. - Page 236 Info centre "EasyTouch" Setting the PowerSplit Fig. 173 The main menu 1 Settings has been opened. • You can use the incremental encoder to select menu 1-4 PowerSplit. • Press the incremental encoder. The display shows the "PowerSplit" menu level. Item Designation Current power mode...
- Page 237 Info centre "EasyTouch" Automatic switch between ECO Power and X Power Automatic switching only takes place from Eco-Power to X-Power and vice versa. Switching to Tri-Power must always be performed manually. The type of switching from Eco-Power to X-Power can be performed using two levels: Icon Designation Switching is performed abruptly at a set rotational speed...
- Page 238 Info centre "EasyTouch" Manual switching between ECO Power, X Power and TRI Power TRI Power mode cannot be pre-set and can only be accessed if you switch modes manually. The manual switching from X Power - TRI Power -ECO Power takes place in sequence and is only possible if the diesel engine is not overloaded.
-
Page 239: Menu 1-5 "Language
Info centre "EasyTouch" 8.4.5 Menu 1-5 "Language" BX500035 Fig. 175 Main menu 1 "Settings" is opened. • You can use the incremental encoder to select menu 1-5 "Language". • Press the incremental encoder. The display shows the current set language (1), the selected language (2) and the selection of all available languages (3). -
Page 240: Menu 1-7 "Display
Info centre "EasyTouch" 8.4.6 Menu 1-7 "Display" BX500037_1 Fig. 176 Main menu 1 "Settings" is opened. • You can use the incremental encoder to select menu 1-7 "Display". • Press the incremental encoder. The display shows menu level 1-7 "Display". The "Display"... -
Page 241: Menu 1-7-1 "Day/Night Mode
Info centre "EasyTouch" 8.4.7 Menu 1-7-1 "Day/night mode" BX500611_1 Fig. 177 In menu 1-7-1 "Day/night mode", you can set the brightness of the display. When driving at night, the display should be dimmed so that the driver is not dazzled. Menu 1-7 "Display"... -
Page 242: Menu 1-7-2 Beeper
Info centre "EasyTouch" 8.4.8 Menu 1-7-2 Beeper BX500038_2 Fig. 178 In this menu, you can set the signal tone (beeper) for the error messages, information messages and for pressing a key. Menu 1-7 "Display" is active. • You can use the incremental encoder to select menu 1-7-2 "Beeper". •... - Page 243 Info centre "EasyTouch" Carrying out the setting • You can use the incremental encoder to select the required selection window, the selection box is highlighted in colour. • Press the incremental encoder to jump to the selection box. • You can use the incremental encoder to select the required setting. •...
-
Page 244: Menu 1-7-4 Direction Of Rotation
Info centre "EasyTouch" 8.4.9 Menu 1-7-4 Direction of Rotation BX500201_1 Fig. 179 In this menu, the direction of rotation of the incremental encoder for scrolling purposes can be changed. The incremental encoder is set at the factory so that it is rotated anticlockwise to scroll down and clockwise to scroll up (recognisable by the blue arrow). -
Page 245: Menu 1-7-5 Configure Status Line
Info centre "EasyTouch" 8.4.10 Menu 1-7-5 Configure status line BX850839 Fig. 180 The first field (1) of the status display for the working screens "Road travel / Field mode" can be adjusted individually in this menu. Menu 1-7 Display is active. •... -
Page 246: Nir Sensor For Moisture Measurement (Option)
Info centre "EasyTouch" BX850841 Fig. 181 The newly selected display (1) appears in the working screens "Road mode / Field mode". 8.4.10.1 NIR sensor for moisture measurement (option) BX851032 Fig. 182 The NIR sensor determines the moisture content of the crop, which can then be used to determine the DS content. - Page 247 Info centre "EasyTouch" • Menu 1-7-5 "Configure status line" is active. • You can use the incremental encoder to select the display , the input field is highlighted in colour. • Press the incremental encoder to confirm your selection. BX851054 Fig.
- Page 248 Info centre "EasyTouch" Automatic NIR sensor calibration BX851055 Fig. 184 The NIR sensor performs automatic calibration if the following conditions are fulfilled: • At least 10 hours of sensor operation have elapsed since the last calibration of the NIR sensor. •...
-
Page 249: Menu 1-8 Date/Time
Info centre "EasyTouch" 8.4.11 Menu 1-8 Date/time BX500044_1 Fig. 185 Main menu 1 Settings is opened. • You can use the incremental encoder to select menu 1-8 "Date/time". • Press the incremental encoder. The display shows the date and the time. Carrying out the setting •... -
Page 250: Menu 1-9 Owner's Address
Info centre "EasyTouch" 8.4.12 Menu 1-9 Owner's address März M o n t a g Fig. 186 Main menu 1 Settings is opened. • You can use the incremental encoder to select menu 1-9 Owner's address. • Press the incremental encoder. ... -
Page 251: Menu 1-10 Memory Keys
Info centre "EasyTouch" 8.4.13 Menu 1-10 Memory keys BX850994 Fig. 188 Main menu 1 Settings is opened. • You can use the incremental encoder to select menu 1-10 Memory keys. • Press the incremental encoder. Further procedure, see page 183. -
Page 252: Main Menu 2 Counters
Info centre "EasyTouch" Main menu 2 Counters Fig. 189 The main menu level is active. • You can use the incremental encoder to select the main menu 2 Counters. • Press the incremental encoder. The display shows the "Counter" menu. Item Icon Designation... -
Page 253: Deleting The Day Counter
Info centre "EasyTouch" 8.5.1 Deleting the day counter Fig. 190 The day counters 1 to 3 can be deleted in this menu. The main menu level is active. • You can use the incremental encoder to select the main menu 2 Counters. •... -
Page 254: Main Menu 3 Maintenance
Info centre "EasyTouch" Main Menu 3 Maintenance BX500075_1 Fig. 191 The main menu level is active. • Select main menu 3 with the incremental encoder. • Press incremental encoder. The display shows menu level 3 Maintenance. The Maintenance main menu is divided into the following menus: Icon Designation Menu 3-1 Central Lubrication/Cleaning... -
Page 255: Unfulfilled Switching-On Conditions And Can Bus Disturbances
Info centre "EasyTouch" 8.6.1 Unfulfilled switching-on conditions and CAN bus disturbances Depending on the selected diagnostics menu, non-fulfilled switching-on conditions and errors are displayed in the terminal. There is a difference between: – non-fulfilled switching-on conditions (yellow) – CANBUS errors (red) Overview of non-fulfilled switching-on conditions Symbol Description... - Page 256 Info centre "EasyTouch" Overview of possible CANBUS errors Symbol Description Symbol Description Error CAN to ADM 1/MFR Error CAN to control lever Error CAN to ADM 2 (only double Error CAN to KMC2 engine) Error CAN to autopilot Error CAN to KMC3 Error CAN to CUC Error CAN to metal detection Error CAN to maturity level...
-
Page 257: Menu 3-1 Central Lubrication/Cleaning
Info centre "EasyTouch" 8.6.2 Menu 3-1 Central lubrication/cleaning BX500613 Fig. 192 Main menu 3 Maintenance is active. • You can use the incremental encoder to select menu 3-1 Central lubrication/cleaning. • Press the incremental encoder. The display shows the menu level Central lubrication/cleaning. •... -
Page 258: Menu 3-2 Grind/Counterblade
Info centre "EasyTouch" 8.6.3 Menu 3-2 Grind/Counterblade BX500615 Fig. 193 Main menu 3 Maintenance is active. • You can use the incremental encoder to select menu 3-2 Grinding/counterblade. • Press the incremental encoder. The display shows the menu level Grinding/counterblade. The display shows warning messages that draw attention to the special hazards associated with grinding the chopping blades. - Page 259 Info centre "EasyTouch" Status displays for grinding operation BX851003 Fig. 194 Status displays for the grinding flap (1) Icon Explanation Grinding flap is closed. Grinding flap is open. Status of the grinding stone (2) Icon Explanation Grinding stone is on the left. Grinding stone is in centre.
- Page 260 Info centre "EasyTouch" Status of remaining grinding cycles up to grinding stone readjustment After approx. 560 grinding cycles, the grinding stone must be readjusted or replaced. Once this number is reached, the information message "Readjust grinding stone" is displayed. BX851004_1 Fig.
- Page 261 Info centre "EasyTouch" Resetting the question dialogue (6) # 00420 BX500175 Fig. 196 • Press the key to open the question dialogue (6) in the display. The display shows the question dialogue "Reset grinding cycle counter?" • Press the key under to reset the total of all grinding cycles to the maximum value.
- Page 262 Info centre "EasyTouch" Status displays of the counterblade motors (data as seen in the direction of travel) BX500173_1 Fig. 197 Status displays when the counterblade is moved using manual operation Icon Explanation Approach counterblade on the right active. Approach counterblade on the right inactive. Moving away from counterblade on the right active.
- Page 263 Info centre "EasyTouch" NOTE Using the manual operation on the platform, the grind can also be started and the counterblade adjusted. Changing the number of grinding cycles Carrying out the setting • You can use the incremental encoder to select the required selection window, the selection box is highlighted in colour.
-
Page 264: Menu 3-3 Calibration Of Absolute Lifting Unit Height
Info centre "EasyTouch" 8.6.4 Menu 3-3 Calibration of absolute lifting unit height BX500053 Fig. 198 Main menu 3 Maintenance is active. • Using the incremental encoder, choose menu 3-3 Calibration of absolute lifting unit height. • Press the incremental encoder. The display shows the menu level Calibration of absolute lifting unit height. -
Page 265: Calibration Of Sensors At Lifting Unit
Info centre "EasyTouch" Risk of injury due to unexpected movement of parts! During the calibration process, there is a risk of injury for persons who stay in the area of lifting gear, front attachment and discharge chute. Make certain no one remains in the swivel range or in the range of movement of lifting gear, front attachment and discharge chute during the calibration process. - Page 266 Info centre "EasyTouch" Adjusting the lifting unit The following switching-on conditions must be satisfied to adjust the lifting unit. – The diesel engine is at idle speed. – The release switch field mode is switched off. – The release switch traction drive is switched off. –...
- Page 267 Info centre "EasyTouch" Adjusting process 1 "lower height" - calibration of the lower height of the lifting unit Fig. 200 • Press the "Lower lifting unit" key (2) and memory key for "Lifting unit adjusting process" (1) and hold down simultaneously for approx. 7 seconds. The lifting unit is lowered all the way. –...
-
Page 268: Calibrating The Absolute Cutting Height
Info centre "EasyTouch" 8.6.4.2 Calibrating the absolute cutting height Calibration of the absolute cutting height is required to ensure the absolute cutting height can be indicated in the info centre. The calibration values are stored separately for Pick-up, XDisc and maize header. To calibrate the absolute cutting height, the sensors at the lifting unit must be calibrated in advance, see page 302. - Page 269 Info centre "EasyTouch" Calibrating the upper lifting unit height Fig. 204 • Press the "Raise lifting unit" key (1) on the multi-function lever until the display shows a value of "80 %" beside the icon. • Using the incremental encoder, choose the setting "Saved absolute height of the lifting unit at 80 %".
- Page 270 Info centre "EasyTouch" Calibrating the lower lifting unit height Fig. 205 • Press the "Lower lifting unit" key (1) on the multi-function lever until the display shows a value of "20 %" beside the icon. • Using the incremental encoder, choose the setting "Saved absolute height of the lifting unit at 80 %".
-
Page 271: Calibrating The Automatic Steering System
Info centre "EasyTouch" 8.6.5 Calibrating the automatic steering system Risk of injury due to unexpected movement of parts! During the calibration process, there is a risk of injury for persons who stay in the area of lifting gear, front attachment and discharge chute. Make certain no one remains in the swivel range or in the range of movement of lifting gear, front attachment and discharge chute during the calibration process. - Page 272 Info centre "EasyTouch" After exchanging the sensors and actuators, the ISOBUS steering system must be recalibrated. Observe the sequence below to perform calibration: • Calibrate the steer angle. • Calibrate the row tracers. • Calibrate the steering (valves) (automatic or manual). •...
- Page 273 Info centre "EasyTouch" The display shows the menu Calibration of automatic steering system. Display with outer tip Display with central tip BX500617 Fig. 208 Item Meaning Saved value, maximum steering angle, left Saved value, straight-ahead driving Saved value, maximum steering angle, right Saved value, minimum row tracer, left Saved value, minimum row tracer, right actual value of steering angle sensor...
-
Page 274: Calibrating The Steering Angle Sensor
Info centre "EasyTouch" 8.6.5.1 Calibrating the steering angle sensor BX500661_2 BX500058 Fig. 209 The steer angle must be calibrated if: • a new front attachment was mounted, • control units (KMC 2, autopilot) were replaced, • sensors B63 (steering wheel pressure), B64 (inclination registration, steering axle) were replaced, •... - Page 275 Info centre "EasyTouch" Calibrating the steering angle for straight-ahead driving When driving straight ahead, the value for the steering angle sensor for straight-ahead driving should be 400 +/- 10. If the value is not within this range, the steering angle sensor must be readjusted.
-
Page 276: Row Tracer Calibration
Info centre "EasyTouch" 8.6.5.2 Row tracer calibration BX500661_2 BX500058 Fig. 210 The row tracers must be calibrated if the sensors B61, B65, B66 of the row tracers have been replaced. The row tracers in the central tip or the outer tips can be chosen. •... - Page 277 Info centre "EasyTouch" Calibrating row tracer outer tip left/central tip right (1) When the row tracer "Outer tip left/central tip right" is activated, the sensor value is increased. Fig. 211 • Using the incremental encoder, choose the setting <row tracer left>, the input field is highlighted in colour.
- Page 278 Info centre "EasyTouch" Calibrating row tracer outer tip right/central tip left (2) When the row tracer "Outer tip right/central tip left" is activated, the sensor value is reduced. Fig. 212 • Using the incremental encoder, choose the setting <row tracer right>, the input field is highlighted in colour.
-
Page 279: Calibrating Flexible Row Tracers
Info centre "EasyTouch" 8.6.5.3 Calibrating flexible row tracers Fig. 213 Prerequisites: – The machine is on a level surface. – The row tracers can vibrate freely without striking an obstacle. Calibrating row tracers: • In menu 1-1-14, set parameter 26025 in the group autopilot "Flexible row tracer fitted" to the value 1. -
Page 280: Calibration Of Valves For Steering Left/Right (Manual)
Info centre "EasyTouch" 8.6.5.4 Calibration of valves for steering left/right (manual) Display with outer row tracer Display with row tracer central tip BX500617 Fig. 214 Prerequisites: – The machine is on a level surface. – The row tracers can vibrate freely without striking an obstacle. –... - Page 281 Info centre "EasyTouch" Calibration of minimum current for valve, steering to the left • Using the incremental encoder, choose <left valve current value> (9), the input field is highlighted in colour. • Press the incremental encoder to jump to the input field. •...
-
Page 282: Calibration Of Valves For Steering Left/Right (Automatic)
Info centre "EasyTouch" 8.6.5.5 Calibration of valves for steering left/right (automatic) During automatic calibration, the system records and saves the valve flows. Calibration is interrupted as soon as the steering wheel is moved or the driver gets up off the seat. - Page 283 Info centre "EasyTouch" If an error occurs during calibration, the calibration process will be interrupted and the corresponding error will be displayed. Calibrating Steering Error List Automatically Meaning Cause/Remedy Icon The value of steering angle Recalibrate steering angle sensor B64. sensor B64 is less than the calibrated value "Steering all the way to the left"...
- Page 284 Info centre "EasyTouch" Meaning Cause/Remedy Icon • Cable break to valve Y39 "Steering Left". 7 and 9 Cable break Y40 steering left • Valve coil Y39 faulty. valve • Automatic steering system faulty. • Cable break to valve Y40 "Steering 8 and 10 Cable break Y39 steering right Right".
-
Page 285: Turning Circle Calibration (Only For Isobus Steering System)
Info centre "EasyTouch" 8.6.5.6 Turning circle calibration (only for ISOBUS steering system) 1900 0.00 0.00 5 mA 5 mA Min. 1005 m A Min. 1080 m A Fig. 216 • Move the machine onto a solid surface and turn the steering as far to the left as possible. •... - Page 286 Info centre "EasyTouch" Left turning circle Fig. 217 • Mark a spot on the ground at the outer edge of the front right tyre (1). • Drive semi circle at low speed and with the steering turned as far as possible. •...
-
Page 287: Menu 3-5 Calibration Spout
Info centre "EasyTouch" 8.6.6 Menu 3-5 Calibration Spout The calibration must be performed to determine the maximum final position left/right. The spout must always be calibrated if: • a new spout was mounted. • the controlled final position is not reached. •... - Page 288 Info centre "EasyTouch" BX500067 Fig. 220 Status displays Icon Explanation Upper discharge chute Lower discharge chute Position of lower discharge chute sensor, cable break. Position of lower discharge chute sensor, short circuit. Spout position unknown, sensor position bottom, may be defective. spout position left Spout central position Spout position right...
- Page 289 Info centre "EasyTouch" NOTE The individual calibration processes are interrupted by manually operating the spout with the keys on the multi-function lever and when the driver leaves the driver’s seat. Calibration of the minimum flows is performed automatically. After each time the machine is restarted and the first time the spout is reversed, the flows are determined again.
-
Page 290: Menu 3-6 Corn Conditioner Calibration
Info centre "EasyTouch" 8.6.7 Menu 3-6 Corn conditioner calibration The discharge chute must always be calibrated when – a corn conditioner has been removed or installed again. – the control unit KMC3 has been replaced. – the actual roller distance deviates significantly from the target roller distance. BX500621 Fig. - Page 291 WHBBX03207 Fig. 222 The current power consumption of the corn conditioner is indicated by the icon . It is required for diagnostic purposes by the KRONE service technicians. • The diesel engine is switched off. • The machine is prevented from rolling away.
- Page 292 For corn conditioner with discs Fig. 223 The current power consumption of the corn conditioner is indicated by the icon . It is required for diagnostic purposes by the KRONE service technicians. • The diesel engine is switched off. •...
-
Page 293: Menu 3-7 Calibration Of Feed Drive/Front Attachment
Info centre "EasyTouch" 8.6.8 Menu 3-7 Calibration of feed drive/front attachment BX500071_1 BX500622 Fig. 224 Main menu 3 Maintenance is active. • Use the incremental encoder to choose menu 3-7 Calibration of feed drive/front attachment. • Press the incremental encoder. The display shows the menu level Calibration of feed drive/front attachment. -
Page 294: Calibrate Feed Drive/Front Attachment
Info centre "EasyTouch" 8.6.8.1 Calibrate feed drive/front attachment The intake must always be calibrated if – a new intake was mounted. – the actual chop length deviates from the displayed chop length. – the KMC2 control unit was replaced. – if work was performed on components of the intake drive (pump, hydraulic motor or speed sensor). - Page 295 Info centre "EasyTouch" Starting the calibration process: • Press the key to start calibration for the intake/front attachment. NOTE The intake/front attachment starts to rotate after a short time. The calibration process last for up to 120 seconds. If the required data was not determined during this time, the calibration process is cancelled and must be repeated.
- Page 296 Info centre "EasyTouch" BX500072_1 Fig. 226 The display shows the rotational speeds for the support values (1) and (2) of the calibration: If calibration was successful, the status display switches to " ", the front attachment stops (power consumption and rotational speed are 0. •...
-
Page 297: Menu 3-9 Calibration Of Rockprotect
Info centre "EasyTouch" 8.6.9 Menu 3-9 Calibration of RockProtect The nominal value of the sensor is 2500 mV. This value may deviate slightly due to component tolerances. The zero position of the sensor must always be calibrated if – the sensitivity of the sensor is too strong or too weak. –... -
Page 298: Menu 3-10 Calibration Of Main Coupling
Info centre "EasyTouch" 8.6.10 Menu 3-10 Calibration of main coupling The main coupling must always be calibrated if – it does not switch on "smoothly". – the KMC3 control unit has been replaced. – parts of the main coupling have been worked on. –... - Page 299 Info centre "EasyTouch" Status displays Icon Explanation The calibration process has been stopped. The calibration process is currently running. A rotational speed was measured at the chopping drum. The current values were saved. The calibration process was concluded successfully. Displays on the display Icon Explanation Actual current to the valve Y12 "Main coupling ON"...
- Page 300 Info centre "EasyTouch" BX500659_2 Fig. 229 If all switching-on conditions are fulfilled, the icon is displayed. • Press the key to start the calibration. If rotation of the chopping drum is detected, the min and max current for the cutting drum valve is calculated and automatically saved.
-
Page 301: Menu 3-11 Maintenance Of Additional Axle (Option)
Axle load 2.3 t 2.5 t 2.75 t 98 – 104 bar Setpoint pressure 78 - 84 bar 88 - 94 bar approx. NOTE If the setpoint pressure specified in the table is not reached, contact your Krone dealer. -
Page 302: Menu 3-12 Automatic Calibration Of Sensors At Lifting Unit
Info centre "EasyTouch" 8.6.12 Menu 3-12 Automatic calibration of sensors at lifting unit Risk of injury due to unexpected movement of parts! During the calibration process, there is a risk of injury for persons who stay in the area of lifting gear, front attachment and discharge chute. - Page 303 Info centre "EasyTouch" BX770221 Fig. 232 • To carry out automatic calibration, press the “Lower lifting unit automatically” key on the control lever and hold it down, see page 140. During calibration, the upper end position is first approached and then the lower end position. Then the header weight is determined.
-
Page 304: Main Menu 4 Service
Info centre "EasyTouch" Main menu 4 Service Fig. 233 The main menu level is active. • You can use the incremental encoder to choose main menu 4. • Press the incremental encoder. The display shows menu level 4 Service. The main menu, Service, is divided into the following menus: Icon Designation Menu 4-1 Diagnostics... -
Page 305: Menu 4-1 Diagnostics
Info centre "EasyTouch" Menu 4-1 Diagnostics Errors can be analyses and rectified with the help of the "Diagnostics" menu. The error descriptions in the appendix provide information as to which components could be affected. These can then be checked in the corresponding diagnostics menu. The individual menus consist of a sensor and actuator test. - Page 306 Info centre "EasyTouch" The Diagnostics menu is divided into the following menus: Icon Designation Menu 4-1-1 Feed Drive Menu 4-1-2 Front attachment Menu 4-1-3 CAN bus Menu 4-1-4 Upper Discharge Chute Menu 4-1-5 Lifting Unit Menu 4-1-6 Travelling gear Menu 4-1-7 Metal Detection Menu 4-1-8 Diesel Engine Menu 4-1-9 Autopilot (option) Menu 4-1-10 Autoscan...
-
Page 307: Unfulfilled Switching-On Conditions And Can Bus Disturbances
Info centre "EasyTouch" 8.8.1 Unfulfilled switching-on conditions and CAN bus disturbances Depending on the selected diagnostics menu, non-fulfilled switching-on conditions and errors are displayed in the terminal. There is a difference between: – non-fulfilled switching-on conditions (yellow) – CANBUS errors (red) Overview of non-fulfilled switching-on conditions Symbol Description... - Page 308 Info centre "EasyTouch" Overview of possible CANBUS errors Symbol Description Symbol Description Error CAN to ADM 1/MFR Error CAN to control lever Error CAN to ADM 2 (only double Error CAN to KMC2 engine) Error CAN to autopilot Error CAN to KMC3 Error CAN to CUC Error CAN to metal detection Error CAN to maturity level...
-
Page 309: General Status Displays Sensors/Actuators
Info centre "EasyTouch" 8.8.1.1 General Status Displays Sensors/Actuators The following status displays may appear during diagnostics of all sensors and actuators: Icon Description Icon Description Error/implausible Cable break Broken cable sensor Short circuit Sensor attenuated Actuator ON Sensor unattenuated Actuator OFF Short circuit sensor Actuator error Wiring... -
Page 310: Menu 4-1-1 Diagnostics Intake
Info centre "EasyTouch" 8.8.1.2 Menu 4-1-1 Diagnostics intake Fig. 235 • Select menu 4-1-1 “Intake”. The “Intake” diagnostics menu is divided into three displays: – “Sensor test” Display 1 – “Actuator test” Displays 2 and 3 Display 1 "Sensor test" BX770181 Fig. - Page 311 Info centre "EasyTouch" Screen description display 1 "Sensor test" Screen display/icons/description D607 feed drive current . . . mA Feed drive forwards Feed drive backwards Current amperage in mA. D630 feed drive rotational speed . . . rpm Intake speed Current sensor value in rpm.
- Page 312 Info centre "EasyTouch" Status displays Actuator Actuator Actuator Actuator Description status status status status active inactive released Short-circuit Feed drive forwards Feed drive backwards Horn Metal detection Table 8...
- Page 313 Info centre "EasyTouch" Display 2 “Actuator test” BX770182 Fig. 237 On display 2 "Actuator test" the function of the actuators associated with the feed drive can be tested. Mask description display 2 "Actuator test" Screen display/icons/description D607 feed drive current .
-
Page 314: Menu 4-1-2 Diagnostics Front Attachment
Info centre "EasyTouch" 8.8.1.3 Menu 4-1-2 Diagnostics front attachment Fig. 238 • Select menu 4-1-2 "Front attachment". The "Front attachment" diagnostics menu is divided into three displays: – Display 1 "Sensor test" – Displays 2 and 3 "Actuator test" Display 1 "Sensor test" BX770183 Fig. - Page 315 Info centre "EasyTouch" Screen description display 1 "Sensor test" Screen display/icons/description D606 front attachment current . . . mA Front attachment forwards Front attachment backwards Current amperage in mA. D631 front attachment speed . . . rpm Front attachment speed Current sensor value in rpm.
- Page 316 Info centre "EasyTouch" Status displays Actuator Actuator Actuator Actuator Description status status status status active inactive released Short-circuit Front attachment forwards Front attachment backwards Metal detection Status active Description Headland position management error Headland position management Headland position management reduces the rotational speed of the intake unit and of the front attachment above a specified lifting height.
- Page 317 Info centre "EasyTouch" Display 2 “Actuator test” BX770184 Fig. 240 On display 2 "Actuator test" the function of the actuators associated with the front attachment can be tested. Mask description display 2 "Actuator test" Screen display/icons/description D606 front attachment current .
-
Page 318: Menu 4-1-3 Can Bus
An error message is also displayed on the terminal. NOTE For error correction, contact your dealer or KRONE customer service. Sample illustration of an error at the CAN bus: KMC2 active KMC2 inactive or disconnected from CAN bus... - Page 319 Info centre "EasyTouch" Display 2 “Terminating resistor CAN bus 2” Fig. 243 In display 2 “Terminating resistor CAN bus 2”, the relay to switch the terminating resistor installed in the CAN bus 2 can be switched on or off for extended diagnostics purposes. The terminating resistor is switched on automatically if there is no AutoScan sensor installed on the machine.
-
Page 320: Menu 4-1-4 Diagnostics Spout
Info centre "EasyTouch" 8.8.1.5 Menu 4-1-4 Diagnostics spout Fig. 244 • Select menu 4-1-4 “Discharge Chute”. The “Discharge Chute” diagnostics menu is divided into three pages: – “Sensor test” Display 1 – “Actuator test” Displays 2 and 3 Display 1 "Sensor test" BX770185 Fig. - Page 321 Info centre "EasyTouch" Screen description display 1 "Sensor test" Screen display/icons/description ..Angular momentum discharge chute Current sensor value in digits. Status of sensor "position spout centre". Status of sensor "angular momentum spout". Status of sensor "position spout below". .
- Page 322 Info centre "EasyTouch" Screen display/icons/description Status display of the valves. D617 KMC2 . . . Load voltage 12V4 D617 Supply voltage +12V4 for the outputs of the KMC2 in mV. Status displays Position Position Position Position Description left centre right unknown Angular momentum discharge chute...
- Page 323 Info centre "EasyTouch" Display 2 “Actuator test” Fig. 246 On display 2 "Actuator test" the function of the actuators associated with the spout can be tested. Mask description display 2 "Actuator test" Screen display/icons/description D616 KMC2 load voltage 12V3 . . . mV D616 Supply voltage +12V3 for the outputs of the KMC2 in mV.
- Page 324 Info centre "EasyTouch" Switching actuators on/off If all switching-on conditions for the actuator test are fulfilled, are displayed and the actuators displayed are released. These can be switched on and off using the numerical keys. Switch on Switch off Icon Description actuator actuator...
- Page 325 Info centre "EasyTouch" Display 3 "Actuator test" BX500180 Fig. 247 On display 3 "Actuator test" the function of the actuators associated with the spout can be tested. Mask description display 3 "Actuator test" Screen display/icons/description . . . mV D617 KMC2 Load voltage 12V4 D617 Supply voltage +12V4 for the outputs of the KMC2 in mV.
-
Page 326: Menu 4-1-5 Diagnostics Lifting Unit
Info centre "EasyTouch" 8.8.1.6 Menu 4-1-5 Diagnostics lifting unit Fig. 248 • Select menu 4-1-5 "Lifting unit". The "Lifting unit" diagnostics menu is divided into four displays: – Display 1 "Sensor test" – Displays 2 and 3 "Actuator test" – Display 4 "Calibration values"... - Page 327 Info centre "EasyTouch" Display 1 "Sensor test" BX770186 Fig. 249 Two-part EasyCollect Three-part EasyCollect/XCollect Display 1 "Sensor test" indicates the current test results of the sensors and actuators for the lifting unit. Mask description display 1 "Sensor test" Mask display/icons/description Status display of the set functions and operating modes.
- Page 328 Info centre "EasyTouch" Mask display/icons/description ..% . . . cm Lifting unit position Current sensor value in digits, as % and in cm. Position of header on left (optional) Position of header on right (optional) Current status of the sensors.
- Page 329 Info centre "EasyTouch" Status displays Status Status Description inactive Active Distance mode Pressure mode Position mode Table 13 EasyCollect EasyFlow XDisc Description Set header Table 14 Status Status Status Description inactive implausible Active Dumping/active vibration damping Table 15 Status Status Description Free Locked...
- Page 330 Info centre "EasyTouch" Status Status Description error Active Ground contour left Ground contour right Lifting unit pressure Lifting unit position Table 17 Actuator Actuator Actuator Actuator Description status status status status inactive cable break short circuit Active Raise lifting unit Lower lifting unit Lifting unit accumulator...
- Page 331 Info centre "EasyTouch" Display 2 “Actuator test” Fig. 250 On display 2 "Actuator test" the function of the actuators associated with the lifting unit can be tested. Mask description display 2 "Actuator test" Most of the icons are already described in display 1 "Sensor test". For this reason, only new icons are described below.
- Page 332 Info centre "EasyTouch" Switching actuators on/off • Using the incremental encoder, set the value for the pulse/pause ratio at which the "Lift lifting unit" and "Lower lifting unit" valves are to be actuated. If all switching-on conditions for the actuator test are fulfilled, the softkeys displayed and the actuators displayed are released.
- Page 333 Info centre "EasyTouch" Display 3 "Actuator test" BX770187 Fig. 251 On display 3 "Actuator test" the function of the actuators associated with the lifting unit can be tested. Mask description display 3 "Actuator test" The icons have already been described on display 1 "Sensor test" and display 2 "Actuator test".
- Page 334 Info centre "EasyTouch" Display 4 "Calibration values" • On display 1 "Sensor test", press the key under BX770188 Fig. 252 Display 4 "Calibration values" clarifies the dependencies between sensor and calibration values. Mask description display 4 "Calibration values" Screen display/icons/description .
- Page 335 Info centre "EasyTouch" Screen display/icons/description ..% Lifting unit pressure Current sensor value in digits and as %..Lifting unit pressure Currently calibrated sensor value in digits..% .
-
Page 336: Menu 4-1-6 Diagnostics Travelling Gear
Info centre "EasyTouch" 8.8.1.7 Menu 4-1-6 Diagnostics travelling gear Fig. 253 • Select menu 4-1-6 "Travelling gear". The "Travelling gear (Bosch)" diagnostics menu is divided into three displays: – Display 1 "Sensor test" – Display 2 "Sensor test additional axle" (for additional axle option only) –... - Page 337 Info centre "EasyTouch" Screen description display 1 "Sensor test" Screen display/icons/description . . . km/h Current direction of travel and speed display in km/h..km/h Saved driving speed of the speed controller in km/h. Current status of the parking brake. "Travelling gear"...
- Page 338 Info centre "EasyTouch" Screen display/icons/description Y105 . . . B105 . . . Y105 Adjusting motor at rear left B105 Speed sensor wheel at rear left Current amperage in mA and current sensor value in rpm. Y103 . . . B103 .
- Page 339 Info centre "EasyTouch" Screen display/icons/description B101 . . . B102 . . . B101 Pump pressure MA B102 Pump pressure MB Current sensor values in bar. B110 ..B110 Parking brake pressure Parking brake Current sensor value in digits and current amperage in mA. B109 .
- Page 340 Info centre "EasyTouch" Status displays Forwards Neutral Backwards Description (Standstill) Direction of travel Table 29 Status active Description Emergency operation: The travelling gear computer has detected a serious error. The machine has been switched to a mode which allows the machine to move at a reduced speed.
- Page 341 Info centre "EasyTouch" Display 2 "Sensor test additional axle" (for "additional axle" option only) Fig. 255 Display 2 "Sensor test additional axle" indicates the current test results of the sensors and actuators of the "additional axle" Mask description display 2 "Sensor test additional axle" Screen display/icons/description km/h .
- Page 342 Info centre "EasyTouch" Display 3 "Actuator test additional axle" (for "additional axle" option only) Fig. 256 The functions of the "additional axle" valves can be tested on display 3 "Actuator test additional axle" Mask description display 3 "Actuator test additional axle" Screen display/icons/description Additional axle current valve lift (Y80)
-
Page 343: Menu 4-1-7 Metal Detection
Info centre "EasyTouch" 8.8.1.8 Menu 4-1-7 Metal detection Figure 257 • Select Menu 4-1-7 "Metal Detection”. The “Metal Detection” diagnostics menu is divided into two displays: – Display 1 Sensor test/ actuator test – Display 2 Sensor test/ actuator test... - Page 344 • Ensure that the stop lock is set to "off". If metal detection is deactivated, the working screen displays the icon It is essential to check the setting of the stop lock. If a fault occurs, contact KRONE customer service!
- Page 345 Info centre "EasyTouch" . . . Supply voltage for metal detection in mV..Voltage present at the metal detection switching output in mV. D500 . . . D500 Status of the metal detection output with position information of the metal, if detected. Status of the KMC2 input.
- Page 346 Info centre "EasyTouch" Switching actuators on/off The test stop can be executed with a stationary and running feed drive/front attachment. Icon Description Run function Execute test stop. Cancel test stop and release metal detection. Status displays Status active Status Description inactive Metal detection (active = metal detected) Function "Metal detection"...
-
Page 347: Menu 4-1-8 Diesel Engine
Info centre "EasyTouch" 8.8.1.9 Menu 4-1-8 Diesel Engine Fig. 259 • Select menu 4-1-8 "Diesel engine". The "Diesel engine" diagnostics menu is divided into five displays: – Displays 1 to 3 Sensor test – Display 4 Hydrostatic fan – Display 5 Sensor test –... - Page 348 Info centre "EasyTouch" Display 1 "Sensor test" Fig. 260 Display 1 "Sensor test" shows the latest measurement results for the "diesel engine". Screen description display 1 "Sensor test" Screen display/icons/description D200 . . . D200 Current engine speed in rpm. D201 °C .
- Page 349 Info centre "EasyTouch" Display 2 "Sensor test" BX500110 Fig. 261 Display 2 "Sensor test" shows the latest measurement results for the diesel engine. Mask description display 2 "Sensor test" Screen display/icons/description Max. engine load . . . % D202 Current engine load referred to maximum engine power. Engine load rpm .
- Page 350 Info centre "EasyTouch" Display 3 "Sensor test" BX750053 Fig. 262 Display 3 "Sensor test" shows the latest measurement results for the "diesel engine". Screen description display 3 "Sensor test" Screen display/icons/description ..B377 Fuel pressure (master) B377S Fuel pressure (slave) Current sensor values in bar.
- Page 351 Info centre "EasyTouch" Display 4 "Hydrostatic fan" Fig. 263 Display 4 "Hydrostatic fan" shows the current measurement results of the fan system in connection with the diesel engine. If inappropriate temperature values occur, and possible faults need to be remedied, the fan speed can be varied for diagnostic purposes. Automatic fan adjustment is resumed when you exit the display.
- Page 352 Info centre "EasyTouch" Ref. Screen display/symbols/description . . . °C Hydraulic oil temperature Current sensor value in °C..°C B403 Charge air temperature Current sensor value in °C..°C B124 Coolant temperature Current sensor value in °C. .
- Page 353 Info centre "EasyTouch" Symbol Description Activate manual mode Activate automatic mode Select desired fan speed input in % Select desired fan speed input in rpm Reduce fan speed in rpm/% (according to selection) Increase fan speed in rpm/% (according to selection) Table 36 Status displays The colours of the displayed bars change according to the temperature/speed range.
- Page 354 Info centre "EasyTouch" Display 5 "Service interval" • On display 1 "Sensor test" press the key under BX500161 Fig. 264 Display 5 "Maintenance interval" shows the hours until the next maintenance interval. Screen description - display 5 "Service interval" Screen display/icons/description Number of hours until next scheduled maintenance.
-
Page 355: Menu 4-1-9 Automatic Steering System
Info centre "EasyTouch" 8.8.1.10 Menu 4-1-9 Automatic steering system WHBBX03761 Fig. 265 • Select menu 4-1-9 “Autopilot”. The “Autopilot” diagnostics menu is divided into two displays: – Display 1 Sensor test – Display 2 Actuator test Display 1 "Sensor test" BX500153 Fig. - Page 356 Info centre "EasyTouch" Screen description display 1 "Sensor test" Screen display/icons/description D900 CAN release autopilot . . . Status display as to whether all switching-on conditions for the automatic steering are fulfilled. D900 1: Fulfilled 2: Not fulfilled D901 Manu. steering active .
- Page 357 Info centre "EasyTouch" Screen display/icons/description Y40 Current valve steering right . . . mA Steering to the right Current amperage in mA. D912 Target crop edge . . . Current selected setpoint value mode "crop edge". 1) Left D912 2) Right 3: Both D913 Actual crop edge .
- Page 358 Info centre "EasyTouch" Display 2 “Actuator test” Mask description display 2 "Sensor and actuator test" BX500152 Fig. 267 The display 2 "Sensor and actuator test" can be used to test the functions of the autopilot actuators. Screen display/icons/description D915 Current Y66 .
- Page 359 Info centre "EasyTouch" Switching actuators on/off If all switching-on conditions for the actuator test are fulfilled, are displayed and the actuators displayed are released. These can be switched on and off using the numerical keys. Icon Description Switch on actuator Switch off actuator Lock steering on left Lock steering on right...
-
Page 360: Menu 4-1-10 Diagnostics Autoscan
Info centre "EasyTouch" 8.8.1.11 Menu 4-1-10 Diagnostics AutoScan Fig. 268 • Select menu 4-1-10 "AutoScan". The "AutoScan" diagnostics menu consists of a display: – Display 1 "Sensor test" Display 1 "Sensor test" BX770189 Fig. 269 Display 1 "Sensor test" shows the current voltages and settings for the "AutoScan" function. - Page 361 Info centre "EasyTouch" Screen description display 1 "Sensor test" Screen display/icons/description D1101 AutoScan voltage Ub . . . D1101 Supply voltage of the sensor in V. D1103 AutoScan signal LED 1 . . . D1103 Supply voltage of the signal LED 1 of the sensor in V. D1104 AutoScan signal LED 2 .
-
Page 362: Menu 4-1-11 Diagnostics Electronics
Info centre "EasyTouch" 8.8.1.12 Menu 4-1-11 Diagnostics electronics Fig. 270 • Select menu 4-1-11 “Electronics”. The “Electronics” diagnostics menu is divided into four displays: – “Sensor test KMC2” Display 1 – “Sensor test KMC3” Display 2 – “Sensor test DIOM” Display 3 –... - Page 363 Info centre "EasyTouch" Screen display/icons/description KMC2 volt. 8V anal..mV D612 Supply voltage 8 V (analogue) for the outputs of the KMC2 in mV. KMC2 Battery 3V . . . mV D613 Current voltage of the back-up battery of the KMC2 in mV (SETPOINT = 3 V). D614 KMC2 load voltage 12V1 .
- Page 364 Info centre "EasyTouch" Display 2 "Sensor test KMC3" BX500143 Fig. 272 The display 2 "Sensor test KMC3" can be used to check the input and output voltages at the control unit A3 "KMC3". Furthermore, the value of the terminating resistor fitted in the control unit can be checked.
- Page 365 Info centre "EasyTouch" Screen display/icons/description D614 KMC3 load voltage 12V4 . . . mV D717 Supply voltage +12V4 for the outputs of the KMC3 in mV..Ohm R164 KMC3 Adr. CAN download . . . Digits R164 Resistance of the terminating resistor fitted in ohm and digits.
- Page 366 Info centre "EasyTouch" Display 3 “Sensor test DIOM“ Fig. 273 In display 3 “Sensor test DIOM”, the input and output voltages and currents present at control unit A6 “DIOM” can be checked. Mask description display 3 “Sensor test DIOM” Operating Mask display/symbols/description equipment designation...
- Page 367 Info centre "EasyTouch" Operating Mask display/symbols/description equipment designation D1008 DIOS current total . . . A Actual current intensity (sum) of outputs „DIG_OUT_5 … DIG_OUT_8“ as D1008 well as „PWM_OUT_5 … PWM_OUT_8“ of DIOM in A. D1010 DIOS Ub . . . V Power supply voltage for outputs „DIG_OUT_9 …...
- Page 368 Info centre "EasyTouch" Display 4 "Sensor test Autopilot" BX500144 Fig. 274 The display 4 "Sensor test Autopilot" can be used to check the input and output voltages and currents at the control unit A5 "Autopilot". Mask description display 4 "Sensor test Autopilot" Screen display/icons/description D903 Autopilot voltage HS01-3 .
-
Page 369: Menu 4-1-12 Diagnostics Work
Info centre "EasyTouch" 8.8.1.13 Menu 4-1-12 Diagnostics work Fig. 275 • Select menu 4-1-12 “Work”. The “Work” diagnostics menu is divided into the following displays: – “Sensor test” Display 1 – “Actuator test” Displays 2 - 6 – “Sensor test” Display 7 –... - Page 370 Info centre "EasyTouch" Screen description display 1 "Sensor test" Screen display/icons/description B20 Return suction filter 1 Status of "Return suction filter" sensor. B43 Hydraulic oil filling level Status of "filling level, oil tank" sensor. B44 Filling level fuel tank . . . % Filling level fuel tank Current sensor value as %.
- Page 371 Info centre "EasyTouch" Display 2 “Actuator test” BX500155 Fig. 277 The display 2 "Actuator test" can be used to test the actuators for the main coupling and the coastdown alarm. Mask description display 2 "Actuator test" Screen display/icons/description D716 KMC3 load voltage 12V3 .
- Page 372 Info centre "EasyTouch" Display 3 “Actuator test” BX500186 Fig. 278 The display 3 "Actuator test" can be used to test the actuators for the front hydraulics. If impermissible values occur which require error correction, further information can be found in the "Work sensors"...
- Page 373 Info centre "EasyTouch" Display 4 "Actuator test" BX500187 Fig. 279 The display 4 "Actuator test" can be used to test the actuators for the auxiliary hydraulics. Mask description display 4 "Actuator test" Screen display/icons/description D1020 Current Y51 . . . mA Auxiliary hydraulics up (I A) Current amperage in mA.
- Page 374 Info centre "EasyTouch" Switching actuators on/off If all switching-on conditions for the actuator test are fulfilled, are displayed and the actuators displayed are released. These can be switched on and off using the numerical keys. Icon Description Switch on actuator Switch off actuator Auxiliary hydraulics up (I A) Auxiliary hydraulics down...
- Page 375 Info centre "EasyTouch" Display 5 "Actuator test" BX770190 Fig. 280 The display 5 "Actuator test" can be used to test the actuators for the intake cleaning and the "Grass/Maize" storage switch. Furthermore, the signal for executing the moisture measurement can be tested. Mask description display 5 "Actuator test"...
- Page 376 Info centre "EasyTouch" Display 6 "Actuator test" BX770191 Fig. 281 The display 6 "Actuator test" can be used to test the actuators for the silage additive system and the central lubrication. Mask description display 6 "Actuator test" Screen display/icons/description B60 Silage additives input .
- Page 377 Info centre "EasyTouch" Switching actuators on/off If all switching-on conditions for the actuator test are fulfilled, are displayed and the actuators displayed are released. These can be switched on and off using the numerical keys. Icon Description Switch on actuator Switch off actuator Molasses add-on (optional) Silage additives pump...
- Page 378 Info centre "EasyTouch" Display 7 "Sensor test" Fig. 282 The display 7 "Sensor test" can be used to test the clamping cylinder for the main belt. Screen description display 7 "Sensor test" Screen display/icons/description Current status "Intake/front attachment". Current status of the sensor "clamping cylinder main belt". .
- Page 379 Info centre "EasyTouch" Status displays Actuator Actuator Actuator Actuator Description status status status status active inactive released Error Intake/front attachment forwards Intake/front attachment backwards Intake/front attachment Table 45 Status Status Description extended retracted Position of clamping cylinder main belt Table 46 Status ON Status OFF Description...
- Page 380 Info centre "EasyTouch" Display 8 "Sensor test" BX770207 Fig. 283 Display 8 "Sensor test" shows the current measurement results of the sensors and actuators of the main drive brake. Screen description display 8 "Sensor test" Screen display/icons/description Voltage valve release front attachment backwards Y77 .
- Page 381 Info centre "EasyTouch" Display 9 "Sensor test" BX770192 Fig. 284 The display 9 "Sensor test" can be used to test the electric discharge distance adjustment. Screen description display 9 "Sensor test" Screen display/icons/description Status Discharge accelerator rear wall Indicates the current status of the adjusting motor. Current stage .
-
Page 382: Menu 4-1-13 Diagnostics Grind
Info centre "EasyTouch" 8.8.1.14 Menu 4-1-13 Diagnostics grind Fig. 285 • Select menu 4-1-13 "Grinding". The "Grinding" diagnostics menu consists of a display: – Display 1 "Sensor and actuator test" Display 1 "Sensor and actuator test" BX770200 Fig. 286 Display 1 "Sensor and actuator test" shows the current statuses and measurement results of the sensors and actuators for "Grind". - Page 383 Info centre "EasyTouch" Mask description display 1 "Sensor and actuator test" Screen display/icons/description Current status of the grinding flap. Current position of the grinding stone. B59 sensor Maintenance flap Grinding B36 sensor Grinding stone left B37 sensor Grinding stone right Current status of the sensors.
- Page 384 Info centre "EasyTouch" Switching actuators on/off Description Switch on Switch off actuator actuator Grinding flap closed Grinding stone to the left Grinding stone to the right Status displays Grinding stone position left Intermediate right Error position Grinding flap position closed Intermediate open unknown...
-
Page 385: Menu 4-1-14 Diagnostics Counterblade
Info centre "EasyTouch" 8.8.1.15 Menu 4-1-14 Diagnostics counterblade Fig.287 • Select menu 4-1-14 “Counterblade”. The “Counterblade” diagnostics menu consists of one display: – “Actuator test” Display 1 Display 1 "Actuator test" BX770202 Fig. 288 Display 1 "Actuator test" shows the current measurement results of the actuators for "Counterblade". - Page 386 Info centre "EasyTouch" Mask description display 1 "Actuator test" Screen display/icons/description Current status of the grinding flap. Current position of the grinding stone. D714 KMC3 . . . mV Load voltage 12V1 D714 Supply voltage +12V1 for the outputs of the KMC3 in mV. D716 KMC3 .
- Page 387 Info centre "EasyTouch" Switching actuators on/off • Adjust the counterblade carefully and evenly, left and right. • After the actuator test, move counterblade away somewhat Operating Description Switch on the equipment actuator designation Moving away counterblade left Moving up counterblade left Moving away counterblade right Moving up counterblade right Table 47...
-
Page 388: Menu 4-1-15 Diagnostics Corn Conditioner
Info centre "EasyTouch" 8.8.1.16 Menu 4-1-15 Diagnostics corn conditioner Fig. 289 • Select menu 4-1-15 “Corn Conditioner”. The “Corn Conditioner” diagnostics menu consists of one display: – “Actuator test” Display 1... - Page 389 Info centre "EasyTouch" Display 1 "Actuator test" BX770203 Fig. 290 The display 1 "Actuator test" can be used to test the actuator for adjusting the corn conditioner. Mask description display 1 "Actuator test" Screen display/icons/description D715 KMC3 Load voltage 12V2 .
-
Page 390: Menu 4-1-16 Diagnostics Multi-Function Lever
Info centre "EasyTouch" 8.8.1.17 Menu 4-1-16 Diagnostics multi-function lever Fig. 291 • Select menu 4-1-16 "Control lever". The diagnostics menu "Control lever" is divided into two displays: – Displays 1 and 2 "Sensor test" Display 1 "Sensor test" Fig. 292 The keys as well as the supply voltages of the control lever can be tested on display 1 "Sensor test". - Page 391 Internal supply voltage of the control lever in V..An internal error code can also be displayed following consultations with KRONE customer service. Current voltages for the axes of the joystick in V Current voltage on the slide controller in V Currently set driving stage.
- Page 392 Info centre "EasyTouch" Error messages Symbol Error number Description Undervoltage 12 V Overvoltage 12 V Undervoltage 8 V Fault pushbutton voltage 12 V Fault voltage LEDs Fault voltage Outs Parameter error Flash CheckSum Key pressed / fault keyboard Overtemperature. Fault CAN bus Fault LIN bus EEPROM CheckSum Restart by Watchdog...
- Page 393 Info centre "EasyTouch" Display 2 "Sensor test" Fig. 293 The keys as well as the supply voltages of the control lever can be tested on display 2 "Sensor test". Mask description display 2 "Sensor test" Mask display/symbols/description . . . V Supply voltage of the control lever in V.
-
Page 394: Menu 4-1-17 Diagnostics Cuc
Info centre "EasyTouch" 8.8.1.18 Menu 4-1-17 Diagnostics CUC Fig. 294 • Select menu 4-1-17 "Control unit". The diagnostics menu "Control unit" is divided into two displays: – Displays 1 and 2 "Sensor test"... - Page 395 Info centre "EasyTouch" Display 1 "Sensor test" BX770204 Fig. 295 The switches and keys as well as the supply voltages of the control unit console can be tested on display 1 "Sensor test". Mask description display 1 "Sensor test" Mask display/symbols/description Vlt.
- Page 396 Info centre "EasyTouch" Display 2 "Sensor test" BX770205 Fig. 296 The status of the seat switch can be checked on display 2 "Sensor test". Mask description display 2 "Sensor test" Screen display/icons/description Digits . . . Current voltage of the seat switch, read in from KMC3, in digits. The circle beside the digits indicates whether the driver is setting.
-
Page 397: Menu 4-1-18 Diagnostics Manual Operation
Info centre "EasyTouch" 8.8.1.19 Menu 4-1-18 Diagnostics manual operation Fig. 297 • Select menu 4-1-18 "Manual control unit". Display 1 "Sensor test" BX770206 Fig. 298 The display 1 "Sensor test" can be used to check the keys and internal supply voltage for manual operation. -
Page 398: Menu 4-1-19 Diagnostics Terminal
Info centre "EasyTouch" 8.8.1.20 Menu 4-1-19 Diagnostics terminal Fig. 299 • Select menu 4-1-19 “Terminal”. The “Terminal” diagnostics menu consists of a display: – “Sensor test” Display 1... - Page 399 Info centre "EasyTouch" Display 1 “Sensor test” Fig. 300 In display 1 “Sensor test”, the keys on the terminal and the incremental encoder can be checked. Status displays When activating the keys on the display or menu key or the incremental encoder, the respective symbol is highlighted in green.
-
Page 400: Menu 4-1-20 Diagnostics Rockprotect
Info centre "EasyTouch" 8.8.1.21 Menu 4-1-20 Diagnostics RockProtect Fig. 301 • Select menu 4-1-20 "RockProtect". The diagnostics menu "RockProtect" is divided into two displays: – Display 1 "Sensor and actuator test" – Display 2 "Actuator test" CAUTION Damage caused by deactivated "rock detection RockProtect"! If the "RockProtect"... - Page 401 Current sensor value in mV. D1200 RockProtect stop request . . . D1200 Status of the RockProtect, rock was detected/not detected. D1201 RockProtect stop lock . . . D1201 Status of the "RockProtect" function. If a fault occurs, please contact KRONE customer service!
- Page 402 Screen display/icons/description D1200 RockProtect stop request . . . D1200 Status of the RockProtect, rock was detected/not detected. D1201 RockProtect stop lock . . . D1201 Status of the "RockProtect" function. If a fault occurs, please contact KRONE customer service!
- Page 403 Info centre "EasyTouch" Switching actuators on/off Symbol Description Run function Cancel stop and release intake. Table 63 Status displays Status Status Description inactive Active "RockProtect" function Table 64...
-
Page 404: Menu 4-1-21 Diagnostics Moisture
Info centre "EasyTouch" 8.8.1.22 Menu 4-1-21 Diagnostics moisture Fig. 304 • Select menu 4-1-21 "Moisture". The "Moisture" diagnostics menu consists of a display: – Display 1 "Sensor and actuator test" Display 1 "Sensor and actuator test" Fig. 305 Display 1 "Sensor and actuator test" shows the current voltages and measured values for the "moisture measurement"... - Page 405 Info centre "EasyTouch" Mask description display 1 "Sensor and actuator test" Screen display/icons/description Moisture content ..Current moisture content in %. °C Temperature . . . Current internal temperature of the NIR sensor in ° C. Volt.
-
Page 406: Menu 4-2 Error List
Info centre "EasyTouch" Menu 4-2 Error List BX500120 Fig. 306 The main menu level is active. • Select main menu 4-2 by using the incremental encoder. • Press incremental encoder. The error list is displayed. Icon Explanation Current errors Error memory Current errors diesel engine Error memory diesel engine Current errors... - Page 407 Info centre "EasyTouch" Error Storage BX500121_2 Fig. 307 • Press the key under to display the error storage. The error storage is chronologically arranged. The date, time, status, error numbers and designation are displayed. Status C = Error has come (Come) G = Error has gone (Gone) A = Error acknowledged Menu control:...
- Page 408 Info centre "EasyTouch" Current diesel engine errors BX500123_4 Fig. 308 • Press the key under to display the current diesel engine errors. The display shows the list of errors with the current diesel engine errors. The error codes are displayed with a sequential number. Menu field (1) indicates the number of alarms present.
- Page 409 Info centre "EasyTouch" Diesel engine error storage BX500124_3 Fig. 309 • Press the key under to display the diesel engine error storage. The display shows the error storage (chronologically) of the diesel engine. The error codes, status, date and time are displayed with a sequential number. Menu field (1) indicates the number of alarms present.
- Page 410 Info centre "EasyTouch" Error list "Informative events" and error list "Service events" BX500121_2 Fig. 310 Menu control: Activating the key allows you to scroll up. Activating the key allows you to scroll up one line at a time. Activating the key allows you to scroll down one line at a time.
- Page 411 Info centre "EasyTouch" BX500664 Fig. 311 Error list "Service events" The "Service events" menu contains the following events with the event time: – 60000 Update completed – 60001 Service performed for diesel engine 1 – 60002 Service performed for diesel engine 2 –...
-
Page 412: Menu 4-3 "Service Level
The main menu level is active. • Use the incremental encoder to choose menu 4-3 Service level. • Press the incremental encoder. The "Service level" is protected by a password and is accessible only to the KRONE Customer Service personnel. -
Page 413: Menu 4-4 Information
Info centre "EasyTouch" 8.11 Menu 4-4 Information BX500127_1 Fig. 313 The “Diagnostics” main menu is active. • Use the incremental encoder to select menu 4-4 “Information”. • Press incremental encoder. The display shows menu level 4-4 “Information”. The “Information” menu is divided into three menus: Icon Designation Menu 4-4-1 Control Lever... -
Page 414: Menu 4-4-2 Software
Info centre "EasyTouch" 8.11.2 Menu 4-4-2 Software BX500130_1 Fig. 315 Menu 4-4 Information is open. • Using the incremental encoder, choose menu 4-4-2 Software. • Press the incremental encoder. The display shows the "Software" menu. Software page 1 BX500131_2 Fig. 316 Terminal ... - Page 415 Info centre "EasyTouch" Software page 2 BX500132_1 Fig. 317 Control lever Manual operation • Press the key or turn the incremental encoder to display the third page. Software page 3 BX500133_1 Fig. 318 Page 3 Automatic steering system Metal detection •...
- Page 416 Info centre "EasyTouch" Software page 4 BX500134_1 Fig. 319 DIOM AutoScan (optional) RockProtect (optional) NIR sensor (optional) Printer (optional) • Press the key or turn the incremental encoder to display the first page. • Press the key to show or hide additional information on all pages.
-
Page 417: Menu 4-4-3 Machine
Info centre "EasyTouch" 8.11.3 Menu 4-4-3 machine Fig. 320 The Information menu is open. • Select menu 4-4-3 Machine with the incremental encoder. • Press the incremental encoder. The display shows the machine number of the machine. -
Page 418: Menu 4-4-8 Software Package Display
Info centre "EasyTouch" 8.11.4 Menu 4-4-8 Software package display BX851010 Fig. 321 The Information menu is open. • Using the incremental encoder, choose menu 4-4-8 Software package display. • Press the incremental encoder. The display shows the software package: Pos. Meaning BiG X FuelSave or BiG X FuelSave Advanced BiG X ISOBUS ECU... -
Page 419: Error Messages
761. NOTE Error messages for the diesel engine are also indicated by the lighting up of the engine warning light Engine faults are not shown in the error list. If an engine fault occurs, always contact your KRONE dealer. -
Page 420: Instruction Message
Info centre "EasyTouch" 8.12.2 Instruction message The instruction messages are included with an error number in the list of error messages in the appendix. BX500162 Fig. 324 If one or more conditions are not fulfilled when an action is executed, the display shows the corresponding instruction message. -
Page 421: Warning Message
Info centre "EasyTouch" 8.12.3 Warning message The warning messages are included with an error number in the list of error messages in the appendix. BX500184 Fig. 325 If one or more conditions are not fulfilled when an action is executed, the corresponding warning message appears. -
Page 422: Printing Customer Data
Info centre "EasyTouch" 8.13 Printing customer data BX500169 Fig. 326 Establishing a connection to the printer: • Connect the printer via the diagnostics socket in the console in the cabin. • Insert the paper as explained in the printer's operating instructions. The printer is ready for operation. -
Page 423: Print Menu Customer Data
Info centre "EasyTouch" 8.13.1.1 Print menu customer data BX500193 Fig. 327 Displays on the display Item Explanation Counter will not be printed. Counter is selected for printing. Operating the menu: • Press the key to choose either the entered or last selected cultivated area counter in the customer data counter menu to be printed. - Page 424 Info centre "EasyTouch" Fig. 328 Item Explanation Name and address of the machine operator/contractor (can be adapted in mask 1-9). Date of printout Time of printout Name and address of customer Field number Diesel engine operating hours Chopping drum operating hours Working hours Surface counter Overall distance...
- Page 425 Info centre "EasyTouch" Print a customer record: • Press the key to choose the customer record displayed for the pressure. • Press the key to start the printer. Print all customer records: • Press the key to choose all customer records to be printed. •...
-
Page 426: Printing Cultivated Area Counter State/States
Info centre "EasyTouch" 8.13.1.2 Printing cultivated area counter state/states BX500193 Fig. 329 • Press the key to choose either the entered or last selected cultivated area counter in the customer data counter menu to be printed. • Press the key to start printing. •... -
Page 427: Accessing The Constant Power Setting Menu (Optional)
Info centre "EasyTouch" 8.14 Accessing the constant power setting menu (optional) BX500012_2 Fig. 330 • In the working screen, press the key to switch to the memory keys/machine settings mask. • Press the key to call up the next constant power settings page. •... -
Page 428: Entering The Degree Of Speed Reduction
Info centre "EasyTouch" 8.14.1 Entering the Degree of Speed Reduction Speed reduction can be set dependent on speed and engine load. – In the case of speed-dependent control, the driving speed is automatically adjusted so that the engine speed is reduced until the specified setpoint engine speed is reached. At a rated speed of 2,000 rpm and a specified speed reduction of 10%, the engine speed is restricted to 1,800 rpm. - Page 429 Info centre "EasyTouch" Speed-dependent input: • Press the key to select speed-dependent input (1). • Select the input field for speed reduction (6) by using the incremental encoder. The input field is highlighted in colour. • Press the incremental encoder to jump to the input field. The input field is highlighted in yellow.
-
Page 430: Setting The Maximum Speed
Info centre "EasyTouch" 8.14.2 Setting the maximum speed BX500608_1 Fig. 332 • Using the incremental encoder, choose the input field for maximum speed (1). The input field is highlighted in colour. • Press the incremental encoder to jump to the input field. The input field is highlighted in yellow. -
Page 431: Setting The Minimum Speed
Info centre "EasyTouch" 8.14.3 Setting the minimum speed BX500609_1 Fig. 333 • Using the incremental encoder, choose the input field for minimum speed (1). The input field is highlighted in colour. • Press the incremental encoder to jump to the input field. The input field is highlighted in yellow. -
Page 432: Operation Of The Internal Silage Additive System
Info centre "EasyTouch" 8.15 Operation of the Internal Silage Additive System The following prerequisites must be met for operating the silage agent system: • Quick-stop switch console: OFF • Quick-stop switch manual operation: OFF • Switch the release switch road/field to field mode. BXSI00001 Fig. - Page 433 Info centre "EasyTouch" BXSI00002 Fig. 335 • Press the Terminal button in the main screen. The setting options available for the internal silage agent system are displayed: 1Button Finish the settings and call up the main screen 2Button Calibrate the internal silage agent system 3Button Cancel the currently executed function of the silage agent system 4Button...
-
Page 434: Calibration Of The Internal Silage Additives Unit
Info centre "EasyTouch" 8.16 Calibration of the internal silage additives unit The silage additives unit should be calibrated prior to each use in order to obtain maximum precision. Notice Prior to every calibration, fill the silage additives unit with tanked silage additives up to the nozzle by manually controlling the silage additives pump in continuous operation. -
Page 435: Recording The Characteristic Line
Info centre "EasyTouch" 8.17 Recording the characteristic line The characteristic line can be recorded with an existing flow sensor only. The characteristic line must be recorded whenever there is a change to the silage additives unit (e.g. change to the injection point or nozzle) or silage additives, as the recording of the characteristic line specifies the minimum and maximum silage additives quantity which can be set on the terminal. -
Page 436: Use
Info centre "EasyTouch" 8.17.1 BXSI00002 Fig. 337 The flow sensor monitors the flow of silage additives through the silage additives unit. If the flow sensor is not ready for use, it must be switched off in the settings of the silage additives unit (input field 9). -
Page 437: Continuous Operation
Info centre "EasyTouch" When operating the silage additives unit, check whether the mounted nozzle produces the required spray pattern and whether the material is wetted with the silage additives. Colour coding Dosing quantity Blue nozzle 2.5 l/min (standard) White nozzle >2.5 l/min 8.17.2 Continuous operation... -
Page 438: Automatic Mode
Info centre "EasyTouch" 8.17.3 Automatic mode In Automatic mode, the silage additives is dosed depending on time or crop throughput (with CropControl only). Here, the pumping of silage additives is switched off when the machine is not chopping. The active pumping of silage additives is indicated by a green background colour on the status display. -
Page 439: Crop Flow Cleaning Headland
Info centre "EasyTouch" 8.17.4 Crop flow cleaning headland "Crop flow cleaning headland" mode is used to prevent the crop flow plates from sticking due to crops which contain sugar. "Crop flow cleaning headland" mode is the most effective method of cleaning the crop flow plates, provided the "water injection"... -
Page 440: Error Messages
Info centre "EasyTouch" 8.18 Error Messages BXSI00005 Fig. 340 The "8000 silage agent tank empty" error message can have the following causes: • No silage agent in the tank • The flow sensor is mechanically or electrically defective • The electrical connections of the flow sensor are defective •... -
Page 441: Cleaning And Maintenance
Info centre "EasyTouch" 8.19 Cleaning and Maintenance Danger! - When performing repair, maintenance or cleaning work on the machine , or in the case of technical intervention, drive elements may start moving. Effect: Danger to life, injuries or damage to the machine. •... -
Page 442: Commissioning
Commissioning Commissioning This chapter describes the assembly and set-up work on the machine which may be performed by qualified technicians only. The note "Personnel qualification of the qualified technicians" applies, see chapter Safety, "Basic safety notes". WARNING Risk of injury or damage to the machine due to faulty initial operation If the initial operation is carried out incorrectly or incompletely, the machine may present defects. - Page 443 Commissioning Hydraulic system: – Check the hydraulic system for leaks. Cabin: – Check the function of the indicator lamps. – Check the position of the outside and inside mirrors and the camera monitoring (optional). Set if necessary. – Adjust the driver's seat and the steering column to the driver. –...
- Page 444 Commissioning Service brake: Check the function of the operating brake. WARNING Risk of injury due to defective operating brake! If the operating brake has a restricted function, the machine cannot be brought to a standstill in time and people and material assets are at risk. •...
-
Page 445: Mounting Warning Panels In The Operating Position
Commissioning Mounting warning panels in the operating position Fig. 341 If the warning panels (1) have been mounted in alignment with the machine for transportation, they must be located in operating position (a) before the machine is started up for the first time. To adjust the position of the warning panels to the width of the tyres (2 settings are position): •... -
Page 446: Mounting Fire Extinguisher In The Holder
Commissioning Mounting fire extinguisher in the holder Fig. 342 • Shut down and safeguard the machine. • Insert the fire extinguisher (1) into the support / holder at top left of the machine so that the operating instructions on the type plate are legible and point towards the outside. WARNING! Risk of injury due to falling fire extinguisher! In order to secure the fire extinguisher, adjust the tensioning straps with adequate tension to the circumference of the fire extinguisher. -
Page 447: Start-Up
Start-up Start-up 10.1 Check before Start-up NOTE Compliance with the stipulated checks on the machine significantly increases the safety and the service life of the machine. A machine with established defects must not be started. • If it is established that the machine has defects, shut down the machine and eliminate these defects or have them eliminated by technicians. - Page 448 Start-up Hydraulics: – Check hydraulic oil level. – Check hydraulic system for leaks. Gearbox: – Check the oil level of all gearboxes. Drives: – Check drive belts. – Clean the coupling journal on the machine and grease on the coupling surfaces by means of multi-purpose grease.
-
Page 449: Silage Additive System
Start-up 10.2 Silage additive system 10.2.1 Silage Additives Unit (internal) WARNING Danger of injury due to silage additives! If handled improperly, the chemicals used in the silage additive system may damage health. • The silage additive system may be operated only by persons who are familiar with these operating instructions and the safety data sheet of the silage additive manufacturer. -
Page 450: Silage Additive System (External)
Start-up 10.2.2 Silage additive system (external) Abb. 344 There is an option to connect an external silage additive system. The electrical connection (1) for the silage additive system is located in the cooler compartment to the right beside the channel support. It is a 3-pin plug bearing the designation XY60. No fixed location is stipulated for the silage additive system and the injection of silage additives. -
Page 451: Start-Up - Grass Mode
Start-up - Grass mode Start-up - Grass mode This chapter describes the conversion from maize mode to grass mode. • Installing the grass channel, see page 458. • Setting the rear wall of discharge accelerator "Grass mode", see page 594. •... -
Page 452: Operating The Cable Winch
Start-up - Grass mode 11.1 Operating the cable winch WARNING! – Risk of injury and damage to the machine due to the cable winch! Careless operation of the cable winch can result in injury and damage to the machine. • Only connect the remote control when the cable winch is required. -
Page 453: Removing The Corn Conditioner
Start-up - Grass mode Method of Operation of Remote Control Fig. 347 Unwind the rope from the cable winch: • Press the momentary switch (1). Wind the rope onto the cable winch: • Press the momentary switch (2). 11.2 Removing the corn conditioner Fig. - Page 454 Start-up - Grass mode Prerequisites for installation and removal: – Diesel engine is switched off. – The side flap at the front right is open. – The machine is shut down and safeguarded, see chapter Safety, "Shutting down and safeguarding the machine". Fig.
- Page 455 Start-up - Grass mode Removing the corn conditioner Fig. 351 • Relieve the power belt (2). To do this push the tension roll (4) back manually. • Remove the power belt (2) from the belt pulley (3). Fig. 352 • Move the cable winch hook (2) through the rope guide (1) and hook it in the corn conditioner (3).
- Page 456 Start-up - Grass mode WARNING! – Risk of injury due to suspended load! There is a danger for persons due to falling load. • Pay attention to sufficient carrying load of the hoist. • Do not stay under the suspended load. Fig.
- Page 457 Start-up - Grass mode Fig. 355 • Dismount the safety plates (3) on both sides of the corn conditioner hooks. • Pull corn conditioner up by using the cable winch until the hooks from the forage harvester holder are released. •...
-
Page 458: Installing The Grass Channel
Start-up - Grass mode 11.3 Installing the grass channel WARNING! – Risk of injury due to suspended load! There is a danger for persons due to falling load. • Pay attention to sufficient carrying load of the hoist. • Do not stay under the suspended load. Prerequisites for installation and removal: –... - Page 459 Start-up - Grass mode WHBBX01073 Fig. 359 Depending on the actual design, the grass channel weighs approx. 30 kg. • Loosen the wing nut (1) at the crane splice (2) of the grass channel. • Raise the crane splice (2) as far as possible and tighten the wing nut (1) to fix it into position.
- Page 460 Start-up - Grass mode Fig. 361 • Place the grass channel (4) in the mounting position under the machine. • Catch the hook (1) of the cable winch in the eye (2). • Use the cable winch to raise the grass channel (4) until the retainer hooks (3) are approximately at the height of the receivers (5).
- Page 461 Start-up - Grass mode Fig. 363 • Dismount the deflection pulley (1). BX770228 Fig. 364 • Catch the hook (1) of the cable winch into the crane splice (5). • Raise the grass channel (4) with the help of the cable winch until the bolts (3) on the grass channel are introduced into the receivers (2) on the rear wall.
- Page 462 Start-up - Grass mode Fig. 366 • Actuate the spring lock (1) to release the lock on the rear wall (2). NOTICE The spring locks (1) must be released, otherwise the rear wall will not be flexible and crest lines may occur in the crop flow.
- Page 463 Start-up - Grass mode BX850857 Fig. 367 • Tighten the screw connection (1) on both sides of the machine. • Fit the disc (3) and the counter nut (2) on the right side of the machine. Fig. 368 • Loosen the hook (1) on the cable winch and retract the cable all the way. •...
-
Page 464: Start-Up - Maize Mode
Start-up - Maize mode Start-up - Maize mode This chapter describes the conversion from grass mode to maize mode. WARNING Risk of injury from unexpected movement of the lifting unit! When working on the lifting unit or when opening/closing the stop cocks on the lifting cylinders, the lifting unit and the installed components may move unexpectedly. -
Page 465: Operating The Cable Winch
Start-up - Maize mode 12.1 Operating the cable winch WARNING! – Risk of injury and damage to the machine due to the cable winch! Careless operation of the cable winch can result in injury and damage to the machine. • Only connect the remote control when the cable winch is required. - Page 466 Start-up - Maize mode Method of Operation of Remote Control Fig. 370 Unwind the rope from the cable winch: • Press the momentary switch (1). Wind the rope onto the cable winch: • Press the momentary switch (2).
-
Page 467: Removing The Grass Channel
Start-up - Maize mode 12.2 Removing the grass channel WARNING! – Risk of injury due to suspended load! There is a danger for persons due to falling load. • Pay attention to sufficient carrying load of the hoist. • Do not stay under the suspended load. Prerequisites for installation and removal: –... - Page 468 Start-up - Maize mode Fig. 373 Depending on the actual design, the grass channel weighs approx. 30 kg. • Loosen the wing nut (1) at the crane splice (2) of the grass channel. • Raise the crane splice (2) as far as possible and tighten the wing nut (1) to fix it into position.
- Page 469 Start-up - Maize mode Fig. 375 Notice The screw connection (2) on the left side on the grass channel must be dismounted first. The screw connections (2) on the grass channel can be accessed from outside the cooler compartment. • Dismount the screw connection (2) on the left side of the machine.
- Page 470 Start-up - Maize mode Fig. 377 • Fully lower the grass channel • Position the cable roller guide (3) and use the screw connection (4) to screw it to the lower cross brace of the rear wall of the discharge accelerator (right borehole in the direction of travel) •...
-
Page 471: Installing The Corn Conditioner
Start-up - Maize mode 12.3 Installing the corn conditioner Fig. 379 • Measure roller distance of corn conditioner for calibration before installation, see page 290. • Make sure that the rear wall is secured by both spring locks (1) left and right. •... - Page 472 Start-up - Maize mode Fig. 381 • Put kraftband (3) in place as shown in the diagram. • Push corn conditioner with transportation trailer (1) and fitted kraftband (3) under the forage harvester and align it so that the receiving hooks of the corn conditioner (2) are in front of the holders of forage harvester suspension.
- Page 473 Start-up - Maize mode Fig. 383 • Lower corn conditioner until the cable (3) is loosely in the cable deflection. Note Make sure that the corn conditioner is hooked in correctly. WARNING! – Risk of injury due to suspended load! There is a danger for persons due to falling load.
- Page 474 Start-up - Maize mode • Loosely mount the screw (1) with 1 conical washer (5), 1 ball socket (4) and 1 washer (3) on the left and right sides until the screw (1) completely fills the clamping block (2).
- Page 475 Start-up - Maize mode Fig. 386 • Loosen the lock on the rear wall of discharge accelerator (spring lock). Notice The corn conditioner must be aligned with the belt pulley of the discharge accelerator. • Tighten the screw on both sides and secure on the right side of the machine (2) with the counter nut (3).
- Page 476 Start-up - Maize mode Fig. 388 • Place the belt (1) over the belt pulley (2); if required, manually press the tension roll back. Fig. 389 • Connect the central lubrication plug (2) of the corn conditioner to the central lubrication coupling (1).
- Page 477 Start-up - Maize mode Fig. 391 • Secure the maintenance flap (1) on the right side of the machine with the screws. Fig. 392 • Close the tool box (1) and flap for the cooler compartment on the right side. •...
- Page 478 Start-up - Maize mode Open the stop cock for the corn conditioner tension roll Fig. 394 The shut-off valve for the corn conditioner tensioning roller (1) must be in the position II (open). • If necessary open the stop cock (1) (position II).
-
Page 479: Removing/Installing The Nir Sensor For Moisture Measurement
Start-up - Maize mode 12.3.1 Removing/installing the NIR sensor for moisture measurement Removing the NIR sensor Fig. 395 • Unscrew the wing nuts (1) and remove with the disc. • Open the protective lid (2) on the spout. Fig. 396 •... - Page 480 Start-up - Maize mode Mounting the closing plate NOTE For operation without an NIR sensor, a closing plate must be mounted to guarantee the function of the machine. Fig. 397 • Loosely screw the screws (1) and nuts (2) onto the closing plate (3). Fig.
- Page 481 Start-up - Maize mode NOTE To avoid damage to the rear window of the cabin, close and secure the protective lid on the NIR sensor before raising the spout. Fig. 399 • Raise the spout. • Open the inspection flap (1) on the underside of the spout. •...
- Page 482 Start-up - Maize mode Installing the NIR sensor Fig. 401 • Loosen the wing nuts (1) and open the protective lid (2). Fig. 402 • Loosen and disconnect the plug connection (3) of the connector cable on the closing plate (2). •...
- Page 483 Start-up - Maize mode Fig. 404 NOTE To avoid damage to the rear window of the cabin, close and secure the protective lid on the NIR sensor before raising the spout. • Raise the spout. • Open the inspection flap (1) on the underside of the spout. •...
- Page 484 Start-up - Maize mode Fig. 405 • Lock the 4 screws (3) with the nuts (4) (tightening torque 3.5 Nm). • Secure the NIR sensor (1) with the wing nuts (2) and the associated discs. Fig. 406 • Close the inspection flap (1).
-
Page 485: Converting The Pendulum Frame Cylinder For Maize Mode
Start-up - Maize mode 12.4 Converting the pendulum frame cylinder for maize mode Fig. 407 • Move three-way stopcock (2) to "Maize" position, see information label. Replace the tension spring with the hydraulic cylinder Prerequisites: – Front attachment has been removed. –... - Page 486 Start-up - Maize mode Fig. 409 • Loosen the counter nut (2) on the spindle (1) • Remove spindle (1) • Remove bolt (4) from the spring (3) and remove the spring • Insert the hydraulic cylinder (6) • Mount and secure the bolt (7) and the screw (5) Note After installing the front attachment, the pendulum frame must be unlocked.
-
Page 487: Further Conversion Work
Start-up - Maize mode 12.5 Further conversion work Turning the conveyor bars around Fig. 411 The pre-compression roller (1) features conveyor bars which can be used on alternating sides. One of the sides of the conveyor bar is smooth, while the other is designed with teeth. Experience shows that the smooth side works well for use in grass silage while the toothed side works well with maize. - Page 488 Start-up - Maize mode Installing grain capture plates • Remove the front attachment, see page 502. • Fully lift the lifting unit Fig. 412 • Close two-way stopcock (1) and three-way stopcock (2), see information label Fig. 413 • Insert the front grain capture plate (1) and tighten the screws (2) on both sides...
- Page 489 Start-up - Maize mode Fig. 414 • Loosely install the bracket (1) at the rear grain capture plate using the screws (2) • Inserting the rear grain capture sheet (3). This plate must be located above the front grain capture sheet, with the bevelled side facing upwards, the slots facing the rear and the bracket facing downwards.
- Page 490 Start-up - Maize mode Cutting blade / Counterblade • Replace the grass blade with the maize blade for chopping drum with 20, 28, 36 blades see page 694, for chopping drum with 40, 48 blades see page 701readjust chopping blades and/or replace for chopping drum with 40, 48 blades.
-
Page 491: Start-Up - Additional Axle
Start-up – additional axle Start-up – additional axle 13.1 Additional axle The additional axle is required in order to reduce the axle load on the front axle. This is a prerequisite for obtaining the required approval for the machine in combination with the various front attachments (see the accompanying documents for the machine). - Page 492 Start-up – additional axle Fig. 418 • Dismount the upper bolt (2) of the hydraulic cylinder on both sides and put the hydraulic cylinder to one side • Fully lower the additional axle using the cable winch and secure the wheels of the additional axle against rolling away •...
-
Page 493: Installing The Additional Axle
Start-up – additional axle 13.1.2 Installing the additional axle Fig. 420 • Reverse the machine and position it above the additional axle (1) • Raise the additional axle (1) with a car jack (2) • Install the front bolt (3) of the axle suspension on both sides Fig. -
Page 494: Setting The Pressure Of The Additional Axle On The Pressure Limiting Valve
Start-up – additional axle 13.1.3 Setting the Pressure of the Additional Axle on the Pressure Limiting Valve Fig. 422 • Read off the current pressure in menu 4-1-6 “Traction Drive Diagnostics”, display 2 “Sensor test additional axle”, see page 336. •... -
Page 495: Function Test Additional Axle
Start-up – additional axle 13.1.4 Function test additional axle BX850866 Fig. 423 • In the terminal, select menu 4-1-6 "Traction drive". • Press the key to call up page 2 "Sensor test additional axle" of the menu. • Check all voltages in menu "Sensor test additional axle". •... -
Page 496: Start-Up - Spout Extension
Start-up – Spout extension Start-up – Spout extension 14.1 Removing/attaching the spout extension/spout end piece When you convert from grass mode to maize mode or vice versa, the length of the spout must be adapted to the front attachment. WARNING Risk of injury due to suspended load! There is a danger for persons due to falling load. -
Page 497: Weights
Start-up – Spout extension 14.1.1 Weights The following table lists the weights of the spout end piece and the spout extensions: Component Weight End piece 8-row approx. 80 kg Extension 10-row approx. 112 kg Extension 12-row approx. 165 kg Extension 14-row approx. -
Page 498: Attaching The Spout Extension (12- And 14-Row)
Start-up – Spout extension 14.1.3 Attaching the spout extension (12- and 14-row) Fig. 426 • Pick up the spout extension (1) using a suitable sling. • Hook the spout extension (1) into the receivers (2) of the spout basic (5). •... -
Page 499: Attaching The Spout End Piece (8- And 10-Row)
Start-up – Spout extension 14.1.4 Attaching the spout end piece (8- and 10-row) Fig. 429 • Pick up the spout end piece (1) using a suitable sling. • Hook the spout end piece (1) into the receivers (3) of the spout basic (2). •... -
Page 500: Removing The Spout End Piece (8- And 10-Row)
Start-up – Spout extension 14.1.5 Removing the spout end piece (8- and 10-row) Fig. 431 Disconnect the spout end piece (2) and the spout basic (5): • Use a suitable sling to secure the spout end piece (2) from falling. •... -
Page 501: Setting The Start-Up Safety Mechanism
Start-up – Spout extension 14.1.6 Setting the start-up safety mechanism Fig. 433 The start-up safety mechanism must be set via the compression spring (6) to match the mounted spout extension. This prevents the forces on the spout from becoming too great if the start-up safety mechanism triggers. -
Page 502: Start-Up - Attaching And Removing The Front Attachment
Start-up – Attaching and removing the front attachment Start-up – Attaching and removing the front attachment WARNING Risk of injury due to unexpected movement of the front attachment and moving components! There is an increased risk of injury when attaching and removing front attachments to or from the machine. -
Page 503: Adapting The Adapter Frame Of The Front Attachment
Start-up – Attaching and removing the front attachment 15.1 Adapting the adapter frame of the front attachment The locating points of the different front attachments must be adapted to the locating points of the pendulum frame before they are installed for the first time. Fig. -
Page 504: Preparing The Pendulum Frame For Installation Of The Front Attachment
Start-up – Attaching and removing the front attachment 15.2 Preparing the pendulum frame for installation of the front attachment The front attachment can only be attached to the pendulum frame when the holding claws are open. The pendulum frame must also be locked so that it cannot swivel sideways when the front attachment is attached. -
Page 505: Mounting The Front Attachment
Separate operating instructions for the respective front attachment are supplied, in which all relevant work steps and safety regulations are described in detail. The procedure for mounting the front attachment is explained using the example of the EasyFlow 300. The principle is identical for all KRONE front attachments. BX851033_1 Fig. 437 •... - Page 506 Start-up – Attaching and removing the front attachment Fig. 439 • Shut down and safeguard the machine, see chapter Safety -> Safety routines, "Shutting down and safeguarding the machine". WARNING Risk of injury from unexpected movement of the lifting unit! When working on the lifting unit or when opening/closing the stop cocks on the lifting cylinders, the lifting unit and the installed components may move unexpectedly.
- Page 507 Start-up – Attaching and removing the front attachment WHBBX01920_1 Fig. 441 • Ensure that the adapter frame is hooked correctly into the locating bolt and the locking hook on both sides. • Swivel the locking lever (1) down and secure it with the spring lock (2). •...
- Page 508 Start-up – Attaching and removing the front attachment WARNING Risk of injury from escaping hydraulic oil. The hydraulic system operates at very high pressure. Escaping hydraulic oil may seriously injure skin, limbs and eyes. Before connecting the hydraulic hoses to the forage harvester hydraulics, the hydraulic system must be depressurised on both sides.
- Page 509 Start-up – Attaching and removing the front attachment Fig. 442 • Turn the ignition key to position "II" • Switch the release switch road/field to field mode. Prior to connecting the hydraulic hoses, depressurise the system on both sides: • Press the keys (1) and (2) (red) or the keys (3) and (4) (blue) simultaneously to depressurise both hydraulic circuits.
- Page 510 Start-up – Attaching and removing the front attachment Occupancy of the connections Fig. 444 The identification of hydraulic connections (I - IV) is also on the hydraulic hoses of the front attachment. Pick-up Extend guide wheels Retract guide wheels IV Roller crop guide Maize header Raise plant divider lower plant divider...
- Page 511 Start-up – Attaching and removing the front attachment Fig. 446 • Swivel socket pin (3) of the parking supports (4) by 180° upward on both sides and pull them out. • Push the parking supports (4) upward and secure them with socket pins (3) in bore hole (5). Lock socket pin (3) downward by a rotation of 180°.
-
Page 512: Removing Easyflow
Start-up – Attaching and removing the front attachment 15.4 Removing EasyFlow WARNING Risk of injury from movement of the front attachment! If people are in the area of the front attachment when it is being raised or lowered and folded in or out, there is a risk that these people may be caught and injured by the front attachment or the lifting unit. - Page 513 Start-up – Attaching and removing the front attachment Fig. 450 For EasyCollect only: • Close the stop cock (1) on the front attachment. • Turn the ignition key to position "II" • Switch the release switch road/field to field mode. Fig.
-
Page 514: Switching Off Easyflow
Start-up – Attaching and removing the front attachment Fig. 452 • Detach the hydraulic lines (1) from the hydraulic couplings and seal using dust caps (2). Fig. 453 • Opening the locking lever (1): Swivel the locking lever (3) upwards and secure with the spring lock (2) •... -
Page 515: Start-Up - Attaching The Rear Weight
Start-up – attaching the rear weight Start-up – attaching the rear weight WARNING Risk of injury due to unexpected movements when operating the machine! If the rear weight and the front-mounted EasyCollect front attachment are not coordinated with each other, there is a risk that the machine may overturn when braked or when driving on slopes. - Page 516 Start-up – attaching the rear weight Attaching the rear weight For information on screw fastening material for assembly, refer to parts list in the accessories kit instructions of rear weight. Fig. 456 • Unscrew the four screws (5) and remove the tow coupling (4). Fig.
- Page 517 Start-up – attaching the rear weight Fig. 458 • Using a suitable lifting device, attach the basic weight (1) to the rear bumper of the machine in such a way that the connecting screws can be mounted. – the openings for a forklift (3), –...
-
Page 518: Driving And Transport
Driving and Transport Driving and Transport WARNING Risk of injury when driving on public highways! Due to the large dimensions of the machine, the unusual driving behaviour and the option of riding on the outside of the machine while it is being driven, the risk of accidents for machine personnel and third parties is increased. -
Page 519: Starting The Engine
Driving and Transport 17.1 Starting the engine WARNING Risk of poisoning from toxic exhaust gases! If the forage harvester is operated in closed rooms without adequate ventilation, the pollutant load increases in the air. • Never allow the engine to run in closed rooms without an extraction system. •... - Page 520 (4) control lamps light up briefly. • Check whether the control lamps go out. • If not, switch off the engine immediately and rectify the disturbance or call KRONE customer service. If the engine does not start within 20 seconds: •...
-
Page 521: Observing Indicator Lamps
Driving and Transport 17.1.1 Observing indicator lamps BX770210 Fig. 461 Charging warning light (12V), charging warning light (24V) The charging warning lights (1,2) light up when the ignition key is turned to ignition stages (I and II). Charging warning light (12V) The charging warning light goes out during the start process (12V). -
Page 522: Behaviour After The Engine Has Stalled
Driving and Transport 17.2 Behaviour after the engine has stalled CAUTION Engine will be damaged by the heat accumulation after the engine has stalled! If a warm engine stalls, the heat accumulation, caused by the lack of cooling, may damage the engine. - Page 523 Driving and Transport BX770173 Fig. 462 Item Designation Battery 12 V The machine has been fitted with three 12 V batteries. The batteries (1) and (2) are connected in series (voltage level 24 V). Loads of 12 V voltage level are supplied by the battery (3).
-
Page 524: Jump Starting The Machine
Driving and Transport 17.3 Jump starting the machine CAUTION! Damage to the machine by connecting the jump-start battery to the starter If the jump-start battery for jump-starting the machine is connected to the starter, the starter and the battery will be damaged. •... -
Page 525: Starting Up The Machine
• If an error message is indicated on the terminal, immediately stop and eliminate the error. If this is not possible, inform KRONE customer service or a KRONE dealer. • Adapt driving behaviour to the particular terrain and ground conditions. -
Page 526: Switching On Road Travel Mode
Driving and Transport 17.4.2 Switching on road travel mode Prerequisite for road travel of the machine: – The engine has been started. – The lifting unit is in transport position – The release switch "road/field" is switched to road travel. –... -
Page 527: Setting The Acceleration Behaviour
Driving and Transport 17.4.4 Setting the acceleration behaviour Fig. 466 Four different acceleration stages can be selected, even while driving, with the acceleration stage switch (2) attached to the multi-function lever (1). If the multi-function lever (1) is actuated constantly in one direction and at a constant engine speed, the driving speed will increase slowest in acceleration stage I and fastest in acceleration stage IV. -
Page 528: Reversing
Driving and Transport 17.5 Reversing Fig. 467 Starting in reverse from standstill NOTE An acoustic warning signal sounds when reversing. The parking brake is automatically released when the machine moves off. • Press and hold the activation key for traction drive (2). •... -
Page 529: Cruise Control
Driving and Transport 17.6 Cruise control The cruise control can be activated only when travelling forwards. When cruise control is activated, the machine is accelerated or decelerated with the set acceleration stage to the speed saved for operation with the cruise control. 17.6.1 Saving speed for operation with cruise control The speed is stored for the mode in which the machine is operating. -
Page 530: Activating Cruise Control
Driving and Transport 17.6.2 Activating cruise control Fig. 469 • While driving, push the multi-function lever (1) to the right without pressing the activation key. The saved speed is approached. The display shows the icon with the value of the set speed. -
Page 531: Stopping
Driving and Transport 17.7 Stopping The machine can be stopped either with the multi-function lever or with the foot brake. 17.7.1 Stopping with the multi-function lever Fig. 470 Stopping from forward travel using the multi-function lever: To decelerate the machine while driving forwards using the multi-function lever: •... -
Page 532: Stopping With The Foot Brake
Driving and Transport Quickly braking the machine using the multi-function lever Fig. 472 • Move the multi-function lever (1) to the left while driving. The machine decelerates until it comes to a standstill. 17.7.2 Stopping with the foot brake WARNING Risk of injury due to defective operating brake! If the operating brake has a restricted function, the machine cannot be brought to a standstill in time and people and material assets are at risk. -
Page 533: Trailer Brake (Option)
Driving and Transport 17.8 Trailer Brake (Option) WARNING Danger to life or serious injuries caused by trailer colliding with machine if an emergency stop is made. If the machine is equipped with a trailer brake (option) for trailer operation, the brake pedals of service brake and trailer brake must always be connected for road travel. -
Page 534: Applying The Parking Brake
Driving and Transport 17.9 Applying the parking brake WARNING Risk of injury due to the unsecured machine rolling away! If the unsecured machine starts moving, there is a risk of people being struck or run over. • After pressing the "Parking brake" key or when exiting the machine, check the status of the parking brake in the display. -
Page 535: Switching Off The Machine
Driving and Transport 17.11 Switching off the machine WARNING Risk of injury due to the unsecured machine rolling away! If the machine is not secured against rolling away when it has been switched off, there is a risk of people being injured by the machine rolling away in an uncontrolled manner. •... -
Page 536: Preparations For Road Travel
Driving and Transport 17.12 Preparations for road travel Prepare the machine for road travel: • The machine has been shut down and secured. • Soiling and crop residue have been removed from the machine, in particular from the lighting and identification elements. •... -
Page 537: Folding/Raising The Front Attachment Into The Transport Position
Driving and Transport 17.12.2 Folding/raising the front attachment into the transport position WARNING Risk of injury from movement of the front attachment! If people are in the area of the front attachment when it is being raised or lowered and folded in or out, there is a risk that these people may be caught and injured by the front attachment or the lifting unit. - Page 538 Driving and Transport EasyCollect Fig. 479 To ensure that the maize header can be folded in, the plant divider must be swivelled up and the pendulum frame horizontally aligned: • To move the plant divider (1) to the transport position, hold down the key "Swivel up plant divider"...
- Page 539 Driving and Transport BX480274 Fig. 480 To raise the front attachment (3): • Press and hold down the "Manually raising lifting unit" key (1) on the multi-function lever. The front attachment (3) is raised as long as the key is pressed. Front-attachment-dependent lifting height for folded in maize header: •...
-
Page 540: Swivelling The Discharge Chute Into Transport Position
Driving and Transport 17.12.3 Swivelling the discharge chute into transport position WARNING Crush hazard due to the moving discharge chute! People, who are near the drive sprocket of the discharge chute when the discharge chute is being swivelled, may be injured. •... -
Page 541: Behaviour When Driving Downhill
Driving and Transport 17.13 Behaviour when driving downhill NOTE The permissible maximum speed of 40 km/h must also be observed when driving downhill! On a steep incline, the driver has the option of reducing the driving speed using the multi- function lever or by actuating the service brake. - Page 542 Driving and Transport Notes on towing • Move the lifting unit, front attachment and spout into the transport position. • The machine is shut down and secured, see page 41. • Pull out the fuses F90 and F91 on the relay circuit board console, which sets the hydraulic motors for the traction drive in neutral position (no displacement).
-
Page 543: Releasing The Holding Brake Manually
Driving and Transport 17.14.1 Releasing the holding brake manually Securing the machine against rolling away: • Shut down and safeguard the machine, see chapter Safety, "Shutting down and safeguarding the machine". • Place the wheel chocks on the right and left, in front of or behind (depending on slope) the wheels of the front axle. - Page 544 Driving and Transport After towing • To restore the function of the brake, open the stop cock (4) underneath the valve block. • Drain the system pressure by opening the drain valve on the hand pump. • Unscrew the connecting hose from the release connection (4) (right-hand machine side). •...
-
Page 545: Preparing The Machine For Transport
Driving and Transport 17.15 Preparing the machine for transport WARNING Danger to life due to movements of the forage harvester! If the forage harvester is not properly lashed for transportation on a low loader, it may start moving or even fall off the low loader and endanger people. •... -
Page 546: Operation
Operation Operation 18.1 Raising and lowering the front attachment WARNING Risk of injury from movement of the front attachment! If people are in the area of the front attachment when it is being raised or lowered and folded in or out, there is a risk that these people may be caught and injured by the front attachment or the lifting unit. -
Page 547: Aligning The Pendulum Frame
Operation 18.2 Aligning the pendulum frame Fig. 487 • Lower the lifting unit (1) of the machine completely • Align the pendulum frame (1) of the lifting unit horizontally. • The locking hooks (2) must be open. If necessary, open them with the locking lever (4). •... -
Page 548: Operating The Machine With A Trailer
Operation 18.3 Operating the machine with a trailer WARNING Risk of injury due to unauthorised trailer and incorrect connection! The risk of accidents is increased by unauthorised trailers and incorrect connection. • Only connect trailer which has its own brake. •... -
Page 549: Connecting Trailer
Operation 18.3.1 Connecting trailer WARNING Risk of injury due to non-roadworthy machine/trailer unit! If the support, axle and trailer loads are exceeded during operation, the machine/trailer unit is no longer roadworthy. • When operating with the trailer, ensure that the permitted support, axle and trailer loads are not exceeded. - Page 550 Operation WARNING Risk of injury due to incorrectly braked trailer! Worn, damaged or incorrectly connected compressed air couplings will degrade the braking performance of the trailer. This increase the braking distance of the machinery and puts people at risk. • Make certain the couplings are working properly and there are no leaks.
-
Page 551: Connecting Trailer For Italy
Operation 18.3.2 Connecting trailer for Italy WARNING Risk of injury due to non-roadworthy machine/trailer unit! If the support, axle and trailer loads are exceeded during operation, the machine/trailer unit is no longer roadworthy. • When operating with the trailer, ensure that the permitted support, axle and trailer loads are not exceeded. - Page 552 Operation WARNING Risk of injury due to incorrectly braked trailer! Worn, damaged or incorrectly connected compressed air couplings will degrade the braking performance of the trailer. This increase the braking distance of the machinery and puts people at risk. • Make certain the couplings are working properly and there are no leaks.
-
Page 553: Disconnecting Trailer
Operation 18.3.3 Disconnecting trailer WARNING Risk of injury due to unexpected movements of machine and trailer! If there are people between the machine and trailer during the coupling process and if the uncoupled trailer moves in an uncontrolled manner, there is a risk of injury. •... - Page 554 Operation Fig. 493 If the trailer has a supporting wheel: • Screw down the supporting wheel. To disconnect the trailer: • To open the trailer coupling, press the hand lever (1) upwards as far as the locking point. • Slowly move the machine forwards until the towing ring is removed from the trailer coupling. To protect the aperture of the locking pin from soiling: •...
-
Page 555: Disconnecting Trailer For Italy
Operation 18.3.4 Disconnecting trailer for Italy WARNING Risk of injury due to unexpected movements of machine and trailer! If there are people between the machine and trailer during the coupling process and if the uncoupled trailer moves in an uncontrolled manner, there is a risk of injury. •... -
Page 556: Additional Axle (Optional)
Operation 18.4 Additional axle (optional) The additional axle must be mounted to ensure that the permissible axle load is not exceeded, see page 493. 18.4.1 Maize operating mode Road mode If the machine is stopped while driving forwards or restarted, the additional axle remains lowered. -
Page 557: Manual Check Of Additional Axle Basic Function
Operation 18.4.4 Manual check of additional axle basic function The manual check of the additional axle basic function, see chapter 4 "Menu 3-11 "Maintenance additional axle" (optional)", see page 301. 18.4.5 Function test of additional axle automatic functions Check automatic function "Lift additional axle": Switching-on conditions: –... -
Page 558: Field Mode
Operation 18.5 Field mode WARNING Risk of injury due to movement of the machine or machine parts! If people remain in or enter the danger zone of the machine during operation, there is an increased risk of injury. • Do not start the machine until all safety devices have been fitted and are in sound condition. -
Page 559: Field Mode On Slopes
Operation 18.5.1 Field mode on slopes BX770234 Fig. 495 • When using the forage harvester with a maize header, do not bring the maize header from working position into transport position or from transport position into working position as long as the machine is at right angles to the slope. •... -
Page 560: Fast Change Of Direction Of Travel (Fast Reversing)
Operation 18.5.2 Fast change of direction of travel (fast reversing) NOTE Fast reversing is possible only in the field mode. Fig. 496 During fast reversing, the machine decelerates to a standstill and accelerates in the opposite direction to 70% of the previous driving speed. To activate fast reversing: •... -
Page 561: Emergency Switching Of The Chopping Drum
Operation 18.5.3 Emergency switching of the chopping drum The chopping drum can only be connected in field mode if the software has detected an intake unit at the machine. The release takes place if: • a metal sensor was detected on the CAN bus or •... -
Page 562: Operating Intake/Front Attachment
Operation 18.5.4 Operating intake/front attachment WARNING Risk of injury from moving components of intake or front attachment! When switching on, during operation and when reversing the intake and front attachment, components move and endanger people. • Ensure that there is nobody in the area of the front attachment, intake, cutting drum and other components for crop flow. - Page 563 Operation NOTE When the intake and front attachment are switched on for the first time, the feed drive rollers and the front attachment must be reversed by the driver to remove any soiling. Only then can the intake and front attachment be switched on. BX850961 Fig.
- Page 564 Operation Reverse the intake/front attachment with chopping drum switched on To remove blockages and faults in the crop flow, which occur during operation, the intake and the front attachment can be reversed. WARNING Risk of injury from moving components of intake or front attachment! When switching on, during operation and when reversing the intake and front attachment, components move and endanger people.
- Page 565 Operation Reverse the intake/front attachment with chopping drum switched off For larger blockages, the intake/front attachment must be reversed with the chopping drum switched off. This prevents the drives from overloading. The main coupling can only be connected after the entire crop flow has been checked and any blockages have been cleared. Prerequisites: –...
-
Page 566: Metal Detection
Operation Switch on/reverse the intake/front attachment using manual operation Prerequisites: – The ignition is switched on. – The release switch road/field is in the "field mode" setting. – The release switch "maintenance" is switched off. – The release switch "intake/header" is switched on. –... -
Page 567: Lifting Unit Control
Operation 18.5.7 Lifting unit control To optimise field mode, the position of the front attachment is regulated using the lifting unit on the machine. To ensure the best conditions for the respective application, one of the three following lifting unit controls are selected. –... - Page 568 Operation Fig. 501 Settings for all lifting unit controls: Pre-condition: The required lifting unit control is set for: – Grass/maize mode, see page 193 – With direct cutting system, see page 203 Changing and saving the setpoint height (working height)/setpoint pressure on the multi- function lever •...
-
Page 569: Setting Discharge Chute
Operation 18.5.8 Setting discharge chute NOTE The spout extension (optional) must also be manually folded in for road travel according to the highway code, see chapter Operating and display elements, "Multi-function lever". The spout has been designed in such a way that it can be operated in trailer operation as well as with loading or forager trailers driving in parallel alongside on the left and right. - Page 570 Operation Item Designation Explanation Key "Turn spout" Turns the spout to the right side. Key "Turn spout" Turns the spout to the left side. "Discharge chute flap down" key Lowers the spout flap. "Discharge chute flap up" key Raises the spout flap. "Reversing/parking discharge chute"...
-
Page 571: Traction Control System
Operation 18.5.9 Traction control system The traction control system (TC) is used to prevent the wheelspin (slip) in specific situations. It can be set at two levels. TC I allows increased slip. This setting is usually used in maize mode to ensure adequate forward drive even under difficult conditions. -
Page 572: Automatic Steering System
Operation 18.5.10 Automatic steering system WARNING Danger to life due to automatically controlled machine! The forage harvester with activated autopilot is automatically controlled and is monitored only by the driver while driving. This means that people near the machine and along the route of the machine are in danger. - Page 573 Operation WARNING Danger to life due to automatically controlled machine! When working with the autopilot activated, the driver must act particularly carefully and prudently so that he can respond if people and material assets are at risk. • Ensure that there is nobody within a radius of 50 m around the forage harvester. •...
- Page 574 Operation Fig. 504 Activating the automatic steering system Prerequisites: – The machine drives parallel to the rows of plants with at least 0.7km/h. – The sensor bracket is located in the row of plants. Activate: • Press the "Automatic steering system" key (1) on the multi-function lever. •...
-
Page 575: Constantpower Load Limit Control (Optional)
Operation 18.5.11 ConstantPower load limit control (optional) The ConstantPower load limit control controls the travelling speed of the machine depending on the diesel engine load and provides constant machine load at a lower fuel consumption. This means that the machine travels automatically quicker for a weaker crop and automatically slower for a stronger crop. -
Page 576: Autoscan (Optional)
Operation 18.5.12 AutoScan (optional) The AutoScan system regulates the chop length depending on the degree of maturity of the plants being harvested by the EasyCollect. Using the AutoScan sensor in the central tip of the EasyCollect, the system detects the degree of maturity of the maize plants and calculates the optimum chop length of the maize plants based on the values input previously for the minimum and maximum chop length and controls the speed of the pre-compression rollers accordingly. -
Page 577: Adjusting The Chop Length
Operation 18.5.13 Adjusting the chop length Two chop lengths can be saved on the multi-function lever. These can be called up on the multi-function lever during operation. Fig. 506 Save the chop length with the cross actuating lever Item Designation Explanation Call up chop length 1 if the function is assigned to Memory key "M1"... - Page 578 Operation Saving two chop lengths Saving chop length 1: • Press key (4) and move the cross actuating lever (3) to position I to save chop length 1 set in the info centre. Saving chop length 2: • Press key (4) and move the cross actuating lever (3) to position II to save chop length 2 set in the info centre.
-
Page 579: Variloc Gearbox (Optional), Switching Between 2 Gearbox Positions
Operation 18.5.14 VariLOC gearbox (optional), switching between 2 gearbox positions It must be known in which position the VariLOC gearbox is. If the position is not known, proceed as follows: • Start the machine. • Switch on the chopping drum and leave the diesel engine running at idle speed (1100 min •... - Page 580 Operation NOTE Damage to the VariLOC gearbox due to incorrect operation If the wrench (2) is re-attached during the adjustment or is moved with excessive force or if the gearbox is operated in the neutral position, the VariLOC gearbox may be damaged. •...
- Page 581 Operation Parameter settingPrerequisites: – The overall software version 20 085 163 3 is installed in the info centre of the machine. The parameter 34025 must be reset after each changeover if the parameter is not set to 0 "Automatic detection", parameter setting, see page 230. •...
-
Page 582: Adjusting The Electrically Adjustable Discharge Accelerator Rear (Optional)
Operation 18.5.15 Adjusting the electrically adjustable discharge accelerator rear (optional) Fig. 512 The adjusting motor (1) is used to swivel a deflector sheet into the crop flow. The resulting deflection of the crop flow influences the discharge distance of the crops at the spout. Step 1 Large distance to the discharge accelerator = small discharge distance... -
Page 583: Removing Crop Flow Blockages In The Area Of The Crop Flow
Operation 18.5.16 Removing Crop Flow Blockages in the Area of the Crop Flow WARNING Danger of injury due to unexpected movement of the machine and moving parts! There is an increased danger of injury when removing crop blockages. • Shut down and safeguard the machine, refer to chapter Safety “Shutting Down and Safeguarding the Machine“. - Page 584 Operation Reversing Depending on the size of the blockage, the intake/front attachment can be reversed with the chopping drum switched on or off in order to remove part of the blockage. For blockages located in the area of the intake/front attachment, it is possible to reverse with the chopping drum switched on, see page 564.
- Page 585 Operation Removing crop blockages in the lower crop flow in grass mode Maintenance flaps in the transfer shaft/grass channel Fig. 514 • Unscrew the nuts (1) on the maintenance flaps (2) and (3). • Fold down the maintenance flaps. • Manually remove blocked crops from the crop flow channel.
- Page 586 Operation Removing crop flow blockages in the upper crop flow in case of maize mode and grass mode Maintenance flap channel support Fig. 516 • Unscrew the hexagon nuts (2). • Remove the maintenance flap (1). • When the maintenance work is complete, attach the maintenance flap (2) and secure with the hexagon nuts (2).
- Page 587 Operation Maintenance flaps in the spout WARNING Risk of injury due to falling from a great height! On the engine roof the operator is at a height from which a fall may cause serious injuries. • Do not enter the engine roof until –...
-
Page 588: Blowing Device For Intake Unit And Grinding Device
Operation 18.5.17 Blowing device for intake unit and grinding device Fig. 518 The blowing device (1) cleans areas on the intake unit (2) and the grinding device (3). This increases the functional safety of the machine. Setting the blowing times In menu 1-1 "Parameters"... -
Page 589: Settings
Settings Settings WARNING If the basic safety instructions are not followed, people may be seriously injured or killed. • To avoid accidents, the basic safety instructions in the chapter Safety must have been read and followed, see chapter Safety "Basic safety instructions". WARNING Risk of injury from sharp cutting blades! When performing maintenance work on the chopping drum, there is a risk of the operators... -
Page 590: Optimising Crop Flow
Settings 19.1 Optimising Crop Flow How front attachment speed depends on chop length If the front attachment speed is too low, it may be that the feed drive rollers are pulling the crops in clumps from the front attachment and the crop flow is being severed. The front attachment speeds depend to a great extent on e.g.: Crops, driving speed, crop mass, degree of maturity of the crop. -
Page 591: Optimising Discharge Capacity Of The Machine
Settings 19.2 Optimising discharge capacity of the machine 19.2.1 Adjusting overhang of the cutting blades BX480430_2 Fig. 520 The discharge capacity of the machine is determined by the chopping drum among other things. Depending on how far the chopping blade edge (1) extends beyond the chopping drum housing (3), there will be correspondingly more or less discharge capacity. -
Page 592: Setting Drum Base
Settings 19.2.2 Setting Drum Base NOTE An incorrectly set drum base will result in increased fuel consumption as well as an increased wear of machine components. Fig. 521 Another way to improve the discharge capacity is to fine-tune the setting of the drum base (1) using the setting screw (2). - Page 593 Settings Setting the distance between the drum base and cutter Fig. 522 NOTE The drum base must be equally set on both sides. Reducing the gap dimension between the drum base and blades: • Release the counter nut (2). •...
-
Page 594: Setting The Discharge Accelerator Rear Wall
Settings 19.2.3 Setting the Discharge Accelerator Rear Wall • Remove the ignition key and secure the forage harvester against accidental start-up and against rolling away. • Wait until all units have come to a complete stop 19.2.3.1 Settings on the installed grass channel Fig. - Page 595 Settings Fig. 524 NOTE An incorrectly set distance between the discharge accelerator and the rear wall will result in increased fuel consumption and wear of machine components. • The point of impact (1) of the chopping crops at the top of the channel support should be as far as possible behind the middle Setting the upper distance of the rear wall of discharge accelerator Fig.
- Page 596 Settings Fig. 526 • Loosen the nut (1) • Set this distance with the two rubber buffers (2) left and right at the rear wall of discharge accelerator • Ensure that the distance from the wear plate to the rotor of the discharge accelerator is as uniform as possible •...
- Page 597 Settings Setting the lower distance of the rear wall of discharge accelerator Fig. 527 • Check distance "a" between the rear wall (1) and discharge scoop (2) at the narrowest point between the discharge scoop and the rear wall NOTE Reducing or increasing the distance (a) between the discharge scoops (2) and the rear wall (1) may influence the discharge capacity depending on the crops.
- Page 598 Settings Setting the spring force of the rear wall Fig. 529 • Loosen the nut (3) • To reduce the spring force, slightly unscrew the hexagon head screws (1) on the rear wall - the spring (2) is relieved • To increase the spring force, slightly tighten the hexagon head screws (1) on the rear wall - the spring (2) is tensioned •...
- Page 599 Settings Checking the locating lug Fig. 531 • If the locating lug (2) of the rear wall of discharge accelerator is not resting exactly on the locating bolt (3) of the grass channel (1), the position of the grass channel must be set to the corresponding side.
-
Page 600: Settings With An Installed Corn Conditioner
Settings 19.2.3.2 Settings with an installed corn conditioner Distance from stop discharge accelerator – corn conditioner Fig. 533 • When installing the corn conditioner, set distance "a" between the stop on the discharge accelerator housing and the corn conditioner to a dimension of 60 mm Fig. - Page 601 Settings Fig. 535 • Loosen the nut (1) • Set the distance of 5 mm (factory setting) with the two rubber buffers (2) left and right at the rear wall of discharge accelerator • Ensure that the distance of the wear plate to the discharge scoops is as uniform as possible •...
- Page 602 Settings Checking the belt distance in the corn conditioner Fig. 536 • Check the distance between the belt pulley (3) and the belt (2) • Dimension "a": min. 6 mm • If dimension "a" is less than 6 mm, the corn conditioner must be pulled up higher in the crop flow (1) ...
- Page 603 Settings Setting the spring force of the rear wall Fig. 537 Channel support Wear plate on rear wall of discharge accelerator Rubber buffer • By setting the rear wall (2) to the rotor, you can derive the dimension (a) for the transition to the channel support (1) Fig.
- Page 604 Settings Fig. 539 • Loosen the nut (3) • To reduce the spring force, slightly unscrew the hexagon head screws (1) on the rear wall - the spring (2) is relieved • To increase the spring force, slightly tighten the hexagon head screws (1) on the rear wall - the spring (2) is tensioned •...
- Page 605 Settings Setting the additional ventilation slots on the discharge accelerator for use with the corn conditioner Fig. 541 • Factory basic setting for use with corn conditioner: completely open (With maize, no air travels upward through the corn conditioner to the discharge accelerator.
-
Page 606: Setting The Throttle Valves
"Lower" throttle check valve spout flap The throttle valves are set according to the times specified in the table. The specification is the KRONE factory setting of the time in which the respective component starting from one end position must reach the other end position. -
Page 607: Maintenance
Maintenance Maintenance WARNING If the basic safety instructions are not followed, people may be seriously injured or killed. • To avoid accidents, the basic safety instructions in the chapter Safety must have been read and followed, see chapter Safety "Basic safety instructions". 20.1 Tightening torques 20.1.1... -
Page 608: Metric Thread Screws With Fine Thread
Maintenance 20.1.2 Metric Thread Screws with Fine Thread A = thread size Tightening torque in Nm (unless otherwise stated) (stability class can be seen on screw head) Stability class 10.9 12.9 Tightening torque (Nm) M12 x 1.5 M14 x 1.5 M16 x 1.5 M18 x 1.5 M20 x 1.5... -
Page 609: Maintenance Table
Maintenance 20.2 Maintenance table NOTE Work on the engine not listed in this chapter may be performed only by a qualified service centre. Observe the maintenance and repair manuals and the specifications for consumables of the engine manufacturer. A qualified service centre has the required technical knowledge, qualifications and tools to perform the required work on the engine in a proper manner. - Page 610 Maintenance Once after 1 hour Tyres Retighten wheel nuts on the front/rear wheels Table 67 Once after 4 hours Drive belt Check belt tension of all drive belts Table 68 Once after 10 hours Components for crop flow Retighten the fastening screws of the chopping blades Retighten the fastening screws on the discharge scoops Retightening screws Check fastening screws of the steering cylinder...
- Page 611 Maintenance 6 times after every 10 hours Tyres Retighten wheel nuts on the front/rear wheels Table 70 Once after 50 hours Oil change in gearbox Wheel hub gearbox front/rear Power take-off gear Engine Check the coolant hoses for leaks Fuel system (engine) Check fuel lines for leaks Check that detachable connecting elements (screws, hose clamps, pipe connections, hoses) are tight and retighten if required...
- Page 612 Maintenance Before the beginning of the season Hydraulic system Check oil level of hydraulic oil tank Check hydraulic hoses Brake Brake function test Oil level check gearbox Power take-off gear Transfer gearbox Roller gearbox at bottom left Angular gearbox Roller gearbox at top right Auger gearbox spout Wheel hub gearbox front/rear VariLOC gearbox...
- Page 613 Maintenance Every 10 hours, at least once a day Hydraulic system Check oil level of hydraulic oil tank Brake Brake function test Components for crop flow Check counterblade (damage, wear) Check chopping blades (damage, wear) Check discharge scoops (damage, wear) Check grinding stone (damage) Engine Check coolant hoses for leaks...
- Page 614 Maintenance Weekly Oil level check gearbox Wheel hub gearbox front/rear Tyres Measure tyre pressure with testing instrument Compressor unit Drain condensation water from compressed air storage tank Main drive brake Check brake pads for soiling; if required clean with high-pressure cleaner Wheel hub gearbox front/rear Visual inspection and noise check Table 76...
- Page 615 Maintenance Every 250 hours Drive belt Check main belt Check screen drum belt Check belts on the corn conditioner Components for crop flow Check scraper of flat roller (wear, distance dimension) Check the scrapers of the discharge accelerator Retightening screws Check fastening screws of the steering cylinders Check fastening screws of the track rod Air conditioning/heating...
- Page 616 Maintenance Every 500 hours Hydraulic system Change hydraulic oil in the hydraulic oil tank Change return suction filter Change hydraulic oil filter (high-pressure filter) work hydraulics Brake Check function of the service brake Oil change in gearbox Wheel hub gearbox front/rear Cooling system (engine) Check concentration of anti-freeze and anti-corrosion agent Check pipework in the air intake and charge air for leaks...
- Page 617 Maintenance Every 1000 hours, but at least after the season Hydraulic system Change oil filter of gearbox oil cooling Oil change in gearbox Power take-off gear Transfer gearbox Roller gearbox at bottom left Angular gearbox Roller gearbox at top right Auger gearbox spout VariLOC gearbox Wheel hub gearbox front/rear...
- Page 618 Maintenance As required Hydraulic system Change return suction filter Change hydraulic oil filter (high-pressure filter) work hydraulics Brake Check function of the service brake Components for crop flow Check corn conditioner (wear) Check the conveyor bars of the pre-compression roller Check tension springs of the intake unit.
- Page 619 Maintenance As required Cabin Top up windscreen washer system Clean fresh air filter Clean circulation filter Air conditioning/heating Cleaning capacitor Central lubrication Check filling level of the reservoir Electrical system Clean battery General maintenance work Check all wear plates Check the fire extinguishers Table 84...
-
Page 620: General Maintenance Work
Maintenance 20.3 General maintenance work 20.3.1 Fire extinguisher Fig. 543 – The machine has been shut down and safeguarded, see page 41. Ensure that the fire extinguisher (1) is mounted on the machine. • Ensure that access to and view of the fire extinguisher (1) are not obstructed. Ensure that the fire extinguisher (1) has been filled by weighing the fire extinguisher (1). -
Page 621: Cleaning The Machine Completely
Maintenance 20.3.2 Cleaning the machine completely WARNING Eye damage due to flying dirt particles! When performing cleaning work with compressed air, dirt particles are slung away at high speed. • Keep people away from the working area. • Wear appropriate work clothes (e.g. eye protection) when performing cleaning work with compressed air. -
Page 622: Maintenance - Basic Machine
Maintenance – Basic Machine Maintenance – Basic Machine 21.1 Windscreen washer system Fig. 544 The reservoir (1) for the windscreen washer system is located in the cooler compartment. NOTE • To achieve a better cleaning effect under extreme crop and road conditions, add windscreen cleaner/anti-freeze. -
Page 623: Maintenance - Air Conditioning System And Heating
• Spare parts which are used must correspond to the technical requirements of the machine manufacturer. For this reason, use KRONE original spare parts only. • Extreme caution is advised when welding close to the air conditioning system. 21.2.1... -
Page 624: Refrigerant
• Thus do NOT separate the connecting pipes beforehand. • Have all maintenance and repair work on the air conditioning system carried out only by your KRONE dealer with a suitable disposal and recycling equipment. 21.2.3 Collector / dryer BMII-134 Fig. -
Page 625: Filling Quantities Of Consumables Air Conditioning System
Maintenance – Basic Machine 21.2.4 Filling Quantities of Consumables Air Conditioning System For information on filling quantities of refrigerant and oil for refrigerant pump, refer to chapter Machine Description, “Consumables”. 21.2.5 Checking Refrigerant Condition and Filling Quantity Fig. 546 Checking the filling quantity The refrigerant quantity is checked on the viewing glass (2) via the white float ball (5). -
Page 626: Changing / Cleaning The Fresh Air Filter
Maintenance – Basic Machine 21.2.6 Changing / cleaning the fresh air filter BX480530 Fig. 547 NOTE If filters are not properly maintained, the fresh air filter may become very soiled and it can no longer be guaranteed that adequate fresh air will flow into the cab. A fresh air filter (4) in the form of a wedge filter cell is located in the upper cab area behind the gill screen (2) on the left hand side in direction of travel. -
Page 627: Changing / Cleaning The Circulation Filter
Maintenance – Basic Machine 21.2.7 Changing / cleaning the circulation filter Abb. 548 Fig. 549 • To clean the circulation filter, loosen the screws (2) land remove the gill screen (1) together with the filter element. • Clean the filter element with compressed air or replace if required. •... - Page 628 Maintenance – Basic Machine Clean evaporator filter Fig. 550 • Unscrew the hexagonal socket head screws (1) and remove the service cover. Fig. 551 • Remove the housing cover (1). • Clean the filter (2) with compressed air.
-
Page 629: Cleaning The Radiator And The Radiator Compartment
Maintenance – Basic Machine 21.3 Cleaning the Radiator and the Radiator Compartment CAUTION Damage to the machine caused by water from a high-pressure washing device! If the water jet from a high-pressure cleaner is aimed directly at bearings and electrical/electronic components, these components may be damaged. •... -
Page 630: Maintenance Of Brake (Bosch)
Irrespective of the maintenance intervals, the brake must be completely inspected following emergency braking when the hydrostats have failed. • To do this, carry out an visual inspection of the discs, springs and sealing elements while the multi-disc brake is dismounted. Contact KRONE customer service. -
Page 631: Belt Drives
Maintenance – Basic Machine 21.5 Belt drives 21.5.1 Checking the belt pulley BX480492 Fig. 553 NOTE If worn or soiled, the complete power transmission of the power belt and belt pulley is not guaranteed. NOTE In case of longer standstill times outdoors (e.g. outside the season), water can collect between the belt pulley and the power belt which could lead to heavy rust formation. -
Page 632: Sieve Drum Drive
Maintenance – Basic Machine • Visually check the power belts on the inside (1) and outside (2) for wear and damage (e.g. tears, stones) and replace if required. • Check the power belts for soiling (oil, grease) and clean or replace if required. 21.5.3 Sieve drum drive Fig. -
Page 633: Tyres
Maintenance – Basic Machine 21.6 Tyres 21.6.1 Checking and maintaining tyres WARNING Risk of injury due to reduced driving stability! If the pressure of the tyres on the machine is too low, people are at risk due to reduced driving safety. -
Page 634: Wheel Mounting
(The left wheel is fitted on the right and the right wheel is fitted on the left.) 21.6.4 Changing the tyre size NOTE Before switching the tyre size when changing the tyres, check with KRONE customer service that the new tyre size is permitted for the vehicle. -
Page 635: Servicing The Tow Coupling
Maintenance – Basic Machine 21.7 Servicing the tow coupling BX480385 Fig. 558 Maintenance work on the trailer coupling: • Check the thickness of the wearing plate (1). If the wearing plate is thinner than 6 mm: • Have the wearing plate changed by a service centre. •... -
Page 636: Servicing The Trailer Coupling For Italy
Maintenance – Basic Machine 21.7.1 Servicing the trailer coupling for Italy BX480549 Fig. 560 Maintenance work on the trailer coupling for Italy: • Check the diameter of the 30 mm coupling pin (1) at the thinnest point. If the diameter of the coupling pin is less than 28 mm: •... -
Page 637: Cleaning The Silage Additives Unit
Maintenance – Basic Machine 21.8 Cleaning the silage additives unit NOTE The silage additive residue and the rinsing water must be disposed of properly (see information in the operating instructions of the silage additive manufacturer). CAUTION Damage to the flow sensor due to incorrect cleaning. If the flow sensor is cleaned with compressed air, components may be damaged. - Page 638 Maintenance – Basic Machine • Connect the rinsing hose (1) to the rinsing nozzle (2) of the silage additives unit and place the other end in the tank containing the water. • Move the three-way stopcock (3) to position "I". •...
- Page 639 Maintenance – Basic Machine BX770233 Fig. 563 • Open the maintenance flap (1) on the spout. • Remove the union nut (2). • Clean the nozzle (5), the seal (4) and the ball check valve filter (3) and re-attach with the union nut (2).
-
Page 640: Cable Winch
Maintenance – Basic Machine 21.9 Cable winch Fig. 564 • Check the rope of the cable winch – The rope must not be bent. – Check the rope pressure unit to ensure the rope is wound up correctly (windings next to each other). -
Page 641: Maintenance - Engine
Maintenance – Engine Maintenance – Engine NOTE Work on the engine not listed in this chapter may be performed only by a qualified service centre which has access to the Workshop Information System (WIS). A qualified service centre has the required technical knowledge, qualifications and tools to perform the required work on the engine in a proper manner. -
Page 642: Contamination In The Engine Compartment
Maintenance – Engine 22.1 Contamination in the engine compartment WARNING Risk of fire due to dirt deposits in the engine compartment! A mixture of dust, oil and plant residue inside the engine compartment is a source of fire and presents an increased fire hazard. •... -
Page 643: Checking Engine Oil Level
Maintenance – Engine 22.3.1 Checking Engine Oil Level BX770162 Fig. 565 Check engine oil level Check the engine oil level 5 to 10 minutes after switching off the engine. Clean the oil dip stick with a lint-free cloth. • Clean thoroughly around the oil dip stick. •... -
Page 644: Fuel System
Maintenance – Engine 22.4 Fuel system 22.5 Refuelling CAUTION If refuelling with unauthorised or contaminated fuel or with fuel which has a high sulphur content, the engine and the exhaust gas after-treatment system will be damaged. • Refuel only with standard, sulphur-free diesel fuel, diesel fuel EN 590. •... -
Page 645: Changing Filter Element On The Fuel Prefilter With Water Separator - Draining Condensation
Maintenance – Engine Changing filter element on the fuel prefilter with water separator – draining condensation 22.5.1 BX770164 Fig. 567 Change filter element of the fuel prefilter (1) • Close the shut-off valve on the hand pump (5). • Open the bleed screw on the filter cover (2). •... -
Page 646: Replacing The Fuel Prefilter Hand Pump
Maintenance – Engine 22.5.2 Replacing the fuel prefilter hand pump BX770216 Fig. 568 Hand pump (1) with fuel prefilter is mounted at the machine. Fig. 569 Replacing the fuel prefilter • Loosen the screw (4) at the bottom on the filter housing (3). •... -
Page 647: Replacing The Fuel Filter Insert
Maintenance – Engine 22.5.3 Replacing the fuel filter insert BX770163 Fig. 570 • Open the filler cap to prevent excess pressure in the fuel tank. • Close the shut-off valve on the fuel pre-filter. • Unscrew the fuel filter by using a strap wrench. •... -
Page 648: Maintenance Cooling System (Engine)
Maintenance – Engine 22.6 Maintenance cooling system (engine) WARNING Risk of fire from anti-freeze! If anti-freeze comes into contact with hot components in the warm engine compartment, it may ignite. There is a risk of fire and injuries. • Leave the engine to cool down before filling with anti-freeze. •... - Page 649 Maintenance – Engine Checking the coolant level BX770217 Fig. 571 • Check the coolant level in the expansion reservoir (1) in the viewing pane (2). ➔ The coolant level must reach up to the middle of the viewing pane (2); refill coolant if necessary.
- Page 650 Maintenance – Engine Draining/Replacing coolant Fig. 572 The drain screw (1) for the coolant is located on the coolant pipe on the right side behind the cooler. • Provide a suitable collecting vessel (approx. 100 litres). • Open the cover on the filler neck of the expansion reservoir. •...
-
Page 651: Checking The Engine Pipework
Maintenance – Engine 22.7 Checking the engine pipework Checking the pipework of the cooling and heating system Fig. 573 • Check all hoses and hose connections for leaks and condition and replace, if required. - Page 652 Maintenance – Engine Checking the pipework of the engine cooling system BX770214 Fig. 574 • Replace all lines, hoses and collars for leaks and condition and replace if required. • Mount the joint bolt hose clamps with a tightening torque of 6+1 Nm. Checking the pipework in the clean air and charge air BX770215 Fig.
-
Page 653: Air Filter
Maintenance – Engine 22.8 Air filter CAUTION If the machine is operated with a soiled or damaged air filter or safety cartridge, the engine may be damaged. • Clean or replace the air filter and the safety cartridge according to the maintenance table, see chapter Maintenance –... -
Page 654: 22.8.1.2 Replacing Safety Cartridge
Maintenance – Engine 22.8.1.2 Replacing safety cartridge NOTE Safety cartridge must not be cleaned and used again. Fig. 577 • Unscrew the nut (1) and remove the cover (2). • Unscrew the nut (3) and carefully remove the filter insert (4). •... -
Page 655: Maintenance - Compressed Air System
Maintenance – compressed air system Maintenance – compressed air system WARNING Risk of injury from escaping compressed air. The compressed air system is under high pressure. Escaping compressed air may seriously injure skin, limbs and eyes. • Shut down and safeguard the machine, see chapter Safety, "Shutting down and safeguarding the machine". -
Page 656: Checking The Drain Valve
Maintenance – compressed air system 23.1.1 Checking the drain valve • Switch off and secure the machine • Open the drain valve and allow the condensation water to run out • Check the drain valve, clean it and screw it in again 23.2 Cleaning the silencer BX770152... -
Page 657: Maintenance - Supply System
Maintenance – supply system Maintenance – supply system 24.1 Feed Attachment 24.1.1 Remove the feed attachment with front attachment The intake can be removed with the front attachment mounted; it must be folded down in the case of the 2-part EasyCollect. ... - Page 658 Maintenance – supply system WARNING Risk of injury when working on the lifting unit! When working on the lifting unit or when opening/closing the stop cocks on the lifting cylinders, the lifting unit and attached components may perform unexpected movements. As a result, people may be injured.
- Page 659 Maintenance – supply system Fig. 583 NOTE The connections of the hydraulic lines are located at front left, optionally a cylinder can be installed for the pendulum frame, the connections (4) for this are located at front right. The system must be depressurised when removing the hydraulic lines (3, 4). •...
- Page 660 Maintenance – supply system Fig. 585 • Pull off the compressed air line from the blowing device (1). • Loosen the plug for the RockProtect and CropControl (2) options. • Pull off the connection lines for the central lubrication (3). •...
- Page 661 Maintenance – supply system Fig. 587 • Loosen the coupling rods (2) by pulling the bolt (1). Use the keys (3) to relieve the coupling rods. • Lower the lifting unit completely using the keys (3). • Switch off the engine. Fig.
- Page 662 Maintenance – supply system Fig. 589 • Close two-way stopcock (3) and three-way stopcock (4), see information label. Fig. 590 • Dismount the spring locking pin (2) on the support jacks (1). Pull out the support jacks (1) down to the ground and secure with spring locking pins (2).
- Page 663 Maintenance – supply system Fig. 591 • Unscrew the fastening screw (1) on the lock on the left-hand side of the machine. • Open the lock (2). Fig. 592 • Move three-way stopcock (2) to "Maize" position, see information label. •...
-
Page 664: Attaching The Feed Attachment With Front Attachment
Maintenance – supply system 24.1.2 Attaching the feed attachment with front attachment Fig. 593 • Move three-way stopcock (1) to "Maize" position, see information label Fig. 594 • Check the locating points at the intake and the machine for contamination and clean them if necessary. - Page 665 Maintenance – supply system Fig. 595 • Switch off the engine. • Close two-way stopcock (1) and three-way stopcock (2), see information label. Fig. 596 • Close the lock (2) on the left side of the machine. • Mount the screw (1).
- Page 666 Maintenance – supply system Fig. 597 • Push up the support jacks (1) of the intake and secure with spring locking pins (2) or unscrew the support jacks completely. Fig. 598 • Open two-way stopcock (3) and three-way stopcock (4), see information label •...
- Page 667 Maintenance – supply system Fig. 599 • Lower the lifting unit completely using the keys (3). • Ensure that no lines or cables become jammed. • Switch off the engine. Fig. 600 • Close the interlocking claws (2). To prevent the screws from becoming loose during subsequent operation, the screws must be seated in the recesses in the frame.
- Page 668 Maintenance – supply system Fig. 601 • Connect the hose of the compressed air line blowing device (1). • Connect plug of the RockProtect and CropControl (2) options. • Connect the connection lines to the central lubrication (3), ensuring that the lines are installed and attached correctly.
- Page 669 Maintenance – supply system Fig. 603 • Connect the connector cable plug (1) for the metal detection sensor and pendulum frame. Fig. 604 • Connect the universal shaft (1) for the intake drive. • Connect the universal shaft (2) for the front attachment drive. •...
-
Page 670: Remove The Feed Attachment With Installation Cart
Maintenance – supply system 24.1.3 Remove the feed attachment with installation cart WARNING Risk of injury when working on the lifting unit! When working on the lifting unit or when opening/closing the stop cocks on the lifting cylinders, the lifting unit and attached components may perform unexpected movements. As a result, people may be injured. - Page 671 Maintenance – supply system Fig. 606 • Close two-way stopcock (1) and three-way stopcock (2), see information label. Fig. 607 • Remove universal shaft (1) for the drive of the intake. NOTE Parking jacks of the intake must be fitted and pushed in all the way. Depending on the tyre size, it may be necessary to adjust the support jacks.
- Page 672 Maintenance – supply system Fig. 608 • Fold in the support jacks of the installation cart. • Push the installation cart (1) under the intake. • Lower the lifting unit using the keys (3). • Hook the installation cart (1) into the header locking and lock Fig.
- Page 673 Maintenance – supply system Fig. 610 • Pull off the compressed air line from the blowing device (1). • Loosen the plug for the RockProtect and CropControl (2) options. • Pull off the connection lines for the central lubrication (3). •...
- Page 674 Maintenance – supply system Fig. 612 • Pull off the plug (1) on the connector cable for the metal detection sensor and pendulum frame. Fig. 613 • Loosen counter nut (1) and screw of the interlocking claws (2) and open interlocking claws.
- Page 675 Maintenance – supply system Fig. 614 • Start the engine • Raise lifting unit and fold up and secure the supports of the installation cart (1) NOTE Depending on the tyre size, it may be necessary to adjust the parking jacks of the intake. •...
- Page 676 Maintenance – supply system Fig. 616 • Unscrew the screw (3). • Open the lock (4). • Move three-way stopcock (2) to "Maize" position, see information label. • Open two-way stopcock (1), see information label. • Start the engine. • Continue lowering the lifting unit until the intake is free.
-
Page 677: Attaching The Feed Attachment With Installation Cart
Maintenance – supply system 24.1.4 Attaching the feed attachment with installation cart Fig. 617 • Move three-way stopcock (1) to "Maize" position, see information label. • Start the engine. • Move the traction drive release switch to position "off". • Move the field release switch to position "on". - Page 678 Maintenance – supply system Fig. 619 • Switch off the engine. • Close two-way stopcock (1) and three-way stopcock (2), see information label. Fig. 620 • Switch the lock (4) • Mount the screw (3) • Fold in the supports on the installation cart if they have been adjusted. •...
- Page 679 Maintenance – supply system Fig. 621 • Close the interlocking claws (2). • Tighten screws and secure with counter nut (1). To prevent the screws from becoming loose, the screws must be seated in the recesses in the frame. • Attach coupling rods (4) to the pendulum frame with bolts (3) and secure with linch pin •...
- Page 680 Maintenance – supply system Fig. 623 • Connect the lines (1) of the pendulum frame (if installed). Fig. 624 • Connect the connector cable plug (1) for the metal detection sensor and pendulum frame. • Start the engine. Fig. 625 •...
- Page 681 Maintenance – supply system Fig. 626 • Close two-way stopcock (1) and three-way stopcock (2), see information label. Fig. 627 • Connect universal shaft for the drive of the intake (1). Fig. 628 • Move three-way stopcock (2) to the required position, see information label. •...
-
Page 682: Grinding The Cutting Blade
Maintenance – supply system 24.2 Grinding the cutting blade WARNING Risk of injury from exposed, rotating cutting drum! The cutting blades can be ground only when the cutting drum is rotating. During the grinding process not all rotating parts of the cutting drum and drive can be completely encased. This means there is an increased risk of injury. - Page 683 Maintenance – supply system Dull cutting blades and too great a distance between the cutting blade and the counterblade will result in an unnecessarily high power demand, poor chop quality and high wear on the cutting elements. Therefore the worn cutting blades must be ground with the grinding device of the forage harvester and then the counterblade must be re-adjusted.
- Page 684 Maintenance – supply system Preparing to grind using manual operation Prerequisites: – The machine is secured from rolling away with wheel chocks. – The engine is started and is idling. – The parking brake is applied. – The main coupling is switched on. –...
- Page 685 Maintenance – supply system Running the grinding process Fig. 630 • Activate the "Open grinding flap" key (4). The grinding flap opens. • Activate the "Automatic grinding operation" key (6). The pre-set number of grinding cycles is performed. After the end of the grinding process, the grinding stone moves to its parking position (the right side of the grinding device).
-
Page 686: Re-Adjusting Or Replacing The Grinding Stone
Maintenance – supply system 24.3 Re-adjusting or replacing the grinding stone WARNING Risk of injury due to rotating cutting drum! If the flap of the grinding device is opened while the cutting drum is rotating, there is a risk of injury from the sharp, rotating cutting blades. -
Page 687: Checking The Grinding Stone
Maintenance – supply system 24.3.1 Checking the grinding stone Fig. 631 • Shut down and safeguard the machine, see chapter Safety, "Shutting down and safeguarding the machine". • Open the flap (1) of the grinding device (2). • Clean the grinding channel (1) (e.g. blow out with compressed air). •... -
Page 688: Re-Adjusting The Grinding Stone
Maintenance – supply system 24.3.2 Re-adjusting the grinding stone CAUTION Damage to cutting drum and grinding device due to incorrect operation! If there is no free travel to the cutting drum when the grinding stone has been re-adjusted, there is a risk of collision between the grinding stone and cutting blade. •... - Page 689 Maintenance – supply system Fig. 633 • Determine the distance "b" from the lower edge of the grinding stone to the lower edge of the grinding slide. • Allow the detent pin (1) to lock into place by turning it 90° degrees. •...
-
Page 690: Replacing The Grinding Stone
Maintenance – supply system 24.3.3 Replacing the grinding stone If the grinding stone (1) is worn to such an extent that it can no longer be re-adjusted, the grinding stone must be replaced. If the grinding stone (1) is replaced, the clamping rings (3) must also be replaced. WHBBX00160 Fig. - Page 691 Maintenance – supply system Fig. 636 • Insert the new grinding stone (2) with new clamping rings from above. • Adjust the grinding stone to the previously determined dimension “b” - 2 mm. • Tension the grinding stone by using the ratchet wheel (tightening torque 180 Nm). •...
-
Page 692: Re-Adjusting Or Changing The Cutting Blades
Maintenance – supply system 24.4 Re-adjusting or changing the cutting blades WARNING Risk of injury from sharp cutting blades! When performing maintenance work on the cutting drum, there is a risk of the operators being injured by the sharp cutting blades. •... -
Page 693: Rotating The Chopping Drum
Maintenance – supply system 24.4.1 Rotating the chopping drum Relieving the power belt for the main belt drive To make the chopping drum easier to rotate, the power belt for the main belt drive must be relieved. • Briefly start up the machine to fill the accumulator. •... -
Page 694: Re-Adjusting Or Changing The Chopping Blades On Chopping Drums With 20, 28, 36 Blades
Maintenance – supply system Rotating chopping drum Fig. 640 The turning lever (3) for the chopping drum with 40, 48 blades has a holding fixture (1) at one end for the hexagon head screws which are used to attach the chopping blades. At the opposite end the turning lever (3) has a holding fixture (2) which fits into the boreholes of the blade carriers. - Page 695 Maintenance – supply system • The lever (3) is located on the right-hand side above the connector plug for the intake unit, push it on the locking bolt (2). • Pull out spring cotter pin (4). • Push the locking bolt (2) all the way towards the chopping drum by using the lever (3) and rotate it one quarter turn clockwise.
- Page 696 Maintenance – supply system Readjusting the cutting blades CAUTION Damage to the machine due to screwing in defective screws! If the old fastening bolts are screwed in after changing the cutting blades, there is a risk that these bolts may be damaged and fail during operation, possibly damaging the machine. •...
- Page 697 Maintenance – supply system Fig. 645 • Re-adjust the blade (1) to the counterblade (3): – Screw on a 17 mm ring spanner (7) with a screw and disc on the eccentric (8). – Insert the eccentric into the borehole (4) of the blade carrier (5) and adjust the counterblade on both sides by turning the ring spanner until the distance dimension of 0.1 mm between the blade and counterblade is reached.
- Page 698 Maintenance – supply system Replacing the cutting blades Worn and damaged cutting blades must be replaced. CAUTION Damage to the machine due to installation of dirty components! If dirty cutting blades and screw-on strips are installed, there is a risk of the cutting blades becoming detached from the blade drum and damaging components of the machine.
- Page 699 Maintenance – supply system BX750041 BX750042 BX750038 Fig. 647 To replace the chopping blade: • Grind chopping blades (1), refer to chapter Operation “Grinding the Chopping Blades”. • Block counterblade (3) via manual operation on the platform in parallel to the dimension a = 87 –...
- Page 700 Maintenance – supply system BX480592 Fig. 648 • When inserting blind blades (1), mind the installation position, the notch (2) must be located outside and front, in the direction of travel. The further fastening is identical to the assembly of the chopping blades, as described below. •...
-
Page 701: Re-Adjusting Or Changing The Chopping Blades On Chopping Drums With 40, 48 Blades
Maintenance – supply system 24.4.3 Re-adjusting or changing the chopping blades on chopping drums with 40, 48 blades 24.4.3.1 Locking the chopping drum The locking device is located on the right side of the chopping drum. Fig. 649 The cutting drum (1) has a locking hole (2) for each working position. Fig. -
Page 702: Readjusting The Cutting Blades
Maintenance – supply system 24.4.3.1 Readjusting the Cutting Blades Fig. 651 • Loosen the spring assembly (1) to make the counterblade support tension-free. Then tighten the spring assembly again with a torque of 65-75 Nm. Fig. 652 To sharpen the cutting blades with as few grinding cycles as possible, the cutting blades must be adjusted to the grinding device. - Page 703 Maintenance – supply system Fig. 653 • Measure the distance (a) from the counterblade (2) to the drum shell on the right and left side of the chopping drum. • Determine the differential between the two measurements and taken into account in the following adjustment of the counterblade (2).
-
Page 704: Changing Cutting Blades
Maintenance – supply system 24.4.3.2 Changing Cutting Blades CAUTION Damage to the machine due to installation of dirty components! If dirty cutting blades and screw-on strips are installed, there is a risk of the cutting blades becoming detached from the blade drum and damaging components of the machine. •... - Page 705 Maintenance – supply system Removing the chopping blade Fig. 656 • Measure the distance (a) from the counterblade (2) to the drum shell on the right and left side of the chopping drum. • Determine the differential between the two measurements and taken into account in the following adjustment of the counterblade (2).
- Page 706 Maintenance – supply system Inserting Cutting Blades WARNING Risk of injury due to incorrectly attached components! Components that are not attached may become detached, causing series injuries to people or damage to the machine. • Whenever you change a blade, clean the blade carriers, perforated plates and the blades. •...
-
Page 707: Working With Half The Number Of Cutting Blades
Maintenance – supply system Adjusting the cutting blades Fig. 659 • Set the new blades (2) evenly to the counterblade (3). • Check the dimension on both sides by using a feeler gauge (4) (nominal dimension 0.1 mm). • Tighten all screws (1) from the inside to the outside (tightening torque 270 Nm). •... -
Page 708: Turning Or Replacing The Counterblade
Maintenance – supply system 24.6 Turning or replacing the counterblade WARNING Risk of injury from sharp cutting blades! When performing maintenance work on the cutting drum, there is a risk of the operators being injured by the sharp cutting blades. •... - Page 709 Maintenance – supply system Prerequisites: – The feed attachment is removed, see page 657. BX480593 Fig. 661 Turning/changing counterblade • Grind chopping blades by using grinding device, refer to chapter Operation “Grinding the Chopping Blades”. • Set the counterblade (1) via manual operation on the platform in parallel to the ground surface of the blades, refer to chapter Operation “Blocking the Counterblade”.
- Page 710 Maintenance – supply system BX750047 Fig. 662 CAUTION Damage to machine parts due to loose components! If the counterblade is not securely attached, it may become detached and damage the blades on the cutting drum or the entire cutting drum. •...
-
Page 711: Turning Or Changing The Conveyor Bars On The Pre-Compression Roller
Maintenance – supply system 24.7 Turning or changing the conveyor bars on the pre-compression roller The pre-compression roller (1) is fitted with conveyor bars which have a smooth and a serrated side. The conveyor bars can be attached in such a way that either the smooth or the serrated side is used. -
Page 712: Adjusting The Distance Between The Scraper And Flat Roller
Maintenance – supply system Changing the conveyor bars on the feed roller Fig. 664 The bottom feed roller (4) can also be fitted with conveyor bars. These conveyor bars are used to protect the feed roller against wear and cannot be turned. 24.8 Adjusting the distance between the scraper and flat roller Prerequisites:... - Page 713 Maintenance – supply system Fig. 666 Preparatory work • Check the flat roller for wear (leaching). If there is a high level of wear, the function of the scraper cannot be guaranteed. • Check the scraper and replace it if the thickness falls below 26 mm. The scraper must be adjusted, preferably with no gap, over the entire width of the flat roller.
-
Page 714: Adjusting The Gap Between The Baling Roller And Scraper
Maintenance – supply system 24.9 Adjusting the gap between the baling roller and scraper Prerequisites: – The feed attachment is removed, see page 657. – The tension springs (1) on the rear right and left at the intake housing are correctly set, see page 715. -
Page 715: Setting The Tension Springs On The Feed Attachment
Maintenance – supply system 24.10 Setting the tension springs on the feed attachment Carry out the following work steps on both machine sides: WHBBX04472 Fig. 668 • Pre-tension the rear tension springs (1) to the dimension a = 450 mm. To do this, screw in the clamping screws (2). -
Page 716: Maintenance - Hydraulic System
NOTE Over-pressure valves preset in the factory. Work on the over-pressure valve may be carried out by KRONE customer service only. The valve blocks have been equipped with over-pressure valves. These valves were preset in the factory and must not be changed. -
Page 717: Hydraulic Oil Tank
Maintenance - hydraulic system 25.3 Hydraulic oil tank 25.3.1 Oil level check and oil change on the hydraulic tank Prerequisites: – The machine is parked on level ground. – The lifting unit is fully lowered, see page 140. – The spout is in parking position, see page 140. –... - Page 718 Maintenance - hydraulic system Changing the oil in the hydraulic tank BX770212 Fig. 672 Oil change: • Provide a collecting vessel (approx. 150 litres). • Clean thoroughly around the oil drainage pipe (2). • Place the end of the oil drain hose (included with the machine) into the collecting vessel. Mount the other end of the hose onto the oil drain plug (2) of the hydraulic tank (1).
-
Page 719: Change Return Suction Filter
Maintenance - hydraulic system 25.3.2 Change return suction filter Fig. 673 Prerequisites: – The machine is shut down and secured, see page 41. – The oil filler pipe on the hydraulic tank is open (tank depressurised) and cleaned. Changing the filter: •... -
Page 720: High-Pressure Filter
Maintenance - hydraulic system 25.4 High-pressure filter Fig. 674 The high-pressure filters (1) for the working and steering hydraulics are equipped with an visual contamination indicator (2). The contamination indicator (2) provides visual information about the degree of contamination of the filter. During start-ups in the cold state, the button of the contamination indicator (2) can jump out. -
Page 721: Check Hydraulic Hoses
Maintenance - hydraulic system 25.5 Check hydraulic hoses Hydraulic hoses are subject to natural ageing. This limits their service life. The recommended service life is 6 years, including a maximum storage time of 2 years. The date of manufacture is printed on the hydraulic hoses. -
Page 722: Maintenance - Gearbox
Maintenance - Gearbox Maintenance - Gearbox WARNING Risk of burns and scalding due to hot parts of the machine and hot liquids! Unprotected body parts will be injured if they come into contact with hot parts of the machine or hot liquids. -
Page 723: Maintenance Of Power Take-Off Gear
Maintenance - Gearbox 26.1.1 Maintenance of power take-off gear Oil level check Fig. 677 • The oil level of the power take-off gear (1) must reach up to 1/2 the inspection glass (2), if necessary top up gear oil. Oil change Fig. - Page 724 Maintenance - Gearbox Fig. 679 • Dismount the hoses (22, 35, 43, 65, 61) at the pump and the gearbox (top and bottom) and drain them into the collecting vessel. • Dismount the filter container (38). • Remove the filter insert from the filter container (38) and clean the filter container. •...
- Page 725 Maintenance - Gearbox Fig. 680 • Dismount the oil filler plug (3). CAUTION! Damage to the gearbox! The gearbox may be damaged if a mixture of different oils is used. • Add the gear oil. Type of oil and filling quantity, see page 104. •...
-
Page 726: Maintenance Of Transfer Gearbox
Maintenance - Gearbox 26.1.2 Maintenance of transfer gearbox Oil level check Fig. 682 • Thoroughly clean the area around the oil level inspection screw (1). • Dismount the oil level inspection screw (1) at the transfer gearbox. • Oil level must reach the inspection bore, if necessary, top up oil (see Oil change). •... -
Page 727: Maintenance Of Lower Roller Gearbox
Maintenance - Gearbox 26.1.3 Maintenance of lower roller gearbox NOTE Check oil level and change the oil when the feed drive housing cover is in a horizontal position. Oil level check Fig. 683 • Read the oil level on the viewing glass (3). •... -
Page 728: Maintenance Of Angular Gearbox
Maintenance - Gearbox 26.1.4 Maintenance of angular gearbox NOTE Check oil level and change the oil when the feed drive housing cover is in a horizontal position. Oil level check Machi ne no. 833001-879999 Oil level check Fig. 684 •... -
Page 729: Maintenance Upper Roller Gearbox
Maintenance - Gearbox 26.1.5 Maintenance upper roller gearbox NOTE Check oil level and change the oil when the feed drive housing cover is in a horizontal position. Oil level check Fig. 685 • Thoroughly clean the area around the oil level inspection screw (1). •... -
Page 730: Maintenance Worm Drive
Maintenance - Gearbox 26.1.6 Maintenance worm drive Oil level check Fig. 686 • Thoroughly clean the area around the oil level inspection screw (4). • Dismount the oil level inspection screw (4). • Oil level must reach the inspection bore, if necessary, top up oil (see Oil change). •... -
Page 731: Wheel Hub Gearbox Maintenance
Maintenance - Gearbox 26.1.7 Wheel hub gearbox maintenance NOTE Use SHELL SPIRAX S4 CX 50 gear oil only. Front wheel hub gearbox Oil level check Fig. 687 • Position the wheel ensuring the oil filler plug (1) is at the top. •... - Page 732 Maintenance - Gearbox Rear wheel hub gearbox Oil level check Fig. 688 • Position the wheel ensuring the oil filler plug (1) is at the top. • Thoroughly clean the area around the oil filler plug (1). WARNING! Risk of scalding by hot gear oil escaping under pressure. •...
- Page 733 Maintenance - Gearbox Oil change • Position the wheel ensuring the oil filler plug (1) is at the top. • Thoroughly clean the area around the oil drain plug (2). WARNING! Risk of scalding by hot gear oil escaping under pressure. •...
-
Page 734: Maintenance Variloc Gearbox (Option)
Maintenance - Gearbox 26.1.8 Maintenance VariLOC Gearbox (Option) Oil level check Fig. 689 Prerequisites: – The machine is shut down and safeguarded, see page 41. – The intake has been removed. – A suitable container is available for escaping oil. WARNING! Risk of injury due to rotating chopping drum! Do not reach into the chopping drum. - Page 735 Maintenance - Gearbox Oil change Fig. 690 Prerequisites: – The machine is shut down and safeguarded, see page 41. – A suitable container is available for escaping oil. • Turn the gearbox until the locking screw (1) is in the bottom position. •...
-
Page 736: Maintenance - Electrical System
Maintenance – electrical system Maintenance – electrical system WARNING If the basic safety instructions are not followed, people may be seriously injured or killed. • To avoid accidents, the basic safety instructions in the chapter Safety must have been read and followed, see chapter Safety "Basic safety instructions". -
Page 737: Battery
Maintenance – electrical system 27.1 Battery BX851054 Abb. 691 The battery compartment is located on the left-hand machine side behind the cover (1). Opening the battery compartment Pre-condition: – The side flap at the front left is open. • Open the lock (2) on both sides. •... -
Page 738: Removing And Installing Battery
Maintenance – electrical system 27.1.1 Removing and Installing Battery Prerequisite: – The main battery switch is in the "0" position, see page 58. BX770167 Fig. 692 Item Designation Battery compartment Battery (12 volts) Battery (12 volts) Battery (12 volts) The machine is fitted with 3 12 V batteries (150 Ah, 1150 A). The batteries (2) and (3) are connected in series (24 V). - Page 739 Maintenance – electrical system Removing the batteries Prerequisite: – The battery has been disconnected. BX770168 Fig. 694 Replacement of the batteries is the same for batteries (1), (2) and (3). • In the case of battery (3) unscrew the screws from the cover (4) beforehand and remove the cover.
-
Page 740: Servicing The Battery
Maintenance – electrical system 27.1.2 Servicing the battery • Keep the battery surface clean and dry, clean with a damp or anti-static cloth only. • Protect the battery terminals and connecting terminals from corrosion by applying terminal grease to the battery terminals and connecting terminals. •... - Page 741 The procedure can be found in the supplied Liebherr operating and maintenance manual. If the three-phase generator fails or does not work properly, determine the cause of the damage. If the suggestions below do not repair the damage, ask your KRONE dealer. Malfunction Cause, remedy –...
-
Page 742: Starter
Fig. 697 Starter (24V) If the starter fails or does not work properly, determine the cause of the damage. If the suggestions below do not repair the damage, ask your KRONE dealer. Disturbance Cause, remedy Starter fails or does not work The batteries are inadequately charged. -
Page 743: Maintenance - Lubrication
Maintenance – lubrication Maintenance – lubrication WARNING If the basic safety instructions are not followed, people may be seriously injured or killed. • To avoid accidents, the basic safety instructions in the chapter Safety must have been read and followed, see chapter Safety "Basic safety instructions". CAUTION Environmental damage caused by lubricants! If lubricants are not stored and disposed of properly, they may escape into the environment. -
Page 744: Manual Lubrication Chart
Maintenance – lubrication 28.1 Manual lubrication chart Fig. 698... - Page 745 Maintenance – lubrication Lubrication points • Lubricate the lubrication points mentioned according to the number of operating hours specified in the lubrication chart. Pos. Part Number of Lubrication interval lubrication Operating hours points PTO shaft W 2500 (VS) 100 h Universal shaft W 2500 (ZW) 100 h Flange-mounted bearing cooling...
-
Page 746: Maintenance - Central Lubrication System
Maintenance – central lubrication system Maintenance – central lubrication system CAUTION Damage to the machine due to the use of incorrect and contaminated lubricants! Unauthorised or contaminated lubricants in the central lubrication system will cause faults in the central lubrication and damage the bearing positions. •... - Page 747 Maintenance – central lubrication system Fig. 699 Item Component Main distributor Auxiliary distributor, steering axle Auxiliary distributor for discharge system and drive Auxiliary distributor, right chopper unit Auxiliary distributor, feed system...
- Page 748 Maintenance – central lubrication system Overview of lubrication points of the central lubrication system Fig. 700...
-
Page 749: Lubricant Filling
Maintenance – central lubrication system Emergency lubrication points NOTE Thoroughly clean the lubrication points prior to use. With the exception of the auxiliary distributor on the supply system, each other auxiliary distributor features an emergency lubricating point (grease nipple at the connecting piece of the line) which can be manually lubricated if the central lubrication fails. -
Page 750: Topping Up Lubricant
Maintenance – central lubrication system 29.2.2 Topping up lubricant NOTE Add only clean lubricant using a suitable tool. Dirty lubricants result in serious system faults. Hydraulic-type lubricating nipple Fig. 702 • The lubricant is filled through the hydraulic-type lubricating nipple (1) by means of a commercially available grease gun. - Page 751 Maintenance – central lubrication system Filling cylinder Fig. 704 The lubricant is filled via a filling cylinder. • Dismount the screw plug M20 x 1.5 (1) and mount the filling socket 940 392 0 (2). • For filling, remove the protective caps on the socket (2) and the filling cylinder 940 393 0 (3) Operational sequence Fig.
-
Page 752: Signal Displays
Maintenance – central lubrication system 29.2.3 Signal displays Fig. 706 The functions of the pump are indicated by two control LEDs, red (1) / green (2) in the viewing window (3) for the motor half shell of the pump. Explanation of the display Explanation LED continuously lit LED flashes every 1 s... -
Page 753: Fault
Maintenance – central lubrication system 29.2.4 Fault Fig. 707 NOTE The red LED (1) always displays a fault in the programme sequence. If a central lubrication system error message appears in the machine display, the precise fault must be read at the operation unit of the lubrication system. •... -
Page 754: Placing In Storage
Placing in Storage Placing in Storage 30.1 At the End of the Harvest Season WARNING! If the basic safety instructions are not followed, people may be seriously injured or killed. • To avoid accidents, the basic safety instructions in the chapter Safety must have been read and followed, see chapter Safety "Basic safety instructions". - Page 755 Write down all repair jobs which must be performed by the next harvest and arrange for them to be done with sufficient lead time. Your KRONE dealer is better able to perform maintenance service and any required repairs outside of harvest season.
-
Page 756: Before The Start Of The New Season
Placing in Storage 30.2 Before the Start of the New Season Before the start of the new harvest season, inspect the machine thoroughly. Keeping the machine in a perfect technical condition will significantly reduce costly running problems during harvest time. If this was not already done after the last harvest, the machine must be thoroughly cleaned inside and out. -
Page 757: Disposal Of The Machine
Disposal of the machine Disposal of the machine 31.1 Disposal of the machine After the service life of the machine has expired, the individual components of the machine must be disposed of properly. The applicable country-specific, current waste disposal guidelines and the legal laws must be observed. - Page 758 Disposal of the machine This page has been left blank deliberately.
-
Page 759: Appendix
Appendix Appendix 32.1 Appendix - CropControl System... -
Page 760: Appendix - Parameter List
Main Menu 15 Service ......................38 1.3.13 Error Messages (UT) ......................... 48 Operating CropControl System with Installed CropControl TC Sync. System via KRONE CCI 200 Operating Terminal ............................51 1.4.1 Display Working Screen with CropControl TC Sync System ............ 51 1.4.2... -
Page 761: Connecting The Terminal In Case Of Self-Propelled Machines
Connect interfaces “CAN1-IN” and “CAN1-OUT” on the terminal via “INCAB” cable with “INCAB” bushing of the machine. • Mount KRONE CCI 200 control unit or KRONE Delta control unit as described in the assembly instructions and connect it. Switch control unit on and off if CropControl is not connected to ISOBUS •... - Page 762 Deactivate resistance by pressing the key “CAN 1 termination” (1). Pos: 6.3 /BA/Info-Center/CropControl BiG X 600-1100-1/Krone CCI 200 Bedieneinheit anschließen_Für weitere Angaben Terminal-Betriebsanleitung beachten @ 354\mod_1438169393417_78.docx @ 2644938 @ @ 1 For further information on how the terminal works, observe the provided terminal operating instructions ord.
-
Page 763: Mode Of Operation Cropcontrol And Cropcontrol Tc Sync In Connection With Isobus Task Controller
Controller. There are the following possibilities to operate CropControl TC Sync: • CropControl is displayed on the CCI 200 and the KRONE Task Controller also runs on the same CCI 200. • CropControl is displayed on ISOBUS UT or on the KRONE Delta terminal and the Task Controller runs on the IPAD (Control.Mobile). -
Page 764: Operating Cropcontrol System Via Krone Cci 200 Operation Terminal Or Krone Delta Operation Terminal
Appendix – CropControl System Pos: 10.1 /Überschriften/Überschriften 2/A-E/CCropControl mit Krone CCI 200 Bedieneinheit @ 260\mod_1398864382499_78.docx @ 1986483 @ 2 @ 1 Operating CropControl System via KRONE CCI 200 Operation Terminal or KRONE Delta Operation Terminal Pos: 10.2 /BA/Info-Center/CropControl BiG X 600-1100-1/Arbeitsbild CropControl @ 458\mod_1464853657574_78.docx @ 3096212 @ 3 @ 1 1.3.1... - Page 765 Appendix – CropControl System Pos: 10.5 /BA/Info-Center/CropControl BiG X 600-1100-1/Statuszeile 1 @ 428\mod_1455267413483_78.docx @ 2963985 @ @ 1 Status line (I) Current CropControl states are shown in the top line (I) of the display. Fig. 6 Possible status displays: Graphic Meaning Information Alarm message present.
-
Page 766: Short-Cut Buttons In The Working Screen
Appendix – CropControl System Pos: 10.7 /BA/Info-Center/CropControl BiG X 600-1100-1/Beschreibung der Grafiken @ 429\mod_1455267745068_78.docx @ 2964016 @ @ 1 Description of graphics (II) for function keys (F1 to F12) Pos: 10.8 /BA/Info-Center/CropControl BiG X 600-1100-1/Beschreibung der Grafiken (II) @ 428\mod_1455262562168_78.docx @ 2963710 @ @ 1 Fig. - Page 767 Appendix – CropControl System Pos: 10.13 /BA/Info-Center/CropControl BiG X 600-1100-1/Ertragszähler stoppen @ 429\mod_1455268109679_78.docx @ 2964077 @ @ 1 Stopping yield counter • Stop the yield counter for the selected cultivated area by using function key The selected cultivated area is displayed on the status line! At the same time, function key indicates that a yield counter has been started.
-
Page 768: Display In Basic Screen
Appendix – CropControl System Pos: 10.19 /BA/Info-Center/CropControl BiG X 600-1100-1/Anzeige im Grundbild @ 359\mod_1439215035098_78.docx @ 2663239 @ 3 @ 1 1.3.4 Display in basic screen CC000892_1 Fig. 8 Graphic Meaning Excursion of the last pre-compression rollers Excursion of the last pre-compression roller as a numerical value. Harvested yield of selected cultivated area. -
Page 769: Counterweighing
Appendix – CropControl System Pos: 10.21 /BA/Info-Center/CropControl BiG X 600-1100-1/Gegenwiegung @ 484\mod_1478869799980_78.docx @ 3261133 @ 34 @ 1 1.3.5 Counterweighing To ensure that the yield measurement is accurate, it is necessary to carry out at least one counterweighing for each cultivated area and type of crop. In order to obtain correct measurement values, counterweighing should be performed in the middle and not at the edge of the field. - Page 770 Appendix – CropControl System Pos: 10.23 /BA/Info-Center/CropControl BiG X 600-1100-1/Gewogene Masse einer Gegenwiegung eingeben_teil1 @ 428\mod_1455202370474_78.docx @ 2963188 @ @ 1 • Press function key to call the list of yield counters in the main menu 13 “Yield Counters”. Fig. 9 •...
- Page 771 Appendix – CropControl System Pos: 10.25 /BA/Info-Center/CropControl BiG X 600-1100-1/Hinweis_AutoCalibrate für eine Gegenwiegung @ 428\mod_1455259597467_78.docx @ 2963476 @ @ 1 Note If a tractor/wagon combination with AutoCalibrate is used for counterweighing, the laden weight is determined automatically and entered in the list of counterweighings. The automatically determined value can be deleted or modified manually.
-
Page 772: Menu Level
Appendix – CropControl System Pos: 10.28 /Überschriften/Überschriften 3/K-O/MMenüebene @ 31\mod_1251887481363_78.docx @ 300443 @ 3 @ 1 1.3.6 Menu Level Pos: 10.29 /Überschriften/Zwischenüberschriften/K-OKurzüberblick @ 259\mod_1398758189677_78.docx @ 1982715 @ @ 1 Short Overview Pos: 10.30 /BA/Info-Center/CropControl BiG X 600-1100-1/Menüebene Kurzüberblick CC @ 377\mod_1443425610974_78.docx @ 2737415 @ @ 1 Main menu Sub-menu Designation... -
Page 773: Bringing Up A Menu Level
Appendix – CropControl System Pos: 10.32 /Überschriften/Überschriften 3/K-O/MMenüebene aufrufen @ 33\mod_1255076738228_78.docx @ 321575 @ 3 @ 1 1.3.7 Bringing up a Menu Level Pos: 10.33 /BA/Info-Center/CropControl BiG X 600-1100-1/Menüebene aufrufen Bild_calibrate @ 458\mod_1464857662809_78.docx @ 3096470 @ @ 1 Fig. 11 Pos: 10.34 /BA/Info-Center/CCI-ISOBUS-Terminal/CCI-Ladewagen/Hauptmenüs/Menüebene aufrufen (Hauptmenüs) @ 215\mod_1390820039664_78.docx @ 1762598 @ @ 1 •... -
Page 774: Main Menu 1 Settings
Appendix – CropControl System Pos: 10.37 /BA/Info-Center/CropControl BiG X 600-1100-1/Hauptmenü 1 "Einstellungen" CC @ 377\mod_1443427478098_78.docx @ 2737566 @ 3 @ 1 1.3.8 Main Menu 1 Settings Fig. 12 • Press function key from the basic screen to bring up the menu level. •... - Page 775 Appendix – CropControl System Pos: 10.39 /BA/Info-Center/CropControl BiG X 600-1100-1/Menü 1-1 Mindestauslenkung @ 250\mod_1396943525595_78.docx @ 1936372 @ @ 1 Menu 1-1 Minimum Excursion In menu 1-1 “Minimum Excursion”, you can set from what excursion of the pre-compression rollers the measurement is started. The higher the minimum excursion setting, the more crops must flow through the rollers to activate the yield counter.
-
Page 776: Main Menu 2 Calibration
Appendix – CropControl System Pos: 10.41 /BA/Info-Center/CropControl BiG X 600-1100-1/Hauptmenü 2 "Kalibrierung" CC @ 377\mod_1443427610348_78.docx @ 2737597 @ 3 @ 1 1.3.9 Main Menu 2 Calibration Fig. 14 • Press function key from the basic screen to bring up the menu level. •... - Page 777 Appendix – CropControl System Pos: 10.43 /BA/Info-Center/CropControl BiG X 600-1100-1/Menü 2-1 Kalibrierung Wegaufnehmer @ 250\mod_1396948066518_78.docx @ 1936700 @ @ 1 Menu 2-1 Calibration of Path Sensor Before placing the machine in service the first time and after any assembly work on the path sensor, it must be calibrated.
- Page 778 Appendix – CropControl System Pos: 10.45 /BA/Info-Center/CropControl BiG X 600-1100-1/Menü 2-2 Kalibrierung Drucksensor Teil1 @ 250\mod_1396955223641_78.docx @ 1937180 @ @ 1 Menu 2-2 Calibration Pressure Sensor The calibration of the pressure sensor must be carried out before placing the machine in service the first time, after any assembly work and weekly during operation.
- Page 779 Appendix – CropControl System Fig. 17 • Press function key • Calibration has been started. For a short time, an arrow appears on the right next to the lower green area. Fig. 18 The arrow next to the bottom green area disappears and an arrow appears next to the upper green surface.
- Page 780 Appendix – CropControl System • If the black bar is in the upper green area, the symbol disappears. Wait for a short time. Pos: 10.46 /Layout Module /---------------Seitenumbruch---------------- @ 0\mod_1196175311226_0.docx @ 4165 @ @ 1...
- Page 781 Appendix – CropControl System Pos: 10.47 /BA/Info-Center/CropControl BiG X 600-1100-1/Menü 2-2 Kalibrierung Drucksensor Teil2 @ 250\mod_1396960710226_78.docx @ 1937783 @ @ 1 Fig. 19 • Press function key to save the calibrated values. Fig. 20 If the calibration has been completed successfully, the symbol appears in the upper line and for a short time in the lower right edge.
-
Page 782: Main Menu 13 Yield Counter
Appendix – CropControl System Pos: 10.49 /BA/Info-Center/CropControl BiG X 600-1100-1/Hauptmenü 13 "Ertragszähler" CC @ 378\mod_1443428592033_78.docx @ 2737845 @ 3 @ 1 1.3.10 Main Menu 13 Yield Counter Fig. 21 • Press function key from the basic screen to bring up the menu level. •... - Page 783 Appendix – CropControl System Pos: 10.51 /BA/Info-Center/CropControl BiG X 600-1100-1/Hauptmenü 13 "Ertragszähler" CC_1 @ 259\mod_1398759286757_78.docx @ 1982834 @ @ 1 The total mass is displayed for each cultivated area: Graphic Meaning Information Yield counter (here for area Area 1 to 50 Pos: 10.52 /BA/Info-Center/CropControl BiG X 600-1100-1/Liste "Ertragszähler"...
- Page 784 Appendix – CropControl System Pos: 10.54 /BA/Info-Center/CropControl BiG X 600-1100-1/Wert Ertragszähler drucken @ 360\mod_1439275366265_78.docx @ 2663776 @ @ 1 Printing yield counter value If a CAN printer is connected to the diagnostics interface of the machine, the values of the yield counter can be printed.
- Page 785 Appendix – CropControl System Pos: 10.56 /BA/Info-Center/CropControl BiG X 600-1100-1/Liste "Ertragszähler" CC drucken @ 360\mod_1439280270982_78.docx @ 2663870 @ @ 1 Graphic Meaning Average value of yield per unit of time of the respective cultivated area. Average value of yield per unit of area of the respective cultivated area. Listing of all data concerning control weighings.
- Page 786 Appendix – CropControl System Example 2: Fig. 26 Date of printout Time of printout Determined weight of stated field (here field 4). Average value tons per hectare for the stated field. Average value tons per hour for the stated field. Average calibration value for the stated field.
- Page 787 Appendix – CropControl System Pos: 10.59 /BA/Info-Center/CropControl BiG X 600-1100-1/Gewogene Masse einer Gegenwiegung eingeben @ 251\mod_1397024691526_78.docx @ 1939134 @ @ 1 Entering the weighed mass of a control weighing CC000866 Fig. 27 Menu 13 “List of Yield Counters” is called. Select the cultivated area to enter a control weighing by using function keys .
- Page 788 Appendix – CropControl System Pos: 10.62 /BA/Info-Center/CropControl BiG X 600-1100-1/Gewogene Masse einer Gegenwiegung eingeben teil2 @ 426\mod_1454928782233_78.docx @ 2955010 @ @ 1 The display shows the counterweighing list for the selected cultivated area: Graphic Meaning Information Yield counter (here for cultivated 1 to 50 areas area 5) Correction factor for entire...
- Page 789 Appendix – CropControl System Softkeys Meaning Information Scroll up Scroll down Delete counterweighing. If the weight of this counterweighing is available – The entered weight is deleted and again later, it can be re-entered . saved. – The correction factor is set to zero. The correction factor is not used to determine the correction factor of the entire cultivated area.
- Page 790 Appendix – CropControl System Pos: 10.64 /BA/Info-Center/CropControl BiG X 600-1100-1/Korrekturfaktor eingeben @ 253\mod_1397460352077_78.docx @ 1948793 @ @ 1 Entering the correction factor directly Note The recalculation of the correction factor initiates the correction of the measured mass retrospectively for the entire cultivated area. If no control weighing has been carried out for the cultivated area, a correction factor directly be entered.
- Page 791 Appendix – CropControl System Pos: 10.66 /BA/Info-Center/CropControl BiG X 600-1100-1/Liste "Korrekturfaktor" CC @ 428\mod_1455266574525_78.docx @ 2963954 @ @ 1 Graphic Meaning Information Yield counter Area 1 to 50 (in this case for cultivated area 6) Correction factor for entire cultivated area (in this case for value 230) Displayed correction factor is not saved.
-
Page 792: Main Menu 14 Isobus Settings
Appendix – CropControl System Pos: 10.68 /BA/Info-Center/CropControl BiG X 600-1100-1/Hauptmenü 14 "ISOBUS Einstellungen" CC @ 378\mod_1443428793736_78.docx @ 2737876 @ 3 @ 1 1.3.11 Main Menu 14 ISOBUS Settings Fig. 29 • Press function key from the basic screen to bring up the menu level. •... - Page 793 Appendix – CropControl System Menu 14-1 “Setting the Background Colour” 14-1 14-1 Fig. 30 Calling the menu Main menu 14 “ISOBUS Settings” is called. • Press function key to choose menu 14-1 , the icon is highlighted in grey. • Press function key The display shows menu 14-1 “Setting the Background Colour”.
- Page 794 Appendix – CropControl System Selecting and saving mode The icon in the upper line indicates that the displayed mode is saved. • Press to bring up the next mode. • Press to bring up the previous mode. The icon in the upper line disappears. •...
-
Page 795: Main Menu 15 Service
Appendix – CropControl System Pos: 10.70 /BA/Info-Center/CropControl BiG X 600-1100-1/Hauptmenü 15 "Service" CC @ 378\mod_1443434831616_78.docx @ 2738156 @ 3 @ 1 1.3.12 Main Menu 15 Service CC000875 Fig. 31 • Press function key to bring up the menu level from the basic screen. •... - Page 796 Appendix – CropControl System Pos: 10.72 /BA/Info-Center/CropControl BiG X 600-1100-1/Menü 15-1 „Sensortest Hand“ @ 253\mod_1397467147299_78.docx @ 1949357 @ @ 1 Menu 15-1 Manual Sensor Test In the manual sensor test, the sensors are checked for errors. CC000876 CC000877 Fig. 32 Calling the menu Main menu 15 “Service”...
- Page 797 Appendix – CropControl System Pos: 10.74 /BA/Info-Center/CropControl BiG X 600-1100-1/Diagnose analoger Sensoren @ 253\mod_1397467332560_78.docx @ 1949596 @ @ 1 Diagnostics of analogue sensors CC000877 Fig. 33 Setting values: The black bar must be in the green area of the bar display. Analog sensors Sensor symbol Description...
- Page 798 Appendix – CropControl System Pos: 10.79 /BA/Info-Center/CropControl BiG X 600-1100-1/Diagnose Druckerhöhung @ 253\mod_1397468953679_78.docx @ 1950135 @ @ 1 Diagnostics pressure increase CC000878 Fig. 34 Description of display: The left black bar indicates the pressure measured by the pressure sensor. The value is displayed under the black bar.
- Page 799 Appendix – CropControl System Pos: 10.84 /BA/Info-Center/CropControl BiG X 600-1100-1/Diagnose analoger Sensoren CC @ 253\mod_1397469920870_78.docx @ 1950391 @ @ 1 Diagnostics power supply voltages CC000879 Fig. 35 Sensor symbol Description Power supply voltage Nominal voltages: Designation Values +12V_EIN 12 - 14.5 V +12V_Si 12 - 14.5 V +12VANA...
- Page 800 Appendix – CropControl System Pos: 10.89 /BA/Info-Center/CropControl BiG X 600-1100-1/Diagnose Einzug CC @ 253\mod_1397473445996_78.docx @ 1950580 @ @ 1 Diagnostics intake The speed of intake drive as well as the speed of the crop through the intake is displayed. CC000880 Fig.
- Page 801 Appendix – CropControl System Pos: 10.94 /BA/Info-Center/CropControl BiG X 600-1100-1/Diagnose Hektar Zähler CC @ 253\mod_1397474477770_78.docx @ 1950818 @ @ 1 Diagnostics acreage counter CC000881 Fig. 37 Description of display: The latest state of the total acreage counter of the machine is displayed in the first line. This must correspond to the total acreage counter displayed in the machine terminal.
- Page 802 Appendix – CropControl System Pos: 10.99 /BA/Info-Center/CropControl BiG X 600-1100-1/Diagnose Maschine häckselt @ 253\mod_1397475122275_78.docx @ 1950877 @ @ 1 Diagnostics machine chops CC000882 Fig. 38 Description of display: It indicates whether the machine is currently chopping or not. The state must be ON, if: •...
- Page 803 Appendix – CropControl System Pos: 10.104 /BA/Info-Center/CropControl BiG X 600-1100-1/Menü 15-3 „Alarme“ @ 253\mod_1397475796114_78.docx @ 1950936 @ @ 1 Menu 15-3 Alarms CC000883 CC000884 Fig. 39 Calling the menu Main menu 15 “Service” is called. • Press function key to select menu 15-3 .
- Page 804 Appendix – CropControl System Pos: 10.109 /BA/Info-Center/CropControl BiG X 600-1100-1/Menü 15-4 „Info“ @ 253\mod_1397476724109_78.docx @ 1951265 @ @ 1 Menu 15-4 Information CC000885 CC000886 Fig. 40 Calling the menu Main menu 15 “Service” is called. • Press function key to select menu 15-4 .
-
Page 805: Error Messages (Ut)
Appendix – CropControl System Pos: 10.115 /Überschriften/Überschriften 3/A-E/AAlarmmeldungen (UT) @ 484\mod_1478848080526_78.docx @ 3260826 @ 3 @ 1 1.3.13 Error Messages (UT) Pos: 10.116 /BA/Info-Center/CropControl BiG X 600-1100-1/Alarmmeldungen CC @ 259\mod_1398675864753_78.docx @ 1980563 @ @ 1 CC000889 Fig. 42 Alarm message If there is a disturbance on the CropControl, an alarm message appears in the display and an audio signal sounds at the same time (constant horn signal). - Page 806 Appendix – CropControl System Pos: 10.118 /Überschriften/Zwischenüberschriften/A-EAllgemeine Meldungen @ 260\mod_1398864544105_78.docx @ 1986512 @ @ 1 General messages Pos: 10.119 /BA/Info-Center/CropControl BiG X 600-1100-1/Allgemeine Meldungen CC @ 259\mod_1398694679037_78.docx @ 1981878 @ @ 1 No. Image Possible cause Remedy – Computer internal plug-in fuse 2 –...
- Page 807 Appendix – CropControl System Pos: 10.122 /Überschriften/Zwischenüberschriften/P-T/Physikalische Meldungen @ 484\mod_1478848293790_78.docx @ 3260856 @ @ 1 Physical messages Pos: 10.123 /BA/Info-Center/CropControl BiG X 600-1100-1/Physikalische Meldungen CC @ 259\mod_1398695334108_78.docx @ 1981907 @ @ 1 No. Image Sensor Possible cause Remedy Path sensor –...
-
Page 808: Operating Cropcontrol System With Installed Cropcontrol Tc Sync. System Via Krone Cci 200 Operating Terminal
Appendix – CropControl System Pos: 12.1 /Überschriften/Überschriften 2/A-E/C/CropControl mit Krone CCI 200 Bedieneinheit_mit AutoCalibrate @ 458\mod_1464853117980_78.docx @ 3096151 @ 2 @ 1 Operating CropControl System with Installed CropControl TC Sync. System via KRONE CCI 200 Operating Terminal Pos: 12.2 /BA/Info-Center/CropControl BiG X 600-1100-1/Arbeitsbild autocalibrate @ 458\mod_1464850733988_78.docx @ 3095958 @ 3 @ 1 1.4.1... - Page 809 Appendix – CropControl System Pos: 12.5 /BA/Info-Center/CropControl BiG X 600-1100-1/Statuszeile 1_Calibrate @ 458\mod_1464854971680_78.docx @ 3096243 @ @ 1 Status line (I) Current states of CropControl are indicated on the top line (I) of the display. Fig. 45 Possible status displays: Graphic Meaning Information...
-
Page 810: Short-Cut Buttons In The Working Screen
Appendix – CropControl System Pos: 12.7 /BA/Info-Center/CropControl BiG X 600-1100-1/Beschreibung der Grafiken @ 429\mod_1455267745068_78.docx @ 2964016 @ @ 1 Description of graphics (II) for function keys (F1 to F12) Pos: 12.8 /BA/Info-Center/CropControl BiG X 600-1100-1/Beschreibung der Grafiken (II)_calibrate @ 458\mod_1464856097404_78.docx @ 3096306 @ @ 1 CC000989 Fig. - Page 811 Appendix – CropControl System Pos: 12.12 /BA/Info-Center/CropControl BiG X 600-1100-1/Schnellzugriff Beladungszähler auswählen @ 428\mod_1455194332411_78.docx @ 2962864 @ @ 1 Load counter This function can be used to measure the laden weight and so determine the total weight of the tractor/wagon combination. Note The load counter only indicates the laden weight precisely when CropControl has been calibrated for the field by means of counterweighing operations and the field is homogeneous...
- Page 812 Appendix – CropControl System Pos: 12.15 /BA/Info-Center/CropControl BiG X 600-1100-1/Wert Ertragszähler drucken_calibrate @ 459\mod_1464861448284_78.docx @ 3097079 @ @ 1 Printing yield counter values Prerequisites: – A CAN printer is connected to the diagnostics interface. – An order is started. Fig. 47 •...
- Page 813 Appendix – CropControl System Pos: 12.18 /BA/Info-Center/CropControl BiG X 600-1100-1/Liste "Ertragszähler" CC drucken_calibrate @ 459\mod_1465213274537_78.docx @ 3100387 @ @ 1 Graphic Meaning Average value of yield per time unit of the respective order. Average value of yield per area unit of the respective order. List of data belonging to counterweighings.
- Page 814 Appendix – CropControl System Pos: 12.20 /BA/Info-Center/CropControl BiG X 600-1100-1/Beschreibung des Ausdruckes bei calibrate @ 459\mod_1464865896451_78.docx @ 3097366 @ @ 1 Description of printout Example 1: Fig. 49 Example 2: Fig. 50 Pos. Explanation Date of printout Time of printout Determined weight of stated order (here “Alte Weide”).
-
Page 815: Display In Working Screen
Appendix – CropControl System Pos: 12.22 /BA/Info-Center/CropControl BiG X 600-1100-1/Anzeige im Arbeitsbild_Calibrate @ 459\mod_1465213686529_78.docx @ 3100448 @ 3 @ 1 1.4.4 Display in Working Screen CC000892_1 Fig. 51 Pos. Meaning Excursion of the last pre-compression rollers Excursion of the last pre-compression roller as a numerical value. Harvested yield of the selected order. -
Page 816: Creating Cci200 Order And Performing Counterweighing
Appendix – CropControl System Pos: 12.25 /BA/Info-Center/CropControl BiG X 600-1100-1/Auftrag anlegen @ 459\mod_1465200457335_78.docx @ 3099104 @ 34 @ 1 1.4.5 Creating CCI200 Order and Performing Counterweighing 1.4.5.1 Creating Order The process for creating an order and creating a field is the same. Fig. - Page 817 Appendix – CropControl System Fig. 54 • Select an order to display the selection list. • Select “Display” from the selection list and press Fig. 55 • To start the order, press Pos: 12.26 /BA/Info-Center/CropControl BiG X 600-1100-1/Der Softkey für die Liste der Gegenwiegungen @ 483\mod_1478590199968_78.docx @ 3258558 @ @ 1 Notice The softkey for the list of counterweighings does not appear for orders which have never...
-
Page 818: Counterweighing
Appendix – CropControl System Pos: 12.28 /BA/Info-Center/CropControl BiG X 600-1100-1/Gegenwiegung _Calibrate @ 484\mod_1478868612065_78.docx @ 3261102 @ 3 @ 1 1.4.6 Counterweighing To ensure that the yield measurement is accurate, it is necessary to carry out at least one counterweighing for each cultivated area and type of crop. In order to obtain correct measurement values, counterweighing should be performed in the middle and not at the edge of the field. - Page 819 Position the empty tractor/wagon combination next to the machine. • An order is started and is running, refer to chapter Operation, “Operating CropControl System with Installed CropControl TC Sync System via KRONE CCI 200 Operating Terminal”, “Creating CCI 200 Order and Performing Counterweighing”, “Creating Order”. Fig. 56 •...
-
Page 820: Entering The Weight Of The Counterweighing
The order for which the counterweighing was performed is started or paused, refer to chapter Operation, “Operating CropControl System with Installed CropControl TC Sync System via KRONE CCI 200 Operating Terminal”, “Creating CCI 200 Order and Performing Counterweighing”, “Creating Order”. -
Page 821: Deleting A Counterweighing
The order for which the counterweighing was performed is started or paused, refer to chapter Operation, “Operating CropControl System with installed CropControl TC Sync via KRONE CCI 200 Operating Terminal”, “Creating CCI 200 Order and Performing Counterweighing”, “Creating Order”. Fig. 59 •... -
Page 822: Entering Calibration Factor Directly
The order for which the correction factor should be modified is started or paused, refer to chapter Operation, “Operating CropControl System with Installed CropControl TC Sync System via Operating Terminal KRONE CCI 200”, “Creating CCI 200 Order and Performing Counterweighing”, “Creating Order”. -
Page 823: Creating Control Mobile Order And Performing Counterweighing
Appendix – CropControl System 1.4.7 Creating Control Mobile Order and Performing Counterweighing 1.4.7.1 Creating Order The process for creating an order and creating a field is the same. Fig. 63 • To select an order, press Fig. 64 • Select an order Fig. -
Page 824: Performing Counterweighing
Appendix – CropControl System Fig. 66 Overview icons Icons Description Set correction factor Start counterweighing Stop counterweighing (here counterweighing 1) Display list with made counterweighings Counterweighing without correction Counterweighing with correction Counterweighing deleted Counterweighing with correction via AutoCalibrate Pos: 12.42 /BA/Info-Center/CropControl BiG X 600-1100-1/Gegenwiegung durchführen_Calibrate @ 483\mod_1478596419018_78.docx @ 3258782 @ 4 @ 1 1.4.7.2 Performing Counterweighing There are two possibilities to start and stop counterweighing. - Page 825 Position the empty tractor/wagon combination next to the machine. • An order is started and is running, refer to chapter Operation, “Operating CropControl System with Installed CropControl TC Sync System via KRONE CCI 200 Operating Terminal”, “Creating ControlMobile Order” and “Performing Counterweighing”, “Creating Order”.
-
Page 826: Entering The Weight Of Counterweighing
Appendix – CropControl System 1.4.7.3 Entering the weight of counterweighing Notice While the weight of the counterweighing is entered for an order, another order may run simultaneously. Prerequisite: – The order for which the counterweighing was performed is started or paused, . Fig. -
Page 827: Deleting A Counterweighing
The order for which the counterweighing is performed is started or paused, refer to chapter Operation, “Operating CropControl System with Installed CropControl TC Sync System via KRONE CCI 200 Operating Terminal”, “Creating ControlMobile Order and Performing Counterweighing”, “Creating Order”. Fig. 70 •... -
Page 828: Entering Correction Factor Directly
The order for which the factor should be modified is started or paused, refer to chapter Operation, “Operating CropControl System with Installed CropControl TC Sync System via KRONE CCI 200 Operating Terminal”, “Creating Control Mobile Order and Performing Counterweighing”, “Creating Order”. -
Page 829: Autocalibrate
Appendix – CropControl System 1.4.7.6 AutoCalibrate If AutoCalibrate is used, the weights of the counterweighings are entered automatically in the list of the counterweighings. They can be modified or deleted manually. Fig. 75 If a correction is made via AutoCalibrate, a corresponding message will be displayed that confirms this correction. -
Page 830: Menu Level
Appendix – CropControl System Pos: 12.49 /Überschriften/Überschriften 3/K-O/MMenüebene @ 31\mod_1251887481363_78.docx @ 300443 @ 3 @ 1 1.4.8 Menu Level Pos: 12.50 /Überschriften/Zwischenüberschriften/K-OKurzüberblick @ 259\mod_1398758189677_78.docx @ 1982715 @ @ 1 Short Overview Pos: 12.51 /BA/Info-Center/CropControl BiG X 600-1100-1/Menüebene Kurzüberblick CC_calibrate @ 458\mod_1464857055966_78.docx @ 3096439 @ @ 1 Main menu Sub-menu Designation... -
Page 831: Bringing Up A Menu Level
Appendix – CropControl System Pos: 12.53 /Überschriften/Überschriften 3/K-O/MMenüebene aufrufen @ 33\mod_1255076738228_78.docx @ 321575 @ 3 @ 1 1.4.9 Bringing up a Menu Level Pos: 12.54 /BA/Info-Center/CropControl BiG X 600-1100-1/Menüebene aufrufen Bild_calibrate @ 458\mod_1464857662809_78.docx @ 3096470 @ @ 1 Fig. 76 Pos: 12.55 /BA/Info-Center/CCI-ISOBUS-Terminal/CCI-Ladewagen/Hauptmenüs/Menüebene aufrufen (Hauptmenüs)_calibrate @ 458\mod_1464858130799_78.docx @ 3096563 @ @ 1 •... -
Page 832: Main Menu 1 Settings
Appendix – CropControl System Pos: 12.58 /BA/Info-Center/CropControl BiG X 600-1100-1/Hauptmenü 1 "Einstellungen" CC_calibrate @ 458\mod_1464858552290_78.docx @ 3096625 @ 3 @ 1 1.4.10 Main Menu 1 Settings Fig. 77 • By pressing the function key from the working screen you get into the menu level. •... - Page 833 Appendix – CropControl System Pos: 12.60 /BA/Info-Center/CropControl BiG X 600-1100-1/Menü 1-1 Mindestauslenkung @ 250\mod_1396943525595_78.docx @ 1936372 @ @ 1 Menu 1-1 Minimum Excursion In menu 1-1 “Minimum Excursion”, you can set from what excursion of the pre-compression rollers the measurement is started. The higher the minimum excursion setting, the more crops must flow through the rollers to activate the yield counter.
-
Page 834: Main Menu 2 Calibration
Appendix – CropControl System Pos: 12.62 /BA/Info-Center/CropControl BiG X 600-1100-1/Hauptmenü 2 "Kalibrierung" CC_calibrate @ 458\mod_1464860012599_78.docx @ 3096788 @ 3 @ 1 1.4.11 Main Menu 2 Calibration Fig. 79 • Open the menu level from the working screen by pressing the function key. - Page 835 Appendix – CropControl System Pos: 12.64 /BA/Info-Center/CropControl BiG X 600-1100-1/Menü 2-1 Kalibrierung Wegaufnehmer @ 250\mod_1396948066518_78.docx @ 1936700 @ @ 1 Menu 2-1 Calibration of Path Sensor Before placing the machine in service the first time and after any assembly work on the path sensor, it must be calibrated.
- Page 836 Appendix – CropControl System Pos: 12.66 /BA/Info-Center/CropControl BiG X 600-1100-1/Menü 2-2 Kalibrierung Drucksensor Teil1 @ 250\mod_1396955223641_78.docx @ 1937180 @ @ 1 Menu 2-2 Calibration Pressure Sensor The calibration of the pressure sensor must be carried out before placing the machine in service the first time, after any assembly work and weekly during operation.
- Page 837 Appendix – CropControl System Fig. 82 • Press function key • Calibration has been started. For a short time, an arrow appears on the right next to the lower green area. Fig. 83 The arrow next to the bottom green area disappears and an arrow appears next to the upper green surface.
- Page 838 Appendix – CropControl System • If the black bar is in the upper green area, the symbol disappears. Wait for a short time. Pos: 12.67 /BA/Info-Center/CropControl BiG X 600-1100-1/Menü 2-2 Kalibrierung Drucksensor Teil2 @ 250\mod_1396960710226_78.docx @ 1937783 @ @ 1 Fig.
-
Page 839: Main Menu 14 Isobus Settings
Appendix – CropControl System Pos: 12.69 /BA/Info-Center/CropControl BiG X 600-1100-1/Hauptmenü 14 "ISOBUS Einstellungen" CC_Calibrate @ 459\mod_1465193538305_78.docx @ 3098785 @ 3 @ 1 1.4.12 Main Menu 14 ISOBUS Settings Fig. 86 • Open the menu level from the working screen by pressing the function key. - Page 840 Appendix – CropControl System Menu 14-1 “Setting the Background Colour” 14-1 14-1 Fig. 87 Opening the menu Main menu 14 “ISOBUS Settings” is active. • Select menu 14-1 by pressing the function key, the icon is highlighted in grey. • Press function key The display shows menu 14-1 “Setting the Background Colour”.
- Page 841 Appendix – CropControl System Selecting and saving mode icon in the upper line indicates that the displayed mode is saved. • To bring up the next mode, press • To bring up the previous mode, press icon in the upper line disappears. •...
-
Page 842: Main Menu 15 Service
Appendix – CropControl System Pos: 12.71 /BA/Info-Center/CropControl BiG X 600-1100-1/Hauptmenü 15 "Service" CC_Calibrate @ 459\mod_1465194150363_78.docx @ 3098848 @ 3 @ 1 1.4.13 Main Menu 15 Service CC000875 Fig. 88 • Press function key to open the menu level from the working screen. •... - Page 843 Appendix – CropControl System Pos: 12.73 /BA/Info-Center/CropControl BiG X 600-1100-1/Menü 15-1 „Sensortest Hand“ @ 253\mod_1397467147299_78.docx @ 1949357 @ @ 1 Menu 15-1 Manual Sensor Test In the manual sensor test, the sensors are checked for errors. CC000876 CC000877 Fig. 89 Calling the menu Main menu 15 “Service”...
- Page 844 Appendix – CropControl System Pos: 12.75 /BA/Info-Center/CropControl BiG X 600-1100-1/Diagnose analoger Sensoren @ 253\mod_1397467332560_78.docx @ 1949596 @ @ 1 Diagnostics of analogue sensors CC000877 Fig. 90 Setting values: The black bar must be in the green area of the bar display. Analog sensors Sensor symbol Description...
- Page 845 Appendix – CropControl System Pos: 12.80 /BA/Info-Center/CropControl BiG X 600-1100-1/Diagnose Druckerhöhung @ 253\mod_1397468953679_78.docx @ 1950135 @ @ 1 Diagnostics pressure increase CC000878 Fig. 91 Description of display: The left black bar indicates the pressure measured by the pressure sensor. The value is displayed under the black bar.
- Page 846 Appendix – CropControl System Pos: 12.85 /BA/Info-Center/CropControl BiG X 600-1100-1/Diagnose analoger Sensoren CC @ 253\mod_1397469920870_78.docx @ 1950391 @ @ 1 Diagnostics power supply voltages CC000879 Fig. 92 Sensor symbol Description Power supply voltage Nominal voltages: Designation Values +12V_EIN 12 - 14.5 V +12V_Si 12 - 14.5 V +12VANA...
- Page 847 Appendix – CropControl System Pos: 12.90 /BA/Info-Center/CropControl BiG X 600-1100-1/Diagnose Einzug CC @ 253\mod_1397473445996_78.docx @ 1950580 @ @ 1 Diagnostics intake The speed of intake drive as well as the speed of the crop through the intake is displayed. CC000880 Fig.
- Page 848 Appendix – CropControl System Pos: 12.95 /BA/Info-Center/CropControl BiG X 600-1100-1/Diagnose Hektar Zähler CC @ 253\mod_1397474477770_78.docx @ 1950818 @ @ 1 Diagnostics acreage counter CC000881 Fig. 94 Description of display: The latest state of the total acreage counter of the machine is displayed in the first line. This must correspond to the total acreage counter displayed in the machine terminal.
- Page 849 Appendix – CropControl System Pos: 12.100 /BA/Info-Center/CropControl BiG X 600-1100-1/Diagnose Maschine häckselt @ 253\mod_1397475122275_78.docx @ 1950877 @ @ 1 Diagnostics machine chops CC000882 Fig. 95 Description of display: It indicates whether the machine is currently chopping or not. The state must be ON, if: •...
- Page 850 Appendix – CropControl System Pos: 12.105 /BA/Info-Center/CropControl BiG X 600-1100-1/Menü 15-3 „Alarme“ @ 253\mod_1397475796114_78.docx @ 1950936 @ @ 1 Menu 15-3 Alarms CC000883 CC000884 Fig. 96 Calling the menu Main menu 15 “Service” is called. • Press function key to select menu 15-3 .
- Page 851 Appendix – CropControl System Pos: 12.110 /BA/Info-Center/CropControl BiG X 600-1100-1/Menü 15-4 „Info“ @ 253\mod_1397476724109_78.docx @ 1951265 @ @ 1 Menu 15-4 Information CC000885 CC000886 Fig. 97 Calling the menu Main menu 15 “Service” is called. • Press function key to select menu 15-4 .
-
Page 852: Error Messages (Ut)
Appendix – CropControl System Pos: 12.115 /BA/Info-Center/CropControl BiG X 600-1100-1/Menü 15-5 „Monteur“ @ 259\mod_1398675491008_78.docx @ 1980504 @ @ 1 Menu 15-5 Technician CC000887 CC000888 Fig. 98 Calling the menu Main menu 15 “Service” is called. • Press function key to select menu 15-5 . - Page 853 Appendix – CropControl System Pos: 12.119 /Überschriften/Zwischenüberschriften/A-EAllgemeine Meldungen @ 260\mod_1398864544105_78.docx @ 1986512 @ @ 1 General messages Pos: 12.120 /BA/Info-Center/CropControl BiG X 600-1100-1/Allgemeine Meldungen CC @ 259\mod_1398694679037_78.docx @ 1981878 @ @ 1 No. Image Possible cause Remedy – Computer internal plug-in fuse 2 –...
- Page 854 Appendix – CropControl System Pos: 12.124 /Überschriften/Zwischenüberschriften/P-T/Physikalische Meldungen @ 484\mod_1478848293790_78.docx @ 3260856 @ @ 1 Physical messages Pos: 12.125 /BA/Info-Center/CropControl BiG X 600-1100-1/Physikalische Meldungen CC @ 259\mod_1398695334108_78.docx @ 1981907 @ @ 1 No. Image Sensor Possible cause Remedy Path sensor –...
- Page 855 Appendix 32.2 Appendix - Parameter List...
-
Page 878: Appendix - Error Messages
32.3 Appendix - Error Messages... - Page 1130 Index Automatic steering system ....... 574 AutoScan (optional) ......... 578 12 volt socket ............ 153 Axle Loads ............98 Access a menu level ......... 227 Basic safety instructions ........23 Accessing the constant power setting menu Battery .............. 739 (optional) ............429 Before the Start of the New Season ....
- Page 1131 ConstantPower load limit control (optional) ..577 Consumables ..........33, 105 Emergency exit ..........64 Contact for KRONE NORTHAMERICA ..58, 74 Emergency steering forces ......527 Contamination in the engine compartment ..644 Emergency switching of the chopping drum ..563 Control and display elements ......
- Page 1132 Function test additional axle ......497 Function test of additional axle automatic Ladder ..............59 functions ............559 Ladder lighting ..........115 Further applicable documents ......14 Ladder to the cab ..........82 Further assembly work ........489 Ladders and flaps ..........81 Lashing points ............
- Page 1133 Warning signs ..........18 Menu 4-1-6 Diagnostics travelling gear ... 338 Means of Representation Menu 4-1-7 Metal Detection ......345 Figures ............15 Menu 4-1-8 Diesel Engine ....... 349 Membrane keyboard ......... 140 Menu 4-1-9 Automatic steering system ... 357 Memory keys ............
- Page 1134 Overview of the distributor blocks of the central Removing/attaching the spout extension/spout lubrication system ......... 748 end piece ............. 498 Overview of the drives ........724 Removing/installing the NIR sensor for moisture measurement ..........481 Reordering the safety stickers ......58 Parking the machine safely ........
- Page 1135 Setting the Discharge Accelerator Rear Wall ... 596 Stopping and securing the machine ....41 Setting the grass pick-up working width ... 187 Stopping with the foot brake ......534 Setting the header type........192 Stopping with the multi-function lever ....533 Setting the lifting unit control for the direct cutting Structural changes to the machine ....
- Page 1136 Wheel mounting ..........636 Wind shield wiper ..........158 Validity ..............14 Windscreen washer system ..... 158, 624 Venting the fuel system ........649 Working floodlights ........... 114 Verstellbare Lüfterdüsen........133 Working with half the number of cutting blades 709 Workstations on the Machine ......
- Page 1138 Maschinenfabrik Bernard Krone GmbH & Co. KG Heinrich-Krone-Straße 10, D-48480 Spelle Postfach 11 63, D-48478 Spelle Phone +49 (0) 59 77/935-0 +49 (0) 59 77/935-339 Internet: http://www.krone.de eMail: info.ldm@krone.de...
Need help?
Do you have a question about the BiG X 600-3 and is the answer not in the manual?
Questions and answers
Схема поводов на разметке от наклонке