
Related Manuals for Krone XXL-RGL


Summary of Contents for Krone XXL-RGL
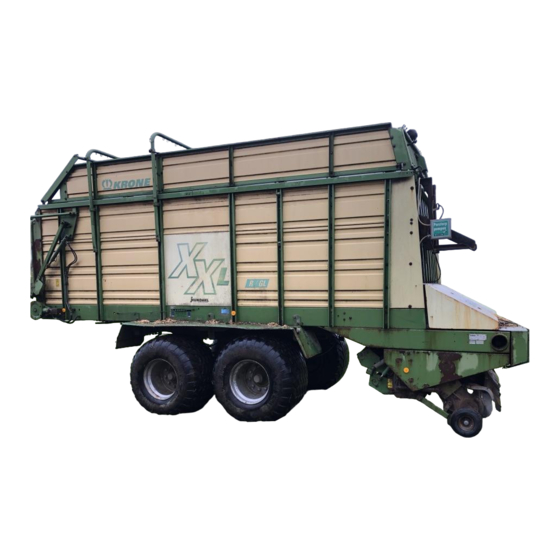
- Page 1 Operating instructions No. 727-3 GB Short-stork loading wagon XXL-RGL 4XL-RGL (from Machine no. 490 681)
- Page 2 (pp Dr. Josef Horstmann, Manager of Construction and Development) (Josef Jungehüser, Manager of Quality Assurance) Dear customer, These are the operating instructions for the KRONE product which you have just acquired. These operating instructions contain important information on the correct and safe operation of this machine.
- Page 3 Should these operating instructions become partly or totally unusable, you can acquire a replacement copy for your machine by quoting the number given overleaf. We wish you every success with your KRONE machine. Maschinenfabrik Bernard Krone GmbH Spelle, Germany...
- Page 4 Foreword...
-
Page 5: Table Of Contents
Contents Contents Foreword Contents General information I - 1 ........................................Information on the product I - 1 .............................. Safety Identification of safety remarks in the operating instructions II - 1 .............. Personnel qualifications and training II - 1 ........................Dangers involved in not following the safety instructions II - 1 .............. - Page 6 Contents Hydraulic system Special safety instructions VI - 1 ............................Adjusting the hydraulic systems VI - 2 .......................... Maintenance Special safety instructions VII - 1 ............................General information VII - 1 ............................... Tyres VII - 2 ......................................Towing eye on the tow-bar VII - 3 ............................
-
Page 7: Use
The variable cutter theoretically provides for cutting lengths up to 40mm. 1.2 Information on the product 1.2.1 General information These operating instruction apply to short-stalk loading wagon Models XXL-RGL and 4XL-RGL from Machine KDW00050 no. 490 681 1.2.2 Manufacturer’s address Maschinenfabrik Bernard Krone GmbH Heinrich-Krone-Str. - Page 8 General information 1.2.6 Connections See Hydraulic system circuit diagram - See Page VI - 7 See Electrical system circuit diagram - See Page A -12 1.2.7 Intended use The XL series short-stalk loading wagons are built exclusively for agricultural work (proper use). Any other use is considered improper use.
- Page 9 1950 1880 * Tyres 555/45-17 FRT 555/45-17 FRT * DIN capacity for dry material (DIN 11741) approx. m3 KRONE protection from foreign objects Individual cutter protection Individual cutter protection Cutting length for 10 cutters approx. mm 20 cutters approx. mm 39 cutters approx.
- Page 10 General information I - 4...
-
Page 11: Safety
Safety Safety 2.2 Personnel qualifications and training These operating instructions contain fundamental information which must be taken into account when The short-stalk loading wagon must only be used, hitching up, operating or maintaining the machine. For serviced and maintained by personnel who are familiar this reason, these operating instructions must be read with this work and have been instructed about the by all personnel before starting up and using the... -
Page 12: Safety And Accident Prevention Regulations
Safety If the vehicle is used on the public highways, the relevant legal requirements (in the Federal Republic of 15. Ancillary equipment (ropes, chains and rods etc.) Germany: the Motor Vehicle Regulations (StVZO) and and remotely operated devices must be positioned the Motor Vehicle Construction and Use Regulations so that they do not cause any unintentional (StVO)) must be followed. -
Page 13: Hitched Up Machines
Safety engine shut down. 2.6 Hitched-up machines 11. When working with the power take-off shaft, nobody must remain inside the area of the rotating 1. Secure the machines against rolling away. power take-off shaft or articulated shaft. 2. Keep to the maximum permitted supporting load 12. -
Page 14: Tyres
This is only guaranteed by using genuine KRONE spare parts. 10. When storing gases, only use nitrogen for filling - 2.9 Tyres Risk of explosion. - Page 15 Safety II - 5...
- Page 16 Safety Position of safety labels on the machine Right side of the wagon KLW07350 Left side of the wagon KLW07340H II - 6...
- Page 17 Safety 939 100-4 540/ MAX. Do not exceed MAX. Before starting, read and the speed of the follow the operating Part no. 939 100-4 (1 x) power take-off shaft. instructions and safety The operating 939 101-4 instructions. pressure 1000/ MAX. of the hydraulic unit must not exceed MAX.
-
Page 18: Position Of The General Information Panels On The Machine
Safety 2.14 Position of the general information panels on the machine Right side of the machine KLW07350 Left side of the machine KLW07340 II - 8... - Page 19 Safety The information panels describe the special features of the particular machine and must be observed for the machine to operate perfectly. Anhänger ist mit einer Zugöse DIN 11026 ausgerüstet. Er darf nur an Zugmaschinen mit einer dafür geeigneten Anhänge- kupplung angekuppelt werden.
- Page 20 Safety II - 10...
-
Page 21: Operation
Operation Operation 3.1 General information The short-stalk loading wagon must be adjusted to the tractor being used (see Appendix A “Inital hitch up“) If the tractor is changed, the following adjustments must be checked and carried out again if necessary. •... -
Page 22: Hitching Up To The Tractor
Operation 3.3 Hitching up to the tractor No persons are permitted inside the danger area. The short-stalk wagon must be adjusted to the tractor currently being used (see Appendix A “Inital hitch up“) 3.3.1 Couple the towing eye of the trailer to the tractor hitch. -
Page 23: Connections
Operation 3.4 Connections 3.4.1 Hydraulic connection When connecting the hydraulic hoses, make sure that the hydraulic systems on the tractor and the machine are not under pressure. • Take the hydraulic hoses out of their retainers on the tow-bar. • Remove the caps from the hoses. - Page 24 Operation Connection for operator-friendly control unit Mount the operator-friendly control unit on the tractor within the field of view of the driver. Connect the operator-friendly control unit to the on-board computer. Plug the control cable (1) into the socket (2) of the operator-friendly control unit.
- Page 25 Operation 3.4.4 Hydraulic brakes (Export) A hydraulic brake is available for certain export models. With these models, the relevant hose is connected to the control valve on the tractor. The brake is activated by operating the tractor brake valve. 3.4.5 Articulated shaft •...
-
Page 26: Pick Up
Operation 3.5 Pick up 3.5.1 Special safety instructions The following applies during all maintenance, assembly, repair and adjustment work: • Shut down the short-stalk loading wagon. • Shut down the engine, remove the ignition key and switch off the electrical supply at the control box. - Page 27 Operation 3.7 Cutter unit 3.7.1 Special safety instructions The following applies during all maintenance, assembly, repair and adjustment work: • Shut down the short-stalk loading wagon. • Shut down the engine, remove the ignition key and switch off the electrical supply at the control box.
-
Page 28: Cutter Unit
Operation 3.7.3 Setting the cutting length This adjustment is carried out centrally on the left hand side of the wagon. Lowering the cutter unit • Press the cutter switch on the control box to "Lower" (for the operator-friendly control unit: press until "Switch cutters?"... - Page 29 (1). Only sharpen from the side which is not fluted. If possible, use the KRONE sharpener for sharpening. ET Part no. for the KRONE cutter-sharpener cutter holder 940 003-0.
- Page 30 Operation 3.7.7 Installing the cutters Installation is carried out in the reverse order. Make sure that: • the cutters are correctly located on the pins (1) on the pivot and in the safety rollers (2) . • and in the case of new or old, worn blades, the control distance from the cutter points to the conveyor drum has been correctly adjusted.
- Page 31 Operation 3.7.10 Blockages on the cutter unit • Lower the cutter unit and remove the blockages by switching on the power take-off shaft. • If there are blockages in the intake area, it is advisable to raise the articulated tow-bar somewhat beforehand. Risk of accident •...
-
Page 32: Road Travel
Operation 3.8 Road travel • Do not exceed the permitted speed limit (see serial plate). • Riding on the loading wagon is not permitted. • The roadworthiness of the loading wagon must be checked before travelling on the public highways, in particular the lights and tyres and whether the rear flap has been closed, the articulated shaft lowered and whether the pick-up has been lifted out. -
Page 33: Work Input
Operation 3.10 Work input 3.10.1 Preparing for the loading process • Adjust to the desired cutter number and therefore the cutting length see Page III - 6 • Adjust the pick-up working height: see Page III -5 • Normal position of baffle plate: see Page III -5 The swathe should be uniform and loose. - Page 34 Operation 3.10.2.3 For the electromagnetic operator-friendly control unit without automatic loader • When starting the loading process, switch on the hydraulic oil circulation on the tractor and arrest the switch lever. • Switch the pick-up switch to "Lower". The pick-up can be run in this position during the whole of the loading process so that the pick-up is able to accomodate itself to the ground.
- Page 35 Operation 3.10.3 Finishing the loading process Make sure that the laden weight shown on the serial plate is not exceeded. Loading finishes when:: a) for the standard model : – the green scraper-floor indicator light (if the scraper floor is switched on) has gone out b) for the operator-friendly model: –...
-
Page 36: Shutting Down
Operation 3.10.6 After emptying • Switch off the scraper floor. • Close the rear flap. To ensure that the hydraulic mechanism locks the rear flap, the switch for the rear flap must continue to be held in position for approx. 1-2 seconds after closing. For the standard hydraulic system, the closing procedure must follow the following sequence: Switch the electrical... - Page 37 Operation • Stow the control box in the retainer provided for it. KLW09340 • Arrest the short-stalk loading wagon by applying the parking brake (1). KDW03210 III - 17...
- Page 38 Operation III - 18...
-
Page 39: Standard Operation
Standard operation Standard operation 4.1 General information The loading wagon is fitted with solenoid valves which make it possible to pre-select the hydraulic functions on the wagon at the control box. Each switch function desired is pre-selected at the control box by operating the corresponding push button so that the relevant valve is opened. -
Page 40: Control Panel
Standard operation 4.3 Control panel KLW07013 Switch for switching and power supply „ON“ and (10) Switch for the floodlamp in the storage area. „OFF“. (11) Switch for changing cutters. The (green) indicator lamp lights up when (1) is switched on. When changing cutters, first switch cutter The (red) indicator lamp lights up when the scraper unit to Position „Cutters 0“... -
Page 41: Operator-Friendly Solenoid Control Unit
Operator-friendly solenoid control unit Operator-friendly solenoid control unit 5.1 General information The operator-friendly solenoid control unit is used to monitor and control the loading and emptying processes. The cutter 0 circuit and the automatic scraper-floor circuit are monitored using sensors. Indicator lamps signal the operating state of the cutter 0 system, the scraper floor and the locking system for the steering axle (special fitting). -
Page 42: Control Panel
Operator-friendly solenoid control unit 5.3 Control panel KLW07014 (1) ON/OFF switch for the power supply. "ON/OFF" switch for the scraper floor (Display appears with a short tone on the horn) – When the scraper floor is switched on, (2) Indicator lamp (red) warns when the cutter unit is not in "Scraper floor is running"... -
Page 43: Checking The Sensors
Operator-friendly solenoid control unit 5.4 Checking the sensors Carry out all sensor tests with the machine shut down Switch on the display and control unit at Button (1) and operate the Quit button (12) until the following message appears on the display: Sensor test Load a: 0 Scrape b: 1... - Page 44 Operator-friendly solenoid control unit V - 4...
-
Page 45: Hydraulic System
Hydraulic system Hydraulic system 6.1 Special safety instructions • Before starting work on the hydraulic unit, depressurise the system. Hydraulic fluids escaping under pressure can cause serious injury. In case of injury, immediately call a doctor. • Repair work on the hydraulic system must only be carried out by a trained specialist. With the standard and the operator-friendly unit, the solenoid valve unit is located on the end of the wagon at the front and right... -
Page 46: Adjusting The Hydraulic Systems
Hydraulic system 6.2 Adjusting the hydraulic system The operator-friendly hydraulic system of the short-stalk loading wagon must be adapted to the tractor (see KLW0A-07) and is designed for continuous circulation. The system is adapted by adjusting the hydraulic system screw on the solenoid valve unit. The unit is located on the end of the wagon at the front and right under the protective box. - Page 47 Hydraulic system 6.2.2 Examples of emergency manual operation Raising the pick up • Screw in the star-wheel screw on the „Raise lower pick- up“ control valve. • Push in the solenoid plunger of the control valve (2) using a sharp object. The pick-up will raise. •...
- Page 48 Hydraulic system 6.2.3 Hydraulic unit - standard VI - 4...
- Page 49 Hydraulic system 6.2.4 Hydraulic unit - operator-friendly VI - 5...
- Page 50 Hydraulic system 6.2.5 Hydraulic circuit diagram of the loading wagon - Standard operation Model HECKKLAPPE MESSER KRATZBODENANTRIEB KNICKDEICHSEL PICK-UP d=1mm (332-014) d=1,4mm (920-904) RUECKSCHLAG VENTIL DRUCK TANK LEITUNG LEITUNG ANSCHLUSS SCHLEPPERHYDRAULIK VI - 6...
- Page 51 Hydraulic system 6.2.6 Hydraulic circuit diagram of the loading wagon - Operator-friendly operation Model GL HECKKLAPPE MESSER KRATZBODENANTRIEB KNICKDEICHSEL PICK-UP d=1,5mm d=1mm (332-014) (340-687) d=1,4mm (920-904) LASTMELDELEITUNG NUR BEI LOAD-SENSING SCHLEPPERHYDRAULIK UEBER POWER-BEYOND ANZUSCHLIESSEN. RUECKSCHLAG VENTIL HOCHDRUCK FILTER POWER DRUCK TANK BEYOND LEITUNG...
- Page 52 Hydraulic system VI - 8...
-
Page 53: Maintenance Special Safety Instructions
Maintenance Maintenance 7.1 Special safety instructions • Maintenance, care, service and cleaning work must only be carried out with the machine shut down. Shut down the engine, remove the ignition key and switch off the electrical supply at the control box. •... -
Page 54: Tyres
Maintenance 7.3 Tyres • Repair work on the tyres and wheels must only be carried out by specialists using the assembly tools which are suitable for the purpose. • Support the short-stalk loading wagon on firm and level ground. Secure the wagon against rolling away unintentionally by using wheel chocks. -
Page 55: Towing Eye On The Tow-Bar
Maintenance Tyre-data table Tyre- Width pressure diameter Tyre definition 600/55-22.5 1,232 700/45-22.5 1,232 The above-mentioned tyres are permitted for use at speed up to 25 km/h and 40 km/h. High speed tyres (load capacity at 80 km/h) Tyre- Width Load diameter capacity pressure... - Page 56 Maintenance 7.5 Adjusting the sensors with the rear flap closed and the wagon empty 7.5.1 Automatic scraper-floor shut-down When the wagon is full, the advance shuts down via a limit switch (1) on the right guide rod of the rear flap if the load material presses against the rear wall.
-
Page 57: Maintenance Instructions For The Hydraulic System
Maintenance 7.6 Maintenance instructions for the hydraulic system 7.6.1 High-pressure filter All Series XL loading wagons with the operator-friendly hydraulic unit are fitted with a high-pressure filter in the high-pressure pipework to the valve unit. Change the filter (3) after each season. Changing the filter element •... -
Page 58: Checking And Changing The Oil
Maintenance 7.7 Checking and changing the oil The oil level in the transmission must be checked regularly before and after use. An oil change should be carried out after the first period of use (approx. 30-50 h). After this, change the oil once a year. -
Page 59: Chain Tension
Maintenance 7.8 Chain tension 7.8.1 Pick-up drive unit The pick-up drive unit is located at the front on the left hand side of the loading wagon. Spring length under tension X = 30 mm KDW04120 7.8.2 Scraper-floor advance The scraper floor of the loading wagon is tensioned automatically. -
Page 60: Scrapers
Maintenance Shortening the scraper-floor chain • Remove the cotter pin (1) on the chain joint (3). • Remove the locking piece (2) • Shorten the chain by 2 or 4 links at a time. • Join the chain with the chain joint (3). •... - Page 61 Maintenance 7.9.2 Distance, cutters to drum scraper to drum The points of the blades on the cutters (1) and the scrapers (2) must be at a distance „A“ or „B“ from the rotating conveyor drum (3). KLW0A-05 Adjusting the distance from the cutter to the drum •...
-
Page 62: Lubrication
Maintenance 7.10 Lubrication 7.10.1 Special safety instructions • Maintenance, care, service and cleaning work must only be carried out when the machine is shut down. Shut down the engine, remove the ignition key and switch off the electrical supply at the control box. •... - Page 63 250h 100h KDW10230 bei Lenkachse bei Lenkachse 100h bei Hitch 250h 250h 250h KDW05180 KDW10290 KDW02280 333 678-4...
- Page 64 Maintenance 7.10.4 Lubrication points The following table shows the lubrication points on the short-stalk loading wagon together with the number of lubrication nipples. Lubrication points Number of lubrication nipples Curved path of the pick-up Compensation linkage Bearing of the roller-feeler arm for the pick-up Conveyor drum bearing, right Parking-brake lever Towing eye (for swivel hitching eye only)
-
Page 65: Brake System
Repair work on the brake system must only be carried out by a trained specialist or at appropriate workshops. • KRONE accepts no liability under the terms of the guarantee for normal wear, deficiencies due to overloading or changes to the brake system. •... - Page 66 Maintenance 7.11.3 Air filter for the pipework The air filter is installed in front of the brake valve. This cleans the compressed air, thereby protecting the brake system from faults. The brake system will also work even if the filter element is blocked in both flow directions.
-
Page 67: Care After Daily Use
Maintenance 7.11.4 Compressed air reciever The compressed air receiver stores the compressed air supplied by the compressor. During operation, therefore, condensation water may collect in the receiver. The compressed air filter must be regularly emptied: – every day during winter (when used), –... - Page 68 Maintenance VII - 16...
-
Page 69: Overwintering Special Safety Instructions
Have the necessary maintenance work carried out during the period directly after the harvest season. Draw up a list of all the spare parts needed. In so doing, you will make it easier for your KRONE dealer to process your orders and you can rest assured that your machine will be ready and available at the start of the new season. - Page 70 Overwintering VIII - 2...
-
Page 71: Recommissioning Special Safety Instructions
Recommissioning Recommissioning 9.1 Special safety instructions • The following are fundamentals which apply during all maintenance, assembly, repair and adjustment work: • Shut down the machine, switch off the engine, remove the ignition key and switch off the electrical supply at the control box. •... - Page 72 Recommissioning IX - 2...
-
Page 73: Faults - Causes And Removal
Faults – causes and removal 10 Faults – causes and removal 10.1 Special safety instructions • Maintenance, care, service and cleaning work must only be carried out with the machine shut down. Shut down the engine, remove the ignition key and switch off the electrical system at the control box. - Page 74 Faults – causes and removal X - 2...
- Page 75 Appendix A1 Initial hitch up For transport reasons, the loading wagon is supplied without the articulated shaft attached and with the covers not fully assembled. Before commissioning, the loading wagon must be fully assembled and adapted to suit the type of tractor used to tow it.
- Page 76 Appendix A1.1 Adjusting the tow-bar to the appropriate height and adjusting the towing eye A1.1.1 General information To ensure that the wagon will take the optimum load, the height of the tow-bar must be matched to the type of tractor being used. When the wagon is attached, the distance measured between the upper edge of the frame at the front and ground must be x = 1.29 - 1.32 m .
- Page 77 Appendix • Support the wagon by its supporting foot. • Slacken the nut (1). • Unscrew the screw (2). • Turn the threaded spindle (3). The threaded spindle must be turned until the distance x measured between – the upper edge of the frame and the ground lies between 1.29 and 1.32 m So that the adjustment can be made, the piston (4) of the ram must not be...
- Page 78 The torque (1) stamped on the overload coupling - see example - must agree with the torque in the following table. • If these values do not agree, the KRONE dealer must be informed. Model Speed of power take-off shaft...
- Page 79 Appendix A1.2.3 Adjusting the length The length of the articulated shaft (1) must be adjusted to the conditions. The shortest operating position is selected for the tightest corners. Hitch up the wagon to the tractor.. Take the shortest operating position for the articulated shaft.
- Page 80 Appendix A1.3 Assembling the superstructure Preparation • Secure the tractor and loading wagon against rolling away. • Support the wagon by its supporting foot. • If the tractor is coupled and connected to the wagon, switch off the engine, apply the brake and remove the ignition key.
- Page 81 Appendix • Connect side panels to tubular hoop (2) and secure with bolt (2) and nut. KDW03060 • Fasten front panel (3) and side panel (4) via the slotted holes (1) with two bolts and plane washers. KDW03040 A1.3.1 Installing the tarpaulins Installing the rear tarpaulin (without metal eyelets) •...
- Page 82 Appendix Installing the front tarpaulin • Suspend the eyes from the hooks (4) on the front panel. The two outer hooks each take two eyes. 1. To do this, fold the tarpaulin upwards and over on one side and place the eyes (1) in the hooks (2). 2.
- Page 83 Appendix A2 Electrical circuit diagram Standard operation A - 9...
- Page 84 Appendix Operator-friendly operation A - 10...
- Page 85 Appendix A - 11...
- Page 86 Appendix A - 12...
- Page 87 Appendix A - 13...
- Page 88 SELBSTFAHRENDER HOCH- LEISTUNGS-MÄH-AUFBEREITER SELF-PROPELLED MOWER CONDITIONER GROßPACKENPRESSEN FAUCHEUSE AUTOMOTRICE BIG BALERS PRESSES À GRANDES BALLES CUBIQUES DREISEITEN-KIPPER THREE-WAY TIPPING TRAILER REMORQUES BASCULANTES TRIBENNES Maschinenfabrik Bernard Krone GmbH, Heinrich-Krone-Straße 10, D-48480 Spelle (Germany), Tel.: 05977/935-0, Fax: 05977/935-339 Internet: http://www.krone.de; e-mail: info-ldm@krone.de...
Need help?
Do you have a question about the XXL-RGL and is the answer not in the manual?
Questions and answers