Sign In
Upload
Manuals
Brands
Krone Manuals
Farm Equipment
BiG X 600-3
Krone BiG X 600-3 Manuals
Manuals and User Guides for Krone BiG X 600-3. We have
1
Krone BiG X 600-3 manual available for free PDF download: Original Operating Instructions
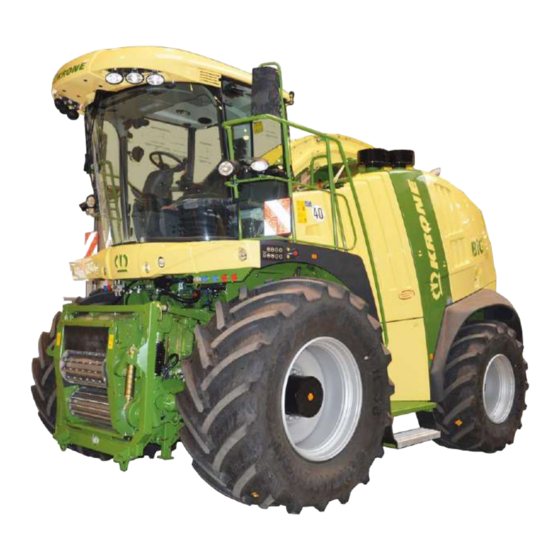
Krone BiG X 600-3 Original Operating Instructions (1138 pages)
Exact forage harvester
Brand:
Krone
| Category:
Farm Equipment
| Size: 26 MB
Table of Contents
Table of Contents
3
To this Document
14
Validity
14
Re-Ordering
14
Further Applicable Documents
14
Target Group of this Document
14
Figures
15
Term "Machine
15
Direction Information
15
Directories and References
15
How to Use this Document
15
Scope of Document
16
Means of Representation
16
Conversion Table
19
Safety
20
Intended Use
20
Improper Use
21
Service Life of the Machine
22
Basic Safety Instructions
23
Importance of the Operating Instructions
23
Personnel Qualification
23
Personnel Qualification of the Technicians
23
Children in Danger
24
Connecting Front Attachments or Trailers
24
Structural Changes to the Machine
24
Additional Equipment and Spare Parts
25
Workstations on the Machine
25
Operational Safety: Technically Perfect Condition
26
Danger Zones
27
Keeping Safety Devices Functional
29
Personal Protective Equipment
30
Safety Signs on the Machine
30
Traffic Safety
31
Parking the Machine Safely
31
Consumables
33
Chemicals
34
Dangers Associated with the Operational Environment
35
Sources of Danger on the Machine
36
Dangers Associated with Certain Activities: Climbing up and down
38
Dangers Associated with Certain Activities: Work on the Machine
38
Dangers Associated with Certain Activities: Checking and Charging Batteries
40
Dangers Associated with Certain Activities: Working on Wheels and Tyres
40
Behaviour in Hazardous Situations and When Accidents Occur
40
Safety Routines
41
Stopping and Securing the Machine
41
Supporting Lifted Machine and Machine Parts Securely
41
Safely Checking the Oil Level and Changing the Oil and Filter Element
42
Safety Stickers on the Machine
44
Position and Meaning of the Safety Stickers on the Machine
44
Contact for KRONE NORTHAMERICA
56
Attaching the Safety Stickers
56
Reordering the Safety Stickers
56
Safety Equipment
57
Ladder
57
Main Battery Switch
58
Seat Switch in the Driver's Seat
59
Fire Extinguisher
60
Wheel Chocks
61
Emergency Exit
62
Instantaneous Stop Switch in the Cab
64
Quick-Stop Switch Grinding Control Unit
64
SMV Emblem
65
Data Memory
66
Machine Description
67
Machine Overview
67
Overview of Crop Flow
69
Identification Plate
71
Information Required for Questions and Orders
71
Contact for KRONE NORTHAMERICA
72
Description of Foraging Process
72
Picking up the Crops
73
Feed Drive
74
Cutting Drum Unit
75
Main Drive Brake
76
Corn Conditioner
76
Discharge Accelerator
76
Discharge Chute
77
Travelling Gear
77
Central Lubrication System
77
System Settings
77
On-Board Power Supply Voltage
78
Silage Additive System (Option)
78
Ladders and Flaps
79
Ladder to the Cab
80
Opening the Cabin Door
81
Opening and Closing Flaps
82
Right Side Flap
83
Left Side Flap
83
Tailgate Engine Compartment
83
Front Right Side Flap
84
Front Left Side Flap
84
Technical Data
85
Technical Data of the Machine
85
Authorised Headers
96
Total Weights and Axle Loads
97
Technical Data of the Air Conditioning System
103
Consumables
104
Control and Display Elements
107
Roof Panel
108
Roof Panel Switch Group
109
Lighting
110
Direction Indicator, Hazard Lights and Brake Light
110
Side Light/Dipped Beam
111
Working Floodlights
113
Reversing Lights
114
Ladder Lighting
114
Warning Beacons
115
Interior Lighting/Reading Lamp
116
Spotlight on Control Lever
117
Coming Home Function
117
Climatronic / Heating
118
Control and Display Elements
118
Operation
120
Switching on the System
120
Setting the Desired Cab Temperature
120
Switch Air Conditioning on / off
121
Switching REHEAT Mode On/Off
122
Manually Setting the Evaporator Fan Speed
123
Malfunctions Indicated on the Display
124
Switching the Temperature Display to ° Fahrenheit
124
Air Comfort Seat
126
ACTIVO Design (Optional)
127
Verstellbare Lüfterdüsen
132
Operation Console
133
Switches and Control Lamps
134
Functions of the Release Switches and Keys
135
Membrane Keyboard
139
Control Lever
140
Steering Column and Foot Pedals
144
Steering Column Adjustment
145
Full Beam
146
Headlamp Flasher
146
Horn
147
Direction Indicator
147
Service Brake
148
Trailer Brake
148
Drawer for First-Aid Kit/Operating Instructions
149
Monitor for Camera Monitoring System (Optional)
149
Guide's Seat
150
Cooling Box
150
Ignition Lock
151
Cigarette Lighter / 12 Volt Socket
152
Socket and USB Connection
153
OBD Diagnostic Socket
153
CAN Diagnostic Socket, USB Connection and ISOBUS Socket
154
Outside Mirrors
155
Left Outside Mirror
155
Right Outside Mirror and Anti-Collision Mirror
155
Setting the Right Outside Mirror
155
Inside Mirror
156
Sun Blind
156
Wind Shield Wiper
157
Washer System - Windshield
157
Manual Operation on the Left Platform
158
Radio Installation
158
Trailer Coupling
160
Info Centre "Easytouch
161
Overview
161
Information Section
164
Status Line
165
Engine Data Information Section
167
Drive Data Information Section
169
Settings Information Section
176
Menu Field Working Width
176
Menu Area Header
177
Intake Menu Area
180
Lifting Unit Menu Area
182
General Machine Settings Information Section
183
Memory Keys
183
Grass Pick-Up Mode
186
Maize Header
190
Direct Cut Header
202
Customer Data Counter
207
Silage Additives Unit
214
Setting the Corn Conditioner Distance
220
Menu Level
221
Access a Menu Level
226
Main Menu 1 Settings
227
Menu 1-1 Parameters
228
Entering Parameters
230
Menu 1-2 Machine Setting
232
Menu 1-3 Units
233
Menu 1-4 Powersplit (Option)
235
Menu 1-5 "Language
239
Menu 1-7 "Display
240
Menu 1-7-1 "Day/Night Mode
241
Menu 1-7-2 Beeper
242
Menu 1-7-4 Direction of Rotation
244
Menu 1-7-5 Configure Status Line
245
NIR Sensor for Moisture Measurement (Option)
246
Menu 1-8 Date/Time
249
Menu 1-9 Owner's Address
250
Menu 1-10 Memory Keys
251
Main Menu 2 Counters
252
Deleting the Day Counter
253
Switching to Customer Datacounters
253
Main Menu 3 Maintenance
254
Unfulfilled Switching-On Conditions and CAN Bus Disturbances
255
Menu 3-1 Central Lubrication/Cleaning
257
Menu 3-2 Grind/Counterblade
258
Menu 3-3 Calibration of Absolute Lifting Unit Height
264
Calibration of Sensors at Lifting Unit
265
Calibrating the Absolute Cutting Height
268
Calibrating the Automatic Steering System
271
Calibrating the Steering Angle Sensor
274
Row Tracer Calibration
276
Calibrating Flexible Row Tracers
279
Calibration of Valves for Steering Left/Right (Manual)
280
Calibration of Valves for Steering Left/Right (Automatic)
282
Turning Circle Calibration (Only for ISOBUS Steering System)
285
Menu 3-5 Calibration Spout
287
Menu 3-6 Corn Conditioner Calibration
290
Menu 3-7 Calibration of Feed Drive/Front Attachment
293
Calibrate Feed Drive/Front Attachment
294
Menu 3-9 Calibration of Rockprotect
297
Menu 3-10 Calibration of Main Coupling
298
Menu 3-11 Maintenance of Additional Axle (Option)
301
Menu 3-12 Automatic Calibration of Sensors at Lifting Unit
302
Main Menu 4 Service
304
Menu 4-1 Diagnostics
305
Unfulfilled Switching-On Conditions and CAN Bus Disturbances
307
General Status Displays Sensors/Actuators
309
Menu 4-1-1 Diagnostics Intake
310
Menu 4-1-2 Diagnostics Front Attachment
314
Menu 4-1-3 CAN Bus
318
Menu 4-1-4 Diagnostics Spout
320
Menu 4-1-5 Diagnostics Lifting Unit
326
Menu 4-1-6 Diagnostics Travelling Gear
336
Menu 4-1-7 Metal Detection
343
Menu 4-1-8 Diesel Engine
347
Menu 4-1-9 Automatic Steering System
355
Menu 4-1-10 Diagnostics Autoscan
360
Menu 4-1-11 Diagnostics Electronics
362
Menu 4-1-12 Diagnostics Work
369
Menu 4-1-13 Diagnostics Grind
382
Menu 4-1-14 Diagnostics Counterblade
385
Menu 4-1-15 Diagnostics Corn Conditioner
388
Menu 4-1-16 Diagnostics Multi-Function Lever
390
Menu 4-1-17 Diagnostics CUC
394
Menu 4-1-18 Diagnostics Manual Operation
397
Menu 4-1-19 Diagnostics Terminal
398
Menu 4-1-20 Diagnostics Rockprotect
400
Menu 4-1-21 Diagnostics Moisture
404
Menu 4-2 Error List
406
Menu 4-3 "Service Level
412
Menu 4-4 Information
413
Menu 4-4-1 Multi-Function Lever
413
Menu 4-4-2 Software
414
Menu 4-4-3 Machine
417
Menu 4-4-8 Software Package Display
418
Menu 5 Working Screen
418
Error Messages
419
Instruction Message
420
Warning Message
421
Printing Customer Data
422
Selecting the Customer Record
422
Print Menu Customer Data
423
Printing Cultivated Area Counter State/States
426
Accessing the Constant Power Setting Menu (Optional)
427
Entering the Degree of Speed Reduction
428
Setting the Maximum Speed
430
Setting the Minimum Speed
431
Operation of the Internal Silage Additive System
432
Calibration of the Internal Silage Additives Unit
434
Recording the Characteristic Line
435
Use
436
Continuous Operation
437
Automatic Mode
438
Crop Flow Cleaning Headland
439
Error Messages
440
Cleaning and Maintenance
441
Commissioning
442
Checks before Starting up the Machine for the First Time
442
Mounting Warning Panels in the Operating Position
445
Mounting Fire Extinguisher in the Holder
446
Identification Plate
446
Start-Up
447
Check before Start-Up
447
Silage Additive System
449
Silage Additives Unit (Internal)
449
Silage Additive System (External)
450
Start-Up - Grass Mode
451
Operating the Cable Winch
452
Removing the Corn Conditioner
453
Installing the Grass Channel
458
Start-Up - Maize Mode
464
Operating the Cable Winch
465
Removing the Grass Channel
467
Installing the Corn Conditioner
471
Removing/Installing the NIR Sensor for Moisture Measurement
479
Converting the Pendulum Frame Cylinder for Maize Mode
485
Further Conversion Work
487
Removing the Additional Axle
491
Additional Axle
491
Start-Up - Additional Axle
491
Installing the Additional Axle
493
Setting the Pressure of the Additional Axle on the Pressure Limiting Valve
494
Function Test Additional Axle
495
Start-Up - Spout Extension
496
Removing/Attaching the Spout Extension/Spout End Piece
496
Weights
497
Removing the Spout Extension (12- and 14-Row)
497
Attaching the Spout Extension (12- and 14-Row)
498
Attaching the Spout End Piece (8- and 10-Row)
499
Removing the Spout End Piece (8- and 10-Row)
500
Setting the Start-Up Safety Mechanism
501
Start-Up - Attaching and Removing the Front Attachment
502
Adapting the Adapter Frame of the Front Attachment
503
Preparing the Pendulum Frame for Installation of the Front Attachment
504
Mounting the Front Attachment
505
Removing Easyflow
512
Switching off Easyflow
514
Start-Up - Attaching the Rear Weight
515
Driving and Transport
518
Starting the Engine
519
Observing Indicator Lamps
521
Behaviour after the Engine Has Stalled
522
Jump Starting the Machine
524
Starting up the Machine
525
General on Driving
525
Switching on Road Travel Mode
526
Driving Forwards
526
Setting the Acceleration Behaviour
527
Reversing
528
Cruise Control
529
Saving Speed for Operation with Cruise Control
529
Deactivating Cruise Control
530
Activating Cruise Control
530
Stopping
531
Stopping with the Multi-Function Lever
531
Stopping with the Foot Brake
532
Trailer Brake (Option)
533
Applying the Parking Brake
534
Switching off the Engine
534
Switching off the Machine
535
Preparations for Road Travel
536
Transport Position
536
Folding/Raising the Front Attachment into the Transport Position
537
Swivelling the Discharge Chute into Transport Position
540
Behaviour When Driving Downhill
541
Towing
541
Releasing the Holding Brake Manually
543
Preparing the Machine for Transport
545
Raising and Lowering the Front Attachment
546
Operation
546
Aligning the Pendulum Frame
547
Operating the Machine with a Trailer
548
Connecting Trailer
549
Connecting Trailer for Italy
551
Disconnecting Trailer
553
Disconnecting Trailer for Italy
555
Additional Axle (Optional)
556
Maize Operating Mode
556
Grass Mode
556
Xdisc Mode
556
Manual Check of Additional Axle Basic Function
557
Function Test of Additional Axle Automatic Functions
557
Field Mode
558
Field Mode on Slopes
559
Fast Change of Direction of Travel (Fast Reversing)
560
Emergency Switching of the Chopping Drum
561
Operating Intake/Front Attachment
562
Metal Detection
566
Rockprotect (Option)
566
Lifting Unit Control
567
Setting Discharge Chute
569
Traction Control System
571
Automatic Steering System
572
Constantpower Load Limit Control (Optional)
575
Autoscan (Optional)
576
Adjusting the Chop Length
577
Variloc Gearbox (Optional), Switching between 2 Gearbox Positions
579
Adjusting the Electrically Adjustable Discharge Accelerator Rear (Optional)
582
Removing Crop Flow Blockages in the Area of the Crop Flow
583
Blowing Device for Intake Unit and Grinding Device
588
Settings
589
Optimising Crop Flow
590
Adjusting Overhang of the Cutting Blades
591
Optimising Discharge Capacity of the Machine
591
Setting Drum Base
592
Setting the Discharge Accelerator Rear Wall
594
Settings on the Installed Grass Channel
594
Settings with an Installed Corn Conditioner
600
Setting the Throttle Valves
606
Metric Thread Screws with Control Thread
607
Tightening Torques
607
Maintenance
607
Metric Thread Screws with Fine Thread
608
Metric Thread Screws with Countersunk Head and Hexagonal Socket
608
Maintenance Table
609
General Maintenance Work
620
Fire Extinguisher
620
Cleaning the Machine Completely
621
Maintenance - Basic Machine
622
Windscreen Washer System
622
Maintenance - Air Conditioning System and Heating
623
Components of the Air Conditioning System
623
Refrigerant
624
Collector / Dryer
624
Filling Quantities of Consumables Air Conditioning System
625
Checking Refrigerant Condition and Filling Quantity
625
Changing / Cleaning the Fresh Air Filter
626
Changing / Cleaning the Circulation Filter
627
Cleaning the Radiator and the Radiator Compartment
629
Maintenance of Brake (Bosch)
630
Belt Drives
631
Checking the Belt Pulley
631
Checking the Power Belt
631
Sieve Drum Drive
632
Tyres
633
Checking and Maintaining Tyres
633
Changing the Tyre Size
634
Wheel Mounting
634
Running Direction of the Tyres
634
Servicing the Tow Coupling
635
Servicing the Trailer Coupling for Italy
636
Cleaning the Silage Additives Unit
637
Cable Winch
640
Maintenance - Engine
641
Contamination in the Engine Compartment
642
Cleaning the Engine Compartment with Compressed Air
642
Engine Oil Level
642
Checking Engine Oil Level
643
Fuel System
644
Refuelling
644
Changing Filter Element on the Fuel Prefilter with Water Separator - Draining Condensation
645
Replacing the Fuel Prefilter Hand Pump
646
Replacing the Fuel Filter Insert
647
Venting the Fuel System
647
Maintenance Cooling System (Engine)
648
Coolant
648
Checking the Engine Pipework
651
Air Filter
653
Cleaning Air Filter
653
22.8.1.2 Replacing Safety Cartridge
654
Maintenance - Compressed Air System
655
Compressed-Air Reservoir
655
Checking the Drain Valve
656
Cleaning the Silencer
656
Maintenance - Supply System
657
Feed Attachment
657
Remove the Feed Attachment with Front Attachment
657
Attaching the Feed Attachment with Front Attachment
664
Remove the Feed Attachment with Installation Cart
670
Attaching the Feed Attachment with Installation Cart
677
Grinding the Cutting Blade
682
Re-Adjusting or Replacing the Grinding Stone
686
Checking the Grinding Stone
687
Re-Adjusting the Grinding Stone
688
Replacing the Grinding Stone
690
Re-Adjusting or Changing the Cutting Blades
692
Rotating the Chopping Drum
693
Re-Adjusting or Changing the Chopping Blades on Chopping Drums with 20, 28, 36 Blades
694
Re-Adjusting or Changing the Chopping Blades on Chopping Drums with 40, 48 Blades
701
Locking the Chopping Drum
701
Readjusting the Cutting Blades
702
Changing Cutting Blades
704
Working with Half the Number of Cutting Blades
707
Turning or Replacing the Counterblade
708
Turning or Changing the Conveyor Bars on the Pre-Compression Roller
711
Adjusting the Distance between the Scraper and Flat Roller
712
Adjusting the Gap between the Baling Roller and Scraper
714
Setting the Tension Springs on the Feed Attachment
715
Hydraulic Oil
716
Maintenance - Hydraulic System
716
Over-Pressure Valves
716
Hydraulic Oil Tank
717
Oil Level Check and Oil Change on the Hydraulic Tank
717
Change Return Suction Filter
719
High-Pressure Filter
720
Check Hydraulic Hoses
721
Maintenance - Gearbox
722
Overview of the Drives
722
Maintenance of Power Take-Off Gear
723
Maintenance of Transfer Gearbox
726
Maintenance of Lower Roller Gearbox
727
Maintenance of Angular Gearbox
728
Maintenance Upper Roller Gearbox
729
Maintenance Worm Drive
730
Wheel Hub Gearbox Maintenance
731
Maintenance Variloc Gearbox (Option)
734
Maintenance - Electrical System
736
Battery
737
Removing and Installing Battery
738
Servicing the Battery
740
Three-Phase Generator
740
Starter
742
Maintenance - Lubrication
743
Manual Lubrication Chart
744
Maintenance - Central Lubrication System
746
Overview of the Distributor Blocks of the Central Lubrication System
746
Lubricant Filling
749
Visual Filling Level Control
749
Topping up Lubricant
750
Signal Displays
752
Fault
753
At the End of the Harvest Season
754
Placing in Storage
754
Before the Start of the New Season
756
Disposal of the Machine
757
Appendix
759
Appendix - Cropcontrol System
759
Appendix - Cropcontrol System
760
Appendix - Parameter List
760
Connecting the Terminal in Case of Self-Propelled Machines
761
Mode of Operation Cropcontrol and Cropcontrol TC Sync in Connection with ISOBUS Task Controller
763
Design of the Display
764
Display Working Screen
764
Operating Cropcontrol System Via KRONE CCI 200 Operation Terminal or KRONE Delta Operation Terminal
764
Short-Cut Buttons in the Working Screen
766
Display in Basic Screen
768
Counterweighing
769
Performing a Counterweighing
769
Menu Level
772
Bringing up a Menu Level
773
Main Menu 1 Settings
774
Main Menu 2 Calibration
776
Main Menu 13 Yield Counter
782
Main Menu 14 ISOBUS Settings
792
Main Menu 15 Service
795
Error Messages (UT)
805
Design of the Display
808
Display Working Screen with Cropcontrol TC Sync System
808
Operating Cropcontrol System with Installed Cropcontrol TC Sync. System Via KRONE CCI 200 Operating Terminal
808
Short-Cut Buttons in the Working Screen
810
Display in Working Screen
815
Creating CCI200 Order and Performing Counterweighing
816
Creating Order
816
Counterweighing
818
Performing Counterweighing
818
Entering the Weight of the Counterweighing
820
Deleting a Counterweighing
821
Autocalibrate
822
Entering Calibration Factor Directly
822
Creating Control Mobile Order and Performing Counterweighing
823
Creating Order
823
Performing Counterweighing
824
Entering the Weight of Counterweighing
826
Deleting a Counterweighing
827
Entering Correction Factor Directly
828
Autocalibrate
829
Menu Level
830
Bringing up a Menu Level
831
Main Menu 1 Settings
832
Main Menu 2 Calibration
834
Main Menu 14 ISOBUS Settings
839
Main Menu 15 Service
842
Error Messages (UT)
852
Appendix - Error Messages
878
Advertisement
Advertisement
Related Products
KRONE BiG X 500
KRONE BiG X 650
KRONE BiG X 800
KRONE BiG X 1000
Krone XXL-RGL
Krone BiG X 700-3
Krone BiG X 770-3
Krone Big Pack 890
Krone Big Pack 1290
Krone Big Pack 1270
Krone Categories
Farm Equipment
Lawn Mower
Lawn and Garden Equipment
Utility Vehicle
Industrial Equipment
More Krone Manuals
Login
Sign In
OR
Sign in with Facebook
Sign in with Google
Upload manual
Upload from disk
Upload from URL