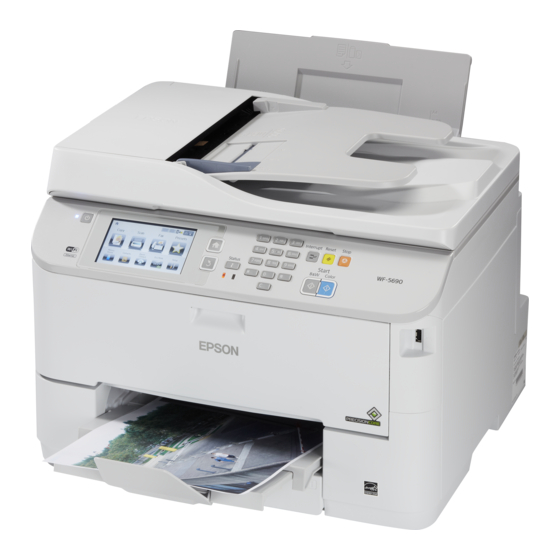
Epson WF-5690 Series Service Manual

Epson WF-5690 Series Service Manual

Color inkjet printer
Hide thumbs Also See for WF-5690 Series:

Advertisement

SERVICE MANUAL
Color Inkjet Printer
Epson WF-5690 series/ Epson WF-4640 series
Epson WF-4630 series/ Epson WF-5620 series
Epson WF-5190 series/ Epson WF-5110 series
CONFIDENTIAL
SEMF13-007

Advertisement

Table of Contents
loading

Summary of Contents for Epson WF-5690 Series

  • Page 1 SERVICE MANUAL Color Inkjet Printer Epson WF-5690 series/ Epson WF-4640 series Epson WF-4630 series/ Epson WF-5620 series Epson WF-5190 series/ Epson WF-5110 series CONFIDENTIAL SEMF13-007...
  • Page 2 The contents of this manual are subject to change without notice.  The above not withstanding SEIKO EPSON CORPORATION can assume no responsibility for any errors in this manual or the consequences thereof. EPSON is a registered trademark of SEIKO EPSON CORPORATION.
  • Page 3 Strictly observe the following cautions. Failure to comply may lead to personal injury or damage of the product. 1. Repairs on Epson product should be performed only by an Epson certified repair technician. 2. No work should be performed on this product by persons unfamiliar with basic safety knowledge required for electrician.
  • Page 4 7. In order to protect sensitive microprocessors and circuitry, use static discharge equipment, such as anti-static wrist straps, when accessing internal components. 8. Do not tilt this product immediately after initial ink charge, especially after performing the ink charge several times.
  • Page 5 About This Manual This manual, consists of the following chapters, is intended for repair service personnel and includes information necessary for properly performing maintenance and servicing the product. CHAPTER 1. TROUBLESHOOTING Describes the step-by-step procedures for the troubleshooting. CHAPTER 2. DISASSEMBLY / REASSEMBLY Describes the disassembly/reassembly procedures for main parts/units of the product, and provide the standard operation time for servicing the product.
  • Page 6 Revision Status Revision Date of Issue Description January 15, 2014 First Release January 29, 2014 Revised contents  Chapter 1  Made change in "1-2 Fatal Error List (p14)".  Chapter 3  "o Method of the Head angular adjustment (Visual adjustment pattern) (p64)"has been added.
  • Page 7: Table Of Contents

    Epson WF-5690/4640/4630/5620/5190/5110 series Revision D Contents Chapter 1 Troubleshooting 1.1 Troubleshooting............................... 10 1.1.1 Troubleshooting Workflow ..........................10 1.1.2 Power-On Sequence ............................12 1.1.3 Fatal Error............................... 14 1.1.4 Status sheet ..............................19 1.1.4.1 Start method of Inspection Mode......................19 1.1.4.2 Description of Status sheet (Non-disclosed information to user) ............20 Chapter 2 Disassembly/Reassembly 2.1 Overview .................................
  • Page 8 Epson WF-5690/4640/4630/5620/5190/5110 series Revision D 4.2 Lubrication Points and Instruction .......................... 84 4.3 Firmware Update..............................87 Chapter 5 Appendix 5.1 Connector Diagram ..............................90 Confidential...
  • Page 9 CHAPTER 1 TROUBLESHOOTING Confidential...
  • Page 10: Troubleshooting

    Epson WF-5690/4640/4630/5620/5190/5110 series Revision D 1.1 Troubleshooting This section describes the troubleshooting workflow. 1.1.1 Troubleshooting Workflow The following page describes the troubleshooting workflow. Follow the flow when troubleshooting problems.  This flowchart is compiled based on the following contents. • Our experience regarding the quality problem.
  • Page 11 Epson WF-5690/4640/4630/5620/5190/5110 series Revision D The power-on sequence Error is indicated during power-on does not start (p10) sequence (p10) Fatal error Maintenance box full Maintenance box CSIC error No maintenance box error Ink end error Ink cartridge detection error No ink cartridge error...
  • Page 12: Power-On Sequence

    Epson WF-5690/4640/4630/5620/5190/5110 series Revision D 1.1.2 Power-On Sequence This section describes the power-on sequences for this product. The preconditions are as follows.  Normal power-on sequence  Turning on the printer after turning it off without an error.  Initial ink charge has finished and every cartridge has sufficient ink.
  • Page 13 Epson WF-5690/4640/4630/5620/5190/5110 series Revision D Table 1-1. Power-On Sequence Movement of Front ASF drive Decompress Operation Components condition motor 3-2.The carriage moves to the 0-digit side slowly up to the position where the Front ASF turn off. 3-3.The carriage moves to the 80-digit side slowly and passes by the CR lock.
  • Page 14: Fatal Error

    Epson WF-5690/4640/4630/5620/5190/5110 series Revision D 1.1.3 Fatal Error This section describes the fatal error code and the possible cause for this product. Fatal errors related to the ADF/Scanner unit do not occur for WF-5190/5110 series because this model does not have ADF/Scanner unit.
  • Page 15 Epson WF-5690/4640/4630/5620/5190/5110 series Revision D Table 1-2. Fatal Error List Error Error type Error name Possible cause code 0x30 Option error • Main Board failure • Paper jam 0x36 Paper jam error • Foreign object • ADF Encoder failure (contaminated/detached scale, Encoder Board...
  • Page 16 Epson WF-5690/4640/4630/5620/5190/5110 series Revision D Table 1-2. Fatal Error List Error Error type Error name Possible cause code • PW Sensor failure 0x94 PW Sensor light value adjust error • Main Board failure • Decompress pump motor failure 0x96 Decompress pump motor driving time error •...
  • Page 17 Epson WF-5690/4640/4630/5620/5190/5110 series Revision D Table 1-2. Fatal Error List Error Error type Error name Possible cause code • ASF Encoder failure (contaminated/detached scale, Encoder Board failure) • ASF Motor failure 0xDA ASF load position excess load error • Pickup Roller (2nd cassette) driven mechanism overload (paper jam/ foreign object) •...
  • Page 18 Epson WF-5690/4640/4630/5620/5190/5110 series Revision D Table 1-2. Fatal Error List Error Error type Error name Possible cause code • PF Encoder failure (contaminated/detached scale, Encoder Board failure) • PF Motor failure 0xF4 PF PID lock error • PF driver mechanism overload (paper jam/foreign object) •...
  • Page 19: Status Sheet

    Epson WF-5690/4640/4630/5620/5190/5110 series Revision D 1.1.4 Status sheet This section describes the Status sheet for this product.  This product can print the three kind of status sheet, and you can confirm the following information. • Configuration Status Sheet • Supply Status Sheet •...
  • Page 20: Description Of Status Sheet (Non-Disclosed Information To User)

    Epson WF-5690/4640/4630/5620/5190/5110 series Revision D 1.1.4.2 Description of Status sheet (Non-disclosed information to user)  Supply Status sheet Figure 1-1. Supply Status Sheet (Non-disclosed information to user) Item Content Item Content Consumable information <Ink Cartridge> Ink residual quantity Residual quantity information of the Ink Cartridge.
  • Page 21 Epson WF-5690/4640/4630/5620/5190/5110 series Revision D  Usage History Sheet Figure 1-2. Usage History Sheet (Non-disclosed information to user) Item Content Item Content Number of Sheets Loaded Casette 1 Number of sheets loaded from 1st Cassette 2 Number of sheets loaded from 2nd cassette.
  • Page 22: Chapter 2 Disassembly/Reassembly

    CHAPTER 2 DISASSEMBLY/REASSEMBLY Confidential...
  • Page 23: Overview

    Flathead Precision screwdriver #1 Tweezers Longnose pliers Acetate tape 1003963 Note 1: Some of the tools listed above are commercially available. 2: EPSON provides the tools listed with EPSON part code. 2.1.2 Jigs Name Quantity EPSON Part Code Thickness gauge (5 mm)
  • Page 24: Standard Operation Time For Servicing The Product

    Epson WF-5690/4640/4630/5620/5190/5110 series Revision D 2.1.3 Standard Operation Time for servicing the product The following are the standard operation time for servicing the product. Those are base on the MTTR result measured using a prototype. The underlined parts/units are supplied as After Service parts.
  • Page 25 Epson WF-5690/4640/4630/5620/5190/5110 series Revision D Table 2-1. Standard Operation Time (WF-5690/4640/4630/5620 series) Time (second) Time (second) Repla Repla Parts/Unit Parts/Unit Adjus Adjus ceme Total ceme Total tment tment Interface Board Assy 1029 1029 EJ Roller 1545 1911 Interface Board Shield Plate...
  • Page 26 Epson WF-5690/4640/4630/5620/5190/5110 series Revision D Table 2-2. Standard Operation Time (WF-5190/5110 series) Time (second) Time (second) Repla Repla Parts/Units Pats/Units Adjus Adjus ceme Total ceme Total tment tment Panel Unit Power Supply Unit Metal Plate CR Cover (Including Paper Support Assy)
  • Page 27: Disassembly/Reassembly Procedures

    Epson WF-5690/4640/4630/5620/5190/5110 series Revision D 2.2 Disassembly/Reassembly Procedures 2.2.1 Caution when Replacing the Printhead/Ink Supply Unit For stable ink supply, this product employs a mechanism where the ink in the ink path is pressurized even the power is off. Therefore, if the joint section of the printhead and the Ink Supply Unit is simply disconnected, the ink in the ink tube will spill over.
  • Page 28 Epson WF-5690/4640/4630/5620/5190/5110 series Revision D  When separating the Printhead and the Ink Supply Unit, make sure to perform "3.2.7 Ink Leak Check (p79)" to check if ink is leaking.  After disconnecting the Printhead and the Ink Supply Unit, ink may spill over even if the pressure is released.
  • Page 29: Parts/Units Need To Be Removed In Advance

    Epson WF-5690/4640/4630/5620/5190/5110 series Revision D 2.2.2 Parts/Units Need to be Removed in Advance Chapter 2 "Disassembly Flowchart (p30)", the procedures are indicated on the premise that some parts/units are removed in advance. Make sure to remove the following parts/units before starting disassembly.
  • Page 30: Disassembly Flowchart

    Epson WF-5690/4640/4630/5620/5190/5110 series Revision D 2.2.3 Disassembly Flowchart This section describes procedures for disassembling the parts/units in a flowchart format. For some parts/units, detailed procedures or precautions are provided (accordingly indicated by icons and cell's color). Refer to the explanations in the example chart below and perform an appropriate disassembling and assembling procedure.
  • Page 31 Epson WF-5690/4640/4630/5620/5190/5110 series Revision D The example below shows how to see the charts on the following pages. White letters indicate a part/ Ref. Ink System Unit Explanation available in the unit supplied as an ASP. Reference Guide Shows the screw types and the specified torque in the “Screw type/torque list”.
  • Page 32: Exterior Parts

    Epson WF-5690/4640/4630/5620/5190/5110 series Revision D 2.2.3.2 Exterior Parts START WF-5190/5110 series WF-5690/4640/4630/5620 series Metal Plate Housing Rear Paper Stopper Cover ASF Assy Panel Assy Panel Assy ADF Pad Assy (w/ Paper Assy Assy Stopper Assy) (p 39) (p 39) (p 44)
  • Page 33 Epson WF-5690/4640/4630/5620/5190/5110 series Revision D (p 32) ADF Unit Scanner Unit (p 44) (p 46) (p 46) ADF Rear Cover (p 44) ADF Cover Assy LD Shaft (p 44) ADF Document ADF Cover Extension Spring Support Assy Housing Upper 0.99...
  • Page 34: Printer Mechanism

    Epson WF-5690/4640/4630/5620/5190/5110 series Revision D 2.2.3.3 Printer Mechanism  The removed parts/units differ between models when the name of each model is indicated and (p 32) enclosed in a box. If “Go to the next step” is indicated for a specific model in the box, skip the step for the model and go to the next step.
  • Page 35 Epson WF-5690/4640/4630/5620/5190/5110 series Revision D (p 34) (p 34) (p 34) Ink Supply Unit Power Supply CR Cover Main Board Cable Interface Board Interface Board Unit Grounding Plate Metal Plate Left Star Wheel Assy Holder Assy Shield Plate Upper Rear ASF Assy...
  • Page 36: Printhead/Ink Supply Unit

    Epson WF-5690/4640/4630/5620/5190/5110 series Revision D 2.2.3.4 Printhead/Ink Supply Unit The disassembling and reassembling procedure of the Printhead/Ink Supply Unit requires additional steps before and during the procedure. Therefore, the whole flow from disassembling to reassembling is provided below. Note: The black arrows ( ) indicate disassembling, and the red arrows ( ) show reassembling.
  • Page 37: 2Nd Cassette Unit

    Epson WF-5690/4640/4630/5620/5190/5110 series Revision D 2.2.3.5 2nd Cassette Unit This unit is installed for WF-4640 series, and option for WF-5690/4630/5620/5190/5110 series. 2nd Cassette Unit START Cassette Assy (p 82) Cassette Cover 2nd Cassette 2nd Cassette 2nd Cassette Paper Stopper Cover Left...
  • Page 38: Detailed Disassembly/Reassembly Procedure For Each Part/Unit

    Epson WF-5690/4640/4630/5620/5190/5110series Revision D 2.3 Detailed Disassembly/Reassembly Procedure for each Part/Unit FAX Cover/USB Cover Housing Upper Assy (WF-5190/5110 series) Front Housing Assy Front Cover Inside Front Cover Rear right Rear left Front Housing Assy Front Cover Bottom left Bottom right...
  • Page 39 Epson WF-5690/4640/4630/5620/5190/5110series Revision D Panel Assy (WF-5690/4640/4630/5620 series) Panel Assy (WF-5190/5110 series) Panel Assy Back of Panel Assy Housing Upper Assy Bottom of Panel Assy Panel Assy Panel Assy Panel Assy Front Scanner Cover Front Unit Cover Bottom of Housing Upper Assy...
  • Page 40 Epson WF-5690/4640/4630/5620/5190/5110series Revision D Interface Board Assy (WF-5690/4640/4630/5620 series) Ink System Unit Main Board Shield Plate Upper Assy Interface Board Tube Ink System clamp Tube Frame Base Maintenance Box Ink Eject Ink System Unit Joint Interface Board Shield Plate Slide the Interface Board Assy, and install it Interface Board Grounding Plate to the Main Board Shield Plate Upper Assy.
  • Page 41 Epson WF-5690/4640/4630/5620/5190/5110series Revision D Head FFC PF Encoder / PF Timing Belt Metal Plate Left Step 3: Back of Front Frame Tube Holders Head FFC PF Encoder Front Frame Head FFC Holder PF Encoder Front Tube Guide Head FFC Holder...
  • Page 42 Epson WF-5690/4640/4630/5620/5190/5110series Revision D Ink System Supply Assy (Ink Supply Unit w/ Printhead) Ink Supply Unit Step 4 Section A I/C Holder Unit Section A Carriage Assy End of ink tube Step 1 Joint section Do not remove. Rubber packing...
  • Page 43 Epson WF-5690/4640/4630/5620/5190/5110series Revision D Rear ASF Assy Rear ASF Guide Upper Assy CR Scale Carriage Assy Rear right Bottom Rear APG Slider APG Slider Carriage Assy Rear ASF Guide Upper Assy Trigger Lever Clutch Lever Step 1 Slit of CR...
  • Page 44 Epson WF-5690/4640/4630/5620/5190/5110series Revision D Paper Stopper Assy 1st Paper Stopper Assy 1st / 2nd ADF Unit (WF-5690/4640/4630/5620 series) Compression Spring 0.188 Secure springs (x4) with dowels. ADF Document Support Assy ADF Cover Assy Compression Spring 0.9 Paper Stopper Slider Cassette...
  • Page 45 Epson WF-5690/4640/4630/5620/5190/5110series Revision D 2nd Cassette Cover Left* Frame Pickup Assy Paper Stopper Assy 2nd 2nd Cassette Cover Right Front Rear 2nd Cassette Cover Right Rear Front 2nd Cassette Cover Left 2nd Cassette Housing Assy 2nd Cassette Cross-section 2nd Cassette...
  • Page 46: Routing Ffcs/Cables

    Epson WF-5690/4640/4630/5620/5190/5110 series Revision D 2.4 Routing FFCs/Cables Top of the Scanner Unit Bottom of the Frame Base Bottom of the Scanner Unit (WF-5690/4640/4630/5620 series) (WF-5690/4640/4630/5620 series) Hole of Frame Base Pull out Scanner Pull out Scanner Ferrite core Shield plate of Main Board Assy Motor cable here.
  • Page 47 Epson WF-5690/4640/4630/5620/5190/5110 series Revision D Top of the Printer Bottom of the Ink System Unit Paper Guide Front Assy Rear right Rear Ink Supply Unit Main Frame Main Frame Assy Hole of Frame Base CSIC FFC Decompress Pump Unit Make one turn...
  • Page 48 Epson WF-5690/4640/4630/5620/5190/5110 series Revision D Main Board Assy (1) Main Board Assy (2) Connector positions on Main Board Assy Front right of Main Board Assy PF Motor cable Main Board Cable Holder Double-sided tape (1) Clamp E Clamp G Clamp F...
  • Page 49 Epson WF-5690/4640/4630/5620/5190/5110 series Revision D 2nd Cassette Housing Assy Rear left Bottom Paper Stopper Lever Sensor cable ASF Encoder Board Groove B Paper Stopper Lever Sensor cable Hole C Groove A Hole C Groove B Left ASF Motor 2nd Cassette Housing Assy...
  • Page 50: Chapter 3 Adjustment

    CHAPTER 3 ADJUSTMENT Confidential...
  • Page 51: Required Adjustments

    Epson WF-5690/4640/4630/5620/5190/5110 series Revision D 3.1 Required Adjustments The table from the following page lists the required adjustments depending upon the parts being repaired or replaced. Find the part(s) you removed or replaced, and check which adjustment(s) must be carried out.
  • Page 52 Epson WF-5690/4640/4630/5620/5190/5110 series Revision D Table 3-1. Required Adjustment List (Mechanism adjustment) Adjustment Type Mechanism Adjustment Priority Rear ASF PF Timing Timing Belt Head Angular Check the Ink Leak Touch Panel Adjustment Item Belt Tension Tension Adjustment Adjustment Platen Gap...
  • Page 53 Epson WF-5690/4640/4630/5620/5190/5110 series Revision D Table 3-1. Required Adjustment List (Mechanism adjustment) Adjustment Type Mechanism Adjustment Priority Rear ASF PF Timing Timing Belt Head Angular Check the Ink Leak Touch Panel Adjustment Item Belt Tension Tension Adjustment Adjustment Platen Gap...
  • Page 54 Epson WF-5690/4640/4630/5620/5190/5110 series Revision D Table 3-2. Required Adjustment List (Adjustment using the Adjustment Program) Adjustment Type Adjustment using the Adjustment Program Priority Initialize First dot position / Bi-d adjustment PE adjustment PF/EJ CR Motor PF Motor SCN Motor Setting...
  • Page 55 Epson WF-5690/4640/4630/5620/5190/5110 series Revision D Table 3-2. Required Adjustment List (Adjustment using the Adjustment Program) Adjustment Type Adjustment using the Adjustment Program Priority Initialize First dot position / Bi-d adjustment PE adjustment PF/EJ CR Motor PF Motor SCN Motor Setting...
  • Page 56 Epson WF-5690/4640/4630/5620/5190/5110 series Revision D Table 3-2. Required Adjustment List (Adjustment using the Adjustment Program) Adjustment Type Adjustment using the Adjustment Program Priority Initialize First dot position / Bi-d adjustment PE adjustment PF/EJ CR Motor PF Motor SCN Motor Setting...
  • Page 57 Epson WF-5690/4640/4630/5620/5190/5110 series Revision D Table 3-2. Required Adjustment List (Adjustment using the Adjustment Program) Adjustment Type Adjustment using the Adjustment Program Priority Initialize First dot position / Bi-d adjustment PE adjustment PF/EJ CR Motor PF Motor SCN Motor Setting...
  • Page 58: Details Of Adjustments

    Epson WF-5690/4640/4630/5620/5190/5110 series Revision D 3.2 Details of Adjustments This section provides adjustment procedures for which explanation in details is necessary. See "3.1 Required Adjustments (p51)" for the adjustments not explained here. 3.2.1 PF Timing Belt Tension Check This section describes PF Timing Belt tension check.
  • Page 59: Rear Asf Timing Belt Tension Check

    Epson WF-5690/4640/4630/5620/5190/5110 series Revision D 3.2.2 Rear ASF Timing Belt Tension Check This section describes Rear ASF Timing Belt tension check.  This printer is designed so that the tension of the Rear ASF Timing Belt falls within the expected range if you correctly reassemble the unit according to this manual. However, deformation of any related part(s) can cause improper tension of the belt.
  • Page 60: Head Angular Mechanism Adjustment

    Epson WF-5690/4640/4630/5620/5190/5110 series Revision D 3.2.3 Head Angular Mechanism adjustment. This section describes the procedure for the Head angular mechanism adjustment. 3.2.3.1 Preparation of the Head Angular Adjustment  When the Head angular adjustment is performed, it is necessary to remove the ADF/SCN unit and the exterior parts from the product.
  • Page 61 Epson WF-5690/4640/4630/5620/5190/5110 series Revision D 2. Start the Printer inspection mode by turning the product on with holding down the [Home] button, [*]button, [Stop] button and [Power] button on the panel simultaneously. Power but on Home button * button Stop button Figure 3-5.
  • Page 62: Adjustment Procedure

    Epson WF-5690/4640/4630/5620/5190/5110 series Revision D 3.2.3.2 Adjustment Procedure  The head angular adjustment has two kinds of adjustment method. • Using the particular scanner • Using the visual adjustment pattern  In this adjustment, make sure to set the dial at the origin position with the follows before perform the Head angular adjustment.
  • Page 63 Epson WF-5690/4640/4630/5620/5190/5110 series Revision D 3. Set the adjustment pattern for the specified scanner as shown below, and scan the head angular adjustment pattern. When the scanning is completed, the adjustment parameter is displayed on the adjustment program Figure 3-11. Procedure of the Head Angular Adjustment (2) 4.
  • Page 64 Epson WF-5690/4640/4630/5620/5190/5110 series Revision D  Method of the Head angular adjustment (Visual adjustment pattern)  Procedure Flowchart Start the adjustment Start the printer with “Printer Inspection Mode” Print the adjustment pattern Start the printer with from Adjustment program “Printer Inspection Mode”, and printer the adjustment pattern.
  • Page 65 Epson WF-5690/4640/4630/5620/5190/5110 series Revision D  Adjustment method/procedure 1. Start the product in the “Printer Inspection Mode” in accordance with "3.2.3.1 Preparation of the Head Angular Adjustment (p60)". 2. Select the “Head angular mecha adjustment” from menu of adjustment program, and print the head angular adjustment pattern.
  • Page 66 Epson WF-5690/4640/4630/5620/5190/5110 series Revision D  When was carried out A, make sure confirm the operation of the cap of the ink system by the following procedure.  If the cap does not return to original position, make sure to replace the ink system Assy.
  • Page 67: Pg Adjustment

    PG adjustment with the PG position set to PG 1. Position PG (mm) Application PG 1 1.50 Printing plain paper/EPSON special paper, PG adjustment PG 2 1.85 Select when PG 1 is too narrow, printing envelopes/matte paper PG 3 2.50...
  • Page 68: Preparation

    Epson WF-5690/4640/4630/5620/5190/5110 series Revision D 3.2.4.1 Preparation This section describes how and what to prepare for the preparation before starting the PG adjustment.  Modification of the thickness gauges  The Printer of this printer has an integral structure of the Printhead Cover and Printhead nozzle surface.
  • Page 69 Epson WF-5690/4640/4630/5620/5190/5110 series Revision D 3. Fold the excess portions of Teflon tape along the edges of the thickness gauge, and trim the portions at about the center in the thickness direction of the sides. Before trimming After trimming Fold the tape at the edges and trim it at the center in the thickness direction.
  • Page 70 Epson WF-5690/4640/4630/5620/5190/5110 series Revision D  APG Position Check Make sure the APG position is in the [PG1] position.  How to check Perform the following to check if the PG position is surely set to PG 1. 1. Move the Carriage Assy to the center of the printer.
  • Page 71: Pg Adjustment Procedure

    Epson WF-5690/4640/4630/5620/5190/5110 series Revision D 3.2.4.2 PG Adjustment procedure When performing the PG adjustment, make sure of the following.  perform the PG adjustment with the new cartridges installed on the CR Unit before installing the CR Scale.  Move the CR Unit by pulling the top pf the CR timing belt.
  • Page 72 Epson WF-5690/4640/4630/5620/5190/5110 series Revision D 5. Press the two points down vertically on the Carriage Assy shown in Figure 3-19 simultaneously, and make sure of the following.  The Carriage Assy is installed correctly without any gap between the Carriage Assy and CR Guide Frame.
  • Page 73 Epson WF-5690/4640/4630/5620/5190/5110 series Revision D 7. With the Carriage Assy in the center of the printer, adjust three notches each for both PG Cam Right and PG Cam Left to make the PG narrower. 8. Pull the Timing Belt to move the Carriage Assy to 0-digit side and 80-digit side and check if the Carriage Assy touches the thickness gauges.
  • Page 74 Epson WF-5690/4640/4630/5620/5190/5110 series Revision D In the following steps, make sure the PG Cam Right/PG Cam Left always touch the CR Guide Frame. (See Figure 3-24 (p 72).) 9. Follow the flowchart below to perform the PG adjustment. START Adjusts the PG to more than 1.45 mm on the 0-digit side.
  • Page 75: Checking The Platen Gap

    Epson WF-5690/4640/4630/5620/5190/5110 series Revision D 3.2.5 Checking the Platen Gap This section describes the procedure for checking the platen gap (PG) necessary when removing the Printhead or in a similar case. When checking the PG, make sure of the following.
  • Page 76: Touch Panel Adjustment (Wf-5690/4640/4630/5620 Series Only)

    Epson WF-5690/4640/4630/5620/5190/5110 series Revision D 3.2.6 Touch Panel Adjustment (WF-5690/4640/4630/5620 series only) This section describes Touch Panel adjustment.  Purpose This adjustment is made to adjust the relative positions between the Touch Panel detection points and displaying positions on the Control Panel.
  • Page 77 Epson WF-5690/4640/4630/5620/5190/5110 series Revision D Figure 3-30. Touch Panel Adjustment (2) 4. Press “Push this Area.[OK]” to displayed the adjustment screen. To abort the adjustment, press “Push this Area.[Cancel]”. Touch Panel to coordinate them. Push this Area. [OK] Push this Area. [Cancel] Figure 3-31.
  • Page 78 Epson WF-5690/4640/4630/5620/5190/5110 series Revision D 7. Press the areas within the red boxes (x5) using the Touch Pen. Touch Red Area Figure 3-34. Touch Panel Adjustment (6) 8. When “Complete!” appears on the LCD, press the [Color] button to finish the adjustment Complete! Push [Color] Button.
  • Page 79: Ink Leak Check

    Epson WF-5690/4640/4630/5620/5190/5110 series Revision D 3.2.7 Ink Leak Check This section describes the procedure for ink leak check necessary when disconnecting the Ink Supply Unit from the Printhead or in a similar case. Tools  Ink Leak Measurement Jig (Parts code: TBD)
  • Page 80 Epson WF-5690/4640/4630/5620/5190/5110 series Revision D Ink Leakage Inspection Condition  Air pressure power : 48 ± 2 Kpa  Air pressure time : 10 sec  Air pressure hold time : 30 sec  Air pressure judgement standard : Less than 0.4 Kpa Checking procedure 1.
  • Page 81 Epson WF-5690/4640/4630/5620/5190/5110 series Revision D 7. Close the valve C of the Ink Leak Measurement Jig. 8. Push the plunger to inject the air out, and confirm the pressure gauge indicates 48±2 kPa, then after the value has stabilized, shut the valve A. If the value is less than 48±2 kPa, open the valve A and pull out and push in the plunger several times until the value reaches 48±2 kPa, then after the value has stabilized,...
  • Page 82: Chapter 4 Maintenance

    CHAPTER 4 MAINTENANCE Confidential...
  • Page 83: Overview

    Epson WF-5690/4640/4630/5620/5190/5110 series Revision D 4.1 Overview In this manual, the product name is abbreviated to such as “WP-4510 series”, however, the last digit of the actual name may differ. Identify your product with the first three digits and refer to the appropriate sections in this manual.
  • Page 84 Epson WF-5690/4640/4630/5620/5190/5110 series Revision D 4.2 Lubrication Points and Instruction <Lubrication Point> <Lubrication Point> <Lubrication Point> Main Frame Edges on the rear of the Shaft hole of the Driven Contact point on the Main Cassette Assy 1st / 2nd Pulley...
  • Page 85 Epson WF-5690/4640/4630/5620/5190/5110 series Revision D <Lubrication Point> <Lubrication Point> Shaft of the Middle Shaft Contact points (x3) Assy (x3). between the LD Shaft and ADF Cover Assy. <Type> <Type> G-71 G-71 <Application Amount> <Application Amount> 1. 2mm x 4mm φ 1 mm x 2 mm x 4 points 2.
  • Page 86 Epson WF-5690/4640/4630/5620/5190/5110 series Revision D <Lubrication Point> Left 1. Contact surfaces (x2) Application point 5 Application point 6 of the Carriage Assy Contact surface of Carriage CR Front Slider Left with the APG Cam Assy with CR Guide Frame 2. Contact points (x2) on...
  • Page 87 Epson WF-5690/4640/4630/5620/5190/5110 series Revision D 4.3 Firmware Update This section describes how to update the firmware of the printer.  The start-up method of the firmware update mode differs depending on the panel type mounted on the printer, so refer to the appropriate start-up method.
  • Page 88 <Panel condition when PC status normally> The following message is displayed on the LCD and all LEDs light. EPSON ROM : IPLF Program Update 2. Start the exclusive firmware update program and select the latest firmware data to rewrite it.
  • Page 89 CHAPTER 5 APPENDIX Confidential...
  • Page 90 Epson WF-5690/4640/4630/5620/5190/5110 series Revision D 5.1 Connector Diagram Cable connections of this printer are shown below Figure 5-1. Connector Diagram Appendix Connector Diagram Confidential...

Table of Contents