Epson All in One Printer User Manual
All in one printer
Hide thumbs
Also See for All in One Printer:
- User manual (189 pages) ,
- User manual (140 pages) ,
- User manual (114 pages)
Table of Contents
Advertisement
Quick Links
Advertisement
Table of Contents
Troubleshooting

Related Manuals for Epson All in One Printer


Summary of Contents for Epson All in One Printer
- Page 1 User’s Guide NPD4934-02 EN...
-
Page 2: Copyright And Trademarks
The information contained herein is designed only for use with this Epson product. Epson is not responsible for any use of this information as applied to other products. - Page 3 User’s Guide Copyright and Trademarks ® ® ® Microsoft , Windows , and Windows Vista are registered trademarks of Microsoft Corporation. Apple, Macintosh, Mac OS, OS X, Bonjour and TrueType are trademarks of Apple Inc., registered in the U.S. and other countries.
- Page 4 Note: microSDHC is built into the product and cannot be removed. General Notice: Other product names used herein are for identification purposes only and may be trademarks of their respective owners. Epson disclaims any and all rights in those marks. © 2013 Seiko Epson Corporation. All rights reserved.
-
Page 5: Table Of Contents
Copying Documents..... . . 38 Using Epson Connect Service....11 Basic copying. - Page 6 Maintenance Box ......112 Starting Epson Scan Driver....72 Starting Other Scanning Software.
- Page 7 Printed side is smeared or scuffed..167 Installing the Epson Universal P6 Printer Driver Printing is too slow..... 167 (for Windows Only).
- Page 8 ......176 Contacting Epson Support....202 Other Problems.
-
Page 9: Introduction
User’s Guide Introduction Introduction Where to Find Information The latest version of the following manuals are available on the Epson support website. http://www.epson.eu/Support (Europe) http://support.epson.net/ (outside Europe) ❏ Start Here (paper): Provides you with an introduction to the product and services. -
Page 10: Caution, Important And Note
User’s Guide Introduction WF-5620 WF-4630 WF-4640 WF-5690 WF-5621 Scan to a network folder Australia and Australia and Scan to an email ✓ ✓ New Zealand New Zealand Forward fax to a network folder only only Forward fax to an email ✓... -
Page 11: Using Epson Connect Service
❏ Mac OS X refers to Mac OS X 10.5.8, 10.6.x, 10.7.x, 10.8.x. Using Epson Connect Service Using Epson Connect and other companies’ services, you can easily print directly from your smartphone, tablet PC or laptop, anytime and practically anywhere even across the globe! For more information about the printing and other services, visit the following URL;... -
Page 12: Important Instructions
User’s Guide Important Instructions Important Instructions Safety Instructions Read and follow these instructions to ensure safe use of this product. Make sure you keep this guide for future reference. Also, be sure to follow all warnings and instructions marked on the product. ❏... -
Page 13: Setting Up/Using The Product
User’s Guide Important Instructions Setting up/using the product ❏ Do not block or cover the vents and openings in the product. ❏ Use only the type of power source indicated on the product’s label. ❏ Avoid using outlets on the same circuit as photocopiers or air control systems that regularly switch on and off. ❏... -
Page 14: Using The Product With A Wireless Connection
User’s Guide Important Instructions ❏ Always turn the product off using the P button. Do not unplug the product or turn off the power at the outlet until the LCD screen has turned off completely. ❏ Before transporting the product, make sure that the print head is in the home (far right) position and the ink cartridges are inserted into the slots. -
Page 15: Protecting Your Personal Information
User’s Guide Important Instructions ❏ Unused postage stamps, pre-stamped postcards, and other official postal items bearing valid postage ❏ Government-issued revenue stamps, and securities issued according to legal procedure Exercise caution when copying the following items: ❏ Private marketable securities (stock certificates, negotiable notes, checks, etc.), monthly passes, concession tickets, etc. -
Page 16: Getting To Know Your Product
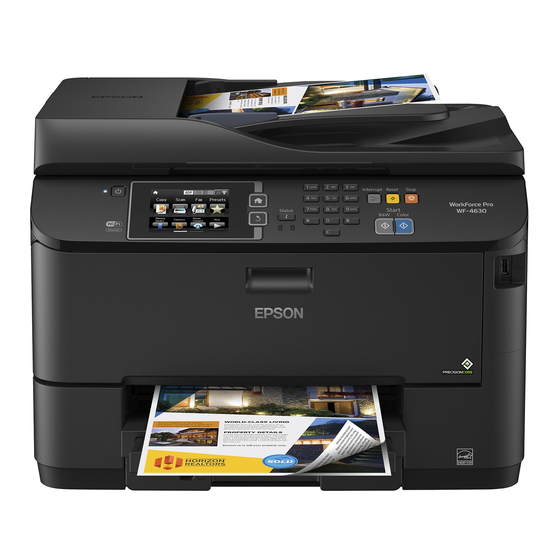
User’s Guide Getting to Know Your Product Getting to Know Your Product Note: The illustrations in this manual are from a similar product model. Although they may differ from your actual product, the method of operation is the same. Product Parts ADF cover Automatic Document Feeder (ADF) Edge guide... - Page 17 User’s Guide Getting to Know Your Product Edge guides Stopper Output tray extension Output tray Edge guides Rear paper feed Feeder guard Document cover Scanner glass Control panel External interface USB port...
- Page 18 User’s Guide Getting to Know Your Product Ink cartridge slots Front cover Print head LINE port EXT. port USB port LAN port Service USB port Maintenance box Rear cover AC inlet * USB port for future use. Do not remove the sticker.
-
Page 19: Guide To The Control Panel
User’s Guide Getting to Know Your Product Guide to the Control Panel Note: ❏ Control panel design varies depending on location. ❏ Although the control panel design and what displayed on the LCD screen such as menu names and option names may differ from your actual product, the method of operation is the same. -
Page 20: Status Icons
User’s Guide Getting to Know Your Product Buttons/Lights Function LCD screen displays menus. If your product has a touch panel, you can scroll the screen by swiping the LCD screen. Try swiping a little harder if the touch panel is slow to respond. Returns to the Home screen if no operations are made for a few minutes. - Page 21 User’s Guide Getting to Know Your Product Icons Description Indicates that unread or unprinted fax data is stored in the product. When you have made settings to save received faxes on a computer or external storage device, this icon also indicates that received faxes have not been saved on the computer or the storage device.
-
Page 22: Status Menu
Enters Memory Device mode. Shows the registered contact list for scanning and faxing. “Making Contact List Settings” on page 95 & Shows the status of Epson Connect service. “Using Epson Connect Service” on page 11 & Opens Eco Mode settings screen. -
Page 23: Icons On The Software Keyboard For The Lcd Screen
User’s Guide Getting to Know Your Product Icons on the Software Keyboard for the LCD Screen You can enter characters and symbols from the software keyboard to register a contact, make network settings, and so on. The following icons are displayed on the software keyboard screen. Note: Available icons vary depending on the setting item. -
Page 24: Paper And Media Handling
You can achieve good results with most types of plain paper. However, coated papers provide superior prints because they absorb less ink. Epson provides special papers that are formulated for the ink used in Epson ink jet products, and recommends these papers to ensure high-quality results. - Page 25 User Defined (other than above) Legal Thick paper Letter Executive User Defined (182 x 257 mm to 215.9 x 297 mm) User Defined (other than above) Envelope ✓ Epson Bright White Ink Jet Paper Epson Photo Quality Ink Jet Paper...
-
Page 26: Paper Type Settings On The Lcd Screen
1 or Rear paper printing Paper feed cassette 2 cassette Epson Matte Paper - Heavyweight Epson Premium Glossy Photo Paper 13 × 18 cm (5 × 7 in.) 10 × 15 cm (4 × 6 in.) 16:9 Wide (102 × 181... -
Page 27: Paper Type Settings From The Printer Driver
Letterhead Letterhead Color Colored paper Recycled Recycled paper plain papers Epson Bright White Ink Jet Paper Epson Ultra Glossy Photo Paper Ultra Glossy Epson Premium Glossy Photo Paper Prem. Glossy Epson Premium Semigloss Photo Paper Prem. Semigloss Epson Photo Paper, Glossy Glossy Epson Matte Paper –... -
Page 28: Loading Paper Into The Paper Cassette
Envelopes Envelope Note: The availability of special media varies by location. For the latest information on media available in your area, contact Epson support. “Technical Support Web Site” on page 202 & Loading Paper into the Paper Cassette Follow these steps to load paper: Pull the paper cassette all the way out. - Page 29 User’s Guide Paper and Media Handling Note: When using Legal-size paper, extend the paper cassette as shown in the illustration. Slide the edge guide to adjust to the paper size you will use. Load paper toward the edge guide with printable side face down, and check that the paper is not sticking out from the end of the cassette.
- Page 30 ❏ For plain paper, do not load paper above the H arrow mark inside the edge guide. For Epson special media, make sure the number of sheets is less than the limit specified for the media. “Selecting Paper” on page 24 &...
-
Page 31: Loading Paper And Envelopes Into The Rear Paper Feed
User’s Guide Paper and Media Handling Note: ❏ Leave enough space in front of the product for the paper to be fully ejected. ❏ Do not remove or insert the paper cassette while the product is operating. Loading Paper and Envelopes into the Rear Paper Feed Follow the steps below to load paper and envelopes into the rear paper feed: Slide out the output tray, and raise the stopper. - Page 32 User’s Guide Paper and Media Handling Load paper with the printable side up, at the center of the rear paper feed. Note: ❏ The printable side is often whiter or brighter than the other side. ❏ When loading envelopes, load the short edge first with the flap facing down. ❏...
-
Page 33: Placing Originals
User’s Guide Paper and Media Handling Note for paper with binding holes: You can use pre-punched paper with binding holes on one of the long edges. Do not load the paper with the binding holes along the top or the bottom. ❏... - Page 34 User’s Guide Paper and Media Handling Capacity 35 sheets or 3.5 mm or less (A4, Letter)/ 10 sheets (Legal) * You cannot automatically scan both sides of the paper at this size. Important: To prevent paper jams, avoid the following documents. For these types, use the scanner glass. ❏...
-
Page 35: Scanner Glass
User’s Guide Paper and Media Handling Slide the edge guide until it is flush with the originals. Note: For 2-up or 4-up Copy layout, place the original as shown. Make sure the orientation of the original matches the Document Orientation settings. Scanner glass Open the document cover and place your original face-down on the scanner glass. - Page 36 Paper and Media Handling Slide the original to the corner. Note: See the following sections if any problems occur with the scanning area or the scanning direction when using EPSON Scan. “The edges of your original are not scanned” on page 176 &...
-
Page 37: Access Control
User’s Guide Access Control Access Control This function is only supported by WF-5620 Series and WF-5690 Series. Administrator can restrict users/groups of printing/copying/scanning/faxing by setting Access Control. When this setting is valid, user authentication is necessary by entering password. Administrator can register up to 10 users/ groups in total. -
Page 38: Copying
User’s Guide Copying Copying Copying Documents Basic copying Follow the steps below to copy documents. Load paper. “Loading Paper into the Paper Cassette” on page 28 & “Loading Paper and Envelopes into the Rear Paper Feed” on page 31 & Place original. -
Page 39: Printing
User’s Guide Printing Printing Printing from the Control Panel Follow the steps below to print from the control panel without using a computer. You can print data from an external USB device. Printing a JPEG file Load paper. “Loading Paper into the Paper Cassette” on page 28 &... -
Page 40: Printing From Your Computer
User’s Guide Printing Load paper. “Loading Paper into the Paper Cassette” on page 28 & “Loading Paper and Envelopes into the Rear Paper Feed” on page 31 & Insert a memory device. Select Memory Device from the Home menu. Select PDF or TIFF. Select the file you want to print. -
Page 41: Accessing The Printer Driver For Windows
Note for Windows users: ❏ Your printer driver automatically finds and installs the latest version of the printer driver from Epson’s Web site. Click the Software Update button in your printer driver’s Maintenance window, and then follow the on-screen instructions. - Page 42 Next, click the Maintenance tab, and then click the Extended Settings button. In the Extended Settings window, select Enable EPSON Status Monitor 3, and then press OK. Next, click the Monitoring Preferences button on the Maintenance tab, and then select Register the shortcut icon to the task bar.
-
Page 43: Basic Operations
Depending on your application, the Page Setup menu may not appear in the File menu. Print Click Print on the File menu of your application. Epson Printer For Mac OS X 10.8 or 10.7, click System Preferences on the Apple menu and then click Print & Utility 4 Scan. - Page 44 User’s Guide Printing Basic product settings for Windows Note for the WF-5620 Series /WF-5690 Series: When the printer’s Access Control is set to On, you need to enter your user name and password on the printer driver before sending a print job. “Access Control settings for Windows”...
- Page 45 User’s Guide Printing Select the appropriate Paper Type setting. “Paper type settings from the printer driver” on page 27 & Note: Print quality is automatically adjusted for the selected Paper Type. Select the appropriate Quality setting. Note: If you are printing high-density data on plain paper, letterhead, or preprinted paper, select Standard-Vivid to make your printout vivid.
- Page 46 User’s Guide Printing Access the Print dialog box. “Accessing the printer driver for Mac OS X” on page 43 & Note: If the simplified dialog box is displayed, click the Show Details button (for Mac OS X 10.8 or 10.7) or the d button (for Mac OS X 10.6 or 10.5.8) to extend this dialog box.
-
Page 47: Canceling Printing
User’s Guide Printing Select Print Settings from the pop-up menu. Select the appropriate Paper Source setting. Select the appropriate Media Type setting. “Paper type settings from the printer driver” on page 27 & Select the appropriate Print Quality setting. Note: If you are printing high-density data on plain paper, letterhead, or preprinted paper, select Standard-Vivid to make your printout vivid. - Page 48 Note: You cannot cancel a print job that has been completely sent to the product. In this case, cancel the print job by using the product. Access the EPSON Status Monitor 3. “For Windows” on page 154 & Click the Print Queue button. The Windows Spooler appears.
-
Page 49: Other Options
User’s Guide Printing Click the Delete button to cancel the print job. For Mac OS X 10.8: Click the button to cancel the print job. Other Options Product presets (For Windows Only) Printer driver presets make printing a snap. You can also create presets of your own. Product settings for Windows Access the printer settings. -
Page 50: 2-Sided Printing
❏ Manual 2-sided printing is available only when EPSON Status Monitor 3 is enabled. To enable the status monitor, access the printer driver and click the Maintenance tab followed by the Extended Settings button. In the Extended Settings window, check the Enable EPSON Status Monitor 3 check box. - Page 51 User’s Guide Printing Product settings for Windows Access the printer settings. “Accessing the printer driver for Windows” on page 41 & Select the appropriate 2-Sided Printing setting. Note: Depending on the driver version, the 2-Sided Printing setting may become available when you select the check box. When using automatic printing, make sure the Auto check box is checked.
-
Page 52: Fit To Page Printing
User’s Guide Printing Fit to page printing Lets you automatically enlarge or reduce the size of your document to fit the paper size selected in the printer driver. Note: This feature may not be available at some settings. Product settings for Windows Access the printer settings. -
Page 53: Pages Per Sheet Printing
User’s Guide Printing Pages per Sheet printing Lets you use the printer driver to print two or four pages on a single sheet of paper. Note: This feature may not be available at some settings. Product settings for Windows Access the printer settings. “Accessing the printer driver for Windows”... -
Page 54: Anti-Copy Pattern Printing
User’s Guide Printing Anti-Copy Pattern printing (for Windows Only) This function allows you to print a document as a copy-protected document. When you try to copy a copy-protected document, the string that you added as the anti-copy pattern is printed several times on the document. Note: This feature may not be available at some settings. -
Page 55: Watermark Printing (For Windows Only)
User’s Guide Printing Watermark printing (For Windows Only) This function allows you to print a text-based or image-based watermark on your document. Note: This feature may not be available at some settings. Access the printer settings. “Accessing the printer driver for Windows” on page 41 &... -
Page 56: Header/Footer Printing (For Windows Only)
User’s Guide Printing Header/Footer printing (For Windows Only) This function allows you to print user name, computer name, date, time, or collate number, at the top or bottom of each page in a document. Access the printer settings. “Accessing the printer driver for Windows” on page 41 &... -
Page 57: Administrator Settings For Printer Driver (For Windows Only)
User’s Guide Printing Make the necessary settings. Click OK to close the printer settings screen and send the print job. Go to the printer, press on the control panel and select Confidential Job. Enter your user name and select the job you sent. Enter the password you set, and then press one of the x buttons to start printing. -
Page 58: Using The Postscript Printer Driver
“Installing the PostScript Printer Driver” on page 139 & Using the Epson Universal P6 Printer Driver See the following for details on installing the Epson Universal P6 Printer Driver. “Installing the Epson Universal P6 Printer Driver (for Windows Only)” on page 143 &... -
Page 59: Scanning
User’s Guide Scanning Scanning Scanning from the Control Panel You can scan documents and send the scanned image from the product to a connected computer, a memory device, a network folder, and send the scanned image by attaching to an email. Note: ❏... -
Page 60: Scanning To An Email
User’s Guide Scanning Place original. “Placing Originals” on page 33 & Enter Scan mode from the Home menu. Select Network Folder/FTP. Press Contacts to display a list of registered folders. Note: You can also specify the folder by entering the folder path directly. After step 3, press the Enter Location field. Select Communication Mode, enter the folder path using the numeric keypad and other buttons on the control panel, and then configure the folder settings. -
Page 61: Scanning To Cloud
Press one of the x buttons to set the color mode, and then start scanning. Your scanned image is sent by email. Scanning to Cloud For instruction on using Scan to Cloud, visit the Epson Connect portal Web site. “Using Epson Connect Service” on page 11 &... -
Page 62: Scanning To A Computer (Wsd)
User’s Guide Scanning Enter Scan mode from the Home menu. Select Document Capture Pro. Press the Select Computer field, and then select the computer to which a job has been registered in Document Capture Pro. Note: If you have set a password in Document Capture Pro from the Network Scan Settings in the software, select a computer and then enter the password. -
Page 63: Scan Mode Menu List
Settings for Access Control (For Windows only) This function is only available for the WF-5620 Series and the WF-5690 Series. When the printer’s Access Control is set On, you need to enter the user name and password in EPSON Scan Settings to use EPSON Scan. - Page 64 In the File Save Settings window, select the Type setting and then click OK. Note: ❏ If the Show this dialog box before next scan check box is cleared, Epson Scan starts scanning immediately without displaying the File Save Settings window.
-
Page 65: Scanning In Professional Mode
This mode is recommended for advanced users. Note: ❏ If you want to install Epson Scan on Windows Server 2012, Server 2008, or Server 2003, you have to install Desktop Experience first. ❏ See the Help for more details on Epson Scan. - Page 66 User’s Guide Scanning Select Professional Mode from the Mode list. Select the Document Source setting. Select Photo or Document as the Auto Exposure Type setting. Select the Image Type setting.
-
Page 67: Image Adjustment Features
& Note for the Automatic Document Feeder (ADF): ❏ The ADF loads your first document page, and then Epson Scan prescans it and displays it in the Preview window. The ADF then ejects your first page. Place your first document page on top of the rest of the pages, and then load the entire document into the ADF. - Page 68 User’s Guide Scanning Histogram Adjustment Provides a graphical interface for adjusting highlight, shadow, and gamma levels individually. Tone Correction Provides a graphical interface for adjusting tone levels individually. Image Adjustment Adjusts brightness and contrast and the balance of red, green, and blue colors in the overall image.
- Page 69 User’s Guide Scanning Descreening Removes rippled patterns (known as moiré) that can appear in subtly shaded image areas such as skin tones. Color Restoration Restores the colors in faded photos automatically. Backlight Correction Removes shadows from photos that have too much background light. Dust Removal Removes dust marks from your originals automatically.
-
Page 70: Previewing And Adjusting The Scan Area
❏ Some of the settings that you change after previewing an image are reset if you change the preview mode. ❏ Depending on your document type and the Epson Scan mode you are using, you may not be able to change the preview type. - Page 71 User’s Guide Scanning ❏ To draw the marquee manually, position the pointer in the area where you want to place the corner of your marquee and click. Drag the cross-hairs over the image to the opposite corner of the desired scan area. ❏...
-
Page 72: Software Information
❏ Windows 7, Vista, XP, Server 2008 and Server 2003: Double-click the EPSON Scan icon on the desktop. Or, select the start button icon or Start > All Programs or Programs > EPSON > EPSON Scan > EPSON Scan. ❏ Mac OS X: Select Applications >... - Page 73 User’s Guide Scanning How to access the help Select Help from the menu on the software screen to display the Help.
-
Page 74: Faxing
This product’s fax features are designed to work over standard analogue telephone lines (PSTN = Public Switched Telephone Network) and PBX (Private Branch Exchange) telephone systems. (Depending on the environment, some PBX telephone systems may not be supported.) Epson cannot guarantee compatibility with all digital phone environments, especially under the following conditions. -
Page 75: Connecting A Phone Device
User’s Guide Faxing Important: ❏ If you have a PBX console in the room, connect from the console to the LINE port. ❏ Do not remove the cap from the EXT port of the product when you are not connecting your phone. DSL or ISDN Connect a phone cable from your DSL modem, terminal adapter, or ISDN router to the LINE port on the back of the product. -
Page 76: Setting Up For Faxing
User’s Guide Faxing Connect a second phone cable to your telephone or answering machine and to the EXT port. Important: ❏ When sharing a single phone line with the phone and the product, make sure you connect the phone to the product’s EXT port. -
Page 77: Using The Fax Setting Wizard
User’s Guide Faxing Using the Fax Setting Wizard The product’s Fax Setting Wizard menu guides you through setting up the basic fax features. The wizard is automatically displayed when the product is turned on for the first time. If you have already configured the settings, skip this section unless you need to change the settings. -
Page 78: Setting The Line Type
User’s Guide Faxing On the Receive Mode Setting screen, select Yes if you have connected an external telephone or answering machine to the product, and then go to the next step. If you select No, Receive Mode is automatically set to Auto. Go to Step 10. -
Page 79: Setting The Number Of Rings To Answer
User’s Guide Faxing Select System Administration. Select Fax Settings. Select Basic Settings. Select Line Type. Select PBX. Select Use or Do Not Use on the Access Code screen. If you select Use, go to the next step. Enter an external access code in the Access Code field. Note: When connecting to a PBX phone system, we recommend making the access code setting first. -
Page 80: Advanced Settings
User’s Guide Faxing Select the number of rings, which is at least one ring greater than that of the answering machine. Note: The answering machine picks up every call faster than the product, but the product can detect fax tones and start receiving faxes. -
Page 81: Sending Faxes
Installing FAX Utility for faxing from a computer Epson FAX Utility allows you to send a fax from a computer and save received faxes in a specified folder. Follow the procedure below to install FAX Utility. PC-FAX Driver is installed at the same time. This is necessary for sending faxes. - Page 82 User’s Guide Faxing Note: The product can accept up to 50 monochrome fax jobs. You can check or cancel the reserved fax job using Status Menu. “Checking fax jobs that are ongoing or waiting” on page 92 & Place original. You can send up to 100 pages in one transmission. “Placing Originals”...
-
Page 83: Other Options
User’s Guide Faxing Go to Step 6 if you do not want to preview before sending. To preview the fax (monochrome fax only), press Preview on the fax top screen. The product starts scanning the documents and displays the scanned image on the LCD screen. To start sending the fax, go to Step 6. -
Page 84: Sending A Fax At A Specified Time
User’s Guide Faxing ❏ Prioritizing urgent faxes (Priority Send) When you want to send an urgent fax, and there are already multiple faxes waiting to be sent, you can send the urgent fax as soon as an ongoing fax job is finished. To do this, enable Priority Send in the Fax Send Settings menu before you press x (Color) or x (B&W). -
Page 85: Sending A Stored Fax
User’s Guide Faxing Select On, and then enter the time you want to send the fax. When you have finished, press OK. Press x (B&W) to start scanning the fax. The scanned image is sent at the specified time. If the product is powered off at the specified time, the fax is sent when the product is turned on. -
Page 86: Sending A Fax From A Connected Phone
Sending a fax from a computer Using Epson FAX Utility, you can fax documents created using an application such as a word processing or spreadsheet application directly from your computer. For information on how to install FAX Utility, see the following section. -
Page 87: Receiving Faxes
User’s Guide Faxing Note: The following explanation uses Microsoft Word as an example for Windows OS, and Text Edit for Mac OS X. The actual operations may differ depending on the application you use. For more details, see the application’s help. Open the file you want to fax. -
Page 88: Outputting Received Faxes
User’s Guide Faxing “Receiving a fax manually” on page 91 & When setting up the fax features for the first time, or when you need to change the settings due to a change in your phone system or for any other reason, use the Fax Setting Wizard to set up the product correctly. “Using the Fax Setting Wizard”... - Page 89 User’s Guide Faxing ❏ Save to Computer To enable this option, use Epson FAX Utility on the computer connected to the product. “Saving received faxes on a computer” on page 92 & Received faxes are saved in a specified folder on the computer in PDF format. After you have configured FAX Utility to save faxes on a computer, you can change to Yes and Print on the product to print received faxes automatically while saving them on the computer.
-
Page 90: Viewing Received Faxes On The Lcd Screen
User’s Guide Faxing * Depending on the product, the forwarding faxes to email and to folder functions may not be supported. See the following section for more details. “Available Features” on page 9 & The Options When Forwarding Failed menu allows you to select whether to print or save the fax in the product’s memory (Inbox) if forwarding fails. -
Page 91: Receiving A Fax By Polling
User’s Guide Faxing Note for printing: If the incoming fax is larger than the paper in the cassette used for fax function, it is reduced to fit or printed on multiple pages, depending on the Auto Reduction setting you select. Receiving a fax by polling This allows you to receive a fax from the fax information service you have called. -
Page 92: Saving Received Faxes On A Computer
& Setup > System Administration > Fax Settings > Receive Settings > Remote Receive Saving received faxes on a computer Using Epson FAX Utility, you can save received faxes on a computer in PDF format. For information on how to install FAX Utility, see the following section. -
Page 93: Printing A Fax Report
User’s Guide Faxing Select a target job from the list. A detailed information screen is displayed showing the available actions. Checking sent/received fax jobs You can check the history of sent or received fax jobs. You can also reprint received faxes. When the limit is reached, the oldest history entry is deleted first. -
Page 94: Fax Mode Menu List
User’s Guide Faxing ❏ On(Time) You can specify when to print the report automatically. However, if the number of fax jobs exceeds 30, the log is printed before the specified time. Printing a fax report manually You can print a variety of fax report when you want. Enter Fax mode from the Home menu. -
Page 95: Making Contact List Settings
User’s Guide Making Contact List Settings Making Contact List Settings Creating a Contact You can register frequently used fax numbers, email addresses, and network folders in the contact list. This function allows you to select destination(s) quickly when faxing and scanning. Note for the WF-5620 Series/ WF-5690 Series: You can register destinations using an LDAP server. -
Page 96: Creating A Group
User’s Guide Making Contact List Settings Press Save to finish registering. Note: To delete or edit an existing entry, press the name section of the target entry on the contact list screen, and then select Delete or Edit. Creating a Group By adding contacts to a group list, you can send a fax or a scanned image by email to multiple destinations at the same time. -
Page 97: Menu List Of Control Panel
User’s Guide Menu List of Control Panel Menu List of Control Panel You can use this product as a printer, copier, scanner, and fax. When using one of these functions, except the printer function, select your desired function by pressing the corresponding Mode button on the control panel. Each mode’s main screen appears as you select the mode. -
Page 98: Memory Device Mode
User’s Guide Menu List of Control Panel Memory Device Mode Note: Setting item may varies depending on the print format. Format Menu Settings and Description JPEG Select the file format. TIFF * This function is only supported by the WF-5690 Series. Advanced Settings Menu Settings and Description... -
Page 99: Fax Mode
User’s Guide Menu List of Control Panel Fax Mode Menu Settings and Options Menu Fax Send Settings Resolution Select the resolution of the outgoing fax. Select Photo for documents that contains a lot of images. Density Select the density of the outgoing fax. When sending text-based monochrome documents, select Auto. - Page 100 User’s Guide Menu List of Control Panel Menu Settings and Description Settings See the Scan to Email menu list. Scan to Network Folder/FTP Menu Settings and Description Location Communication Mode Select the communication mode. Location Specify the folder path for saving the scanned data. User Name Enter a user name for the specified folder.
-
Page 101: Setup Mode
Prints up to 250 reports of email logs that contain the scanning date, ad- dress, and scanning result. Scan to Cloud For instruction on using Scan to Cloud, visit the Epson Connect portal Web site. “Using Epson Connect Service” on page 11 &... -
Page 102: System Administration Settings
You can see the current email server settings. Epson Connect Status You can check whether your printer is registered or connected to Epson Connect or Google Cloud Print service. Google Cloud Print “Using Epson Connect Service” on page 11 &... - Page 103 ❏ Changing the Eco Mode settings. ❏ Adding, deleting, and editing the Preset settings and the contact list The password set in Lock Setting is also necessary when making settings in Epson WebConfig or EpsonNet Config. Note: If you forget your password, contact your dealer.
- Page 104 Advanced Setup For details on the setting items, see the online Network Guide. Epson Connect Services For instructions on use, see the Epson Connect guide. “Using Epson Connect Service” on page 11 & Google Cloud Print Services...
- Page 105 User’s Guide Menu List of Control Panel Menu Settings and Description Copy Settings Make the User Default Settings. The settings made in this menu are displayed as the default settings in each mode. For details on the settings items, see the menu list for each mode. Scan Settings “Copy Mode”...
- Page 106 User’s Guide Menu List of Control Panel Menu Settings and Description Output Settings Fax Output “Outputting received faxes” on page 88 & Auto Select whether large received faxes are reduced in size Reduction to fit on the paper size in the selected paper source, or printed at their original size on multiple sheets.
- Page 107 User’s Guide Menu List of Control Panel Menu Settings and Description Basic Settings Fax Speed Indicates the speed at which you transmit and receive faxes. Indicates whether or not to use Error Correction Mode to automatically correct fax data sent/received with errors due to the line or any other problems.
- Page 108 User’s Guide Menu List of Control Panel Menu Settings and Description Universal Print Settings Top Offset Adjusts the top or left margin. Left Offset Top Offset in Back Adjusts the top or left margin for the back of the page when performing double-sided printing.
- Page 109 User’s Guide Menu List of Control Panel Menu Settings and Description PCL Menu Font Source Select the default font source. Font Select the default font number for the Number default font source. The available number depends on the settings you made.
- Page 110 User’s Guide Menu List of Control Panel Menu Settings and Description PS3 Menu Error Sheet Select On to print an error sheet when an error occurs in PS3 mode or when the PDF file you tried to print is not supported.
-
Page 111: Contacts
User’s Guide Menu List of Control Panel Menu Settings and Description Restore Default Resets the selected settings to their defaults. Settings *1This function is only supported by the WF-5690 Series. *2This function is only supported by the WF-5620 Series and WF-5690 Series. Contacts “Making Contact List Settings”... -
Page 112: Ink Cartridge And Consumable Information
WF-4640 WF-5620 79/79XL/T7891 79/79XL/T7892 79/79XL/T7893 79/79XL/T7894 WF-5690 WF-5621 T7921 T7922 T7923 T7924 * For information on Epson’s ink cartridge yields, visit the following website. http://www.epson.eu/pageyield For Australia / New Zealand Product Black Cyan Magenta Yellow WF-4630 WF-4640 786XL 786XL 786XL... -
Page 113: Replacing Ink Cartridges
User’s Guide Replacing Ink Cartridges Replacing Ink Cartridges Ink Cartridge Safety Instructions, Precautions, and Specifications Safety instructions Observe the following when handling the ink cartridges: ❏ Keep ink cartridges out of the reach of children. ❏ Be careful when you handle used ink cartridges, as there may be some ink around the ink supply port. ❏... -
Page 114: Ink Cartridge Specifications
However, careful handling is recommended. Do not touch the supply port of the ink cartridge or its surrounding area. ❏ Other products not manufactured by Epson may cause damage that is not covered by Epson’s warranties, and under certain circumstances, may cause erratic printer behavior. -
Page 115: Checking The Ink Cartridge Status
User’s Guide Replacing Ink Cartridges Checking the Ink Cartridge Status For Windows Note: When an ink cartridge is running low, the Low Ink Reminder screen automatically appears. You can also check the ink cartridge status from this screen. If you do not want to display this screen, first access the printer driver and then click the Maintenance tab, and then Monitoring Preferences. -
Page 116: For Mac Os X
Note: ❏ If EPSON Status Monitor 3 does not appear, access the printer driver and click the Maintenance tab and then the Extended Settings button. In the Extended Settings window, check the Enable EPSON Status Monitor 3 check box. ❏ Depending on current settings, the simplified status monitor may be displayed. Click the Details button to display the window above. -
Page 117: Using The Control Panel
Click the EPSON Status Monitor icon. The EPSON Status Monitor appears. Note: ❏ The graphic displays the ink cartridge status when EPSON Status Monitor was first opened. To update the ink cartridge status, click Update. ❏ The ink levels displayed are an approximate indication. -
Page 118: Temporary Printing With Black Ink When Color Ink Cartridges Are Expended
Note for Windows: This function is available only when EPSON Status Monitor 3 is enabled. To enable the status monitor, access the printer driver and click the Maintenance tab followed by the Extended Settings button. In the Extended Settings window, check the Enable EPSON Status Monitor 3 check box. - Page 119 User’s Guide Replacing Ink Cartridges When EPSON Status Monitor 3 tells you to cancel your print job, click Cancel or Cancel Print to cancel your print job. Note: If the error stating that a color ink cartridge is expended originates with another computer on the network, you may need to cancel the print job at the product.
-
Page 120: For Mac Os X
User’s Guide Replacing Ink Cartridges Print your file. EPSON Status Monitor 3 is displayed on your computer screen again. Click Print in Black to print with black ink. For Mac OS X Follow the steps below to continue printing temporarily with black ink. -
Page 121: Conserving Black Ink When The Cartridge Is Low (For Windows Only)
Note for Windows: This function is available only when EPSON Status Monitor 3 is enabled. To enable the status monitor, access the printer driver and click the Maintenance tab followed by the Extended Settings button. In the Extended Settings window, check the... -
Page 122: Replacing An Ink Cartridge
User’s Guide Replacing Ink Cartridges The window below appears when black ink runs low and there is more color ink than black ink. It appears only when plain papers is selected as the paper type, and Standard is selected as the Quality. The window gives you the option to either continue using black ink normally or conserve black ink by using a mixture of color inks to create black. - Page 123 User’s Guide Replacing Ink Cartridges Push the ink cartridge that you want to replace and then grip the handle of the cartridge to pull it out of the printer. Dispose of the used cartridge properly. Do not take the used cartridge apart or try to refill it. Note: ❏...
- Page 124 User’s Guide Replacing Ink Cartridges Shake the ink cartridge for 5 seconds 15 times horizontally in approximately 10 cm movements as shown in the following illustration. Place the ink cartridge into the cartridge holder. Push the cartridge until it clicks into place. Note: If Check is displayed on the product's control panel, press it to check if the cartridges are installed correctly.
-
Page 125: Maintaining Your Product And Software
User’s Guide Maintaining Your Product and Software Maintaining Your Product and Software Installing Option Paper Cassette Unit Installing the paper cassette unit Follow the steps below to install the paper cassette unit. Note for WF-4630 Series / WF-5620 Series / WF-5690 Series : This unit is option. -
Page 126: Checking The Print Head Nozzles
User’s Guide Maintaining Your Product and Software Reconnect all the interface cables and the power cord. Plug the product’s power cord into an electrical outlet. Turn on the product. Enabling the optional cassette on the printer driver To enable the optional cassette, access the printer properties and make the following settings. Windows Access the printer properties. -
Page 127: Using The Nozzle Check Utility For Mac Os X
Make sure that no warnings or errors are indicated in the control panel. Make sure that A4-size paper is loaded in the paper cassette. Access the Epson Printer Utility 4. “Accessing the printer driver for Mac OS X” on page 43 &... -
Page 128: Cleaning The Print Head
Then run the nozzle check again and repeat the head cleaning if necessary. If print quality has still not improved, contact Epson support. ❏ To maintain print quality, we recommend printing a few pages on a regular basis. -
Page 129: Using The Head Cleaning Utility For Windows
Follow the steps below to clean the print head using the Head Cleaning utility. Make sure that no warnings or errors are indicated in the control panel. Access the Epson Printer Utility 4. “Accessing the printer driver for Mac OS X” on page 43 &... -
Page 130: Aligning The Print Head
Make sure that no warnings or errors are indicated in the control panel. Make sure A4-size paper is loaded in the paper cassette 1. Access the Epson Printer Utility 4. “Accessing the printer driver for Mac OS X” on page 43 &... -
Page 131: Using The Control Panel
User’s Guide Maintaining Your Product and Software Using the control panel Follow the steps below to align the print head using the product control panel. Make sure that no warnings or errors are indicated in the control panel. Make sure that A4-size paper is loaded in the paper cassette 1. Enter Setup mode from the Home menu. -
Page 132: Making Network Service Settings
Making Network Service Settings You can make network service settings such as Epson Connect, AirPrint, or Google Cloud Print using a Web browser on your computer, smartphone, tablet PC, or laptop that is connected to the same network as the product. -
Page 133: Sharing The Product For Printing
User’s Guide Maintaining Your Product and Software Sharing the Product for Printing You can setup the printer so that other computers on the network can share it. The computer connected directly to the printer acts as a server. Other computers on the network access the server and share the printer. -
Page 134: Cleaning The Interior Of The Product
& Note: If you are having problems feeding the paper and have a cleaning sheet that came with your Epson genuine paper, load the cleaning sheet in the rear paper feed slot instead of the plain paper. Enter Setup mode from the Home menu. -
Page 135: Replacing Maintenance Box
Replace the maintenance box when you are promoted to do so. The Epson Status Monitor, your LCD, or lights on the control panel will advise you when this part needs replacing. - Page 136 User’s Guide Maintaining Your Product and Software Push the buttons on either side of the rear unit at the same time, and then pull the unit out. Put your hand on the handle of the maintenance box, and then pull the box outward. Note: If ink gets on your hands, wash them thoroughly with soap and water.
-
Page 137: Transporting The Product
User’s Guide Maintaining Your Product and Software Insert the new maintenance box into place as far as it will go. Push the button on either side of the rear unit at the same time, and then reattach the unit. Select Done on the control panel. Maintenance box replacement is complete. -
Page 138: Checking And Installing Your Software
Windows XP: Double-click the Add or Remove Programs icon. Windows Server 2003: Click the Add or Remove Programs icon. Check the list of currently installed programs. For Mac OS X Double-click Macintosh HD. Double-click the Epson Software folder in the Applications folder and check the contents. -
Page 139: Installing The Software
Insert the product software disk that came with your product and select the software you want to install on the Software Select screen. If you are using Mac OS X, or if your computer does not have a CD/DVD drive, go to the following Epson website to download and install the software. - Page 140 ❏ Turn off all virus protection programs before installing the printer software. Make sure that the printer is turned off. Insert the printer Software Disc into your CD/DVD drive. Note: If your computer does not have a CD/DVD drive, download the driver from the Epson Web site. http://www.epson.eu/Support (Europe) http://support.epson.net/...
- Page 141 ❏ Turn off all virus protection programs before installing the printer software. Make sure that the printer is turned on. Insert the printer Software Disc into your CD/DVD drive. Note: If your computer does not have a CD/DVD drive, download the driver from the Epson Web site. http://www.epson.eu/Support (Europe) http://support.epson.net/...
-
Page 142: Installing The Postscript Printer Driver With Mac Os X
Follow the on-screen instructions for the rest of the installation. When installation is done, click Finish. Installing the PostScript printer driver with Mac OS X Installing the Post Script printer driver Go to the following Epson support website to download and install the driver. http://www.epson.eu/Support (Europe) http://support.epson.net/... -
Page 143: Installing The Epson Universal P6 Printer Driver (For Windows Only)
& Installing the Printer Driver Insert the printer Software Disc into your computer's CD/DVD drive. Note: If your computer does not have a CD/DVD drive, download the driver from the Epson Web site, and then install it. http://www.epson.eu/Support (Europe) http://support.epson.net/ (outside Europe) If your CD/DVD drive is D:, double-click EP_P6x86.exe in the D:\Driver\PCLUniversal\Win32\ for 32-bit... -
Page 144: For Windows
User’s Guide Maintaining Your Product and Software For Windows Note: ❏ For Windows 8, 7, Vista, Server 2012 and Server 2008, you need an administrator account and password if you log on as a standard user. ❏ For Windows XP and Server 2003, you must log on to a Computer Administrator account. Turn off the product. -
Page 145: For Mac Os X
Access the site at: http://www.epson.com Next, select the support section of your local Epson Web site. ❏ To uninstall applications, you must log on to a Computer Administrator account. You cannot uninstall programs if you log on as a limited account user. -
Page 146: Transferring Data Using An External Storage Device
User’s Guide Transferring Data Using an External Storage Device Transferring Data Using an External Storage Device You can use the product’s external USB port to copy files to a computer connected to the product. You can also use it to copy files on your computer to the storage device. -
Page 147: Saving Files To A Storage Device
User’s Guide Transferring Data Using an External Storage Device Double-click the removable disk icon, then select the folder in which your files are saved. Note: If you have set a volume label, it is displayed as the drive name. If you have not set the volume label, “removable disk” is displayed as the drive name on Windows XP and Server 2003. - Page 148 User’s Guide Transferring Data Using an External Storage Device Select the folder on your computer’s hard drive that contains the files you want to copy. Then select the files and drag them to the folder on your storage device. Important: For Mac OS X users When you remove the storage device, always drag the removable disk icon on your desktop into the trash before you remove the storage device or you may lose data on it.
-
Page 149: Error Indicators
Turn the product off and then back on. Make sure that no paper is see your documentation. still in the product. If the error still appears, contact Epson Support. Maintenance box is at the end of its service life. Replace the maintenance box. - Page 150 User’s Guide Error Indicators Code Problem Solution Collate printing has failed due to a lack of Clear downloaded fonts from Clear Internal Memory Data or available memory. reduce the size of the print job. If you do not want to reduce the size of the print job, print one copy at a time.
- Page 151 User’s Guide Error Indicators Code Problem Solution There is not enough storage space available to Increase the storage space. save the data in the external memory device. When scanning, reduce the number of documents or change the following settings to reduce the size of the scanned data. - Select a lower resolution.
- Page 152 User’s Guide Error Indicators Code Problem Solution A communication error has occurred. Make sure the product is connected to the network correctly. For details, see the Network Guide. Check the Location settings. A file with the same name may exist in the specified file. Make sure the file is not opened and the file is not a read-only file.
-
Page 153: Troubleshooting For Printing/Copying
User’s Guide Troubleshooting for Printing/Copying Troubleshooting for Printing/Copying Diagnosing the Problem Troubleshooting product problems is best handled in two steps: first diagnose the problem, then apply likely solutions until the problem is fixed. The information that you need to diagnose and solve most common problems is provided by online problem solving, the control panel, or the status monitor. -
Page 154: Checking Product Status
When you access EPSON Status Monitor 3, the following window appears: Note: ❏ If EPSON Status Monitor 3 does not appear, access the printer driver and click the Maintenance tab and then the Extended Settings button. In the Extended Settings window, check the Enable EPSON Status Monitor 3 check box. - Page 155 Troubleshooting for Printing/Copying ❏ Current Status: If the ink is low/expended or the maintenance box is nearly full/full, the How to button appears in the EPSON Status Monitor 3 window. Clicking How to displays ink cartridge or maintenance box replacement instructions.
-
Page 156: Paper Jams
User’s Guide Troubleshooting for Printing/Copying You can also use this utility to check the ink cartridge status before printing. EPSON Status Monitor displays the ink cartridge status at the time it was opened. To update the ink cartridge status, click Update. -
Page 157: Removing Jammed Paper From The Rear Unit
User’s Guide Troubleshooting for Printing/Copying Removing jammed paper from the rear unit Push the buttons on either side of the rear unit at the same time, and then pull the unit out. Carefully remove the jammed paper. Carefully remove the jammed paper. Push the button on either side of the rear unit at the same time, and then reattach the unit. -
Page 158: Removing Jammed Paper From The Front Cover And The Output Tray
User’s Guide Troubleshooting for Printing/Copying Removing jammed paper from the front cover and the output tray Open the front cover. Remove all of the paper inside, including any torn pieces. Close the front cover. If the jammed paper remains near the output tray, carefully remove the paper. Removing jammed paper from the paper cassette Pull out the paper cassette. -
Page 159: Removing Jammed Paper From The Automatic Document Feeder (Adf)
User’s Guide Troubleshooting for Printing/Copying Carefully remove any paper jammed inside the printer. Reload the paper into the paper cassette. “Loading Paper into the Paper Cassette” on page 28 & Keep the cassette flat and insert it back into the printer carefully and slowly. Removing jammed paper from the Automatic Document Feeder (ADF) Remove the stack of paper from the ADF input tray. - Page 160 User’s Guide Troubleshooting for Printing/Copying Caution: Make sure you open the ADF cover before removing jammed paper. If you do not open the cover, the printer may be damaged. Carefully remove the jammed paper. Close the ADF cover. Open the document cover. Carefully remove the jammed paper.
-
Page 161: Preventing Paper Jams
❏ For plain paper, do not load paper above the line just under the H arrow mark inside the edge guide. For Epson special media, make sure the number of sheets is less than the limit specified for the media. -
Page 162: Reprinting After A Paper Jam (For Windows Only)
User’s Guide Troubleshooting for Printing/Copying Reprinting after a paper jam (for Windows only) After you cancel the print job because of a paper jam, you can reprint it without reprinting pages that have already been printed. Solve the paper jam. “Paper Jams”... -
Page 163: Horizontal Banding
❏ For best results, use up ink cartridge within six months of opening the package. ❏ Try to use genuine Epson ink cartridges. ❏ Make sure the paper type selected in the LCD menu or printer driver is appropriate for the type of paper loaded in the product. -
Page 164: Incorrect Or Missing Colors
Epson recommends replacing the ink cartridges. “Replacing an ink cartridge” on page 122 & ❏ Try to use genuine Epson ink cartridges and paper recommended by Epson. Blurry or smeared print ❏ Try to use genuine Epson ink cartridges and paper recommended by Epson. -
Page 165: Miscellaneous Printout Problems
User’s Guide Troubleshooting for Printing/Copying ❏ Make sure your paper is dry and the printable side (the whiter or glossier side) is face down in the paper cassette. ❏ If the paper is curled toward the printable side, flatten it or curl it slightly in the opposite direction. ❏... -
Page 166: Incorrect Margins
User’s Guide Troubleshooting for Printing/Copying ❏ Uninstall the printer driver, then reinstall it. “Uninstalling Your Software” on page 143 & ❏ If you put your computer into Hibernate or Sleep mode manually while the computer is sending a print job, pages of garbled text may be printed the next time you start your computer. -
Page 167: Blank Pages Print
User’s Guide Troubleshooting for Printing/Copying ❏ Uninstall the printer driver, then reinstall it. “Uninstalling Your Software” on page 143 & Blank pages print ❏ Make sure the printer driver settings are appropriate for the paper size you are using. For Windows, check the Main window. For Mac OS X, check the Page Setup dialog box or Print dialog box. -
Page 168: Paper Does Not Feed Correctly
❏ For plain paper, do not load paper above the line just under the H arrow mark inside the edge guide. For Epson special media, make sure the number of sheets is less than the limit specified for the media. -
Page 169: Paper Cassette 2 Is Not Displayed On The Printer Driver
User’s Guide Troubleshooting for Printing/Copying Paper Cassette 2 is not displayed on the printer driver After installing the optional paper cassette, you need to enable the cassette on the printer driver. “Enabling the optional cassette on the printer driver” on page 126 &... -
Page 170: Access Control Is Enabled
User’s Guide Troubleshooting for Printing/Copying ❏ Users of Windows can clear any stalled print jobs from the Windows Spooler. “Canceling printing” on page 47 & ❏ Uninstall the printer driver, then reinstall it. “Uninstalling Your Software” on page 143 & Access Control is Enabled ❏... -
Page 171: Miscellaneous Printout Problems
User’s Guide Troubleshooting for Printing/Copying Miscellaneous printout problems ❏ For Windows, set the appropriate substitution fonts on the Device Settings tab in the printer’s properties dialog box. “Accessing printer properties for Windows” on page 42 & ❏ You cannot make color settings on the Paper/Quality tab from printing preferences. Access the printer driver and set the Color Mode on the Advanced Options screen. -
Page 172: Troubleshooting For Scanning
“How to unblock Document Capture Pro” on page 173 & ❏ When the printer’s Access Control is set to On, you need to enter your user name and password in EPSON Scan Settings to use EPSON Scan. “Settings for Access Control (For Windows only)” on page 63 &... -
Page 173: How To Unblock Document Capture Pro
Select Windows Firewall. Select EEventManager Application from the list. Note: Epson Event Manager is installed with Document Capture Pro. ❏ Windows 8 and 7: Confirm that the check box for EEventManager Application is selected in the Allowed programs and features list. -
Page 174: Using Scanning Software Other Than Epson Scan Driver
❏ Scanning at a high resolution takes a long time. ❏ When Quiet Mode is selected, scanning may take longer. Select Quiet Mode from the pull-down list on the Epson Scan Configuration Setting screen. Problems With Scanned Images Scan quality is unsatisfactory Scan quality can be improved by changing the current settings or adjusting the scanned image. - Page 175 User’s Guide Troubleshooting for Scanning An image on the back of your original appears in your scanned image If your original is printed on thin paper, images on the back may be visible to the product and appear in your scanned image.
-
Page 176: The Scanning Area Or Direction Is Unsatisfactory
User’s Guide Troubleshooting for Scanning The scanning area or direction is unsatisfactory The edges of your original are not scanned ❏ If you are scanning using the button or using normal preview in Professional Mode, move the document or photo 4.5mm(0.18inch) away from the horizontal and vertical edges of the scanner glass to avoid cropping. -
Page 177: Other Problems
Epson Scan Configuration Setting screen. Problems Remain After Trying All Solutions If you have tried all the solutions and have not solved the problem, initialize the Epson Scan settings. Click Configuration, select the Other tab, and then click Reset All. -
Page 178: Troubleshooting For Faxing
User’s Guide Troubleshooting for Faxing Troubleshooting for Faxing Cannot send and receive fax ❏ Make sure the phone cable is connected correctly. “Connecting to a Phone Line” on page 74 & ❏ Run the Check Fax Connection to identify the cause of the problem. &... -
Page 179: Memory Full Error Occurs
User’s Guide Troubleshooting for Faxing Memory full error occurs ❏ If your product is set to save received faxes in the Inbox, delete received faxes you have already seen or printed. ❏ If your product is set to save received faxes on a computer or an external storage device, turn on the computer or connect the device to save the faxes to the computer or device. -
Page 180: The Time And Date Of Sent Or Received Fax Jobs Is Incorrect
User’s Guide Troubleshooting for Faxing The time and date of sent or received fax jobs is incorrect If the time stamps on fax jobs are incorrect, or a scheduled fax is not sent at the specified time, the product’s clock may be running fast/slow, it may have been reset by a power failure, or the product may have been turned off for an extended period of time. -
Page 181: Product Information
User’s Guide Product Information Product Information System Requirements For Windows System PC Interface Windows 8 (32-bit, 64-bit), Windows 7 (32-bit, 64-bit), Vista (32-bit, 64-bit), XP SP1 Hi-Speed USB or higher(32-bit), or XP Professional x64 Edition, Server 2012 , Server 2008 R2 Server 2008 , Server 2003 , and Server 2003 R2... -
Page 182: Printable Area
❏ Since the quality of any particular brand or type of paper may be changed by the manufacturer at any time, Epson cannot attest to the quality of any non-Epson brand or type of paper. Always test samples of paper stock before purchasing large quantities or printing large jobs. -
Page 183: Scanner Specifications
User’s Guide Product Information Single sheets: Envelopes: Minimum margin Media type Single sheets Envelopes (#10/DL/C6) Envelop (C4) 3.0 mm (0.12 in.) 3.0 mm (0.12 in.) 3.0 mm (0.12 in.) 3.0 mm (0.12 in.) 5.0 mm (0.20 in.) 9.5 mm (0.38 in.) 3.0 mm (0.12 in.) 3.0 mm (0.12 in.) 3.0 mm (0.12 in.) -
Page 184: Automatic Document Feeder (Adf) Specifications
User’s Guide Product Information Photoelectric device 10200 × 14040 pixels at 1200 dpi Effective pixels Scanning area may be restricted if resolution setting is large. Document size 216 × 297 mm (8.5 × 11.7 inches) A4 or Letter Scanning resolution 1200 dpi (main scan) 2400 dpi (sub scan) Output resolution... -
Page 185: Network Interface Specification
User’s Guide Product Information Resolution Monochrome Standard: 203 × 98 dpi Fine: 203 × 196 dpi Photo: 203 × 196 dpi Super Fine: 203 × 392 dpi Ultra Fine: 406 × 392 dpi Color Fine: 200 × 200 dpi Photo: 200 × 200 dpi Speed dial numbers Page memory Up to 550 pages... -
Page 186: Mechanical
User’s Guide Product Information Security Protocol IEEE802.1X IPsec / IP Filtering SSL / TLS HTTPS Server/Client IPPS SNMPv3 *1Complies with either IEEE 802.11b/g/n or IEEE 802.11b/g depending on location of purchase. *2Complies with WPA2 with support for WPA/WPA2 Personal. *3You can use the product in Simple AP mode of Wi-Fi Direct even if you connect it to an Ethernet network. *4The connected device should comply with IEEE802.3az. -
Page 187: Electrical
User’s Guide Product Information Weight Approx. 16.8 kg (37.0 lb) without the ink cartridges and the power cord. * With the output tray extension extended. WF-5620 Series Storage Dimensions Width: 461 mm (18.1 inches) Depth: 422 mm (16.6 inches) Height: 342 mm (13.5 inches) Printing Width: 461 mm (18.1 inches) Depth: 655 mm (25.8 inches) - Page 188 User’s Guide Product Information Power consumption Standalone copying Approx. 20 W (ISO/IEC24712) (with USB connection) Approx. 7.5 W Ready mode Approx. 1.8 W Sleep mode Power off Approx. 0.3 W WF-4640 Series 100-240 V Model Input voltage range 90 to 264 V 50 to 60 Hz Rated frequency range 49.5 to 60.5 Hz...
-
Page 189: Environmental
Manufacture: Askey Computer Corporation Type: WLU6117-D69 (RoHS) This product conforms to Part 15 of the FCC Rules and RSS-210 of the IC Rules. Epson cannot accept responsibility for any failure to satisfy the protection requirements resulting from a non-recommended modification of the product. -
Page 190: Interface
Australian model: AS/NZS CISPR22 Class B Epson hereby declares that the equipment Models, C511A, C511B and C511C, are in compliance with the essential requirements and other relevant provisions of AS/NZS4268. Epson cannot accept responsibility for any failure to satisfy the protection requirements resulting from a non-recommended modification of the product. -
Page 191: Option
User’s Guide Product Information 2 TB Hard disk drive Formatted in FAT, FAT32, or exFAT. USB Flash drive * External storage devices that are powered via USB are not recommended. Use only external storage devices with independent AC power sources. Data specifications File format JPEG with the Exif Version 2.3 standard... - Page 192 User’s Guide Product Information Font Name AntiqueOlive Roman, AntiqueOlive Italic, AntiqueOlive Bold, AntiqueOlive Compact Apple Chancery ITC AvantGarde Gothic Book, ITC AvantGarde Gothic Book Oblique, ITC AvantGarde Gothic Demi, ITC AvantGarde Gothic Demi Oblique Bodoni, Bodoni Italic, Bodoni Bold, Bodoni Bold Italic, Bodoni Poster, Bodoni Poster Compressed ITC Bookman Light, ITC Bookman Light Italic, ITC Bookman Demi, ITC Bookman Demi Italic Carta Chicago...
-
Page 193: Pcl5 Mode
User’s Guide Product Information Font Name Stempel Garamond Roman, Stempel Garamond Italic, Stempel Garamond Bold, Stempel Garamond Bold Italic Symbol Tekton Times Roman, Times Italic, Times Bold, Times Bold Italic Univers, Univers Oblique, Univers Bold, Univers Bold Oblique, Univers Light, Univers Light Oblique UniversCondensed, UniversCondensed Oblique, UniversCondensed Bold, UniversCondensed Bold Oblique UniversExtended, UniversExtended Oblique, UniversExtended Bold, UniversExtended Bold Oblique Wingdings... - Page 194 User’s Guide Product Information Font Name Family HP Equivalent Symbol Set Swiss 721 SWM Medium, Bold, Italic, Bold Italic Arial Dutch 801 SWM Medium, Bold, Italic, Bold Italic Times New Swiss 721 SWA Medium, Bold, Oblique, Bold Helvetica Oblique Swiss 721 Narrow SWA Medium, Bold, Oblique, Bold Helvetica Narrow Oblique...
-
Page 195: Pcl6 Mode
User’s Guide Product Information Font Name Family Symbol Set Code39 9.37cpi, 4.68cpi EAN/UPC Medium, Bold Note: Depending on the print density, or on the quality or color of the paper, OCR A, OCR B, Code39, and EAN/UPC fonts may not be readable. -
Page 196: Introduction To Symbol Sets
User’s Guide Product Information Font Name Family HP Equivalent Symbol Set Revival 711 SWA Light, Demi Bold, Light Italic, Demi ITC Bookman Bold Italic Century 702 SWA Medium, Bold, Italic, Bold Italic New Century Schoolbook Dutch 801 SWA Medium, Bold, Italic, Bold Italic Times Chancery 801 Medium SWA Italic ITC Zapf Chancery Medium... - Page 197 User’s Guide Product Information In the PCL5 mode Symbol Set Name Attribute Font Classification ISO 60: Danish/Norwegian Roman Extension ISO 15: Italian ISO 8859/1 Latin 1 ISO 11: Swedish ISO 6: ASCII ISO 4: United Kingdom ISO 69: French ISO 29: German Legal ISO 8859/2 Latin 2 ISO 17: Spanish...
- Page 198 User’s Guide Product Information Symbol Set Name Attribute Font Classification Windows 3.0 Latin 1 PS Text PC-8, Code Page 437 PC-8, D/N, Danish/ Norwegian MC Text PC-850, Multilingual Ventura International PcEur858 Ventura US Pi Font PC852, Latin 2 Unicode 3.0 Windows Baltic Windows 3.1 Latin/Arabic PC-755...
- Page 199 User’s Guide Product Information Symbol Set Name Attribute Font Classification PC-862, Hebrew Arabic8 HPWARA PC-864, Arabic Symbol Wingdings 579L ZapfDigbats OCR A OCR B OCR B Extension Code3-9 EAN/UPC In the PCL6 Mode Symbol Set Name Attribute Font Classification ISO Norwegian ISO Italian ISO 8859-1 Latin 1 ISO Swedish...
- Page 200 User’s Guide Product Information Symbol Set Name Attribute Font Classification PS Math ISO 8859-9 Latin 5 Windows 3.1 Latin 5 Microsoft Publishing ISO 8859/10 Latin 6 DeskTop Math-8 Roman-8 Windows 3.1 Latin 2 Pc1004 ISO 8859-15 Latin 9 PC-Turkish Windows 3.0 PS Text PC-8 PC-8 D/N...
- Page 201 User’s Guide Product Information Symbol Set Name Attribute Font Classification PC-866, Cyrillic Greek8 Windows Greek Windows Cyrillic PC-851, Greek ISO 8859/5 Cyrillic PC-8, Greek ISO 8859/7 Greek PC-866 UKR Hebrew7 ISO 8859/8 Hebrew Hebrew8 PC-862, Hebrew Arabic8 HPWARA PC-864, Arabic...
-
Page 202: Where To Get Help
Depending on the product, the dial list data for fax and/or network settings may be stored in the product’s memory. Due to breakdown or repair of a product, data and/or settings may be lost. Epson shall not be responsible for the loss of any data, for backing up or recovering data and/or settings even during a warranty period. -
Page 203: Help For Users In Europe
User’s Guide Where To Get Help Help for Users in Europe Check your Pan-European Warranty Document for information on how to contact Epson support. Help for Users in Taiwan Contacts for information, support, and services are: World Wide Web (http://www.epson.com.tw) Information on product specifications, drivers for download, and products enquiry are available. -
Page 204: Help For Users In Australia
Epson Helpdesk Epson Helpdesk is provided as a final backup to make sure our clients have access to advice. Operators on the Helpdesk can aid you in installing, configuring and operating your Epson product. Our Pre-sales Helpdesk staff can provide literature on new Epson products and advise where the nearest dealer or service agent is located. - Page 205 User’s Guide Where To Get Help Users can access our World Wide Web home page at: http://www.epson.com.hk Technical Support Hotline You can also contact our technical staff at the following telephone and fax numbers: Phone: (852) 2827-8911 Fax: (852) 2827-4383...
-
Page 206: Index
Confidential Job Printing............22, 56 Configuration Status Sheet............102 Configure..................110 Confirm Address List..............107 Connection Check................104 A4/Letter Auto Switching............103 Connection Mode.................100 Access Control............20, 37 , 42 , 110 Contacting Epson.................202 ADF 2-Sided..................99 Continuous Scan from ADF............99 Admin Password................102 Control panel...................19 Admin Settings................102 Copy Settings.................105 Administrator settings..............57 Copying Advanced Settings................97... - Page 207 Help Envelopes Epson..................202 loading..................31 Epson Scan...................72 printable area................183 Horizontal Alignment..............102 Epson Horizontal banding..............163 paper.....................24 Epson Connect................11 Epson Connect Services...............104 Epson Connect Status..............102 Icons....................20 Error Code..................149 ID Card.....................97 Error messages................149 Image Adjustment................67 Error Notice...................103 Image Adjustments.................98 Error Sheet..................110 Image Protect................110 Errors Inbox Password Settings..............107...
- Page 208 Output Settings................106 Printer Settings................103 Printing 2-sided..................50 canceling..................47 fit to page..................52 Pages per sheet printing..............53 multiple pages per sheet.............53 Paper preset....................49 Epson special paper..............24 shortcut..................49 feeding problems..............168 text....................43 jams.....................156 Printing from memory card............39 loading..................28, 31 Printing Language................103 loading capacity................24 Printing Photos................39 printable area................182...
- Page 209 User’s Guide Index product does not print.............169 Service.....................202 scan.....................172 Settings..................98, 100 smeared prints..............164, 167 Skip Blank Page................108 solving..................202 Sleep Timer................104, 110 Product Smeared prints..............164, 167 checking status................154 Software cleaning..................133 uninstalling................143 parts....................16 Sound....................104 transporting................137 Specifications Product settings automatic document feeder............184 accessing for Mac OS X..............43 fax....................184 accessing for Windows..............41 mechanical.................186...
- Page 210 User’s Guide Index Watermark printing...............55 Web service..................11 Wi-Fi Auto Connect..............104 Wi-Fi Direct Setup................104 Wi-Fi Direct Status...............102 Wi-Fi Setup..................104 Wi-Fi Setup Wizard..............104 Wi-Fi/Network Settings...............104 Wi-Fi/Network Status............102, 104 Windows accessing printer settings............41 checking product status............154 managing print jobs..............154 With Border..................97 Zoom....................97...
Need help?
Do you have a question about the All in One Printer and is the answer not in the manual?
Questions and answers