Dorner 2700 Series Installation, Maintenance & Parts Manual
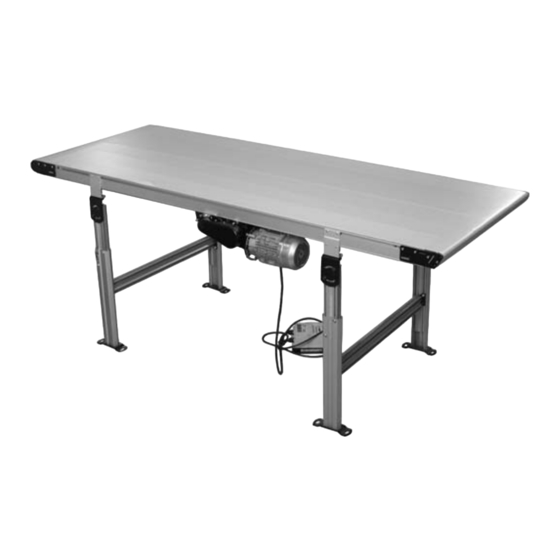
Mid drive end drive
Hide thumbs
Also See for 2700 Series:
- Installation, maintenance & parts manual (30 pages) ,
- Installation, maintenance & parts manual (20 pages) ,
- Installation, maintenance & parts manual (18 pages)

Related Manuals for Dorner 2700 Series


Summary of Contents for Dorner 2700 Series
- Page 1 2700 Series Conveyors Installation, Maintenance & Parts Manual End Drive Mid Drive For other service manuals visit our website at: www.dornerconveyors.com/manuals-literature Record Conveyor Serial Number Here 851-978 Rev. A...
-
Page 2: Table Of Contents
Specifications ..............5 Idler Tail ................. 37 Models: ................5 5/8" (16 mm) Nosebar Tail..........38 Flat Belt 2700 Series End Drive Conveyor ....5 Mid Drive Module............39 Flat Belt 2700 Series iDrive Conveyor ......5 Frame Assembly............. 40 Flat Belt 2700 Series Mid Drive Conveyor.... -
Page 3: Introduction
Upon receipt of shipment: manual with the Performance Parts Kits logo • Compare shipment with packing slip. Contact factory Dorner reserves the right to make changes at any time regarding discrepancies. without notice or obligation. • Inspect packages for shipping damage. Contact carrier regarding damage. -
Page 4: Warnings − General Safety
SEVERE HAZARD! injury. • Dorner cannot control the physical installation and application of conveyors. Taking protective measures is the responsibility of the user. • When conveyors are used in conjunction with other equipment or as part of a multiple conveyor... -
Page 5: Product Description
Drive End Idler/Tension End Figure 1 Figure 1 Specifications Models: Flat Belt 2700 Series End Drive Conveyor Flat Belt 2700 Series iDrive Conveyor 2LED M WW LLLL V X 1 2 3 4 2LED M WW LLLL V FDCPS Tail 4 Auxiliary... -
Page 6: Flat Belt 2700 Series Mid Drive Conveyor
Specifications Flat Belt 2700 Series Mid Drive Conveyor 2L MD M WW LLLL V X 1 2 3 4 Tail 4 Auxiliary Shaft Option Tail 3 Auxiliary Shaft Option Tail 2 Auxiliary Shaft Option Tail 1 Auxiliary Shaft Option Auxiliary Shaft Exists... -
Page 7: End/Mid Drive Conveyor Specifications
Maximum conveyor loads are based on: • Non-accumulating product • Product moving toward gearmotor • Conveyor being mounted horizontally • Conveyor being located in a dry environment • Conveyor equipped with standard belt only 2700 Series Conveyors 851-978 Rev. A Dorner Mfg. Corp. -
Page 8: Idrive Motor Specifications
M10 x 1.5 6 mm 56.0 Nm 8 mm 97.5 Nm 6 mm 48.0 Nm 5 mm 35.0 Nm (496 in lbs) (863 in lbs) (425 in lbs) (310 in lbs) 2700 Series Conveyors Dorner Mfg. Corp. 851-978 Rev. A... -
Page 9: Installation
(Figure 6, item 3) equipped) away from head plates. • Attach guides/accessories. •Loosen fastening screws (Figure 6, item 4) and push head plate assembly inward. Figure 6 Figure 6 2700 Series Conveyors 851-978 Rev. A Dorner Mfg. Corp. - Page 10 (Figure 10, item 2). •Remove middle screw (Figure 8, item 2) from Figure 10 idrive head plate assembly (Figure 8, item 1) on each side of conveyor. Figure 8 Figure 10 Figure 8 2700 Series Conveyors Dorner Mfg. Corp. 851-978 Rev. A...
-
Page 11: Mounting Brackets
(Figure 13, item 1) or connector/mount brackets (Figure 13, item 2) and screws (Figure 13, item 3) on both sides as indicated. Tighten screws to 60 in-lb (7 Nm). Figure 13 Figure 15 Figure 13 2700 Series Conveyors 851-978 Rev. A Dorner Mfg. Corp. -
Page 12: Return Rollers
Figure 19 Locate return rollers. Exploded view shown in Figure Figure 17 Figure 19 Figure 17 Remove screws (Figure 17, item 1) and clips (Figure 17, item 2) from roller assembly. 2700 Series Conveyors Dorner Mfg. Corp. 851-978 Rev. A... -
Page 13: Guide Clips
(Figure 21, item 2) as shown. Tighten screws (Figure 24, item 1) making sure t-nut (Figure 24, item 2) rotates and engages inside of the t- Figure 21 slot. Figure 24 Figure 21 Figure 24 2700 Series Conveyors 851-978 Rev. A Dorner Mfg. Corp. - Page 14 Snap clip (Figure 27, item 1) onto guide rail (Figure 27, item 2). Figure 29 Figure 27 Adjust rail height with lower screw (Figure 30, item 1). Figure 30 Figure 27 Figure 30 2700 Series Conveyors Dorner Mfg. Corp. 851-978 Rev. A...
-
Page 15: Preventive Maintenance And Adjustment
• Worn knurl or impacted dirt on drive pulley • Intermittent jamming or drive train problems Damage to V-guide indicates: • Twisted or damaged conveyor frame • Dirt impacted on pulleys • Excessive or improper side loading 2700 Series Conveyors 851-978 Rev. A Dorner Mfg. Corp. -
Page 16: Belt Removal For End Drive And Idrive Conveyors
(Figure •On both sides of conveyor, rotate cam tracking 32, item 1). assemblies (Figure 34, item 3) to move head plate assembly inward. Figure 32 Figure 34 Figure 34 Figure 32 2700 Series Conveyors Dorner Mfg. Corp. 851-978 Rev. A... -
Page 17: Belt Removal For Mid Drive Conveyors
(Figure 36, item 2) (on each side of conveyor) to allow head plate assembly to slide in slots (Figure 36, item 3). Push head plate inward toward conveyor. Figure 36 Figure 38 Figure 36 2700 Series Conveyors 851-978 Rev. A Dorner Mfg. Corp. -
Page 18: Belt Installation For End Drive And Idrive Conveyors
43, item 2) and tails (Figure 43, item 3). A WARNING Figure 43 Removing mounting brackets without support under gearmotor will cause conveyor to tip, causing severe injury. PROVIDE SUPPORT UNDERNEATH THE GEARMOTOR WHEN CHANGING THE BELT. Figure 43 2700 Series Conveyors Dorner Mfg. Corp. 851-978 Rev. A... -
Page 19: Conveyor Belt Tensioning
If equipped, install return rollers and guiding. Conveyor Belt Tensioning A WARNING Figure 47 Exposed moving parts can cause severe injury. LOCK OUT POWER before removing guards or performing maintenance. 2700 Series Conveyors 851-978 Rev. A Dorner Mfg. Corp. -
Page 20: Conveyor Belt Tracking
Then while holding the cam in position, re-tighten the head plate fastening screws (Figure 50, item 1) to 60 in-lb (7 Nm). Figure 49 2700 Series Conveyors Dorner Mfg. Corp. 851-978 Rev. A... -
Page 21: Pulley Replacement
To prevent damage to the head plates, be sure to remove them slowly because they are not attached to pulley. Figure 53 To replace the drive tail pulley, reverse the removal procedure. 2700 Series Conveyors 851-978 Rev. A Dorner Mfg. Corp. -
Page 22: B − Idrive Pulley Removal
Conveyors” on page 16.) Figure 55 NOTE To prevent damage to the head plates and spindle, be sure to remove them slowly because they are not attached to spindle. 2700 Series Conveyors Dorner Mfg. Corp. 851-978 Rev. A... - Page 23 10. Re-install belt on end of conveyor, then tension the belt. See “Conveyor Belt Tensioning” on page 19. 11. If installed, re-position the cam assemblies against the head plates and adjust belt tracking. See “Conveyor Belt Tracking” on page 20. 2700 Series Conveyors 851-978 Rev. A Dorner Mfg. Corp.
-
Page 24: C − Idler Pulley Removal
Re-install belt on end of conveyor, then tension the belt. See “Conveyor Belt Tensioning” on page 19. If installed, re-position the cam assemblies against the head plates and adjust belt tracking. See “Conveyor Belt Tracking” on page 20. 2700 Series Conveyors Dorner Mfg. Corp. 851-978 Rev. A... -
Page 25: D − 5/8" (16 Mm) Nosebar Pulley Removal
Remove side plate (Figure 67, item 1) from nosebar tail (Figure 67, item 2). Figure 68 Figure 67 Remove outer plate (Figure 69, item 1) from spindles (Figure 69, item 2). Figure 69 Figure 67 Figure 69 2700 Series Conveyors 851-978 Rev. A Dorner Mfg. Corp. - Page 26 71, item 3) is inserted into the slot and hole in Not Level side plate (Figure 71, item 4). Figure 71 Figure 73 Figure 71 Assemble and install head plate in reverse order of removal. 2700 Series Conveyors Dorner Mfg. Corp. 851-978 Rev. A...
-
Page 27: E − Mid Drive Module Pulley Removal
Loosen two screws (Figure 78, item 1) from each side of mounting block (Figure 78, item 2). Figure 75 Figure 78 Figure 75 Remove drive package. See your appropriate Drive Figure 78 Package manual for removal procedure. 2700 Series Conveyors 851-978 Rev. A Dorner Mfg. Corp. - Page 28 Figure 80 78, item 1) to 60 in-lb (7 Nm). Figure 81 12. Tension conveyor belt. See “Conveyor Belt Tensioning” on page 19. Figure 81 Install components, reverse order of removal. 2700 Series Conveyors Dorner Mfg. Corp. 851-978 Rev. A...
-
Page 29: Idrive Motor Replacement
Remove screw (Figure 85, item 1) from idrive head plate (Figure 85, item 2) on each side of conveyor. Figure 85 Figure 87 Figure 85 2700 Series Conveyors 851-978 Rev. A Dorner Mfg. Corp. - Page 30 (Figure 89, item 2). Figure 89 Remove four screws (Figure 91, item 1) securing motor (Figure 91, item 2) to motor mounting bracket (Figure 90, item 3). Figure 91 Figure 89 Figure 91 2700 Series Conveyors Dorner Mfg. Corp. 851-978 Rev. A...
-
Page 31: Pinion Replacement
Remove idler tail (Figure 95, item 1) by sliding off of drive pulley (Figure 93, item 2). Slide drive pulley off the conveyor (Figure 95, item 2). of motor shaft. Figure 95 Figure 93 Figure 95 Figure 93 2700 Series Conveyors 851-978 Rev. A Dorner Mfg. Corp. - Page 32 Figure 100 Figure 97 Figure 100 To reassemble, make sure that the lines (Figure 98, item 1) on the pinion end gears (Figure 98, item 2) are aligned. Figure 98 Figure 98 2700 Series Conveyors Dorner Mfg. Corp. 851-978 Rev. A...
- Page 33 The gear racks must be aligned with each other, as shown above. Example of Insert both gear racks (Figure 103, item 1) into misaligned gear racks shown below. conveyor frame. Figure 103 Figure 106 Figure 106 Figure 103 2700 Series Conveyors 851-978 Rev. A Dorner Mfg. Corp.
- Page 34 11. Reinstall idler tail by sliding tail assembly (Figure 107, item 1) fully back onto conveyor frame. Figure 107 Figure 107 12. Reinstall belt on end of conveyor, then tension the belt. See “Conveyor Belt Tensioning” on page 2700 Series Conveyors Dorner Mfg. Corp. 851-978 Rev. A...
-
Page 35: Service Parts
Service Parts NOTE For replacement parts other than those shown in this section, contact an authorized Dorner Service Center or the factory. Key Service Parts and Kits are identified by the Performance Parts Kits logo . Dorner recommends keeping these parts on hand. -
Page 36: Idrive Tail
WWWW = Conveyor width reference in mm 0254 - 0914 See Specifications chart on page 7 for conveyor belt widths. Service parts can be obtained through your distributor or directly from Dorner Mfg. Corp. (800) 397-8664 or customerservice@dorner.com 2700 Series Conveyors Dorner Mfg. -
Page 37: Idler Tail
See Specifications chart on page 7 for conveyor belt widths. without Shaft Hole Service parts can be obtained through your distributor or directly 208382-F6 Right Hand Head Plate with from Dorner Mfg. Corp. (800) 397-8664 or Shaft Hole customerservice@dorner.com 2700 Series Conveyors 851-978 Rev. A... -
Page 38: 5/8" (16 Mm) Nosebar Tail
See Specifications chart on page 7 for conveyor belt widths. 208388 Nut Bar Service parts can be obtained through your distributor or directly 208389 Spindle Assembly for Conveyors from Dorner Mfg. Corp. (800) 397-8664 or 26" wide and wider customerservice@dorner.com 208391-WWWW-M Top Transfer Plate 208486... -
Page 39: Mid Drive Module
See Specifications chart on page 7 for conveyor belt widths. 807-2852 Plug Service parts can be obtained through your distributor or directly 11954-WWWW-M from Dorner Mfg. Corp. (800) 397-8664 or 708180P Trilobe Screw, M6-1.00 x 25 mm customerservice@dorner.com 2700 Series Conveyors 851-978 Rev. -
Page 40: Frame Assembly
WWWW = Conveyor width reference in inches 08 - 36 See Specifications chart on page 7 for conveyor belt widths. Service parts can be obtained through your distributor or directly from Dorner Mfg. Corp. (800) 397-8664 or customerservice@dorner.com 2700 Series Conveyors Dorner Mfg. -
Page 41: Profile - 3.00" (76 Mm) Aluminum Side
LLLLL = part length in inches with 2 decimal places Length Example: Length = 35.25" LLLLL = 03525 Service parts can be obtained through your distributor or directly from Dorner Mfg. Corp. (800) 397-8664 or customerservice@dorner.com 2700 Series Conveyors 851-978 Rev. A... -
Page 42: Profile - 1.50" (38 Mm) Aluminum Side
LLLLL = part length in inches with 2 decimal places Length Example: Length = 35.25" LLLLL = 03525 Service parts can be obtained through your distributor or directly from Dorner Mfg. Corp. (800) 397-8664 or customerservice@dorner.com 2700 Series Conveyors Dorner Mfg. Corp. -
Page 43: Profile - Low To Side Wiper
LLLLL = part length in inches with 2 decimal places Length Example: Length = 35.25" LLLLL = 03525 Service parts can be obtained through your distributor or directly from Dorner Mfg. Corp. (800) 397-8664 or customerservice@dorner.com 2700 Series Conveyors 851-978 Rev. A... -
Page 44: Profile - Low To High Side
LLLLL = part length in inches with 2 decimal places Length Example: Length = 35.25" LLLLL = 03525 Service parts can be obtained through your distributor or directly from Dorner Mfg. Corp. (800) 397-8664 or customerservice@dorner.com 2700 Series Conveyors Dorner Mfg. Corp. -
Page 45: Profile - 0.5" (13 Mm) Extruded Plastic Side
LLLLL = part length in inches with 2 decimal places Length Example: Length = 35.25" LLLLL = 03525 Service parts can be obtained through your distributor or directly from Dorner Mfg. Corp. (800) 397-8664 or customerservice@dorner.com 2700 Series Conveyors 851-978 Rev. A... -
Page 46: 43 Profile - Adjustable Guiding
Length Example: Length = 35.25" LLLLL = 03525 M6-1.00 x 16 mm Service parts can be obtained through your distributor or directly 9206150M Socket Head Screw, from Dorner Mfg. Corp. (800) 397-8664 or M6-1.00 x 150 mm customerservice@dorner.com 990601M Hex Nut 2700 Series Conveyors Dorner Mfg. -
Page 47: 44 Profile - Tool-Less Adjustable Guiding
Knob, 150 mm Length Example: Length = 35.25" LLLLL = 03525 990601M Hex Nut Service parts can be obtained through your distributor or directly from Dorner Mfg. Corp. (800) 397-8664 or customerservice@dorner.com 2700 Series Conveyors 851-978 Rev. A Dorner Mfg. Corp. -
Page 48: 46 Profile - Outboard Adjustable Guiding
Length Example: Length = 35.25" LLLLL = 03525 920516M Socket Head Screw, M5-0.80 x 16 mm Service parts can be obtained through your distributor or directly from Dorner Mfg. Corp. (800) 397-8664 or customerservice@dorner.com 2700 Series Conveyors Dorner Mfg. Corp. -
Page 49: 49 Profile - Horizontal Adjustable Guiding
M6-1.00 x 25 mm Length Example: Length = 35.25" LLLLL = 03525 990601M Hex Nut Service parts can be obtained through your distributor or directly from Dorner Mfg. Corp. (800) 397-8664 or customerservice@dorner.com 2700 Series Conveyors 851-978 Rev. A Dorner Mfg. Corp. -
Page 50: 50 Profile - Tool-Less Horizontal Adjustable Guiding
Socket Head Screw, Length Example: Length = 35.25" LLLLL = 03525 M6-1.00 x 150 mm Service parts can be obtained through your distributor or directly 207155 Knob from Dorner Mfg. Corp. (800) 397-8664 or 990601M Hex Nut customerservice@dorner.com 834-238-LLLLL Guide Rail... -
Page 51: Mounting Brackets
920692M Low Head Cap Screw, M6-1.00 x 12 mm Service parts can be obtained through your distributor or directly 990603M Square Nut, M6 from Dorner Mfg. Corp. (800) 397-8664 or customerservice@dorner.com 2700 Series Conveyors 851-978 Rev. A Dorner Mfg. Corp. -
Page 52: Mounting Brackets Assembled To The Tail
Socket Head Screw, M6-1.00 x 22 mm (for Nosebar Tail) 208449 Stand Mount Assembly Service parts can be obtained through your distributor or directly from Dorner Mfg. Corp. (800) 397-8664 or customerservice@dorner.com 2700 Series Conveyors Dorner Mfg. Corp. 851-978 Rev. A... -
Page 53: Connecting Assembly Without Stand Mount
Description Item Part Number Description Service parts can be obtained through your distributor or directly 206520 Connecting Bar from Dorner Mfg. Corp. (800) 397-8664 or 950610M Low Head Cap Screw, customerservice@dorner.com M6-1.00 x 10 mm 206519 Connecting Assembly Connecting Assembly with Stand Mount... -
Page 54: Return Roller
WWWW = Conveyor width reference: 0203 - 0914 See Specifications chart on page 7 for conveyor belt widths. Service parts can be obtained through your distributor or directly from Dorner Mfg. Corp. (800) 397-8664 or customerservice@dorner.com 2700 Series Conveyors Dorner Mfg. Corp. -
Page 55: Conveyor Belt Part Number Configuration
“V” for Center V-guided belts or “W” for offset V-guided belts. 22XL - WWWW LLLLL / BB V* 22XL __ __ __ __ __ __ __ __ __ / __ __ V* (Fill In) 2700 Series Conveyors 851-978 Rev. A Dorner Mfg. Corp. -
Page 56: Return Policy
Return Policy Returns must have prior written factory authorization or they will not be accepted. Items that are returned to Dorner without authorization will not be credited nor returned to the original sender. When calling for authorization, please have the following information ready for the Dorner factory representative or your local distributor: Name and address of customer.
Need help?
Do you have a question about the 2700 Series and is the answer not in the manual?
Questions and answers