Advertisement
Quick Links
U NI VERS AL
RO OF R ACK TENT
FAI RING
I N S TAL L INST RU CT I O N S
Please read the mounting instructions below carefully before attempting to install.
Be sure to check out the install video on the product page, if available.
Thank you for purchasing from Victory 4x4! Checkout our website, victory4x4.com for other great off-road
products. Be sure to rate and review our product online. If you have any questions or are missing parts, please
don't hesitate to call us at 269-459-8447!
Advertisement

Related Manuals for Victory 4x4 UNI-RTTF


Summary of Contents for Victory 4x4 UNI-RTTF
- Page 1 Be sure to check out the install video on the product page, if available. Thank you for purchasing from Victory 4x4! Checkout our website, victory4x4.com for other great off-road products. Be sure to rate and review our product online. If you have any questions or are missing parts, please...
- Page 2 I NC LU D E D HA R DWAR E 5/16”-18-3/4” Button Head 5/16”-18 U-Nut 5/16”-18 1” Long 5/16”-18 Serr Carriage Bolt Flange Nut 1/4”-20 3/8” Long 1/4”-20 Thread Stainless Stell Button Head T-Nut...
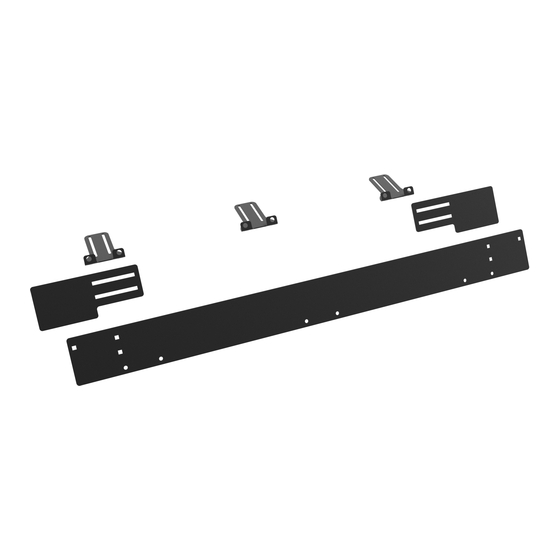
- Page 3 I NC LU D E D PA RTS...
- Page 4 I N S TA L L ATI O N Start with assembling the (3) fairing pieces using the provided carriage bolts and 5/16” flange nuts as shown in the orientation below. You will need to adjust the width according to your vehicle using the slots on the smaller brackets.
- Page 5 INSTA L L AT I ON Once your (3) brackets are loosely installed, you can then secure the fairing previously assembled to them using the provided longer 5/16” button heads into the clip nuts, as shown below. You may need to adjust the distance in-between the brackets so all the holes line up to the fairing.
- Page 6 INSTA L L AT I ON Once all of the hardware is started, go back and fully tighten down and secure the brackets to the crossbar and make sure the rest of the hardware is tight to finsih the install.
Need help?
Do you have a question about the UNI-RTTF and is the answer not in the manual?
Questions and answers