Multitech FaxFinder FF110 Quick Start Manual
V.34 fax server
Hide thumbs
Also See for FaxFinder FF110:
- Client operation primer (14 pages) ,
- Administrator user manual (167 pages)
Table of Contents
Advertisement
Quick Links
Advertisement
Table of Contents

Related Manuals for Multitech FaxFinder FF110


Summary of Contents for Multitech FaxFinder FF110
- Page 1 FaxFinder ™ Model FF110 V.34 Fax Server Quick Start Guide...
- Page 2 Furthermore, Multi-Tech Systems, Inc. reserves the right to revise this publication and to make changes from time to time in the content hereof without obligation of Multi-Tech Systems, Inc., to notify any person or or- ganization of such revisions or changes.
-
Page 3: Table Of Contents
Contents GETTING STARTED... 5 ... 5 RONT ANEL ... 5 UPPLY ... 6 UPPLY DID L REREQUISITE RDERING THE SERVER INSTALLATION PROCESS ... 8 A: C ONNECTING THE INDER TO ... 8 THERNET 1. Connect FaxFinder to AC Outlet... 8 2. - Page 4 Making Address Book Entries by Synchronization with Microsoft Outlook ...31 ...33 DEVICE MANAGER SOFTWARE FUNCTIONS ...34 NSTALLING EVICE ANAGER ...36 DDING INDERS ...37 YNCHRONIZING HONEBOOKS CLIENT OPERATION...40 ENDING A UICK ERSION ENDING A ETAILED ERSION FF C ENDING A AX FROM ...49 ECEIVING A TECH SUPPORT ...51...
-
Page 5: Getting Started
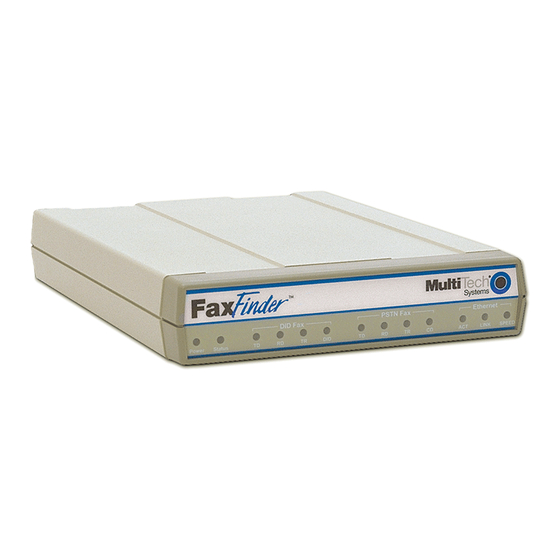
Getting Started This guide shows you how to set up your Multi-Tech Model FF110 FaxFinder. Your FaxFinder is a complete, economical, easy-to-use network fax server. It allows you to receive faxes as emails and send faxes from any application that can print. Simply hook up a DID trunk and a regular POTS phone line, make an Ethernet connection to your LAN, and assign client email addresses to the DID numbers. -
Page 6: You Supply
You Supply • A nearby AC power outlet • A nearby phone line jack • A connection to your Ethernet LAN • A nearby analog DID trunk line with a block of associated DID telephone numbers • A common subscriber phone line (POTS) •... -
Page 7: Prerequisite: Ordering The Did Line
212-555-4101 through 212-555-4120. When ordering your DID line, ask the telco representative for these details about the DID service. These details will be important when setting up your FF110 Fax Server. Parameter Number of digits used to designate the DID extension (usually 3, 4, 6, or 7) Type of “DID Start”... -
Page 8: Server Installation Process
Server Installation Process Part A: Connecting the FaxFinder to Power Outlet, Phone Lines, and Ethernet Summary: Turn off your computer. Place the FaxFinder in a convenient location, and then connect it to your AC power outlet, DID line, POTS line, and Ethernet. 1. -
Page 9: Connect Faxfinder To Pots Line
3. Connect FaxFinder to POTS Line Plug one end of the phone cable into the FaxFinder’s POTS jack and the other end into your standard telephone line jack. The POTS Line cable is included with your FaxFinder. 4. Connect FaxFinder to Ethernet Network. Plug one end of your RJ45 ethernet cable into the FaxFinder’s ethernet jack and the other end into your network ethernet hub. -
Page 10: Part B: Configuring The Faxfinder Server
Part B: Configuring the FaxFinder Server 1. Setting Admin PC to Startup IP Address a. Connect a pc to your network. b. Set the pc IP address to 192.168.2.x subnet (using any address excluding 192.168.2.1). Windows XP a. From the Windows desktop, right-click on “My Network Places,”... -
Page 11: Logging In (I)
192.168.11.251 Name Server update b. Fill in the IP information that applies to your FF110 FaxFinder Server unit. The fields for “IP Address,” “Subnet Mask,” “Default Gateway” and “Name Server” are required. A “Secondary Name Server” may be considered optional. -
Page 12: Resetting Admin Pc To Its Regular Ip Address
4. Resetting Admin PC to Its Regular IP Address In step #1 above, you recorded the original IP address of the administrator’s PC and then reset it to the IP address required to allow communication with the FaxFinder unit. You must now set the IP address of the administrator’s PC back to its original value. - Page 13 The message “Success: [name] was updated” will appear above the Phone Book list. Phone Book Name User ID Email Address H ank Gre gory -- Admi n a dmin hg g@rmc83.com POTS Li ne D ead Le tter Box b. Destination Email Address for POTS Line Fax In the “POTS Line”...
- Page 14 c. Destination Email Address for Unassigned DID Numbers In the “Dead Letter Box” row of the Phone Book screen, enter the email address of the person whom you want to receive all inbound faxes sent to unassigned DID phone numbers. (For example, a company might obtain a group of 20 DID phone numbers but only use 17, retaining 3 for future use.
-
Page 15: Setting Up The Mail Server
Click on Update for this row. The message “Success: [name] was updated” will appear above the Phone Book list. 7. Setting Up the Mail Server The FaxFinder uses a mail server to send fax log reports, by email, to the administrator. An email is also sent to the administrator each time the FaxFinder is powered up. -
Page 16: Configuring The Faxfinder's Inbound Did Modem
e. Email Server Authentication Parameters. If your email server requires authentication in order to give the FaxFinder access, fill in the three related SMTP fields (SMTP Server User ID, SMTP Password, Retype SMTP Password). If you can enter the network email program and send messages without entering a User ID and Password, then you must leave these fields blank. - Page 17 b. Under Modem Configuration: Modem 1 (DID Modem), enter the values that match the characteristics of your DID phone line in the fields provided. (See the section “Prerequisite: Ordering the DID Line” on page 7.) c. Note that the value entered in the “Fax ID” field (typically the DID phone number and, sometimes, an organizational identifier) will appear in the fax log printed by the sender’s fax machine.
-
Page 18: Configuring The Faxfinder's Pots Modem
g. From an ordinary POTS phone, dial one of the DID phone numbers that is active in the system. Dial the DID phone number as you would from an outside line (it will not work to dial the number as if it were an ordinary 3- or 4-digit extension). h. - Page 19 c. Dial Prefix (or ‘access digit’). When the FaxFinder is attached to an extension of a PBX or key phone system, an access digit is often required to ‘get an outside line’ (that is, to make a connection to the PSTN). Often a “9” or an “8” is used for this purpose.
- Page 20 U.S.A.) require that the originating phone number be printed on each fax page. The value entered in the “Fax ID” field will appear in the fax log printed by the sender’s fax machine and, typically, will be printed at the top of each page of the transmitted fax.
-
Page 21: Changing Admin's Server Password
j. If you both observe the "Waiting for Connect" state and hear the tones, then the FaxFinder's Modem has been configured properly. If either of these is absent, see item #3 “What if the FaxFinder doesn’t answer a fax call?” in the “Troubleshooting” chapter of the Administrator User Guide. -
Page 22: Specifying Admin's Client Password
b. Click on Update for this row. The Login screen will appear. Passw ord Administration Name User ID Password Han k Grego ry - Admin a dmin-h ank *** ** Han k Grego ry h ank 11. Specifying Admin’s Client Password a. -
Page 23: Sending Test Fax From Fax Machine To Faxfinder
12. Sending Test Fax from Fax Machine to FaxFinder a. Using a conventional fax machine, send a fax to the DID fax number established for the FaxFinder Administrator. b. Verify that the fax message sent reaches the email inbox of the administrator. - Page 24 Verify also that you can open the fax in a Tiff viewer program on your computer. The viewer program you use could be either the Multi-Tech Tiff Viewer or a graphic file viewer included with or installed in your PC. (The Multi-Tech Tiff viewer is included on the Product CD and installed with other client programs.
-
Page 25: Assigning Did Numbers To Network Clients
13. Assigning DID Numbers to Network Clients a. In the Phone Book screen just below the entries for the FaxFinder administrator, make phonebook entries for the other persons in your office to whom DID fax numbers have been assigned. For each such FaxFinder client/user, enter the name, user ID, email address, and DID extension in the appropriate fields. -
Page 26: Client Software Installation Process
Client Software Installation Process Install FaxFinder Client Software : The FaxFinder client software must be installed on each NOTE computer by a user with administrative rights on that computer. 1. At the client PC, launch the installation program by clicking on the setup.exe file on the FaxFinder Product CD. -
Page 27: Associate Client With Specific Faxfinder Unit(S)
10. Icons for the FaxFinder software applications will appear in the Windows Start menu. A FaxFinder icon will also appear in the tray area at the lower-right corner of the screen. Associate Client with Specific FaxFinder Unit(s) 1. At the main screen of the FaxFinder Fax Client Software, click on Edit and select “Add Fax Server.”... - Page 28 Client Installation Multi-Tech FaxFinder Quick Start 2. At the Add Device Address screen, in the “Select Server” field, highlight “FaxFinder.” In the “Enter Address” field, enter the IP address or domain name of the FaxFinder unit that the client will use.
- Page 29 3. Enter, in the appropriate fields, the Username and Password that the client will use when accessing this FaxFinder unit. (The Username in the FaxFinder client software is the same as the User ID in the FaxFinder server software.) If the client is to be associated with multiple FaxFinder units, a different Username and Password could be established for each.
-
Page 30: Making Addres Book Entrie
Client Installation Multi-Tech FaxFinder Quick Start Making Address Book Entries The Address Book in the FaxFinder Fax Client software is a list of persons to whom you expect to send faxes frequently. It is a kind of “outbound list” or recipient list for faxing. You can create your... -
Page 31: Making Address Book Entries By Synchronization With Microsoft Outlook
Making Address Book Entries by Synchronization with Microsoft Outlook 1. In Microsoft Outlook, view the folder from which you want to be able to transfer fax numbers to the the FaxFinder Client Address Book. Confirm that you want those entries in your FaxFinder Client Address Book. - Page 32 3. Click on Browse. Select the desired folder from the Select Contact Folder (Outlook:) screen. Click OK. If a confirmation screen appears, click OK. At the Options screen, click OK. 4. In the FaxFinder Fax Client Software, go to the Device Status tab and select Outlook Synchronizer in the “Device”...
-
Page 33: Send Test Fax
5. Right-click on Outlook Synchronizer and select Synchronize with Outlook. The Outlook Contact information will be copied into the FaxFinder Address Book. Entries from the FaxFinder Address Book (if any) will also be copied into the Outlook Contact list. A relationship will be created between the corresponding entries for future synchronizations. -
Page 34: Device Manager Software Functions
Device Manager Multi-Tech FaxFinder Quick Start Device Manager Software Functions The Device Manager software lets you control multiple CallFinder units as a system. It is typical to install the Device Manager program on the administrator’s computer (Windows operating system required). - Page 35 Multi-Tech FaxFinder Quick Start Device Manager Device Manager Installation (continued) The Device Manager installation is complete.
-
Page 36: Adding Faxfinders
Device Manager Multi-Tech FaxFinder Quick Start Adding FaxFinders Any FaxFinder unit to be added to the system and come under the management of the Device Manager software must be connected to the same IP network as the computer running the Device Manager software. -
Page 37: Synchronizing Phonebooks
Multi-Tech FaxFinder Quick Start Device Manager Synchronizing Phonebooks To synchronize phonebooks is to cause the list of allowable inbound fax recipients on one FaxFinder server to be the same as that on another FaxFinder server. Both FaxFinder servers must be connected to the same Ethernet network. - Page 38 Device Manager Multi-Tech FaxFinder Quick Start 2. Designating all other FaxFinder units participating in phonebook sharing as Copy units. In the main Device Manager screen, right- click on each unit to share the master phonebook, and select Copy. 3. Invoking synchronization. In the main Device Manager screen, open the Edit menu and select Synchronize Phonebooks.
- Page 39 Multi-Tech FaxFinder Quick Start Device Manager After the master phonebook has been transferred to the first Copy FaxFinder (or CallFinder) unit and that unit has been rebooted, the Device Manager will automatically begin synchronizing the additional Copy FaxFinder (or CallFinder) unit in the system (if any)
-
Page 40: Client Operation
To see the newly synchronized phonebook list in each Copy FaxFinder unit, you must update the Phone Book screen by clicking on the Phone Book button (to the right of Administration) in the list at the top of the screen. Client Operation Sending a Fax (Quick Version) 1. - Page 41 2. At the FaxFinder Send Fax screen: A. Enter the recipient’s name and faxing phone number in the “Name” and “Phone Number” fields. (Add prefix 9 if needed.) B. Click Add Recipient. C. Click No when asked “Would you like to add the recipient to the address book?”...
-
Page 42: Sending A Fax (Detailed Version)
Sending a Fax (Detailed Version) To send a fax by printing from an application program on a client PC, follow the steps listed below. 1. The client PC and the FaxFinder server must both be connected to the same Ethernet LAN system. (See the section “Part B: Configuring the FaxFinder Server”... - Page 43 Multi-Tech FaxFinder Quick Start Client Operation However, you can send faxes through the FaxFinder without bringing up the FaxFinder Fax Client Software screen.
- Page 44 Client Operation Multi-Tech FaxFinder Quick Start 4. At the application program (for example, a word processing program or drawing program), print to the FaxFinder. Setting the destination of the printing job varies from program to program. For the common Notepad text editor program, for example, you must set the destination printer in the Page Setup screen.
- Page 45 Multi-Tech FaxFinder Quick Start Client Operation 5. After the printing has been initiated by the application program, the FaxFinder Send Fax screen will appear. Click on Address Book. When the Address Book screen appears, click “Add.” At the New Contact screen, enter the recipient’s name, fax number, and any other contact information...
- Page 46 Client Operation Multi-Tech FaxFinder Quick Start The recipient’s fax number should be entered as you would dial it from a phone on the public phone network (as from a residential phone). Click OK. At the Address Book screen, highlight the recipient in the list and click “Select.” The party will appear in the “Recipients”...
- Page 47 In it, you can view both the cover page and the main fax page(s). (For more information on this, see the section “Using the Multi-Tech Tiff Viewer” in the Client User Guide.) When satisfied with your fax, close the Multi-Tech Tiff Viewer program and return to the FaxFinder Send Fax screen.
-
Page 48: Sending A Test Fax From Ff Client To Fax Machine
8. Confirmation of having sent the fax(es) successfully will appear in the “Fax Log” tab of the FaxFinder Fax Client Software screen. Sending a Test Fax from FF Client to Fax Machine To confirm that the FaxFinder client software is working properly, identify a fax machine to which you can send a test fax. -
Page 49: Receiving A Fax
Receiving a Fax The FaxFinder Server delivers incoming faxes to client PCs in their email inboxes. 1. A DID phone directory number must be assigned to the client PC at the FaxFinder Server. 2. The client PC and the FaxFinder server must both be connnected to the same Ethernet LAN system. - Page 50 Client Operation Multi-Tech FaxFinder Quick Start 5. The FaxFinder client opens the email message. The incoming fax message takes the form of a graphic file attachment. The FaxFinder Server has assigned the file an automatic file name.
-
Page 51: Tech Support
Technical Support department at the phone number or email address for your geographic location, as listed on page 2. Product support resources are available at the Multi-Tech web site: www.multitech.com. - Page 52 Patents This device is covered by one or more of the following patents: 6,031,867; 6,012,113; 6,009,082; 5,905,794; 5,864,560; 5,815,567; 5,815,503; 5,812,534; 5,809,068; 5,790,532; 5,764,628; 5,764,627; 5,754,589; D394,250; 5,724,356; 5,673,268; 5,673,257; 5,644,594; 5,628,030; 5,619,508; 5,617,423; 5,600,649; 5,592,586; 5,577,041; 5,574,725; D374,222; 5,559,793; 5,546,448;...
Need help?
Do you have a question about the FaxFinder FF110 and is the answer not in the manual?
Questions and answers